Belgium
Gym Bag
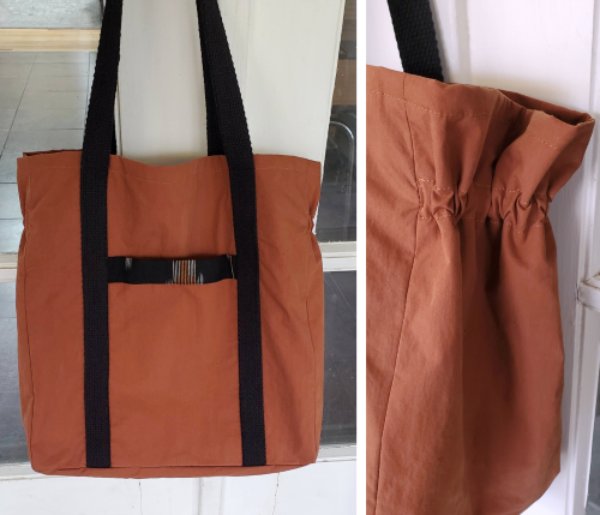
Create a custom gym bag using coated fabric, canvas lining, basic webbing and more. A clever elastic casing in the side panels keeps items securely in the bag.
What you need:
- Sewing Machine
- ¾ yard each of coated fabric (outer) & canvas fabric (lining)
- 1” cotton webbing, approximately 3 yards
- Fabric clips
- Non-stick presser foot (optional)
- Microtex needle (optional)
- 12 inches of ⅜”-wide elastic
- Small fabric scrap (for pocket binding)
- Large safety pin
Cut:
Cut the following pattern pieces from the exterior lining fabric:
- Two 14”x15” panels (front and back)
- Two 10”x15” panels (sides)
- 10”x14” panel (base)
- 7”x10” panel (pocket)
From the lining fabric, cut the following pattern pieces:
- Two 14”x14” panels (front and back)
- Two 10”x14” panels (sides)
- 10”x14” panel (base)
- From the fabric scrap, cut one 4”x10” strip for for binding.
- From the webbing, cut two 48” to 54” lengths.
Prepare & Assemble:
NOTE: Before pinning or sewing your coated fabric, test a scrap first to see how it responds. If pin holes leave a permanent mark, consider using fabric clips instead. To avoid perforating the fabric, consider lengthening your stitch length and switching to a finer needle.
1. Fold the scrap binding strip in half and press. Open, fold each raw edge in toward the center fold, and press again.
2. Place the upper 7” edge of the pocket into the binding. Stitch the binding in place along the folded edge.
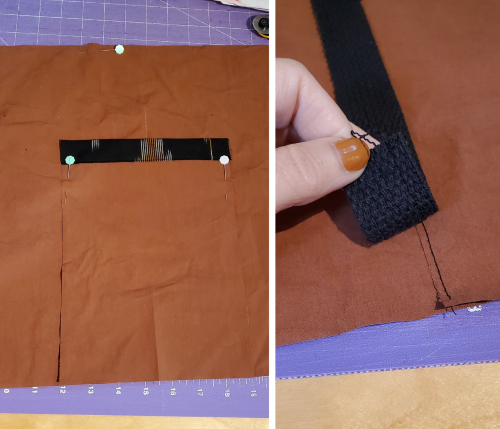
3. Center the pocket right side up over the front panel (also right side up), aligning the lower raw edge. Pin the pocket in place along the side edges; stitch in place. Note: This area will be covered by the webbing in a following step so any permanent pin holes will be covered.
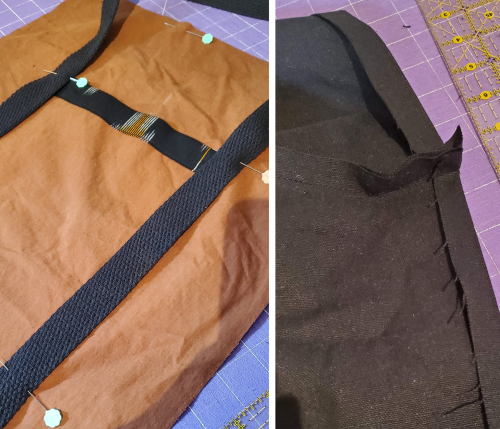
4. With one webbing strip, align the bottom raw edges of the front panel and the webbing and position the webbing over the pocket side edge. Pin in place and stitch along both webbind side edges, up to the upper edge of the pocket. Repeat for the other side of the strap.
5. Repeat to attach the webbing strap to the back panel. The outer edge of the webbing should be about 3” from the panel side edges. Stitch in place along both webbing side edges, stopping about 11” from the panel lower edge.
6. Working with the interior first, align the side edges of the front panels and side panels. Stitch the edges together using a ½” seam allowance and stopping about ½” from the lower edge.
7. Press open the seams and press the lower unstitched portion of each panel up ½”.
8. Align the bag base with the front and back panel lower edges. Stitch in place using the pressed line as a guide, starting and ending ½” from the edge. Repeat to stitch the side panel edges to the base.
9. Repeat to stitch the exterior panels and base together.
10.Turn the bag exterior right side out. Press the upper edge under ½” and then under ½” again. Nest the lining (inside out) into the exterior.
11. Along the side panels, tuck the raw upper edge of the lining into the folded upper edge of the exterior. Pin or clip in place.
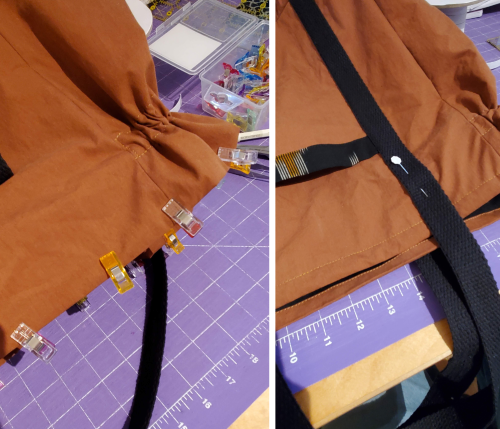
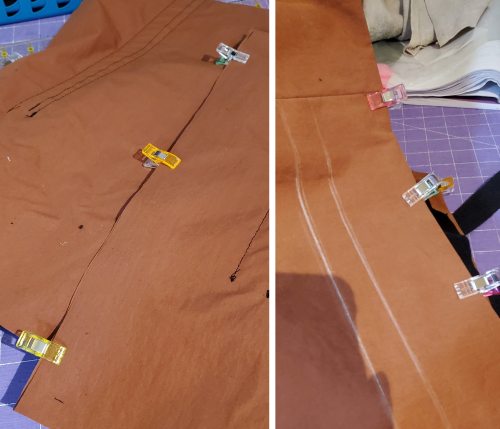
12.On the bag exterior side panels, draw a line 2” from the upper folded bag edge. Next draw a line ¾” below the first.
13. With the exterior and lining held together, stitch along both lines to create an elastic casing. Repeat for the remaining side panel.
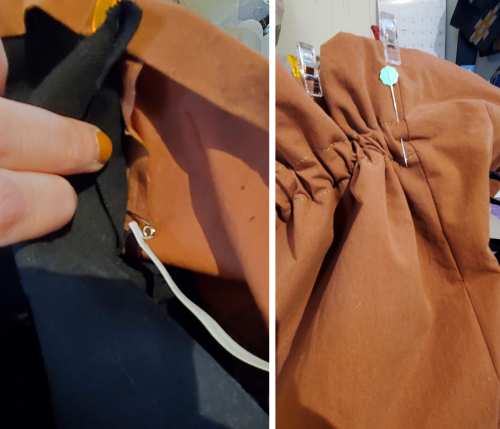
14.Cut the elastic in half to create two 6” strips. Affix the safety pin to one elastic end. Working between the lining and exterior layers, feed the elastic through the casing. Pin both elastic ends in place at the start and end of the casing. Stitch in place securely and remove the safety pin. Repeat to install elastic in the other side panel.
15. On the front and back panels, tuck the raw upper edge of the lining into the folded upper edge of the exterior. Stitch along the folded edge around the entire upper perimeter of the bag.
16. On the bag front, pin the upper portion of the webbing strap to the bag and stitch in place securely, up to the stitch line on the bag upper edge. Repeat for the bag back.