 United States
Wine Bottle Holder
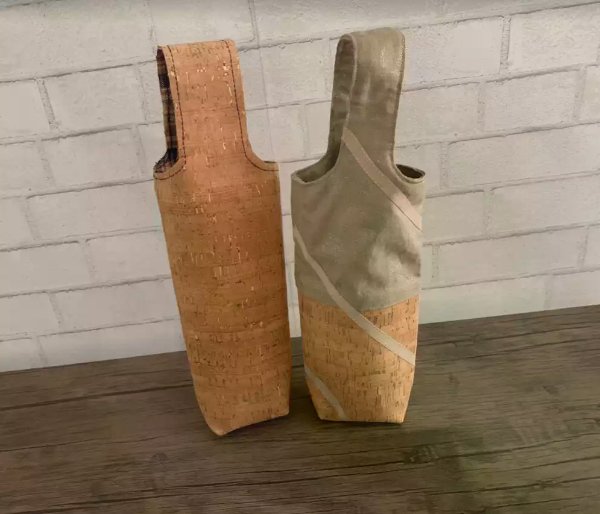
Cork is a fun and easy material to work with. Create these wine bottle holders as the perfect addition to your bottle give-away.
What you need:
- Cork specifically for sewing
- Fabric for lining
- Thread
- Pins or clips
- Perfect ¼ inch Foot with Guide for IDT™ System optional
Cutting the Wine bottle holder out
1. Cut the cork and lining fabric to 17”x12’
2. Fold each fabric rectangle in half long ways and measure ½ inch seam allowance on the side opposite the fold and draw a line.
3. Make a template for the handles, 5 ½ inches long by 3 inches wide with a curve on one end - the curve will be for the handle so you can make it have as much of a curve as you would like for the handle
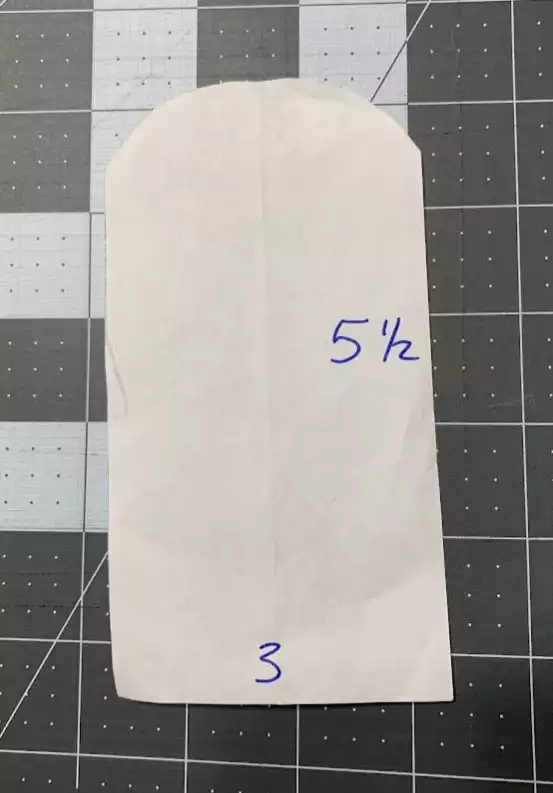
4. Mark the center on the top and bottom of the handle template
5. Take the center mark and line it up on the top of the fold side of the fabric and trace around the template onto the fabric, the flat side should be up and aligned with the top of the fabric and curved side down pointed to the bottom of the fabric
6. Then move it to the other side of the fabric, the side opposite the fold and line up the center marks with the ½ inch seam allowance and trace
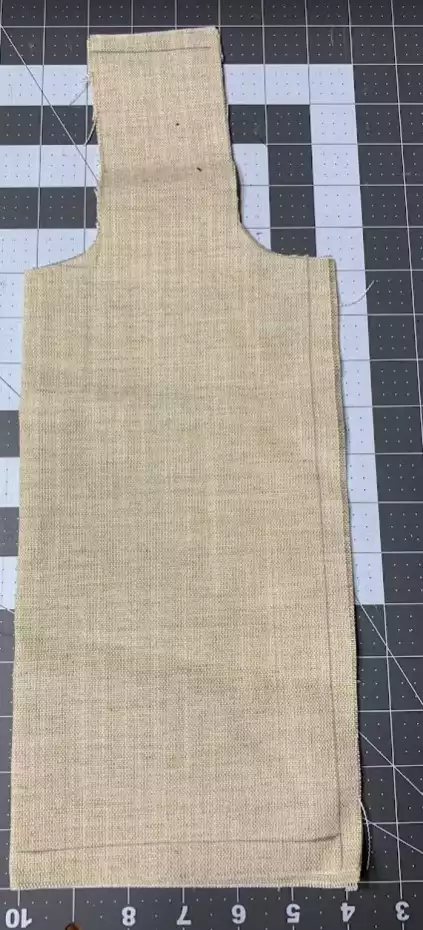
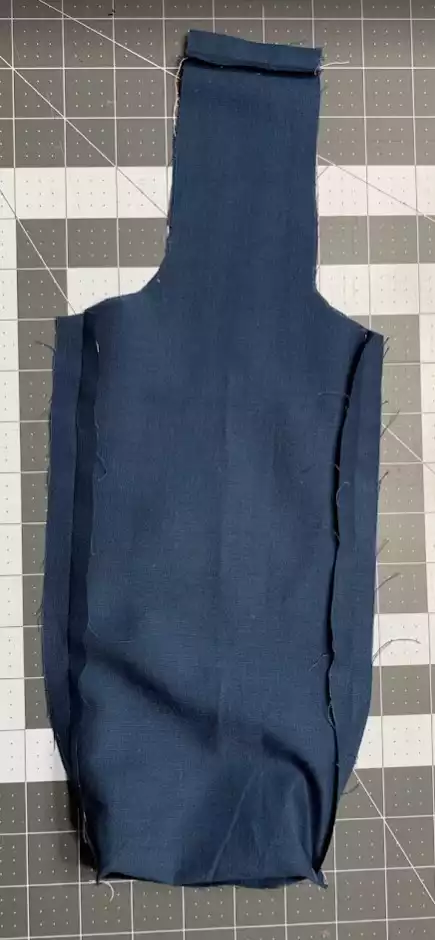
7. Cut out both areas where you just traced for the handles. This should now look like the outline of the bag!
8. Mark a ½ inch seam allowance at the top and bottom of the bag
Sewing the Holder
9. Now it is time to sew: sew along all the lines you have traced, at the top, bottom and side of the fabric
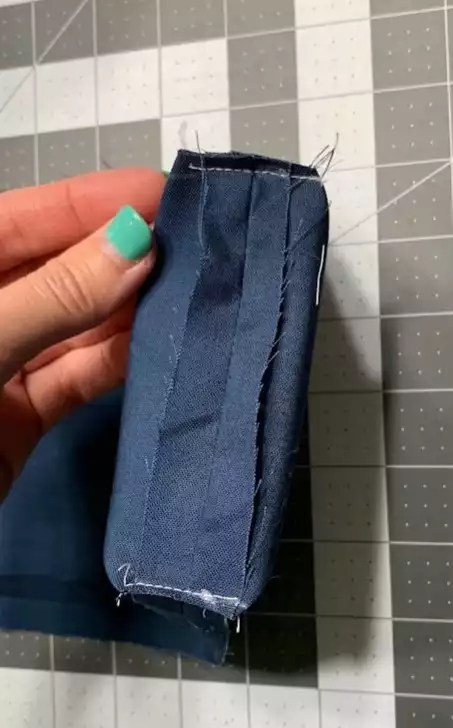
10. Press seams open to create a nice, neat edge. At this time it would also be helpful to clip the corners of the bag at the bottom just to get rid of some of the excess fabric
11. To create the bottom of the bag, you want the side seam to be facing up and in the center
12. Pull the corner at the toward the top of the bag, the area for the bottom of the bag will look like a diamond shape and is facing you
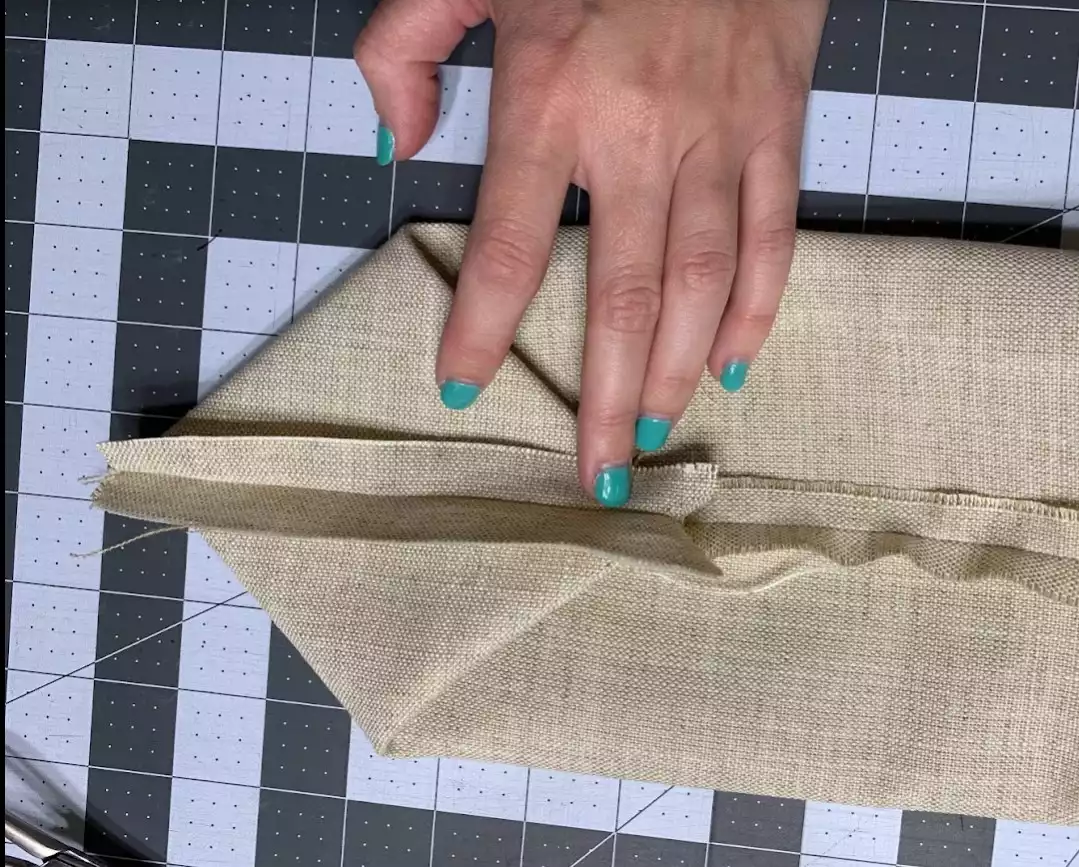
13. Mark 1 ¼ inch away from each corner point on the bottom and draw a line across the corner.
14. You will sew along this line and then cut off the excess
15. Repeat steps 4-13 to create the liner
16. Once you have the liner and outer fabric complete, you will turn the liner right side out so that the seam is on the inside.

Putting the Holder Together
17. You will then stitch around one of the handle openings, ¼ inch seam allowance
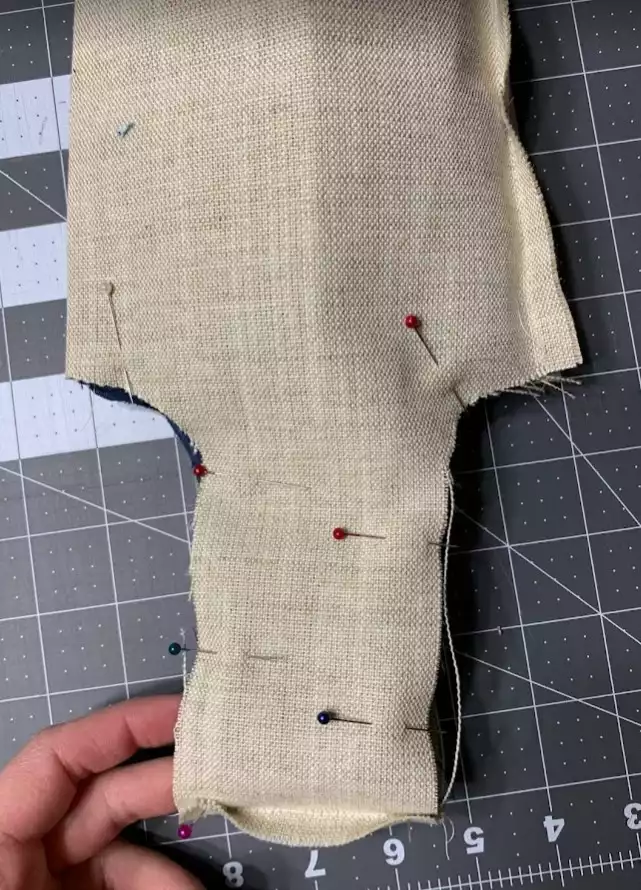
18. You can either take your scissors and snip lines into the curves of the handle going from the edge of the fabric to right before the seam or take pinking shears and cut away excess fabric, this will be to reduce the bulk on the handles. Either method, be sure not to cut your stitching
19. Then you will turn the bag right side out by pulling both the liner and outer bags through the unstitched handel side, so that they are both right side out and tuck the lining into the outer fabric
20. To close the opening, you will tuck in all the raw edges for both the outer and lining fabric and pin and press if needed, it is also helpful to use clips at this point if you have them.
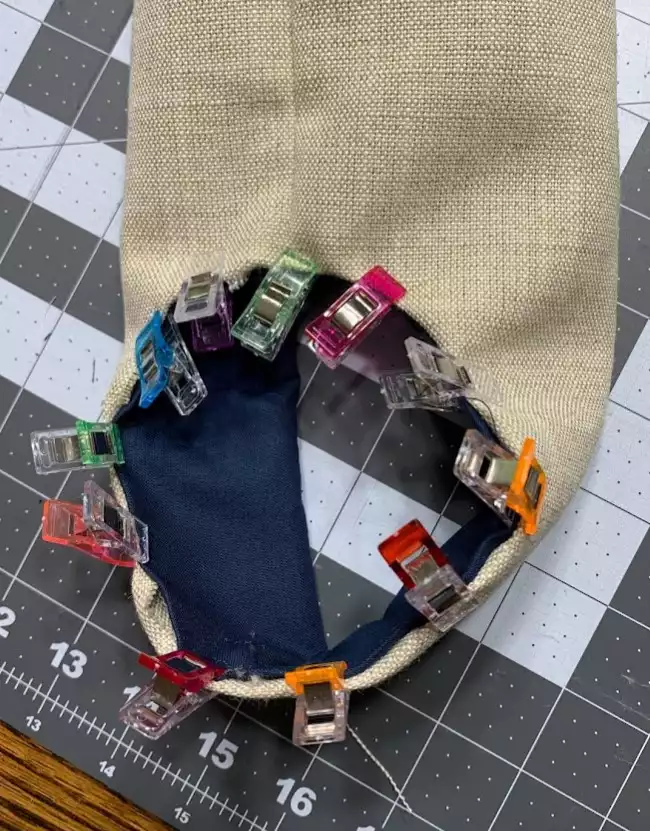
21. Topstitch ¼” seam allowance around opening to close it, the ¼” foot with guide is very helpful in keeping your stitching straight
22. Then press and topstitch the same around the other opening to make both look the same
You have a completed wine bottle holder perfect for parties and gifts!