United States
Tote with Ribbon-Embellished Flatlock Stitching

Your overlock machine can be used to add interesting surface design embellishments to your sewing projects! This simple tote has a striped design created by joining fabrics strips using a 2-thread flatlock stitch. The “ladder” side of the flatlock stitching shows on the tote’s outer side, then, a narrow ribbon is woven in and out of the ladders for a decorative effect.
Finished size of the tote shown is 15” long x 13” (38cm x 33 cm) wide, plus the handles.
What You Need:
- Overlock machine with 2-thread capability (to create flatlock stitching)
- Sewing machine (to assemble the tote)
- Total of 7 fabric strips for outer bag
- 2 cut 34” x 2¾” (86.4cm x 7cm), and 5 cut 34” x 2¼” (86.4cm x 5.7cm)
- 2 fabric strips 30” long x 4” wide (76cm x 10cm) for the 2 handles
- 34” x 15” (86.4cm x 38cm) of lining fabric
- 7 yards (6.4 meters) of ⅛” (3mm) wide ribbon
- 1 spool of construction thread for sewing machine
- Tapestry needle for weaving the ⅛” (3mm) ribbon in and out of the flatlock stitching
- 3 cones overlock thread (for 2-thread flatlocking and 3-thread seam finishing)
- Fabric spray starch (optional)
Preparing to Sew the Fabric Strips
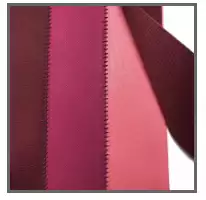
The outer tote is created by flatlock stitching fabric strips together. Of the 7 strips for the tote front, the 2 wider strips are placed at the far left and far right, with the narrower strips in between. Play with the color arrangement until you find the combination you like.
Before stitching, it may be helpful to apply fabric spray starch, giving the strips a bit more stability as you work with them. Fabric should have a slight bit of firmness to support the manipulation you will be doing with the seams.
Set the machine for the 2-Thread Flatlock, Wide. Thread the machine and set the tensions per your instruction manual for the 2-Thread Flatlock, Wide stitch. Set the Cutting Width to a medium setting. Set Stitch Length to a medium setting.
Test the stitches on fabric scraps first and fine-tune the machine settings as needed. The stitch loops should meet the edge of the fabric, without pulling toward either side. The diagram shows the fabric strip layout used for this project. (Note: Image is not to scale)

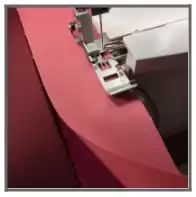
Sew the Flatlock Rows
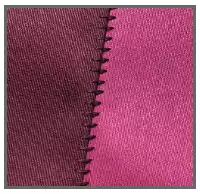
Place the first fabric right side up on a flat surface. Plae the second fabric with its right side down, facing the first strip. Use the edge of the needle plate as a guide for the raw edges - you should only be trimming stray threads from the raw edges as you go.
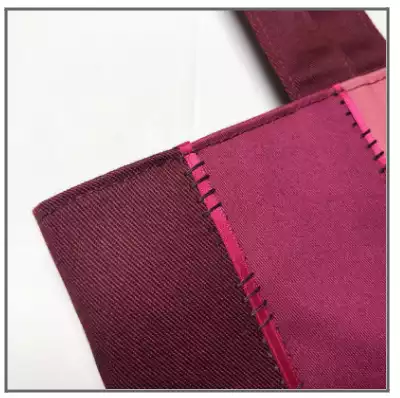
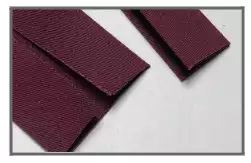
When finished stitching this first seam, gently “pull” the fabrics so that the seam lies flat. The “ladders” of the flatlock stitch will appear on the right side. Don’t work the fabric too hard or the seam may distort - just take your time and gently pull the strips. Press when finished with the first row of stitching.
Place the third fabric strip with its right side facing down onto the right side of the second strip. Stitch with the raw edges lined up with the edge of the needle plate, just trimming away any stray threads. When this row is finished, gently pull the fabric strips so the stitches lie flat, just as you did for the first row. Press. Continue this process until you have sewn all seven strips together.
Add the Ribbon Embellishment
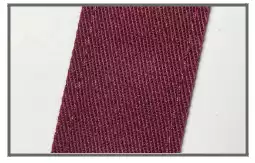
Cut a length of the ⅛” (3mm) ribbon that is approximately 3” longer than the length of the fabric, so that you are sure to have enough extra while weaving the ribbon between the stitches. Thread the tapestry needle with the ribbon. For this project, the ribbon is woven through the stitching so that it goes over 4 stitches, then under 4 stitches, repeating this rhythm throughout the entire length of the flatlock seam.
If you prefer, try a different pattern for weaving the ribbon, such as over 3 stitches and under 3 stitches, or perhaps over 2 stitches and under 4 stitches, etc. You may want to practice on a scrap first to determine the look you want for your tote.
Weave a length of ribbon through each of the flatlock seams. When finished weaving all rows, lightly press the whole tote front piece.
Trim the embellished tote front section so that it measures 31” x 14” (79cm x 35.5cm). Set the tote font fabric piece aside for now to prepare the handles.
(Note: It’s a good idea to secure the ribbons at each end before you continue, to help prevent the ribbon from coming out of the stitches as you work. Use a hand needle and thread to secure the ribbon ends within the seam allowance at each end of the tote.)
Make the Carry Handles
For each of the two 30” x 4” (76cm x 10cm) strips, fold in half lengthwise with the right side of the fabric on the outside. Press. Open the strip and fold each long side so that the raw edges meet at the crease just pressed. Press again. Now fold in half lengthwise and press once more. You should now have a strip that measures 1” (25mm) in width.
Using your sewing machine, edgestitch along each long side of both handles. Press. Set aside for now to prepare the lining.
Prepare the Lining
Using the tote front fabric piece as a guide, trim the lining fabric so that it is the same size as the tote front piece, 31” x 14” (79cm x 35.5cm).
Set the overlock machine for the 3-Thread Overlock, Narrow. Starting with the tote front piece, stitch along each long side, trimming only a scant amount to clean-finish the edges. Do the same for the lining piece fabric’s long edges. Press both pieces.
Finish the Tote
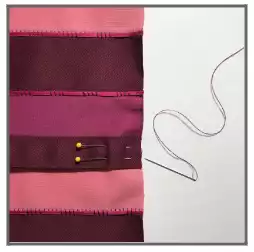
Pin one carry handle to one short side of the tote front piece, making sure that the handle isn’t twisted. Use a hand sewing needle to bast the handle ends in place within the seam allowance, then remove the pins. Repeat with the other carry handle at the other end of the fabric piece.

Set your sewing machine for a straight stitch. Fold the bag, right sides facing and pin the side seams. Sew the two side seams using a ½” (12mm) seam allowance. Press the seam open.
Fold the lining piece in half, then sew one side seam of the lining with a ½” (12mm) seam allowance. Sew the other side seam, but this time leaving a 5” (12.7cm) opening in the middle of the seam. (This opening will be used for turning the tote right side out after the outer fabric and lining have been sewn together.)
Press the seams open.Turn the outer fabric so it is right side out. With the lining wrong side out, pin the tote front and lining together at the top seam (the right side of the tote front should be facing the right side of the lining). Sew, using a ½” (12mm) seam allowance.
Turn the tote right side out through the opening that was left in the lining.
Press, then topstitch around the top edge of the bag to help secure the carry handles.