 United States
Small Monogrammed Bag In-the-hoop with Embroidery Digitizing Instruction

There is always room for a small embroidered bag. Make them for all your different items. They also make great personalized gifts! In this project you will learn how to digitize the embroidery design from scratch! The embroidery design and quilting is made in the hoop. The middle panel will be digitized separately, this makes it possible to customize the bag without the need to start from scratch every time, just change the middle panel!
With 30-day Free Trial of mySewnet Embroidery Software you will get to try out the most user-friendly and feature rich digitizing software on the market. It works with all embroidery machine brands and is available for both Windows and Mac.
What you need:
- MySewnet embroidery software, Platinum level
- Cutaway stabilizer: two pieces 16”x14” (45x35cm)
- Fabric for bag lining: two pieces 12”x9” (30x23cm)
- Binding strips inside the bag: Lining fabric 1 strip 2 ½”x 44” (6x110cm)
- Fabric for center panel: two pieces 9”x5” (23x13cm)
- Fabric for side panels: four pieces 9”x4” (23x10cm)
- Foam batting 3mm: 2 pieces 10”x9” (25x23cm)
- Fabric for binding the top edge: 2 pieces 12”x1” (30x2,5cm)
- Fusible web for the top binding: 2 pieces 12”x ⅜” (30x1cm)
- Zipper 12” (30cm), not metal
- Embroidery thread
- Quarter inch presser foot
Making the bag main part section
1. Open mySewnet embroidery software, select Digitizing. 
(Important note to Mac-Users. Start the Digitizing Module from Finder Applications folder or from Launchpad.This is necessary to avoid problems with saving the Edo file later.)
2. In the next window select Start a New Design with no Picture, click Next
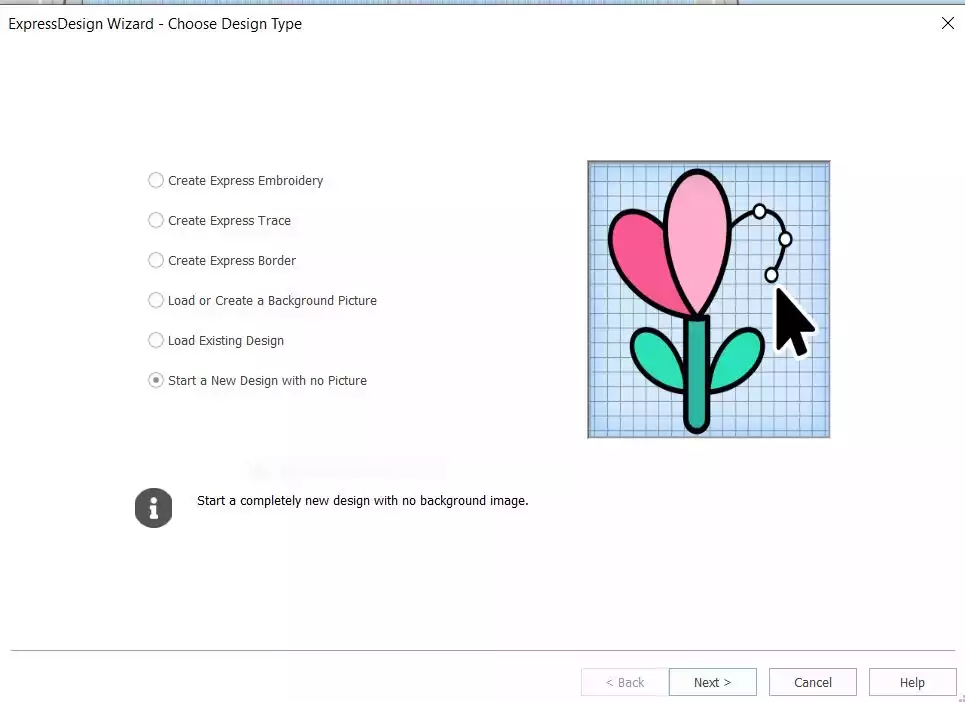
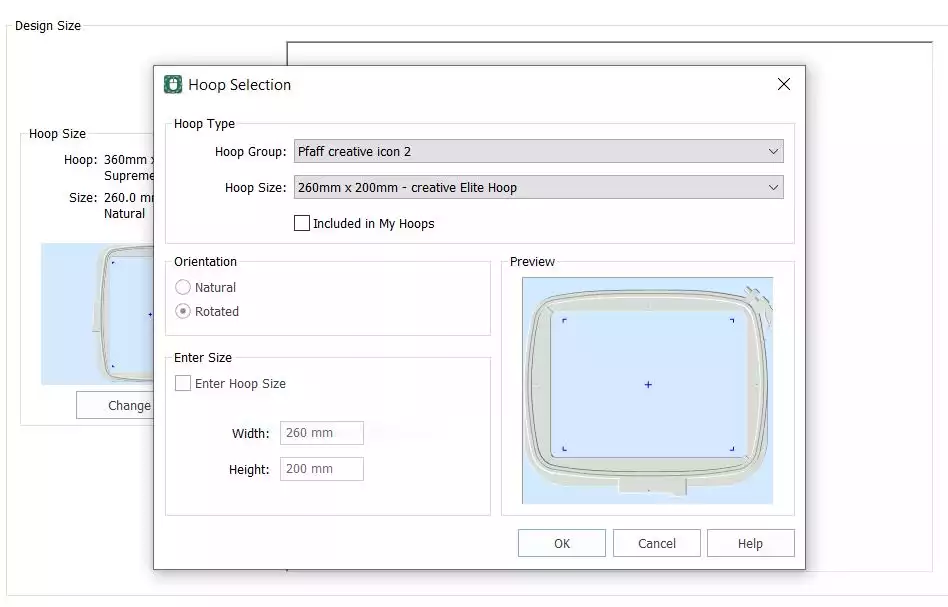
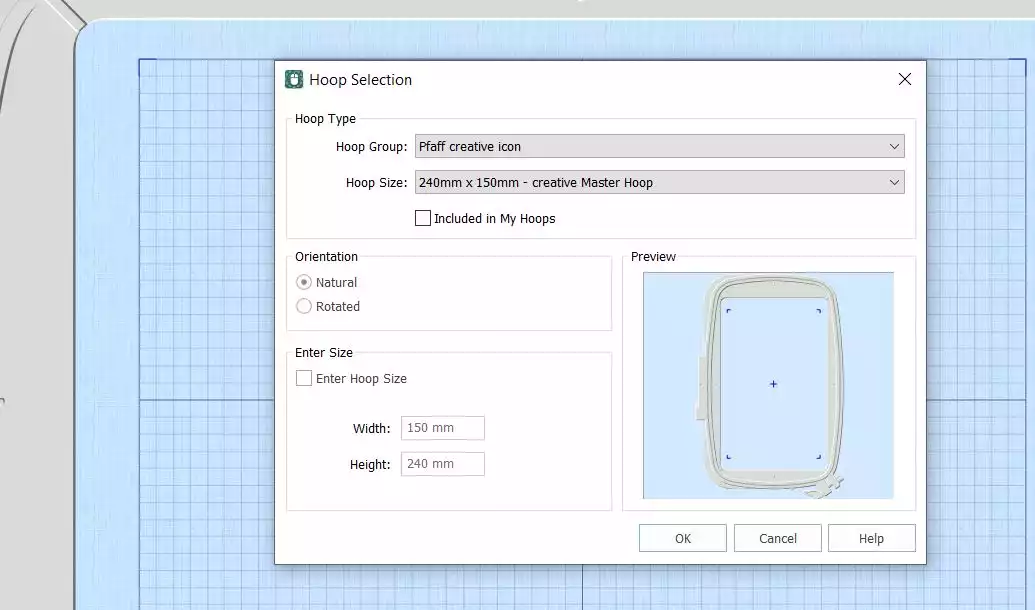
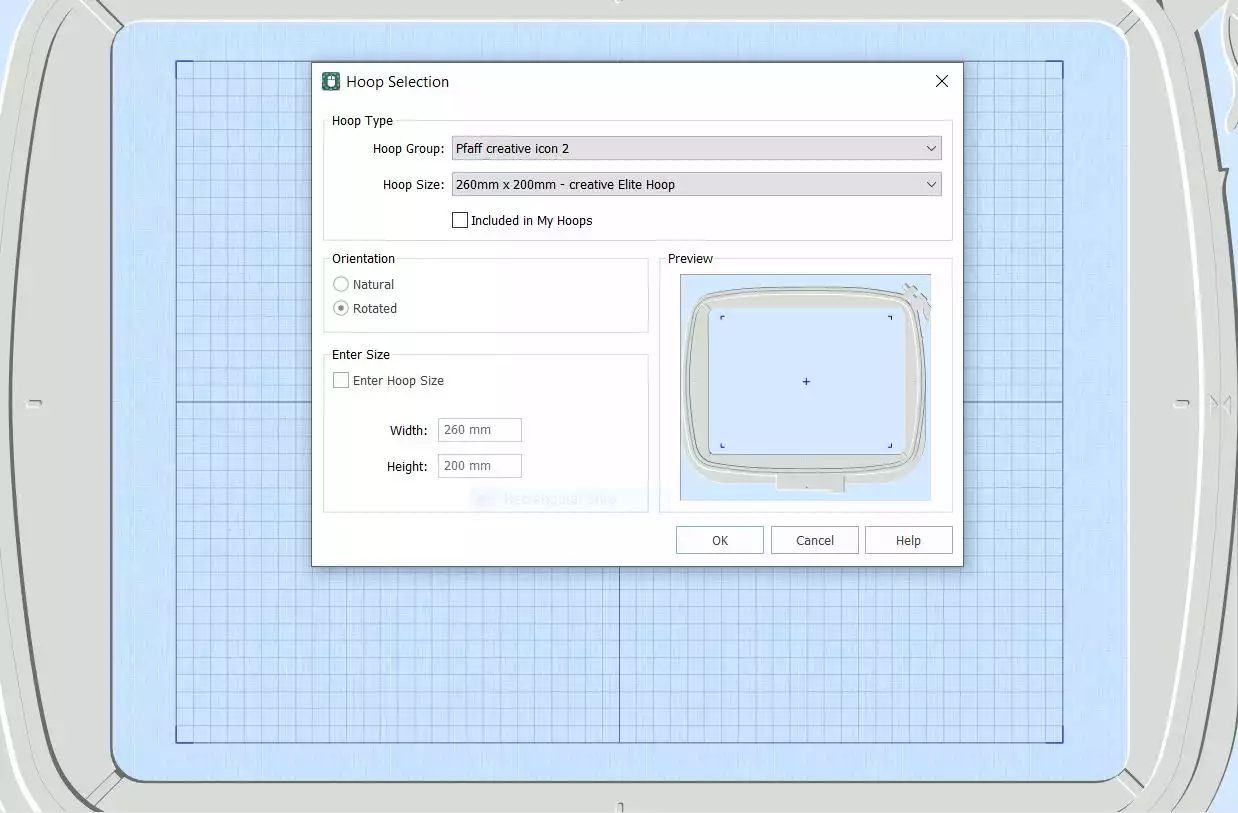
3. In Hoop Selection, click on Change Hoop and select 260mmx200mm - Creative Elite Hoop, Orientation: Rotated. Click OK and then Finish.
4. Go to Point Create, change Pattern Fill to No Fill and Satin Line to Running Stitch
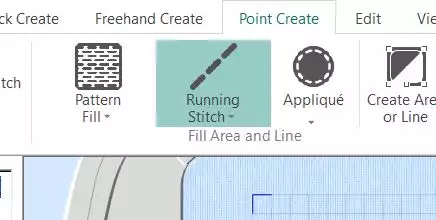
5. Click on Create Area or Line, and Bezier Mode. Bezier mode is a help to get smooth curves.

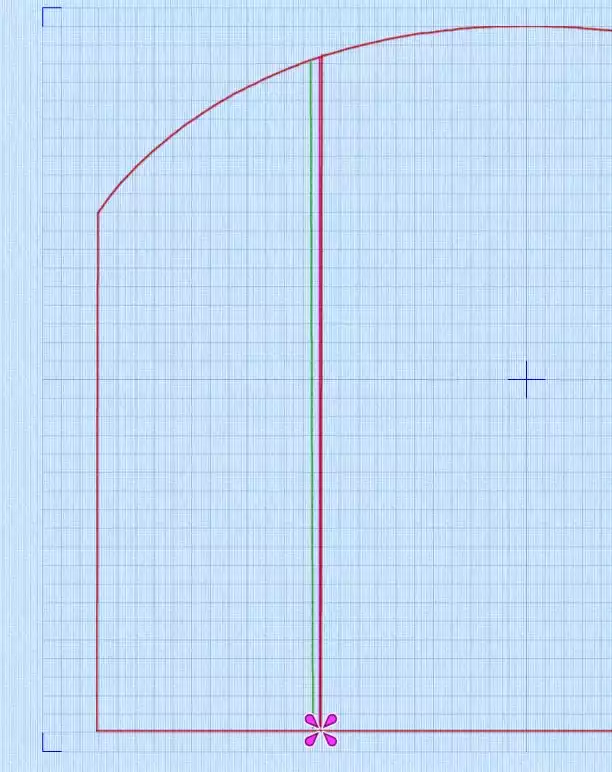
Now we will start making the bag outline. The instructions are a bit tricky to follow, but with help from the images it will be easier.
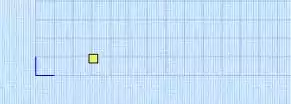
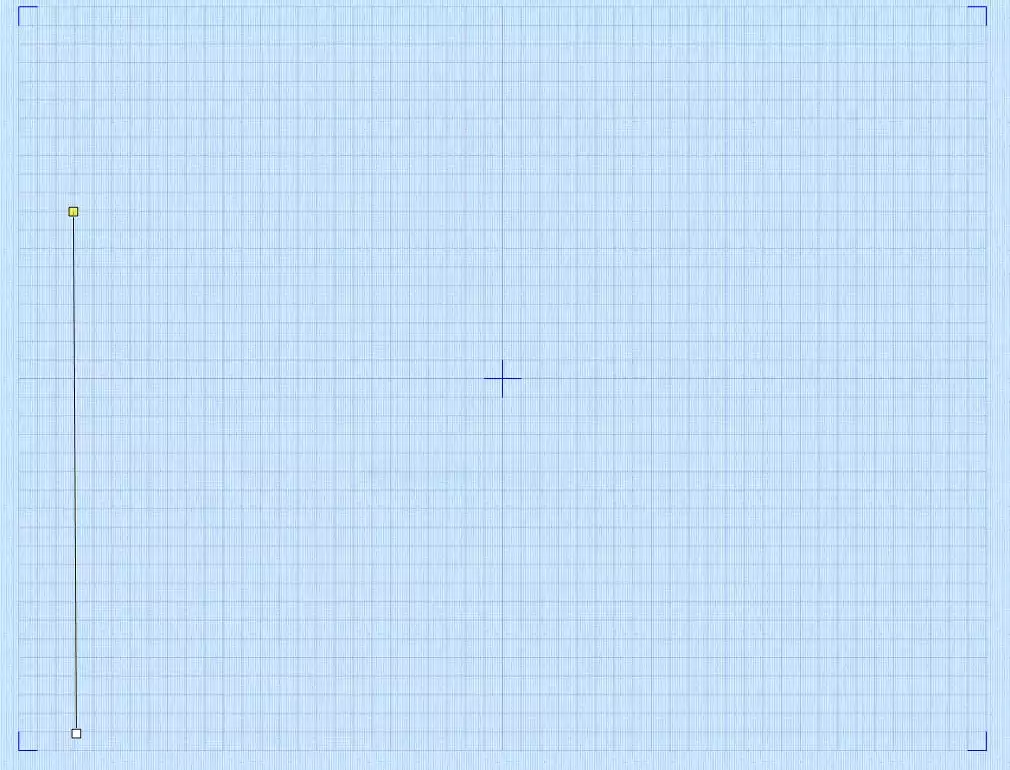
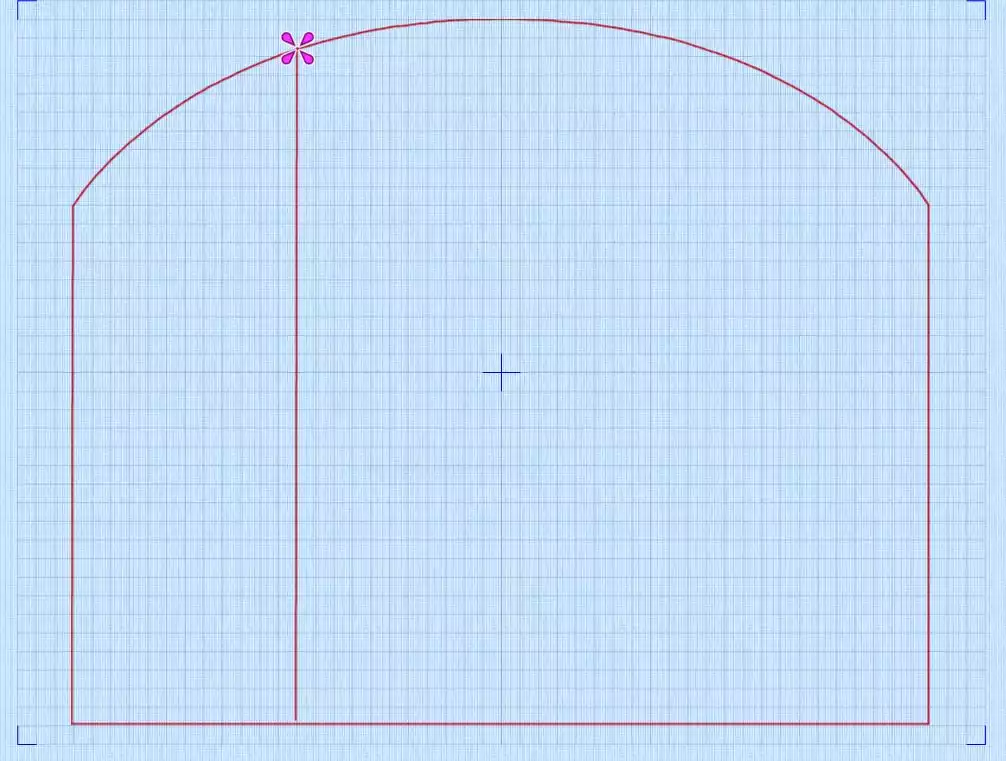
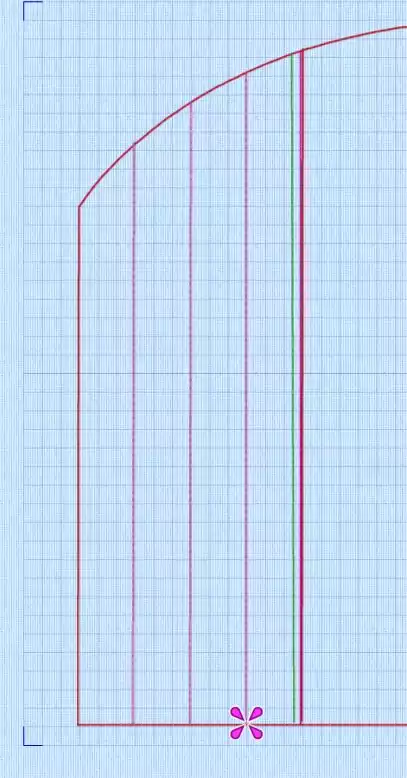
6. Set the first point 1 square up from the base of the grid, three squares in from the right side (Grid size 5mm)
7. Set the next point nine squares above the horizontal center line following the vertical line in the grid
8. Set the next point one square down from the top on the vertical center line.
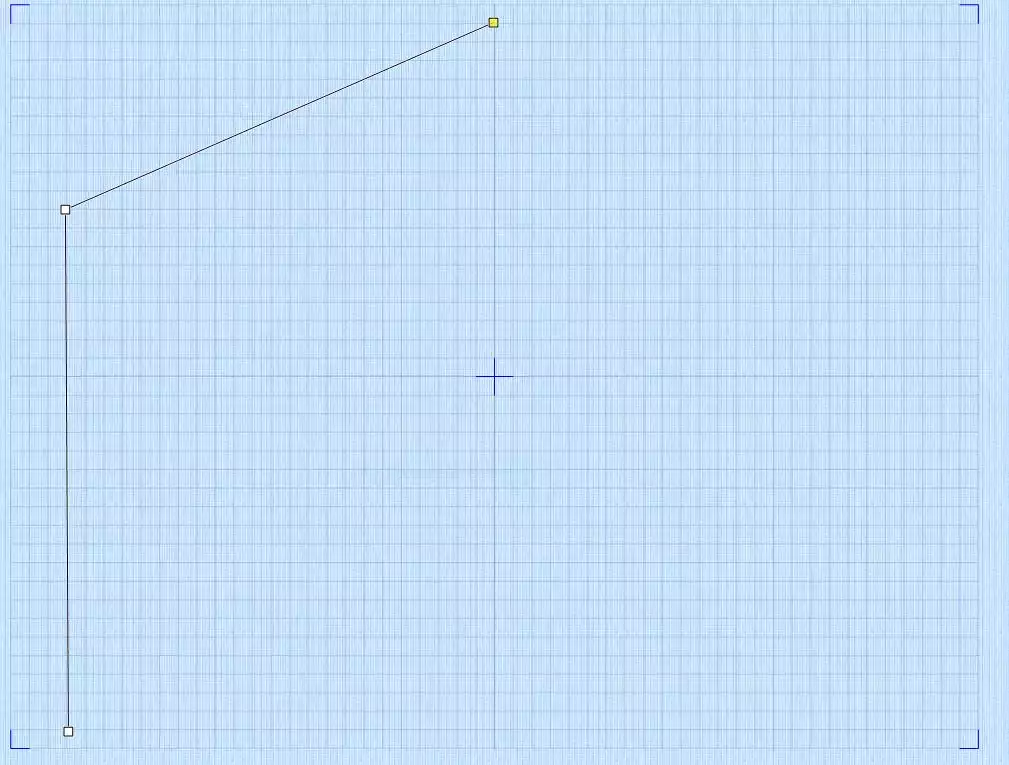
9. Now we will mirror this: set the next point nine squares above the horizontal center line, three squares in from the right side.
10. Place next point one square above the baseline, three squares in from the right side (follow the line from the last point vertically down to one point above the base)

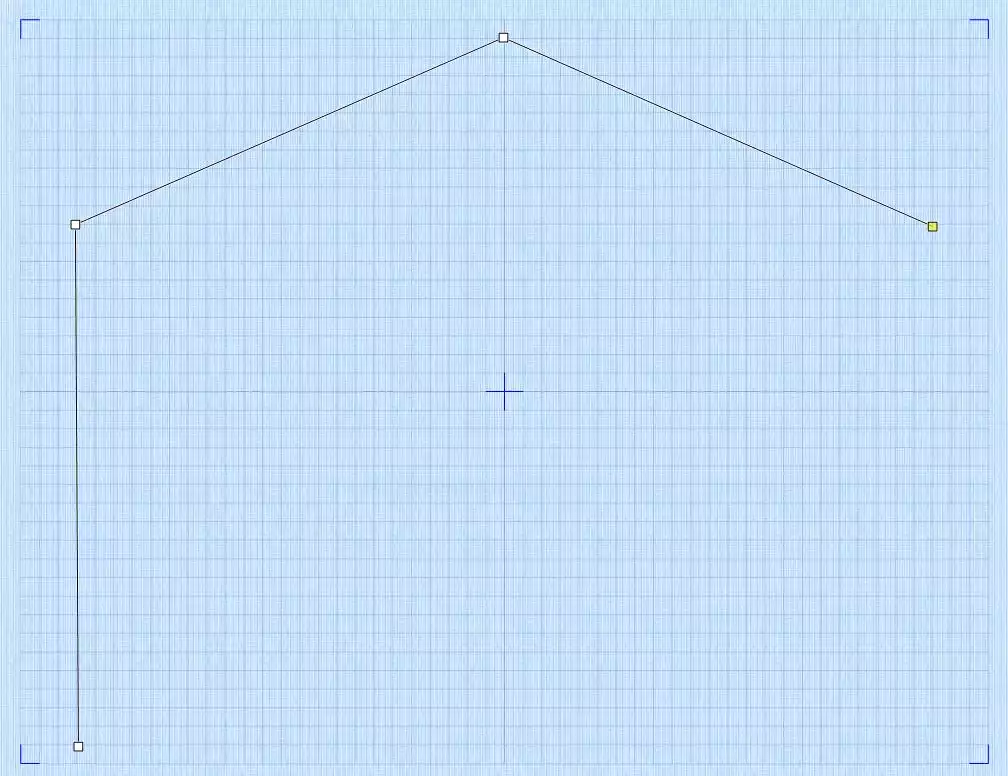
11. Now it is time to close the design: Make a point one square above the baseline close to the first point we made, then drag in on top of the first point. This will close the design.(The black handles are bezier handles, we will not use them here)

12. Click on the square point on the top of the design and when holding down the left mouse button drag it to the right, sevent. een squares from the middle, nine squares in from the right side ( you can adjust it if you don't get right the first time) The handle will swing out on both sides simultaneously.
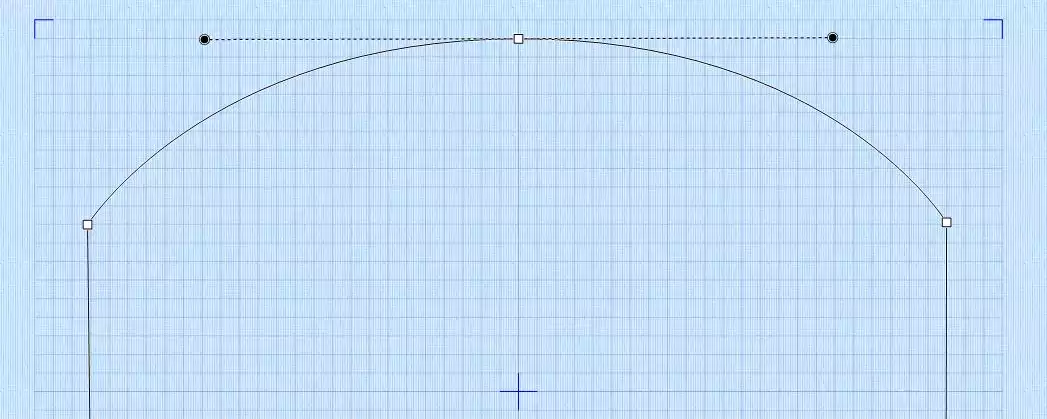
13. Unclick Bezier Mode. The stitch line will now be set.The outline is now finished and the most tricky part is done, good job!
To make the bag to a In-the hoop project we must make some color changes and copies of the outline:
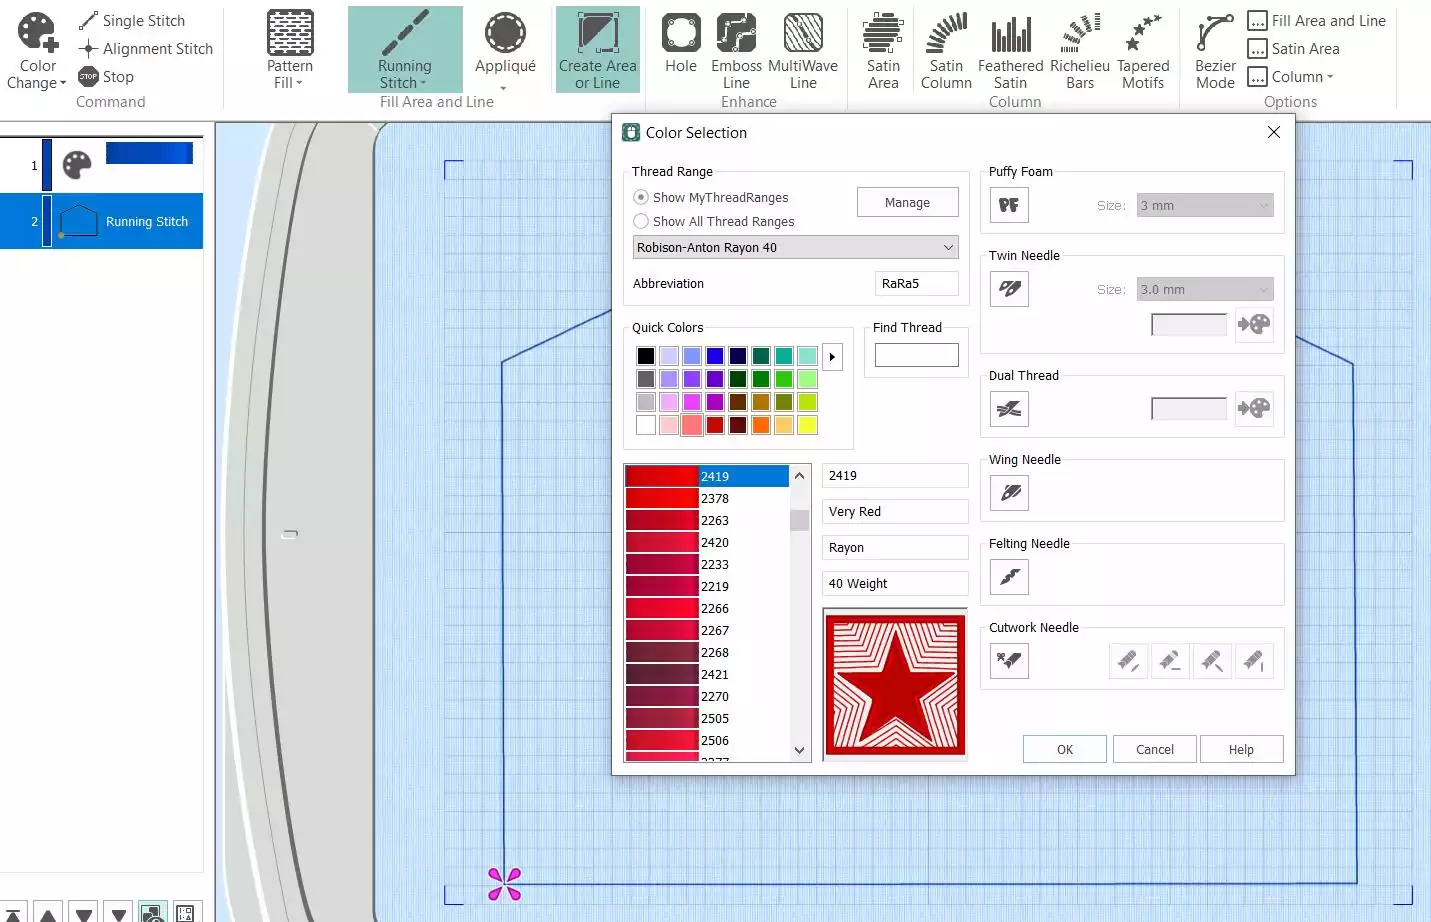
14. Click on Color Change, select a red color and then OK. (It is important that all steps get a different color to avoid being merged together if the file gets color sorted by mistake later!)
15. Right click on the Running Stitch in the Filmstrip at the left side and choose Copy. Then right click on the red color and choose Paste. A copy of the running stitch will appear under the red color.
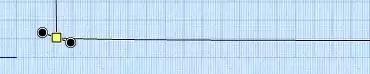
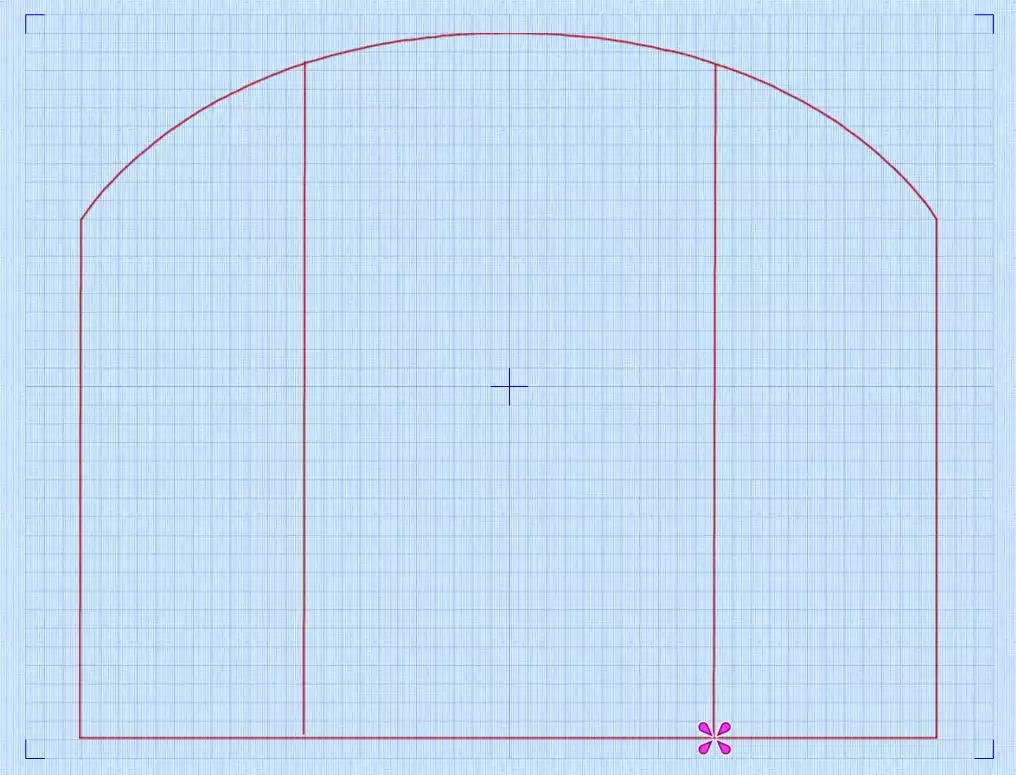
16. Time for the placement stitch for the middle monogrammed panel. Set a point on the lower end of the outline, 11 squares out to the left from the middle line.
17. Follow the vertical line and set the next point on the top of the outline. Right click to set the stitches.
18. Repeat on the right side of the vertical center line.
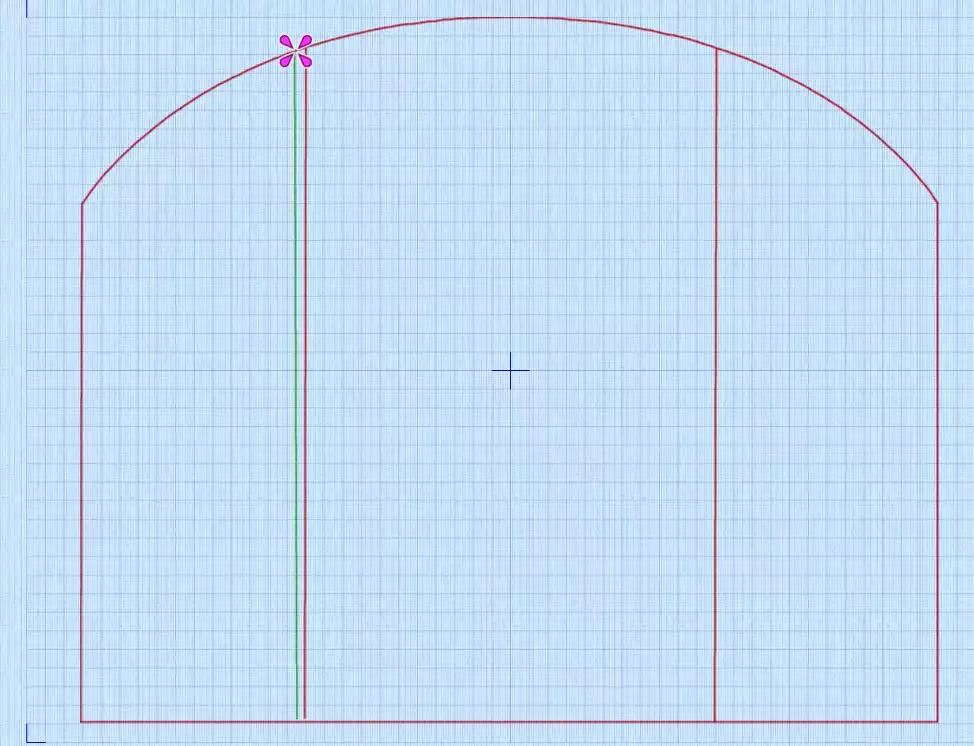
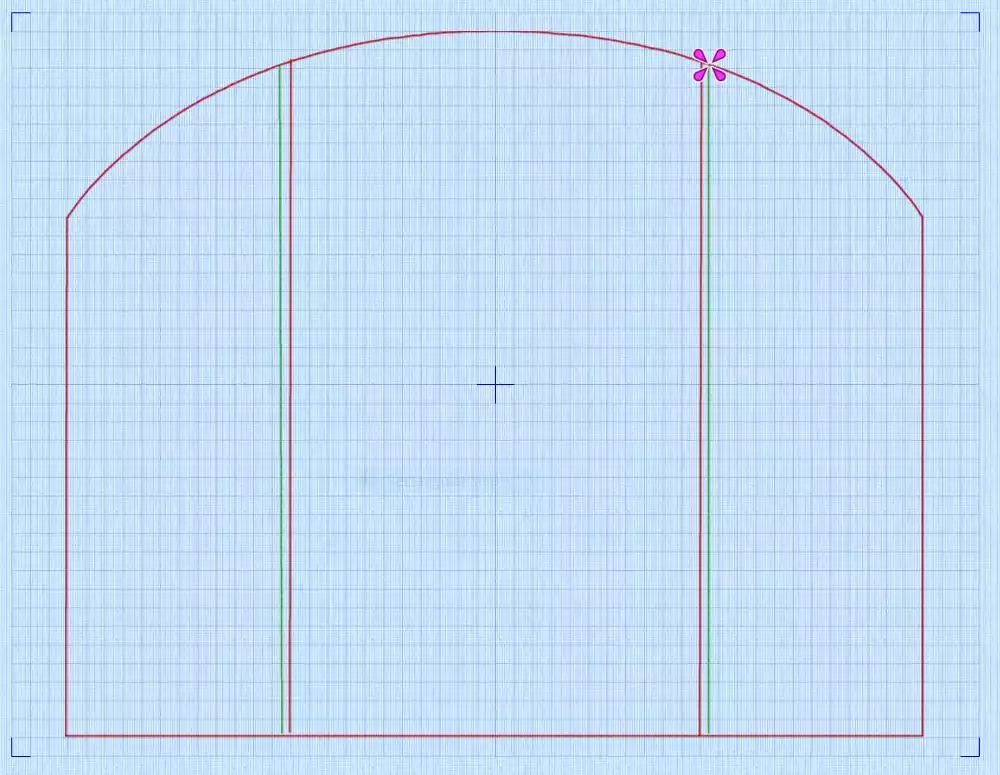
19. Click on Color Change again and select a green color. Click OK.
20. Now we will make two lines just outside the red vertical lines we just did. Place a line about 2mm (½ square) outside the left line. Repeat on the right side
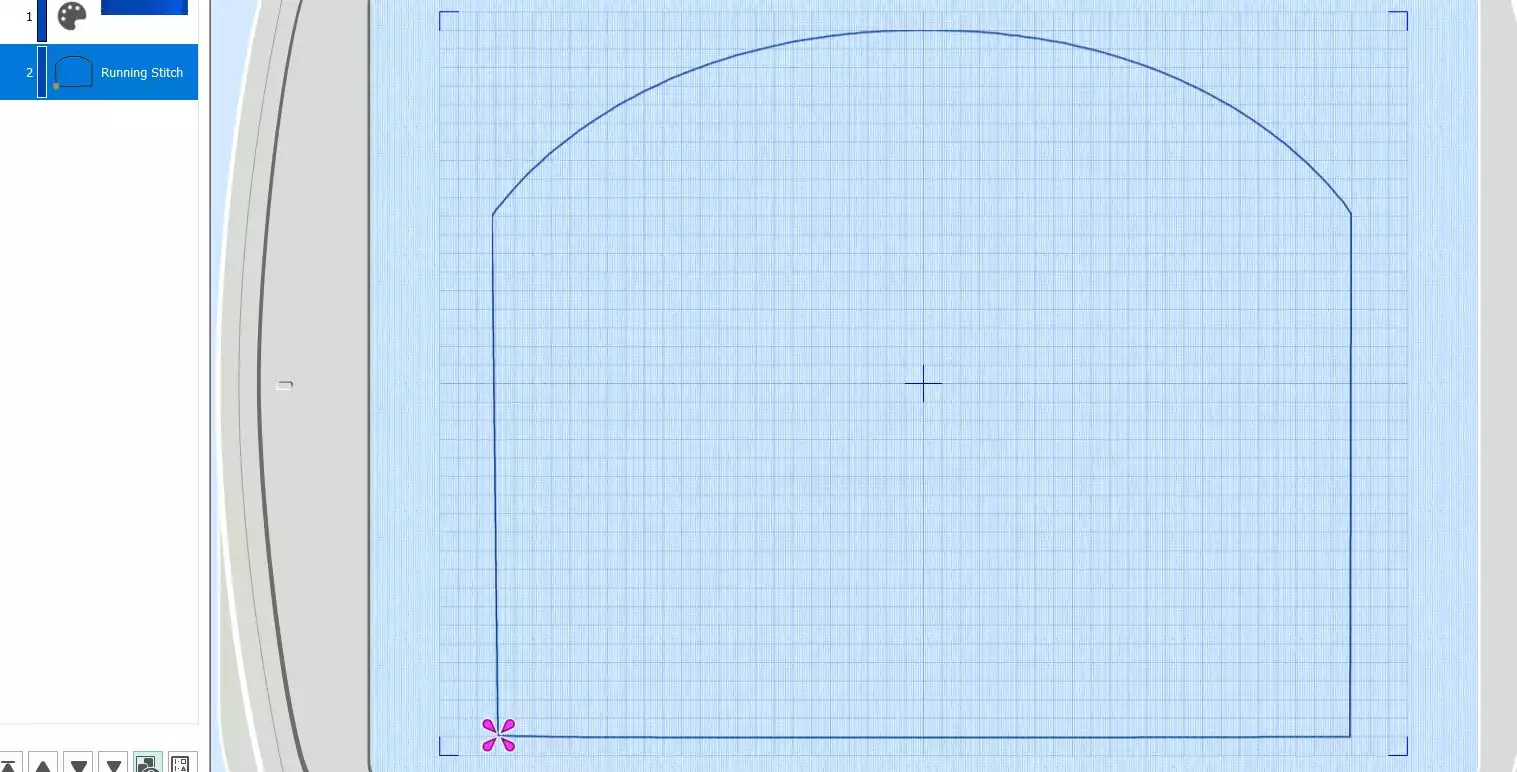
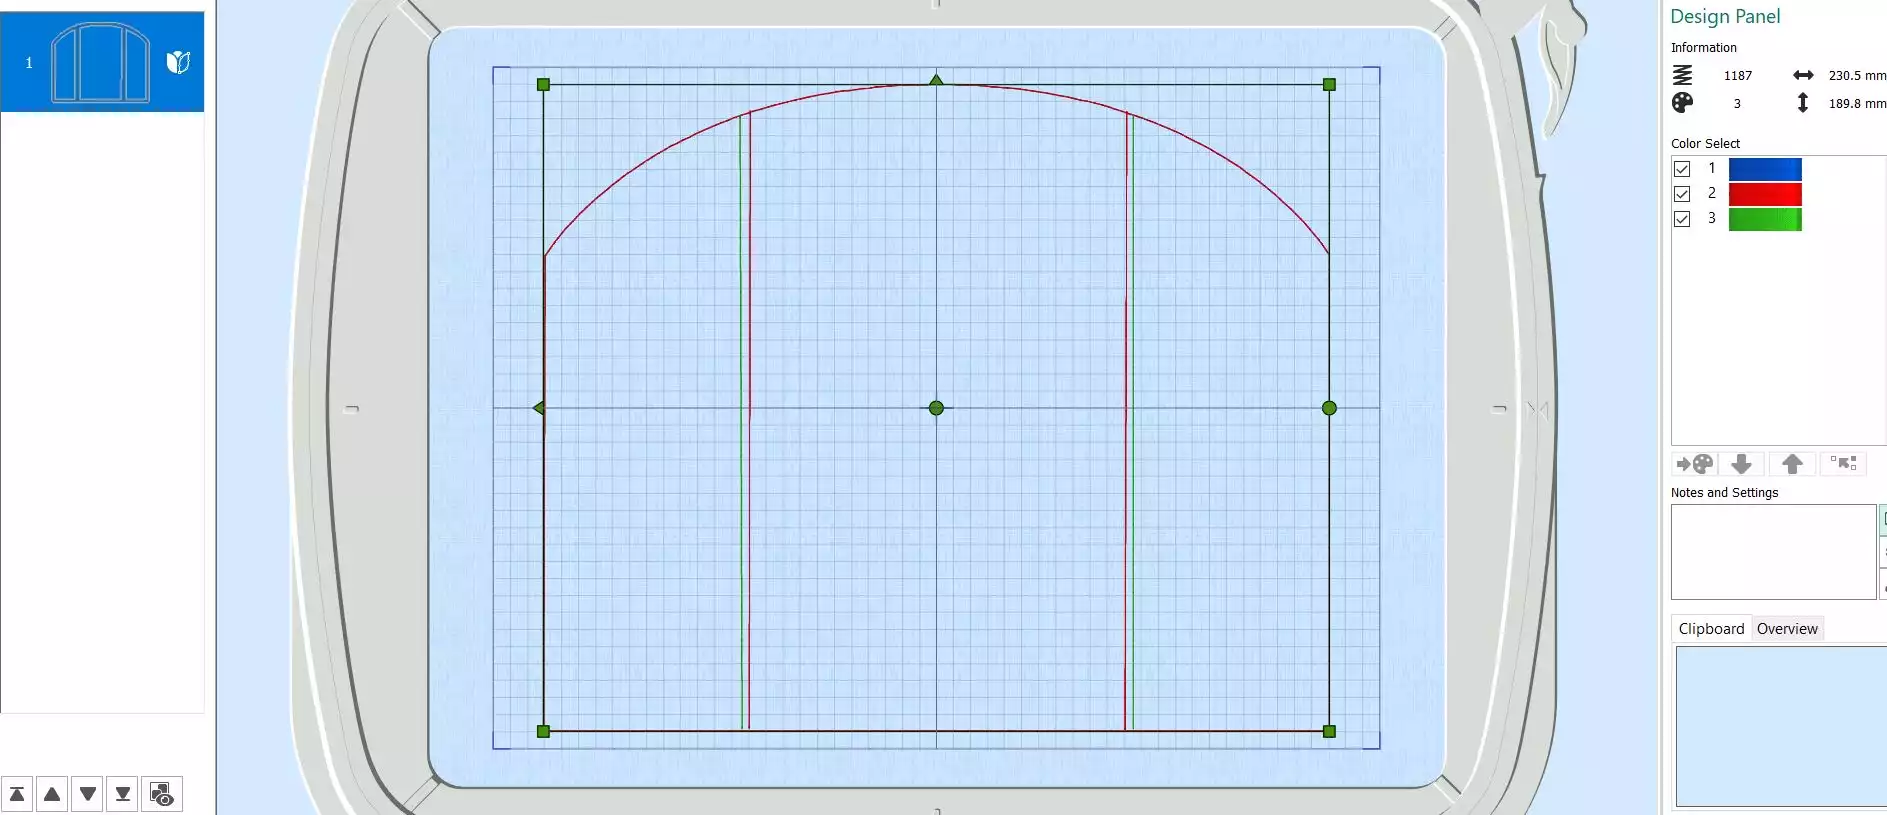
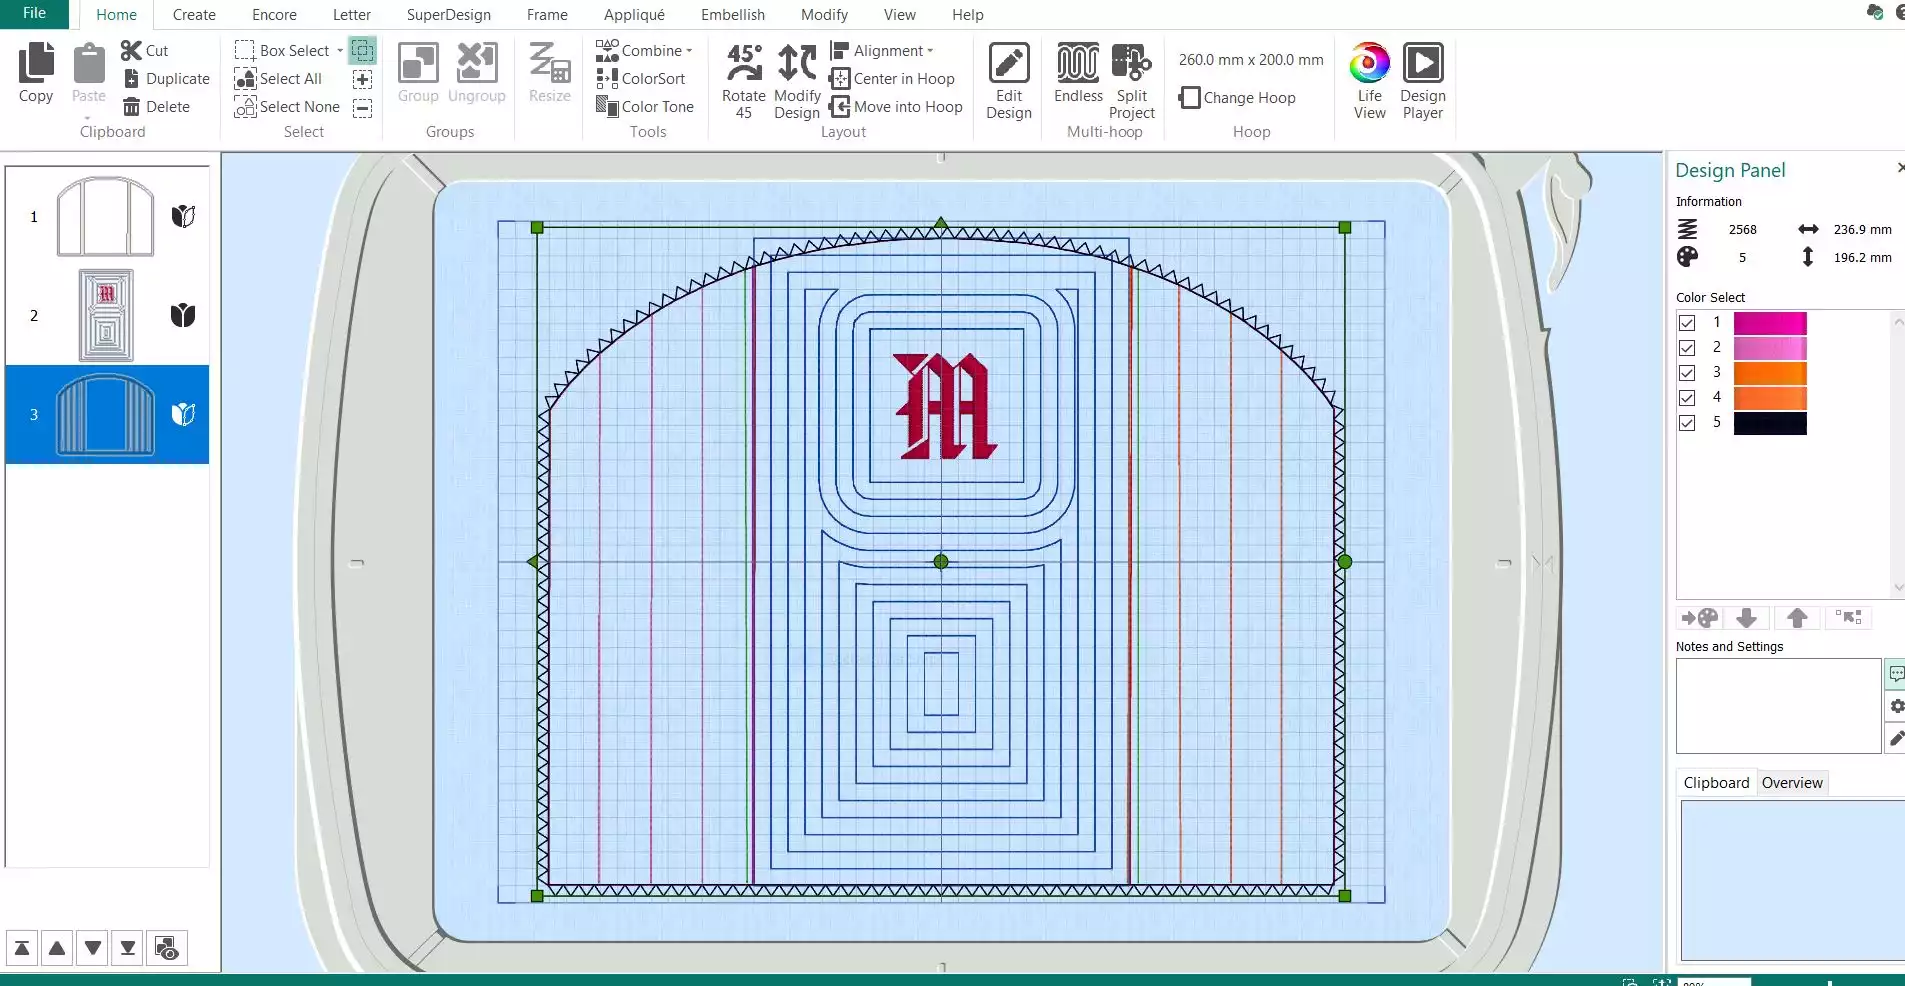
We have completed the first part of the project. The file you just created will first stitch out a placement line (the blue color) to show where to place the foam batting. The red color will secure the batting and stitch the placement line for the center fabric panel. When fabric is placed at the center, the green color will secure the center panel to be embroidered. Before we continue we must save the edo file:
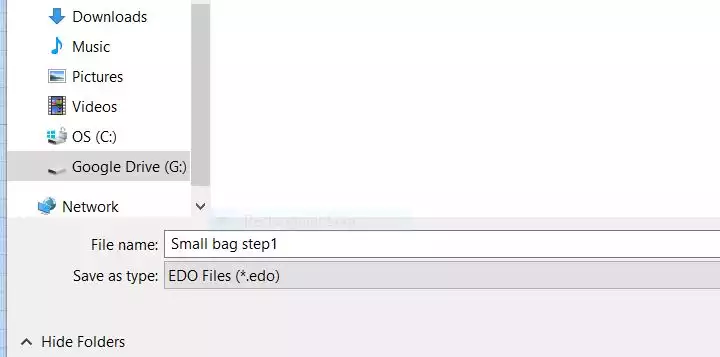
Go to File, Save As and save the edo file as Small bag step 1.
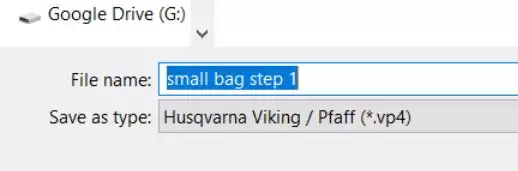
Close the digitizing window, the embroidery design will now appear on the home screen. Save the file as Small bag step 1 in the vp4- format.
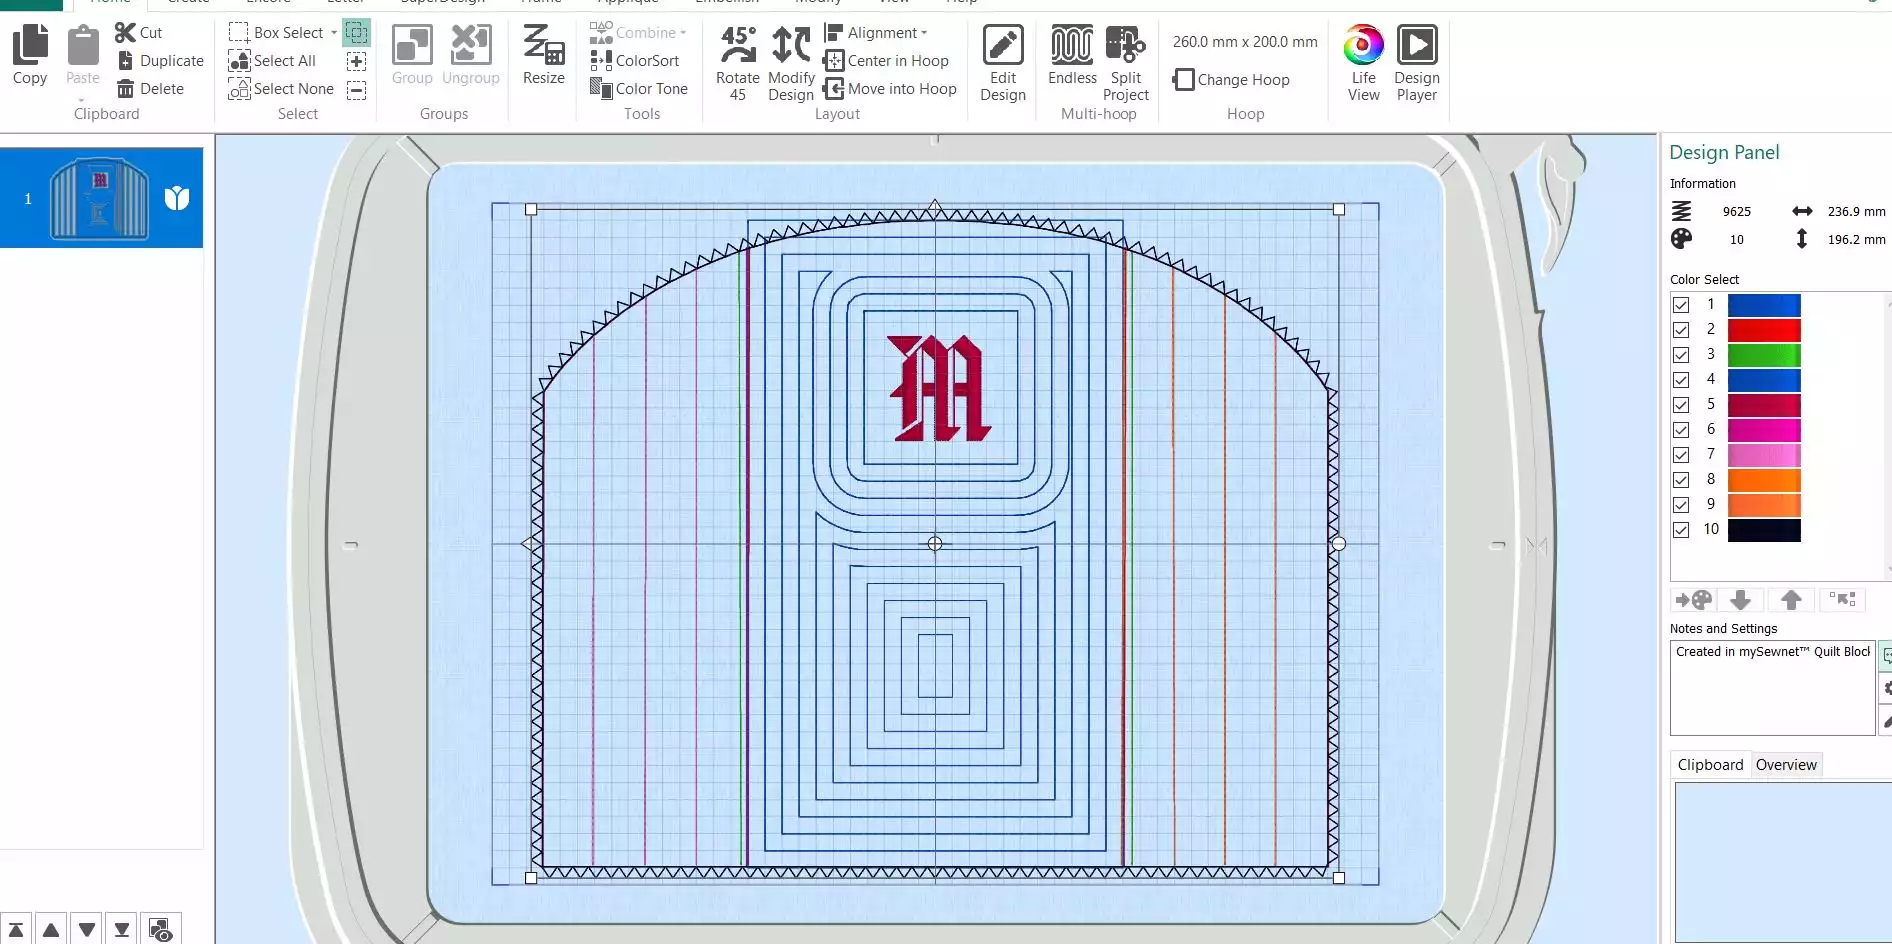
Digitizing the quilting on the side panels
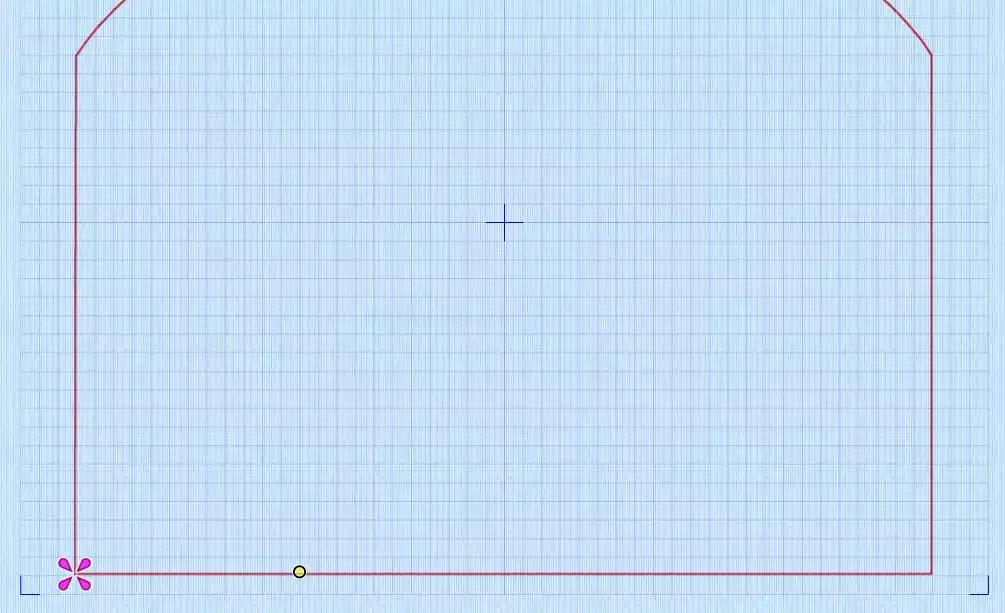
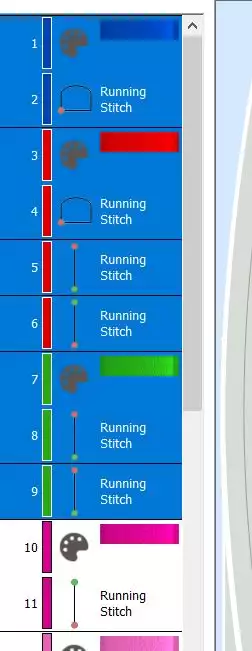
21. Open the small bag step1 edo file. Select Point Create Area or Line and change color to pink/magenta. Make a line on top of the left red vertical line. This will stitch down the fabric for the left side later.
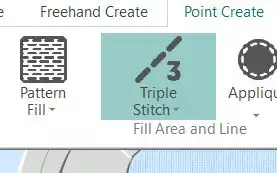
22. Change color to a lighter pink, change the Running Stitch to Triple Stitch
23. Make three vertical lines three squares apart starting from the left edge of the embroidery file. This will quilt the side panels.
24. Now we will repeat the process at the right side: change color to a bright orange, set the stitches to running stitches and repeat step 21
25. Change color to a lighter orange and repeat step 22 and 23 on the right side
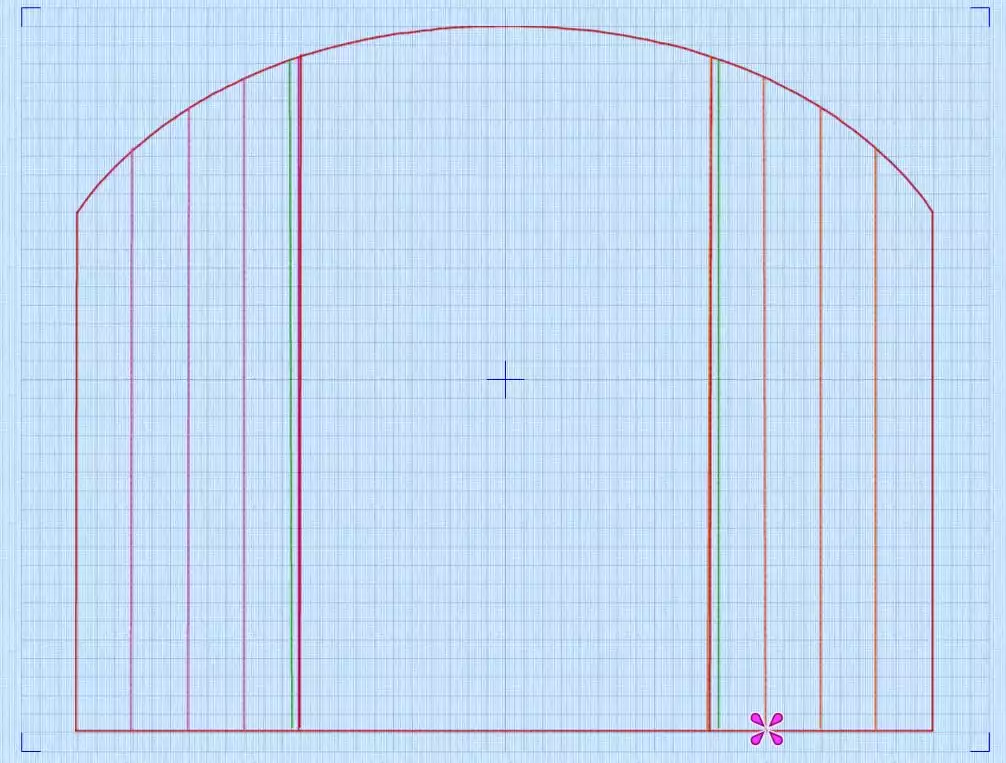
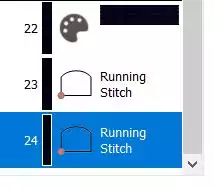
26. The final step is to make a final running stitch line and zigzag around the edges: Change color to black . Move up in the filmstrip to the blue running stitch we started with. Right click and select Copy
27. Scroll down to the black color and right click on it, select Paste, then click Paste one more time
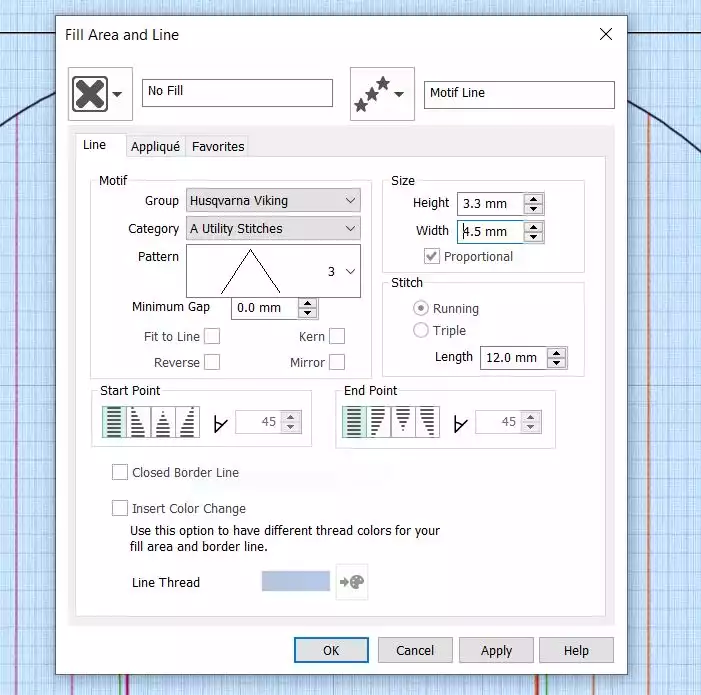
28. Right click on the last running stitch and choose properties. A dialog box will appear, select motif Line. A new dialog box appears: Under Group: select Husqvarna Viking, under Category: A, Utility Stitches And under Pattern: 3 (zig-zag) Set the Width to 4,5 . Click OK.
The embroidery design is now finished, we just have to remove the parts that are already saved in part 1:
29. Delete the green, red and blue colors and stitches associated with them. (hold down shift and click on the blue red and green colors and stitches, then right click again and choose Delete.
30. Now it will look like this:
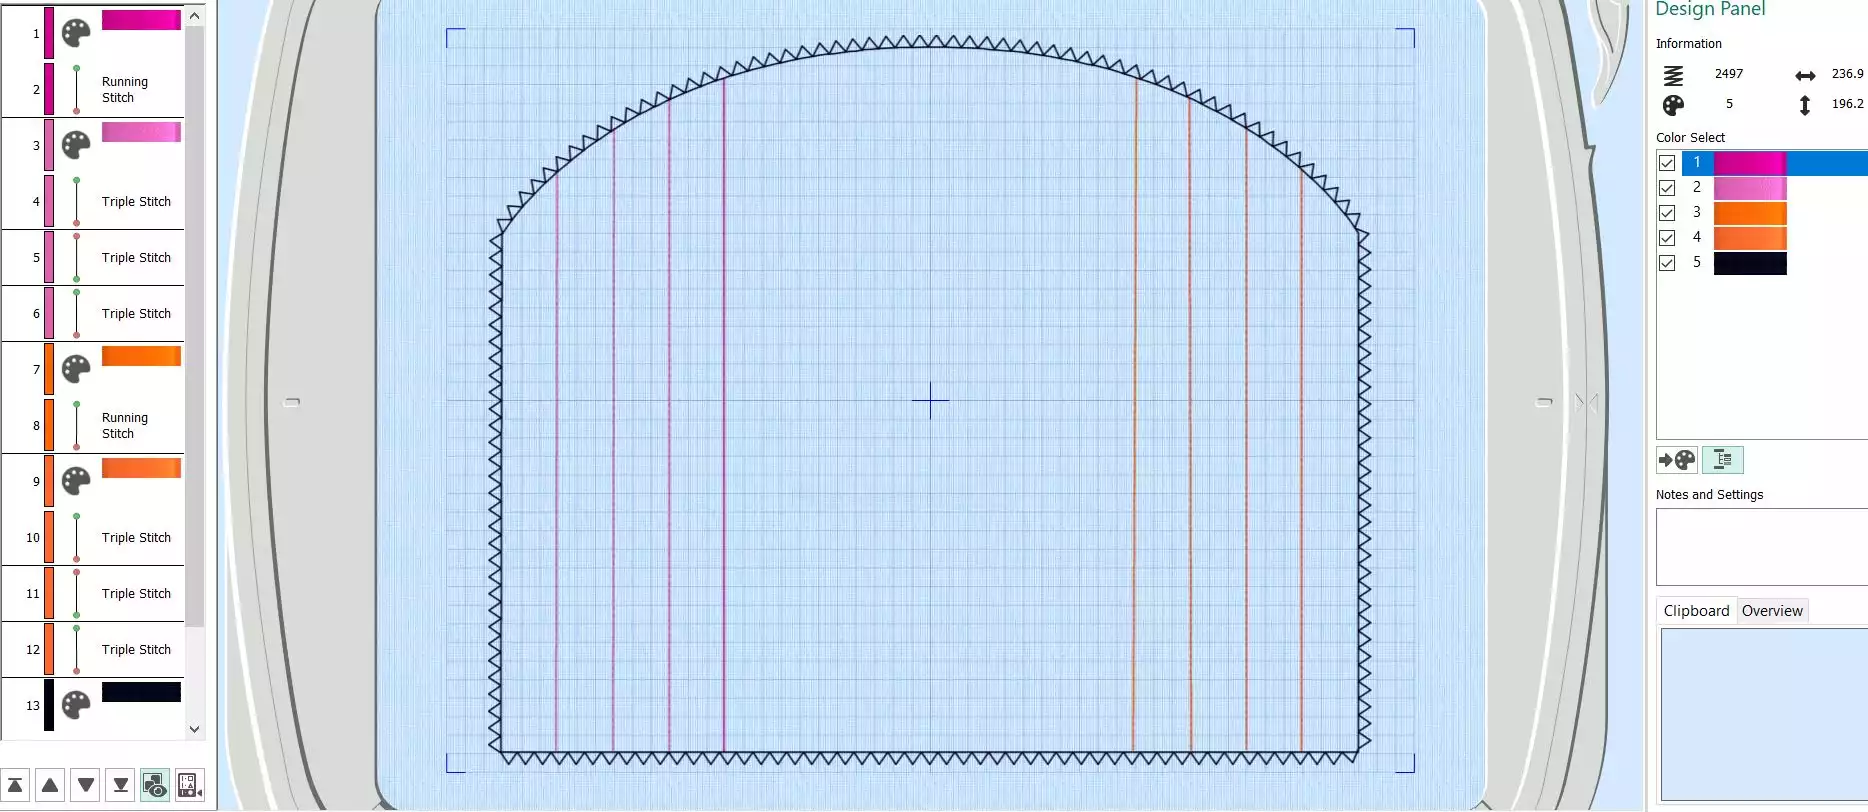
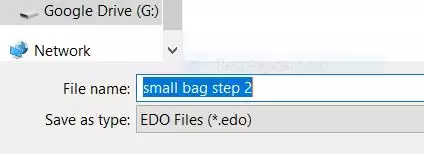
31. Save the file as small bag step 2.edo
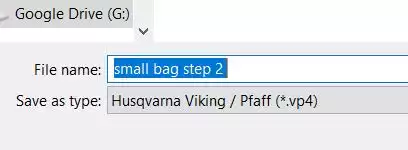
32. Close the digitizing program, the main screen will open, save the file as “small bag step 2.vp4”
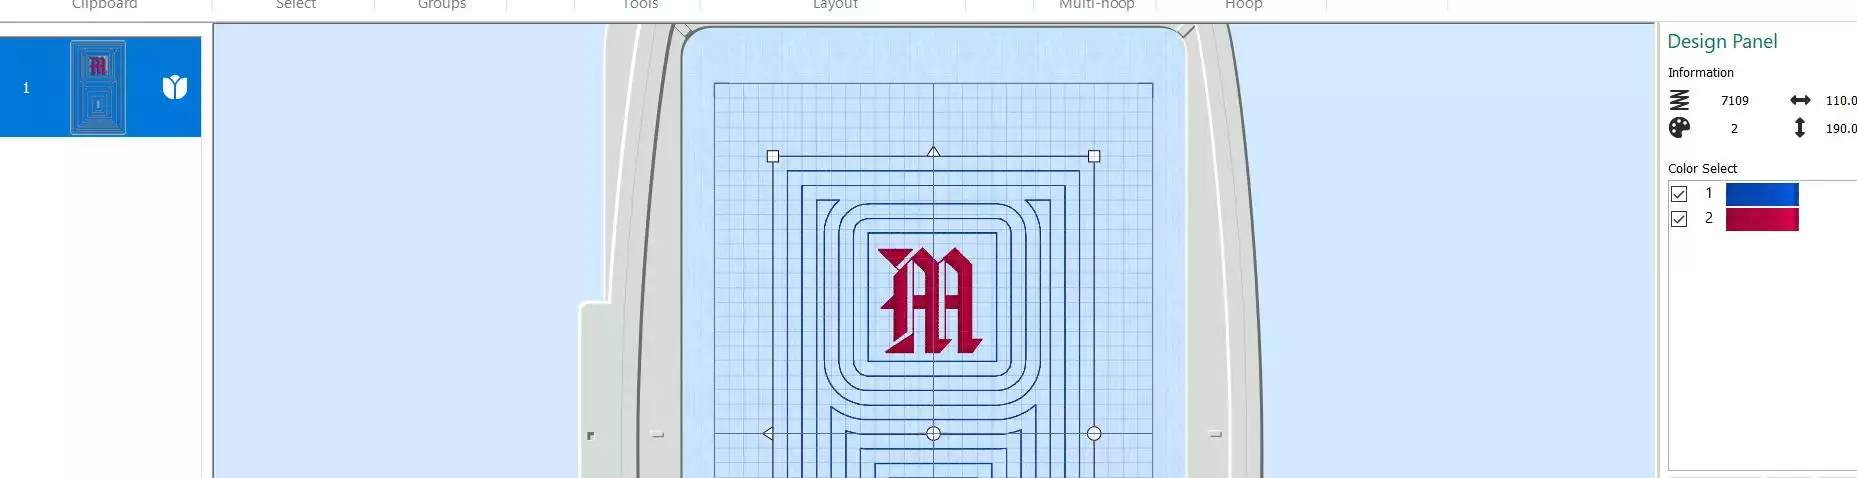
Making the center panel with monogram
33. Open mySewnet Embroidery. Choose Blank Canvas. Change hoop size to 240mmx150mm, Natural orientation, Click OK
34. Go to Create, Click on Quilt Block When you open the wizard there are several choices. If you click on them there will be an image representing the finished result.
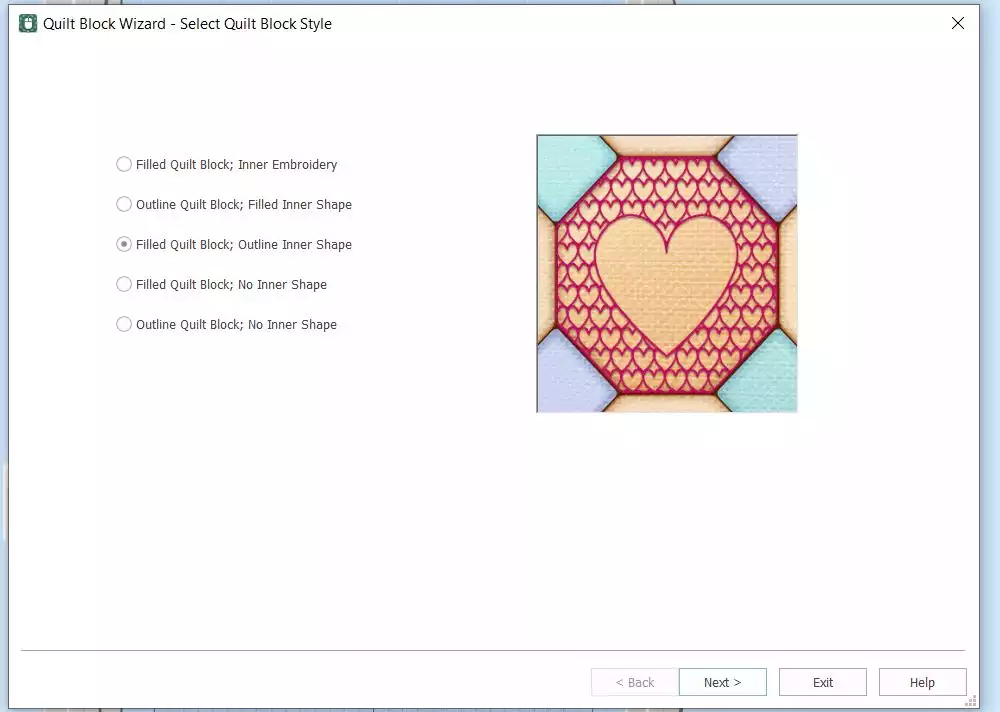
35. In the dialog box, choose Filled Quilt Block; Outline Inner Shape. This means we will create a quilt block with an empty shape in the center Click Next
![]()
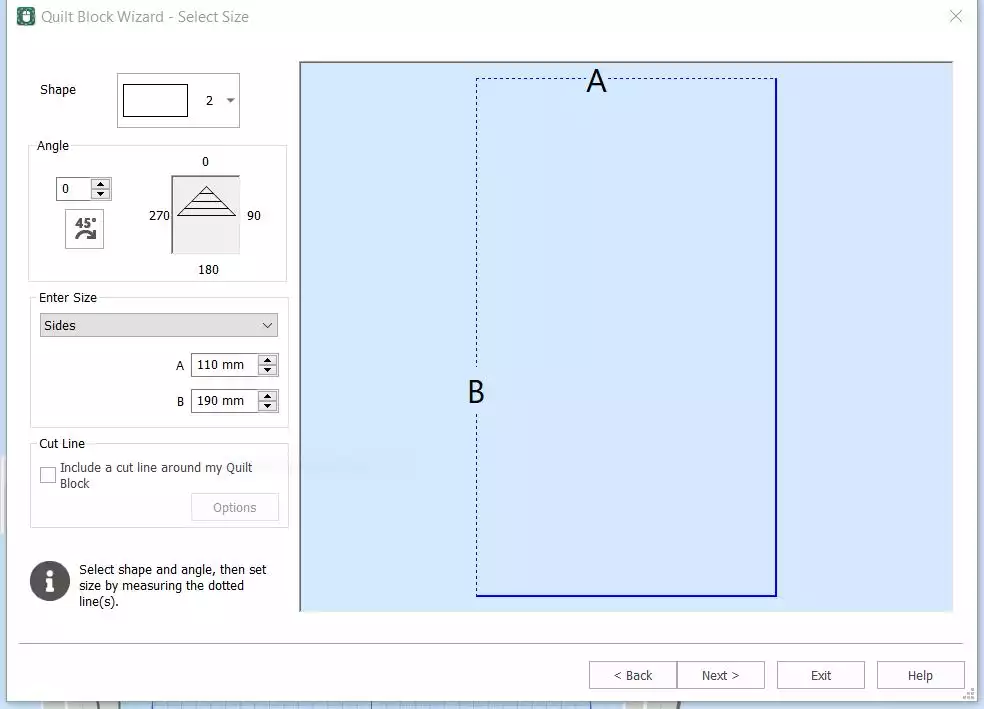
36. In the Select Size dialog box, Set the Shape to 2, rectangle. Enter Size: set A to 110mm and B to 190mm Uncheck the Cut Line box, Click Next
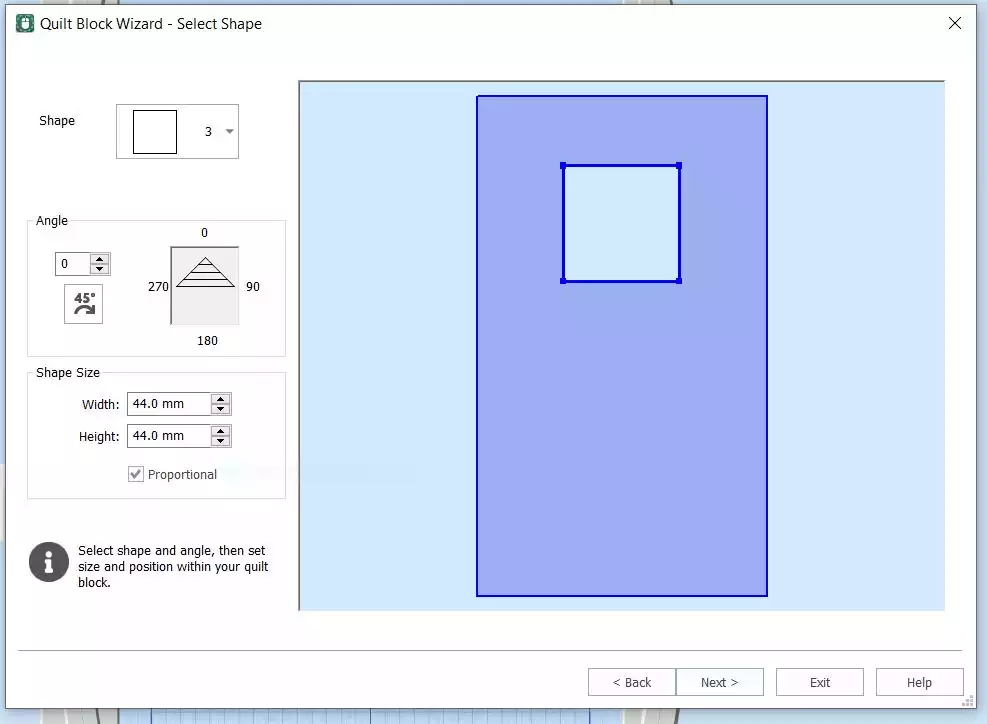
37. In the Select Shape dialog box there are a lot of shapes to choose from, but this time choose number 3, the square In the Shape Size box, set the Width and Height to 44mm. If Proportional is selected you only have to fill in one of the measurements, the height and width will be exactly the same Move the square to the upper part of the area, leaving approximately the same area around the top and the sides. Click Next
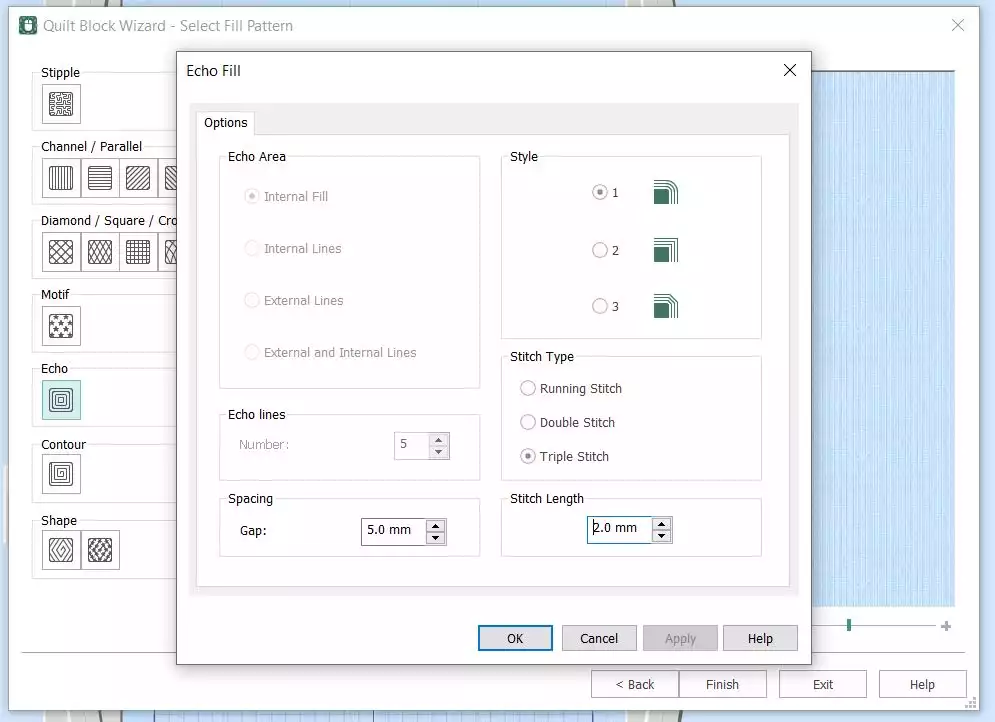
38. In the Select Fill Pattern dialog box you can choose from a variety of fill patterns. When you get into the dialog box the stipple pattern will appear. In this case we will click on echo. The pattern changes immediately. If you are not pleased with the outcome, click on Back and move the inner square. Then click on Options
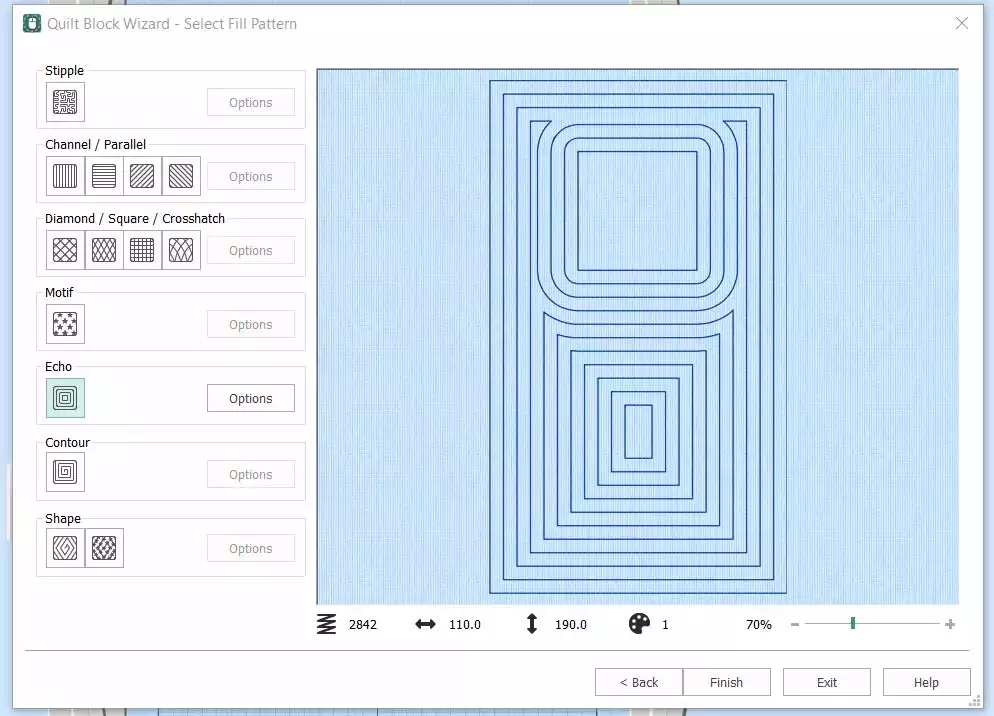
39. In option dialog box choose Triple Stitch, and set Stitch Length to 2mm, click OK
40. The quilt block is finished, now it is time to add a letter in the open area. Click on Finish, then go to letter tab
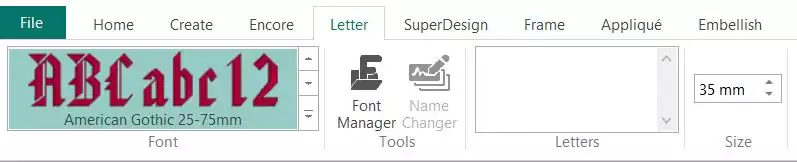
41. Choose American Gothic 25-75mm, in the Elegant Category. Set the Size to 35mm
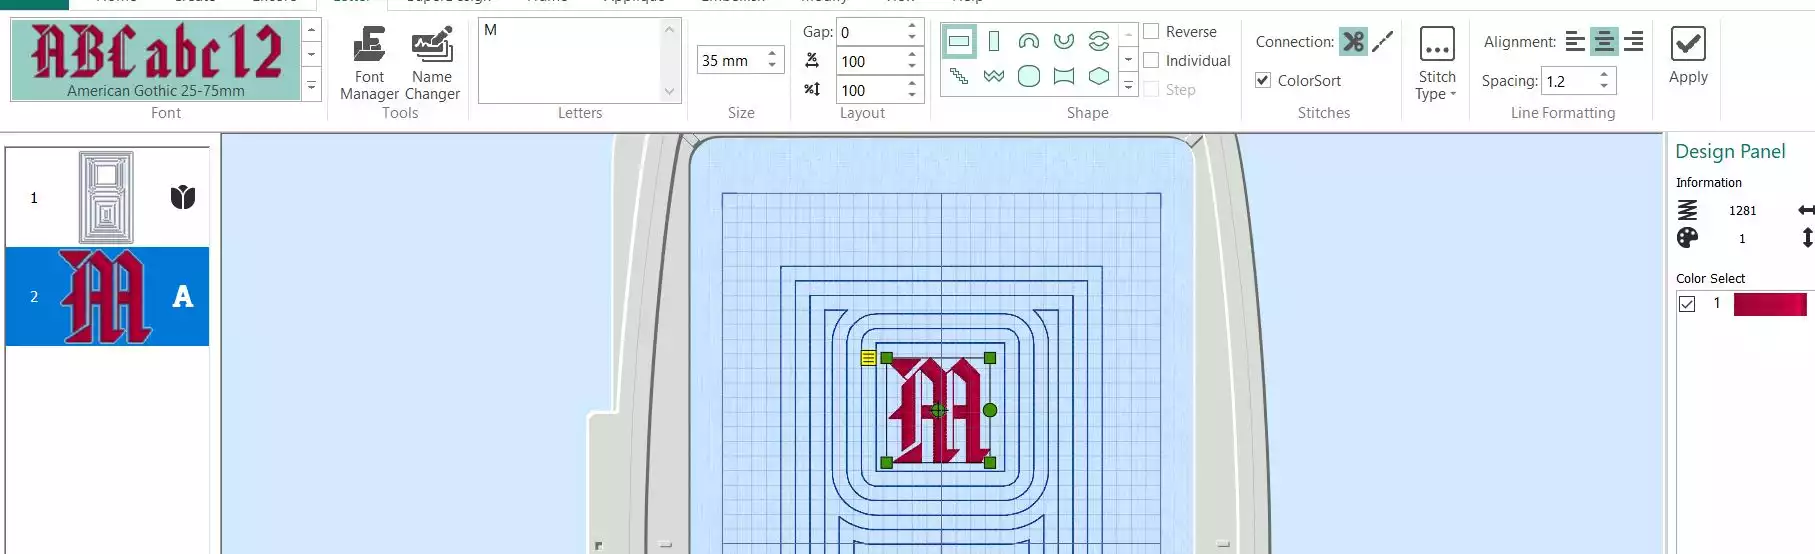
42. Type the letter you want into the Letters box. Hold down shift key to get an uppercase letter
43. On the right side of the toolbar, click on Apply
44. Move the letter into the open area
45. Go to Home tab, click on Combine, Combine All to combine everything in the hoop.
46. Check that all the colors are shown in the Color Select list.
47. To save the design click on File and Save As . This will save a .vp4 file that is fully editable again if you want to continue working with it.

48. Now you can export the file to your preferred format, do not colorsort!
Tip! Make more center panels with different embroideries, and quilting patterns. Then you can easily make many different small bags!
Putting the embroidery design parts together
49. Open mySewnet embroidery program, select blank canvas and Hoop Size 260x200 mm Rotated orientation
50. click Insert and choose small bag file 1.
51. click Insert again and choose your monogram file
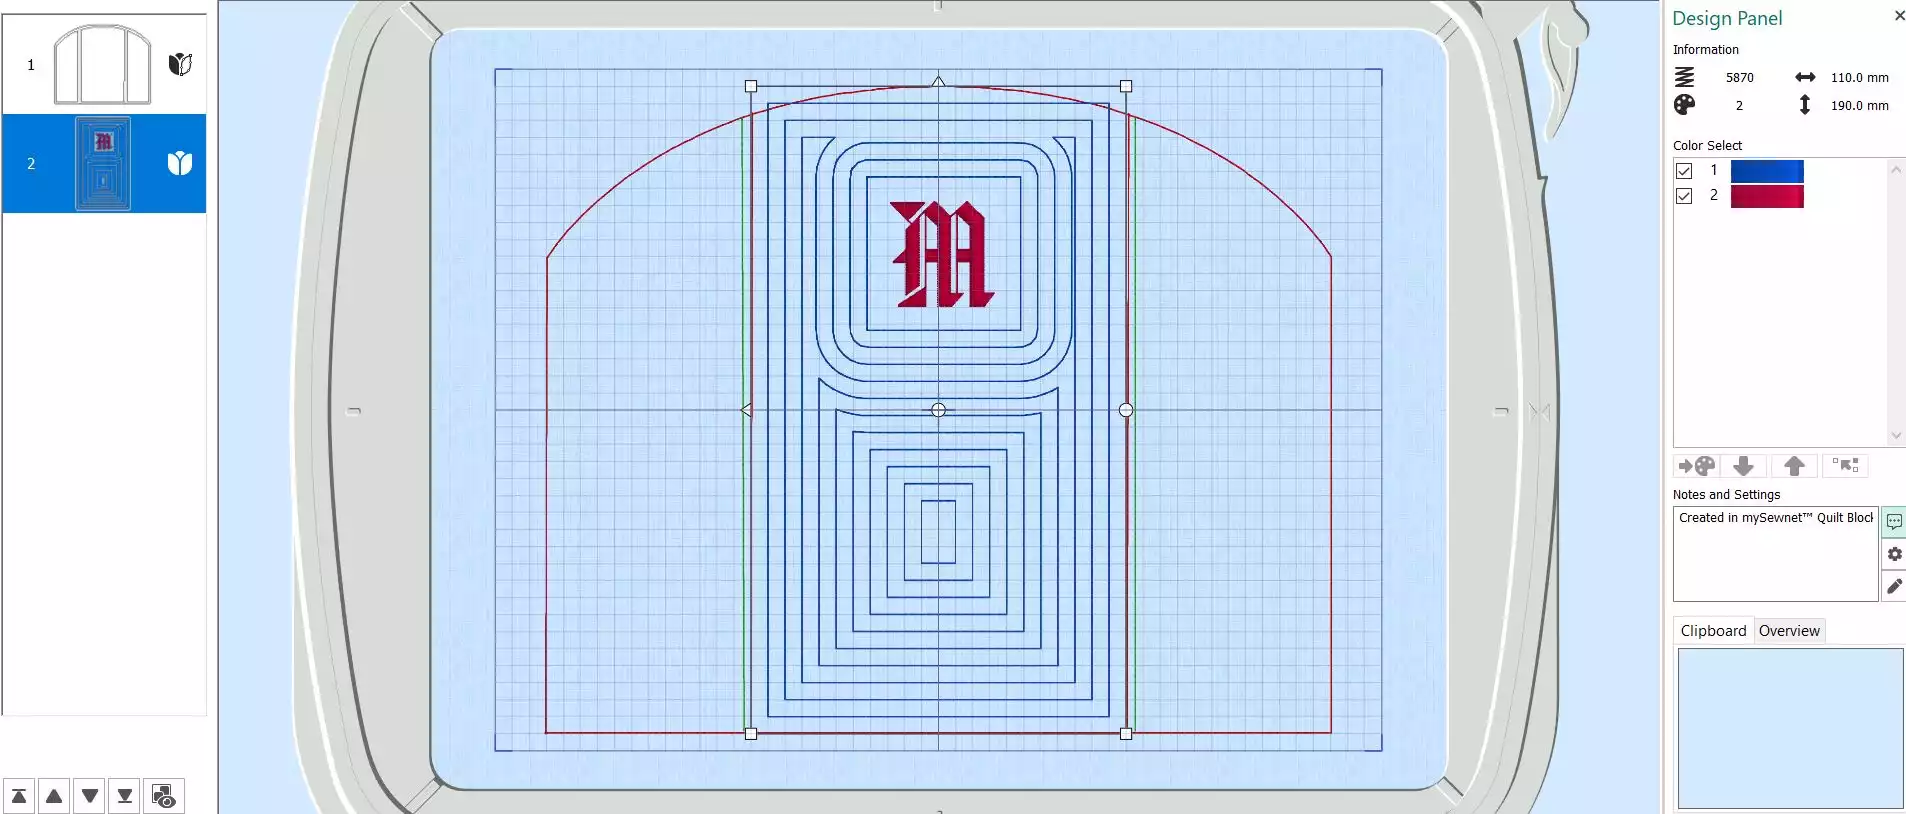
52. click Insert and choose small bag file 2
53. Select Combine, Combine All. You are now ready to stitch out the embroidery.export in your preferred format and save on USB stick or send to machine
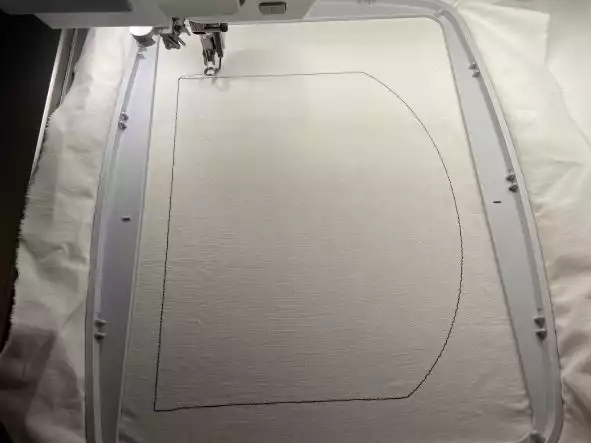
Stitching out the bag pieces
54. Hoop cutaway stabilizer in the hoop, Stitch color 1, showing the outline of the bag
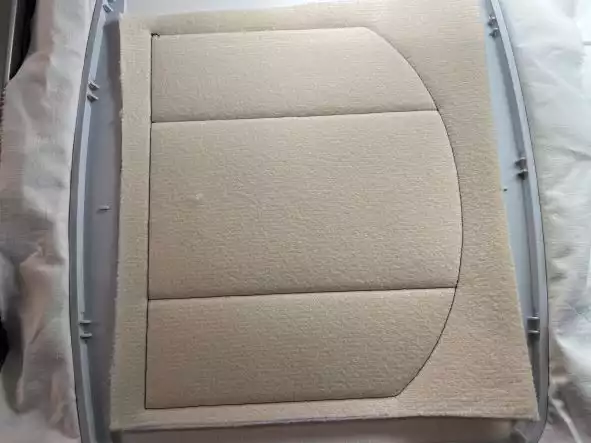
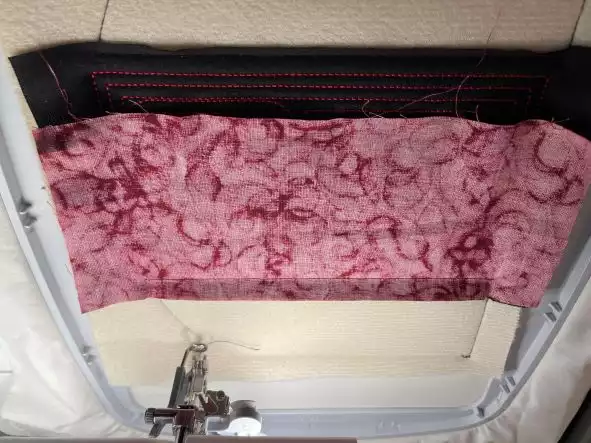
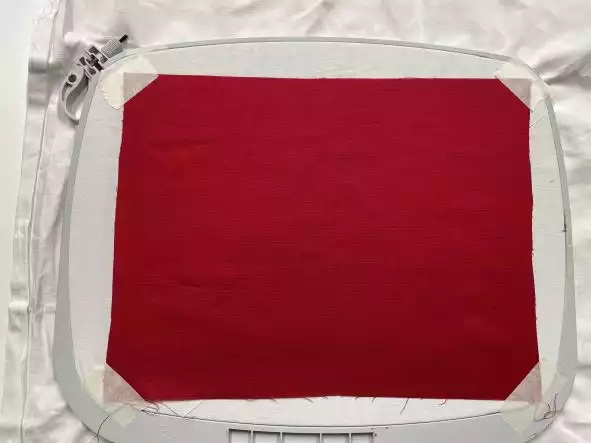
55. Place the foam batting on top, covering the lines on all sides. Use masking tape in the corners to keep the batting in place. Stitch out color 2, this will secure the foam batting and show the placement of center panel fabric
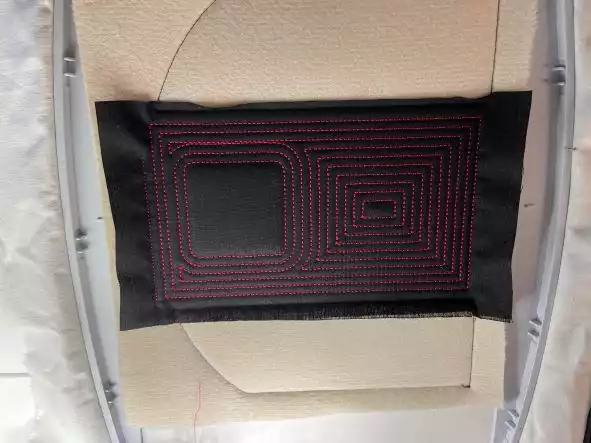
56. Place the center panel on top of the guidelines, covering them on both sides.Tape in place with masking tape in the corners. Stitch the next color, this will secure the center panel fabric in place.
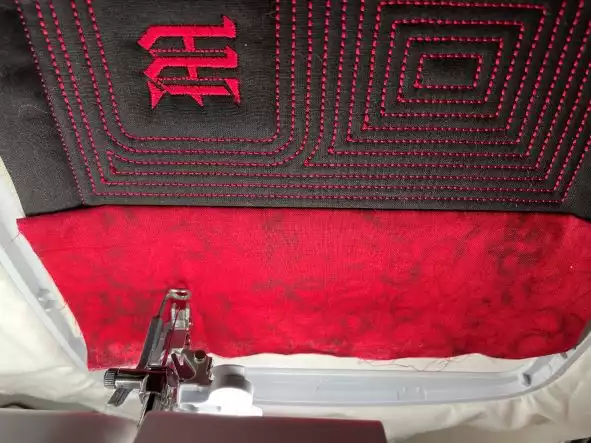
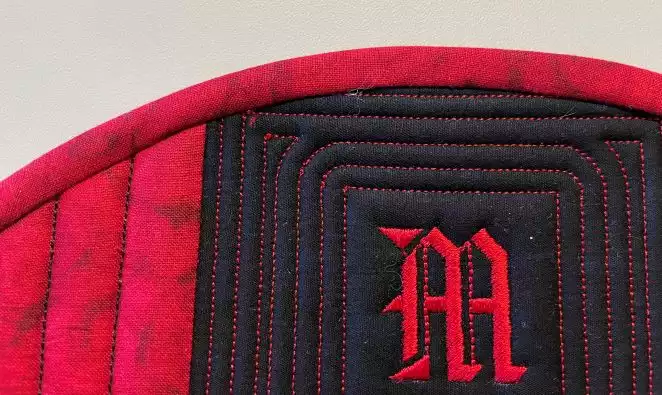
57. Stitch the next color, the quilting stitches on the center panel.
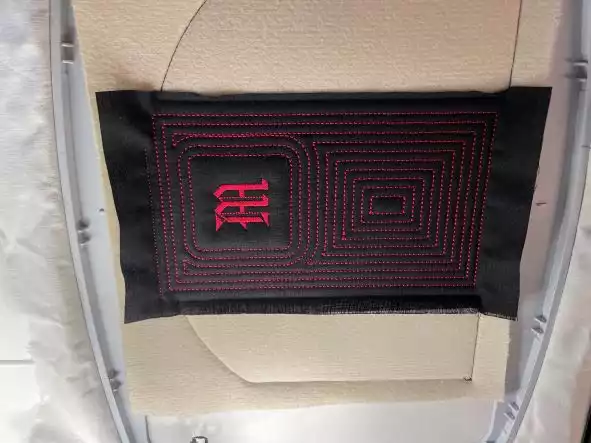
58. .. And the next color, the monogram
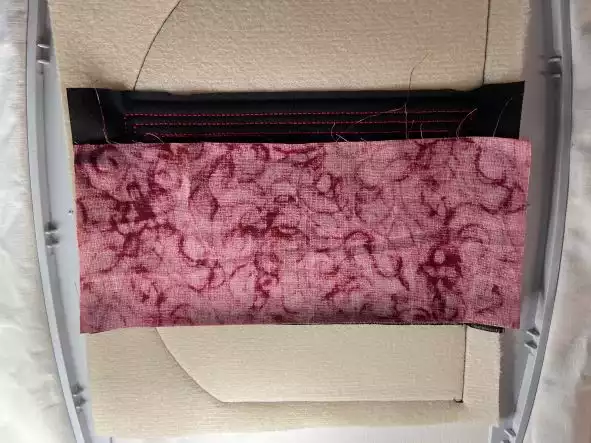
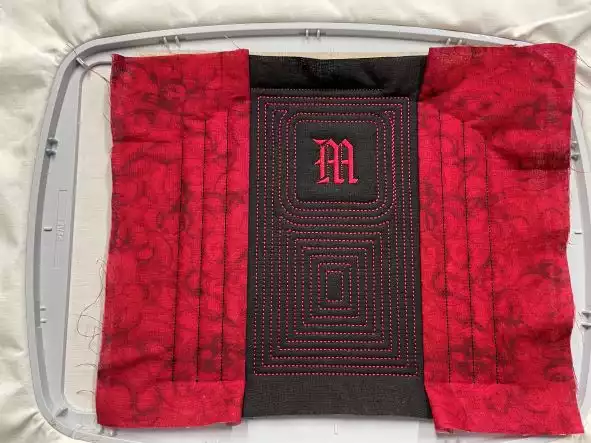
59. Place the side panel fabric along the left side of the center panel, right sides facing each other, tape in place. Stitch the next color, this will secure the side panel fabric on the left side. Fold out and tape the corners. Stitch next color, the quilting stitches on the left side.
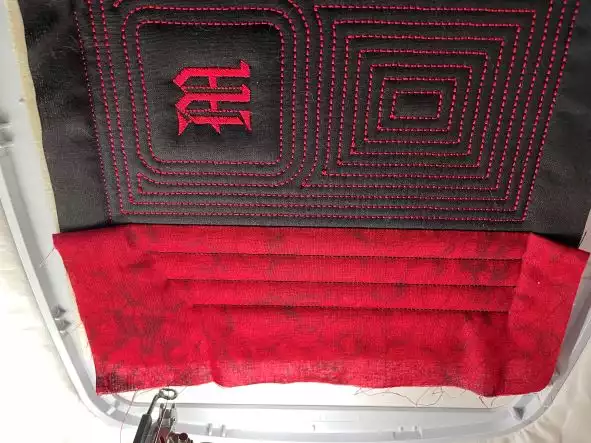
60. Repeat with the right side panel.
61 Take the hoop out of the machine, turn the hoop upside down, position the lining fabric piece right side up, covering the embroidery on all sides, tape in place in the corners. Put the hoop back in the machine.
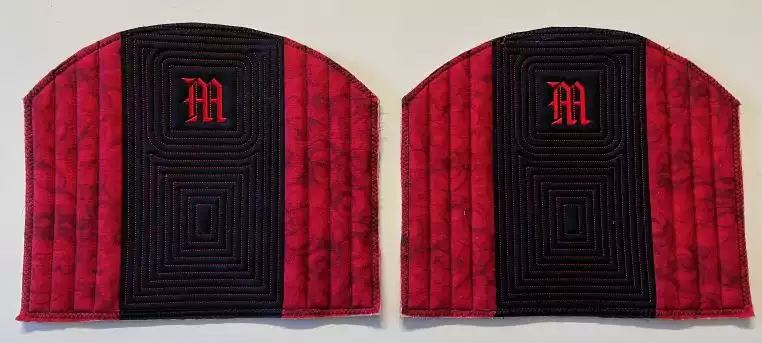
62. Stitch out the remaining two colors, the outline to secure the lining and the zig zag stitch to compress the edges and make them thinner.
63. Make another bag piece, exactly the same as the first.
Sewing the bag together
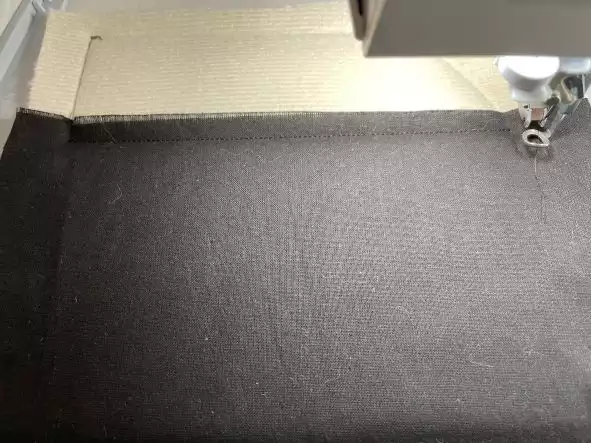
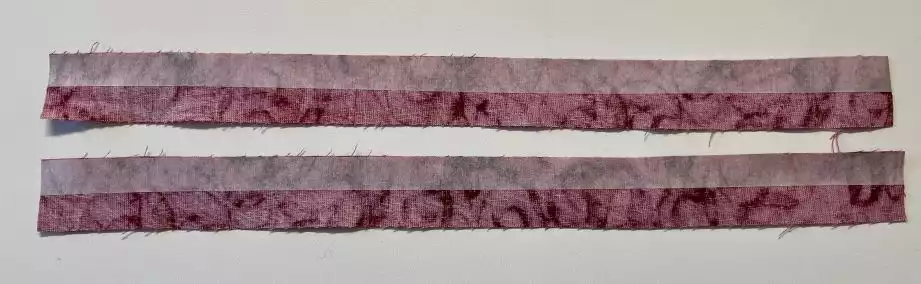
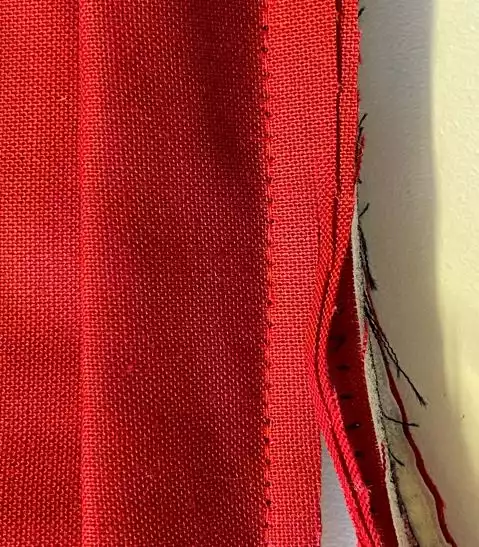
64. Prepare the top binding strips: Fuse the fusible web on one long side of each strip.
65. Stitch the strips along the top edge of the bag pieces using an ¼” (6mm) seam allowance.
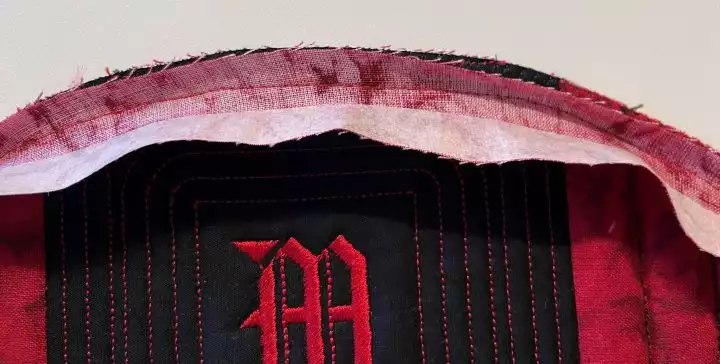
66. Remove the paper backing and turn the edge over to the wrong side of the bag piece, fuse in place with a hot iron, no steam.
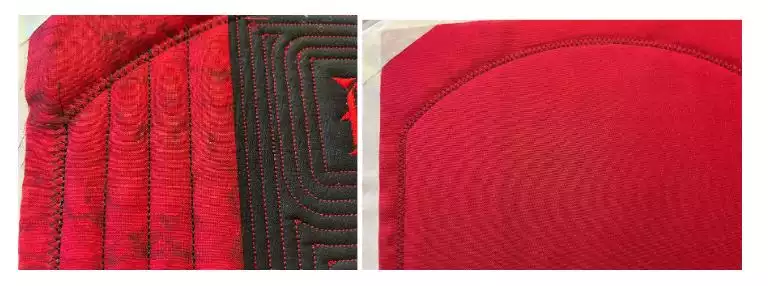
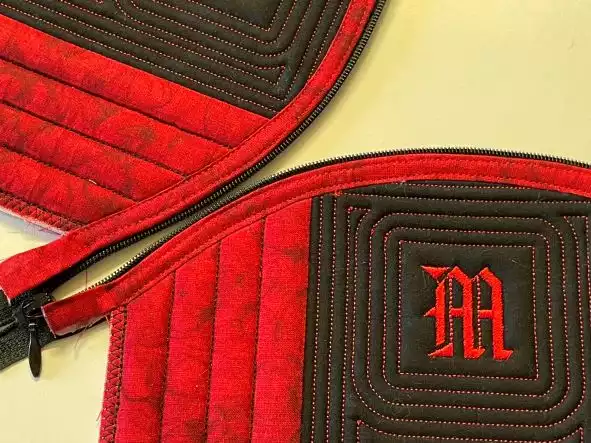
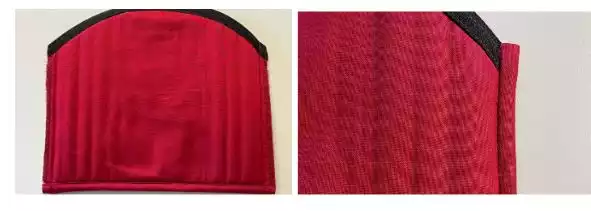
67. On the front it will look like this:
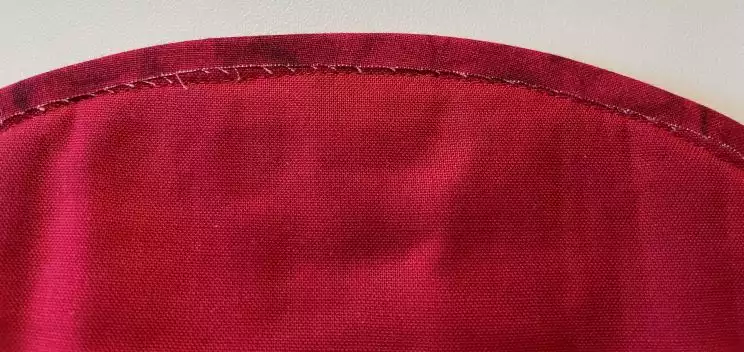
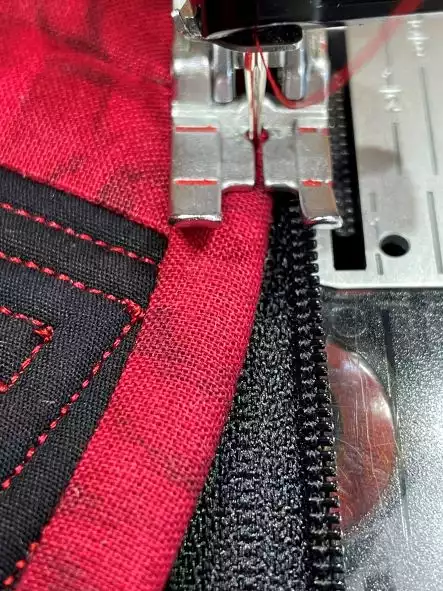
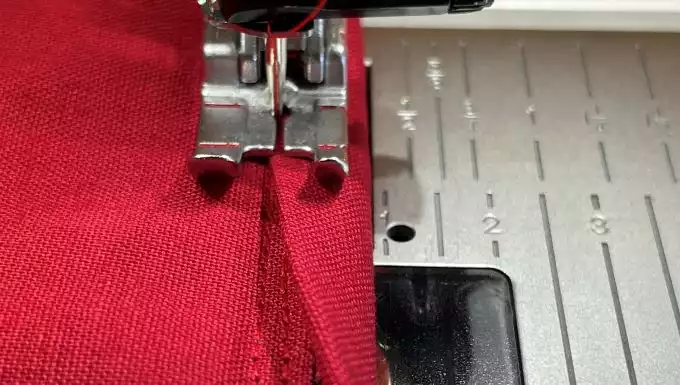
68. Stitch the zipper in place close to the binding. Then topstitch using the edge of the presser foot as a guide.
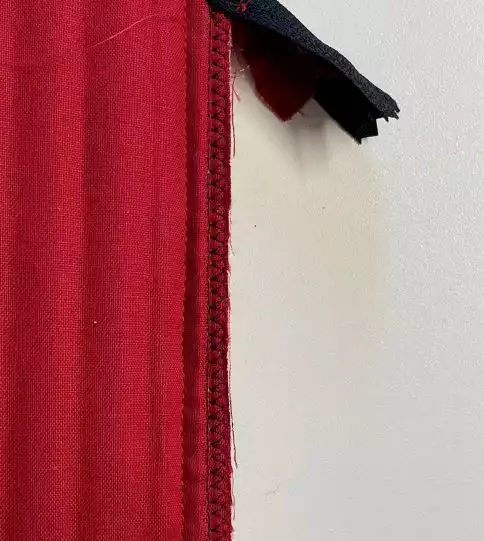
69. The finished edges will look like this:
70. Place the two bag pieces together, right sides facing and stitch them together at the bottom, being careful to match the center panel seams. Use ⅜” (1cm) seam allowance
71. Fold the binding fabric lengthwise and stitch it to the bottom edge Use ⅜” (1cm) seam allowance . On all layers, cut away half of the seam allowance
72. Fold the binding edge over and stitch in place.
73. On the sides: Cut away excess fabric and binding on top and bottom. Remember to move the zipper pull to the center of the top, otherwise it will be difficult to turn the bag right side out!
74. Sew together and bind in the same way you did on the bottom of the bag
75. Fold the corners to make the bottom of the bag. Sew across, 1 ½” (4cm) from the edge. Cut away the extra and bind the edges.
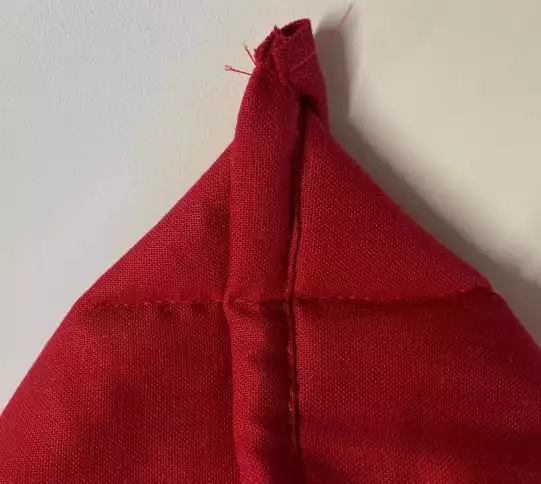
76. Turn right side out and press if needed!. You can leave the corners in the bottom as they are, but if you wish you can cut away the excess seam allowances and bind the edges in the same way as the other seams on the inside.
Now you have finished the small bag, congratulations!