 United States
Fuzzy Dice Ottoman
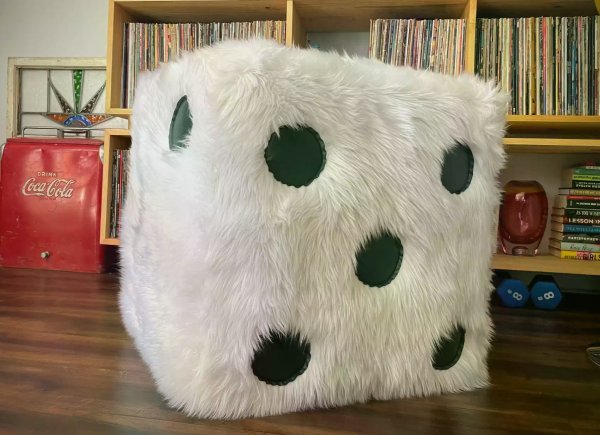
Bring the retro fuzzy dice vibe beyond the car! This ottoman is focused on different ways to use recycled materials, you can even fill it with scraps so it grows as you sew. This project will also teach you tips and tricks for sewing with faux fur and leather/pleather.
What you need:
- 1 ½ yards (1.4 meters) faux fur
- If your fabric is less than 60” (153cm) wide you will want to add a yard/meter
- ½ yard (½ meter) leather or pleather (This is a great opportunity to recycle pleather/leather clothing like a jacket or pants)
- Thread that matches your fur
- Thread matching the leather/pleather
- Leather needle
- Hand sewing needle
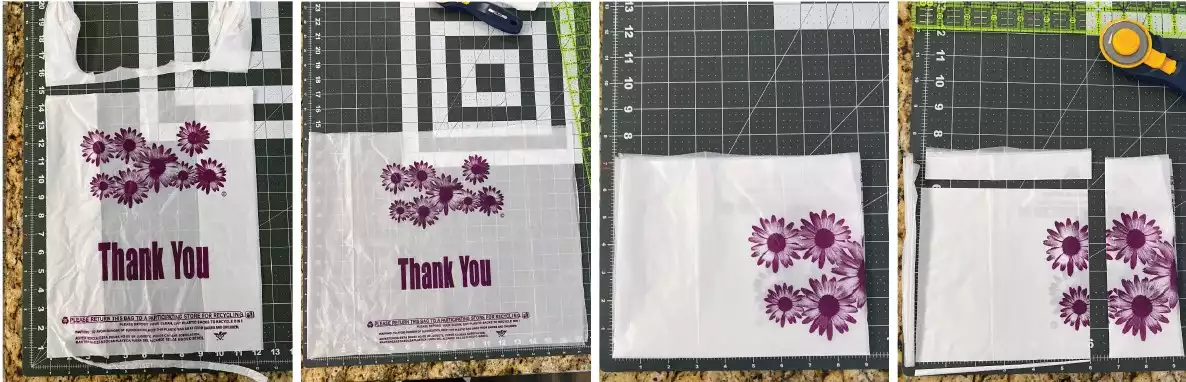
- Topper stabilizer (you can also use thin plastic grocery bags to recycle)
- Fabric marking tool
- Sharp blade utility knife
- Pins
- Glue stick
- Optional: ¼” Foot, Zipper matching the fur
Preparation
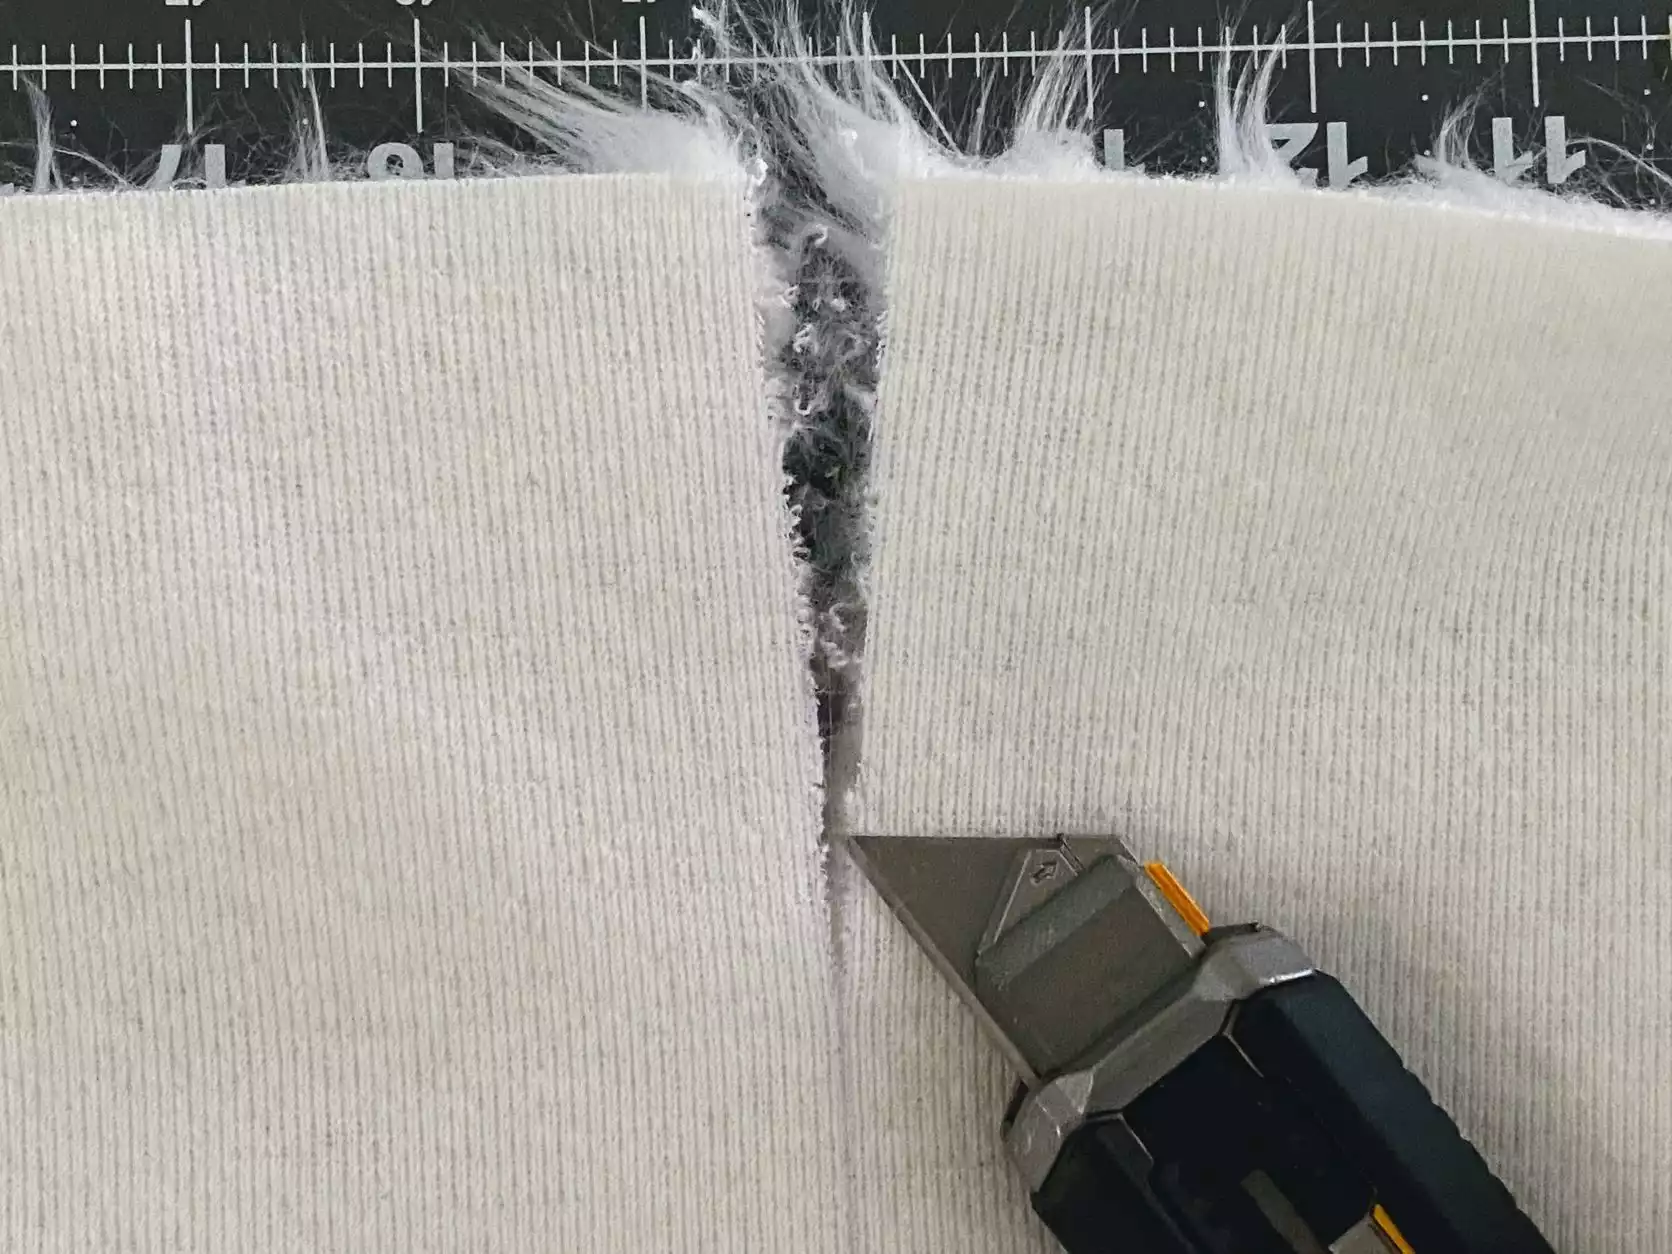
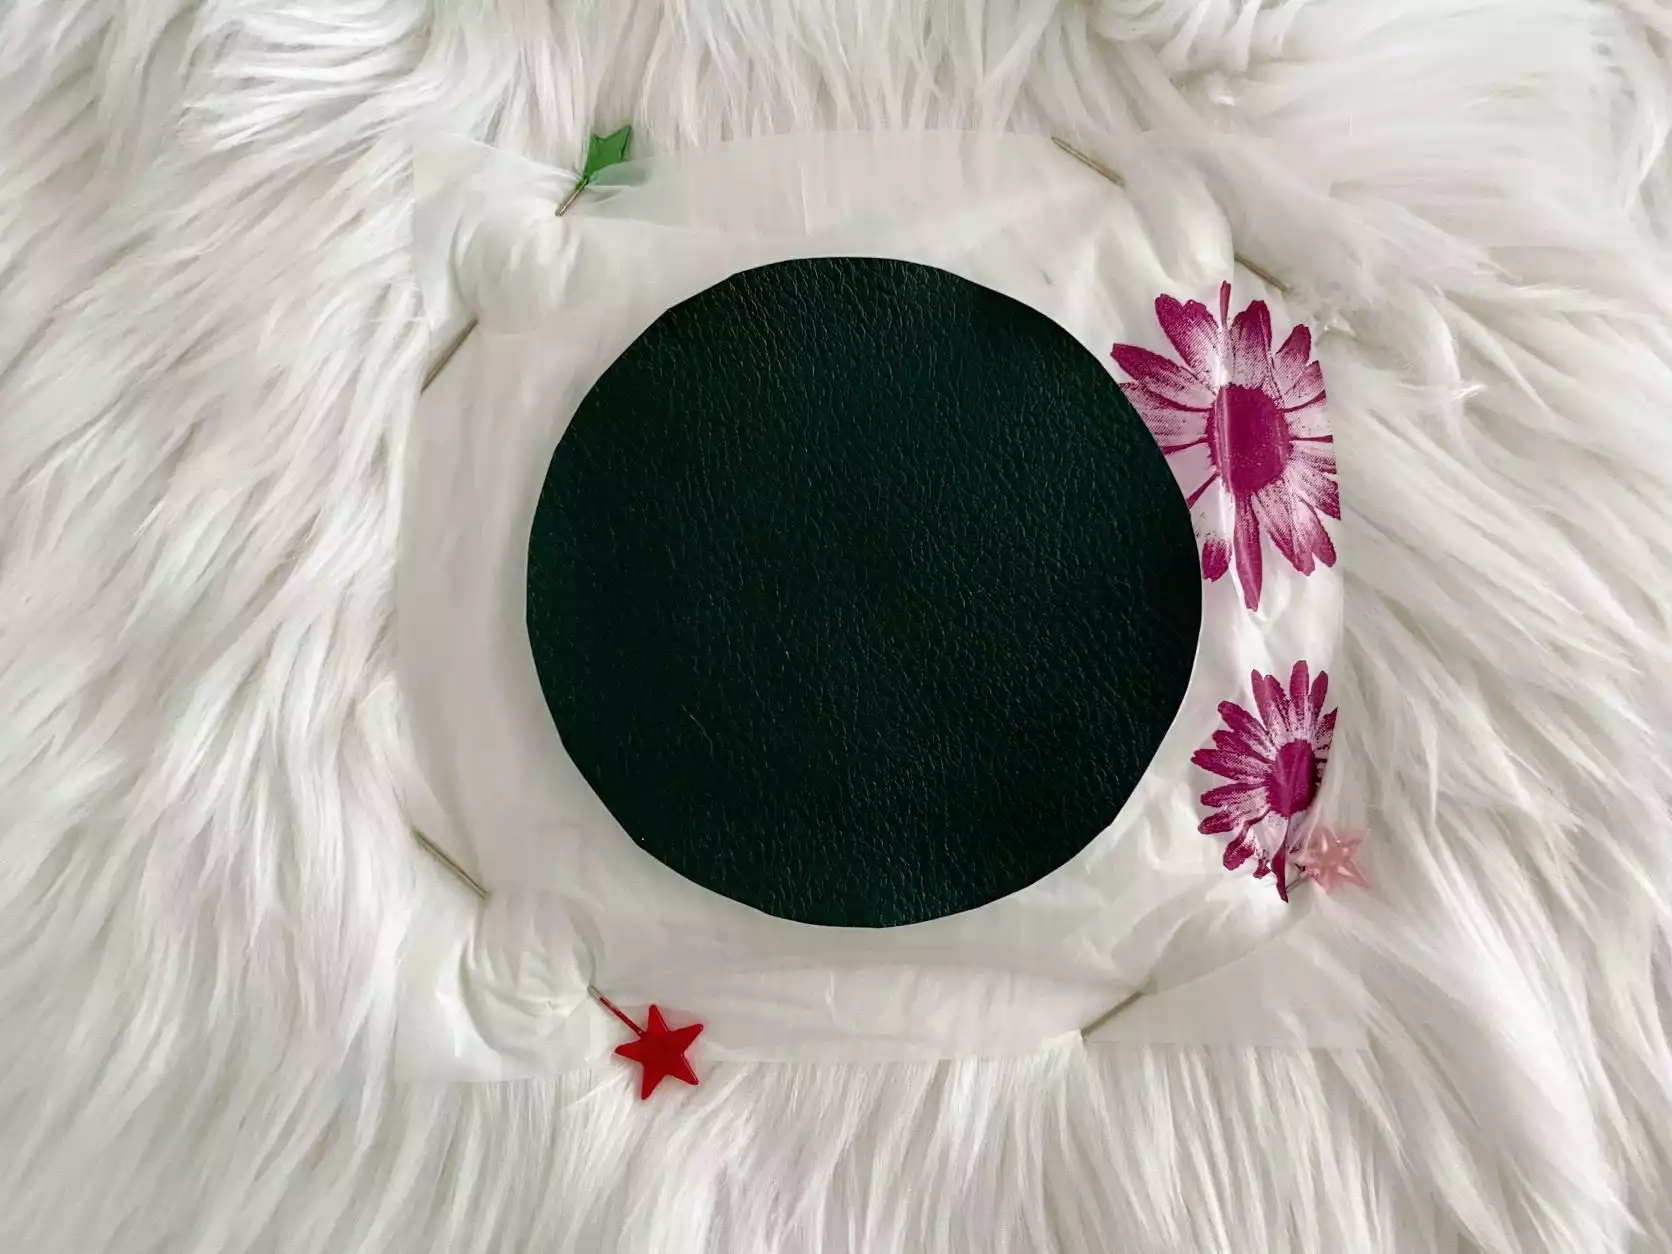
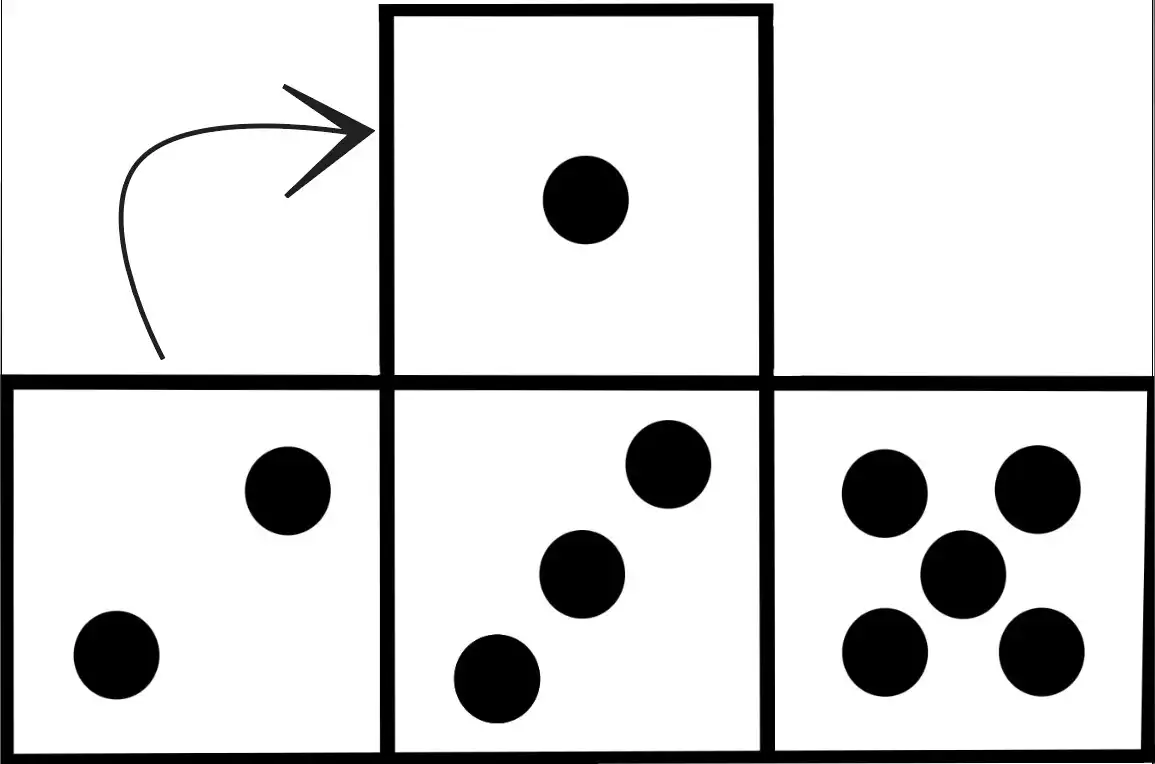
1. Cut six 20” (51cm) squares from your faux fur.
Tip: Mark on the back with a fabric marking tool where to cut and then cut using your utility knife.
2. Cut twenty one 4” (10cm) circles
Tip: Use your fabric marking tool and a small bowl or large cup that’s approximately 5” to trace the circles
3. Cut twenty one 6” (16 cm)squares of topper stabilizer. See below for the best way to start cutting the shopping bags if you’d like to try this method.
Sewing the Circles
4. Put glue in the middle of your circle covering about 2”-3” (5-8cm) and stick each one to its own topper stabilizer square.
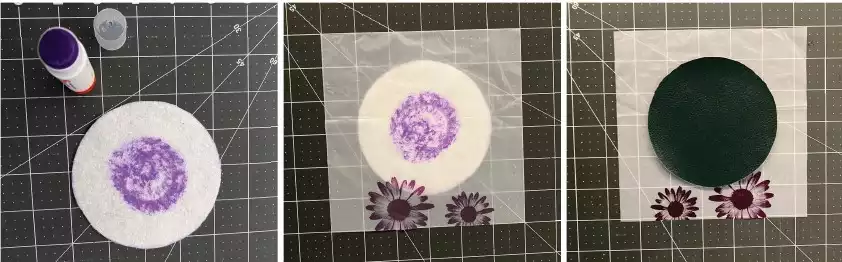
5. Place these where you want the circles and pin the stabilizer in place.
Note: Don’t pin the pleather/leather because the hole the pin makes will not disappear after you remove the pin.
6. Sew along the edge of the circle at least ¼” (6mm) from the edge. The thread matching your pleather/leather should be in the top and bobbin.
Tip: Use the ¼” foot for an easy time getting a consistent edge and use the extra presser foot lift to fit thick furs under the foot easily.
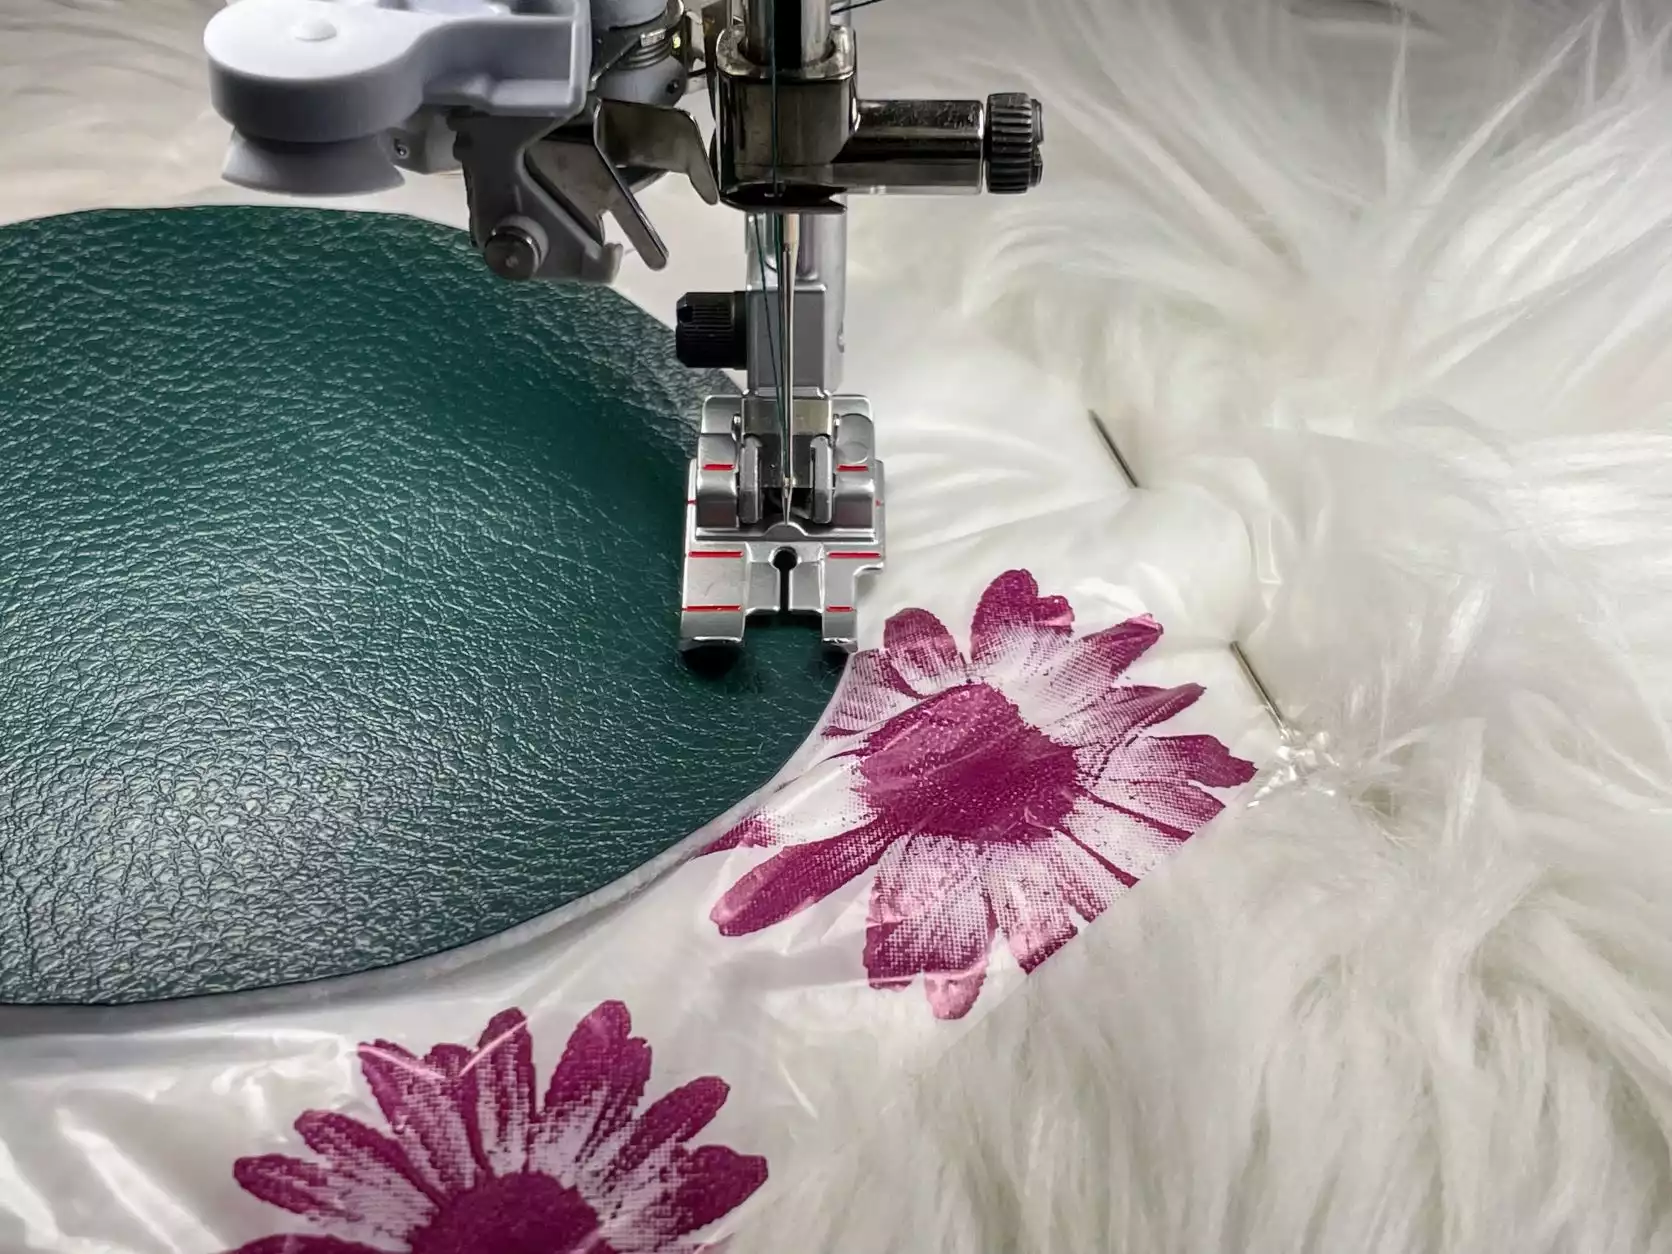
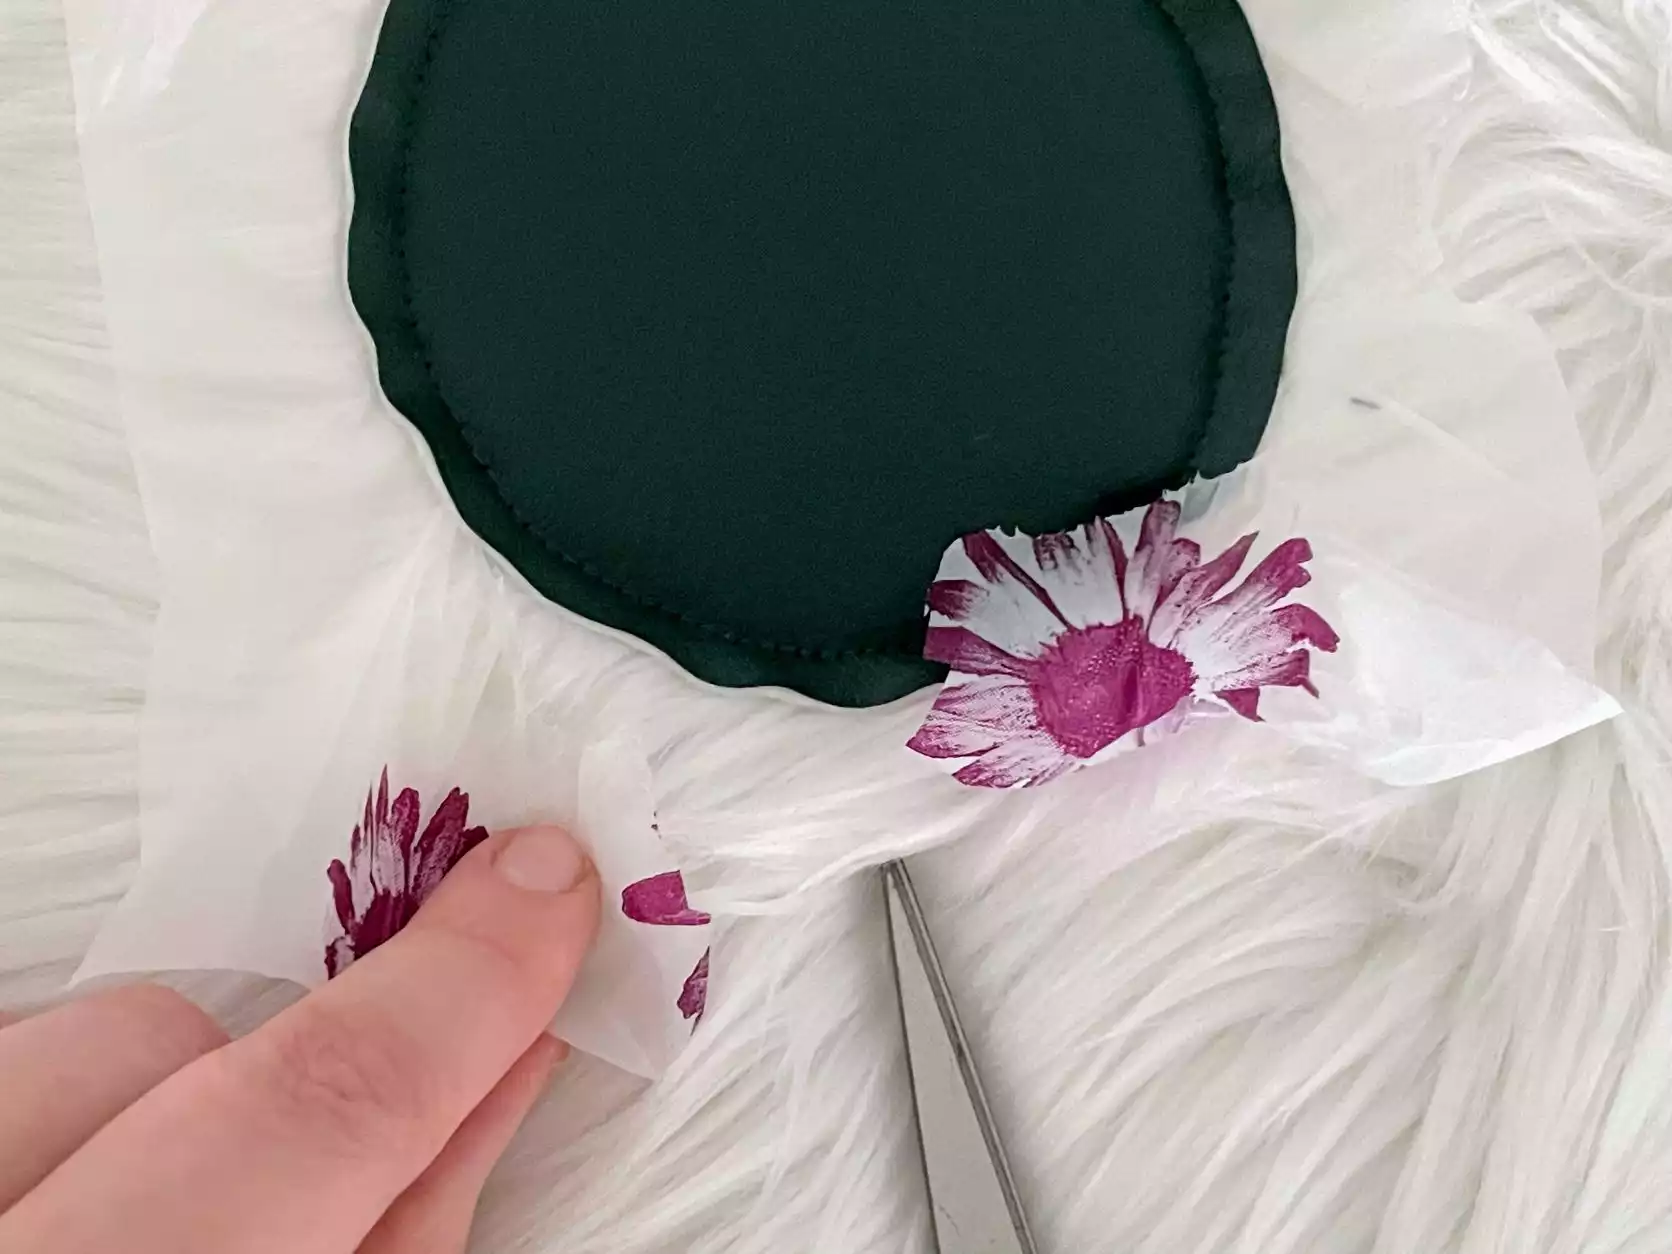
7. Cut a straight line in the stabilizer to easily tear away the topper stabilizer after it’s sewn.
8. Repeat this on all six sides
Forming the Cube
9. Now we’ll sew the sides together with a straight stitch. Increase the stitch length to 3.0mm long and switch the top and bobbin thread to what matches your fur.
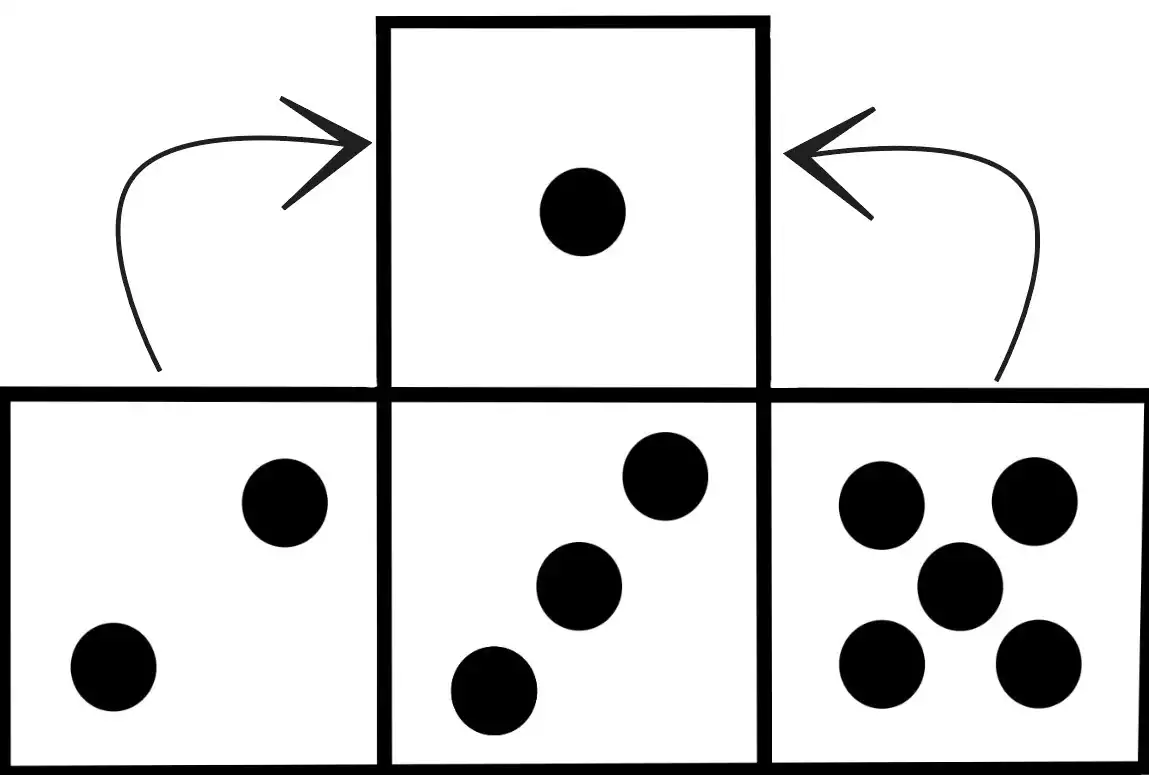
10. With right sides together, pin and stitch the 1 with the 3.

11. With right sides together, pin and stitch the 2 with another side of the 3.
12. With right sides together, pin and stitch the 5 with another side of the 3.
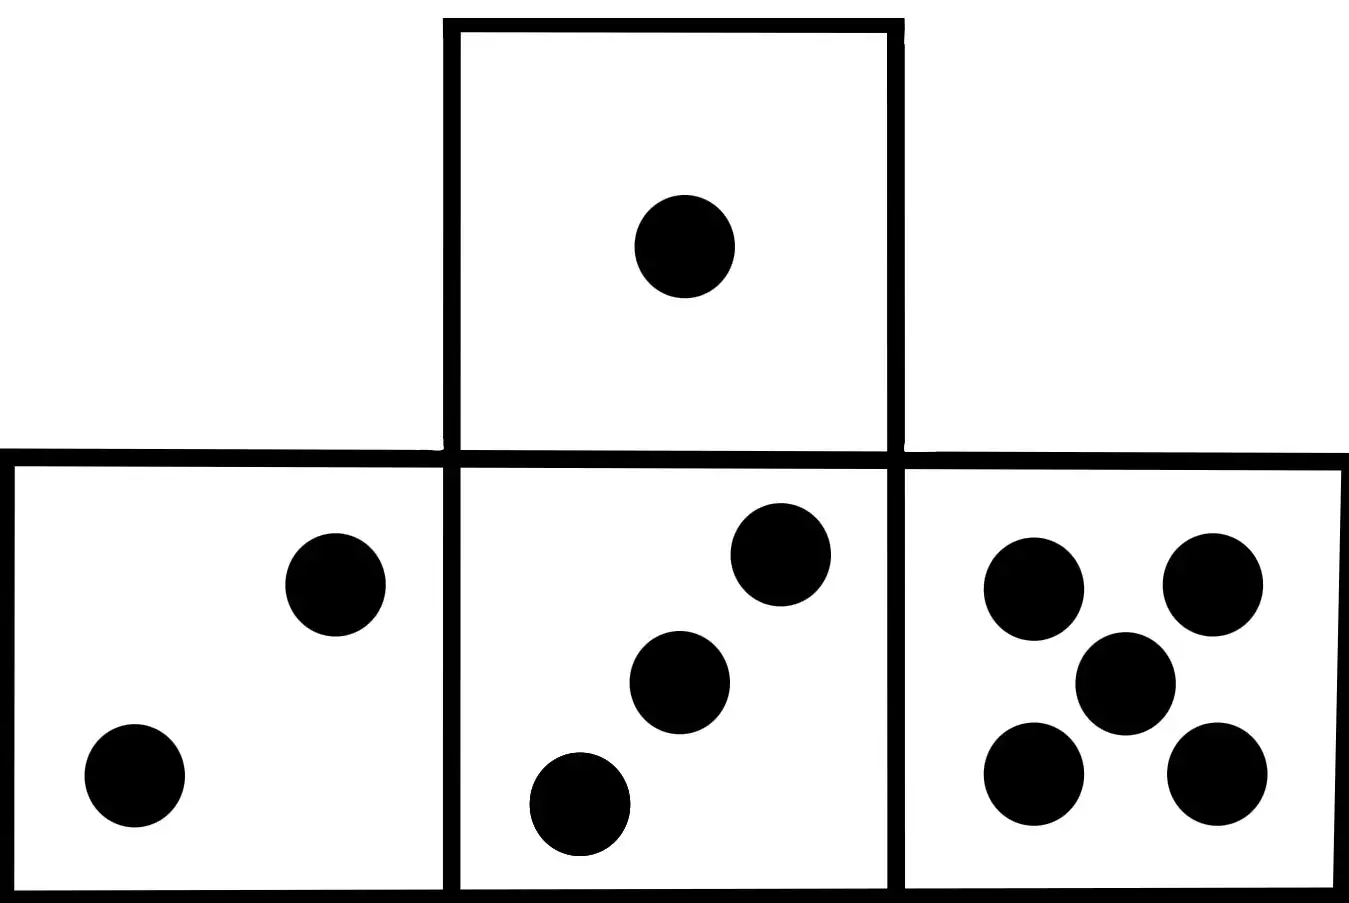
13. With right sides together, pin and stitch the 6 with the last side of the 3.
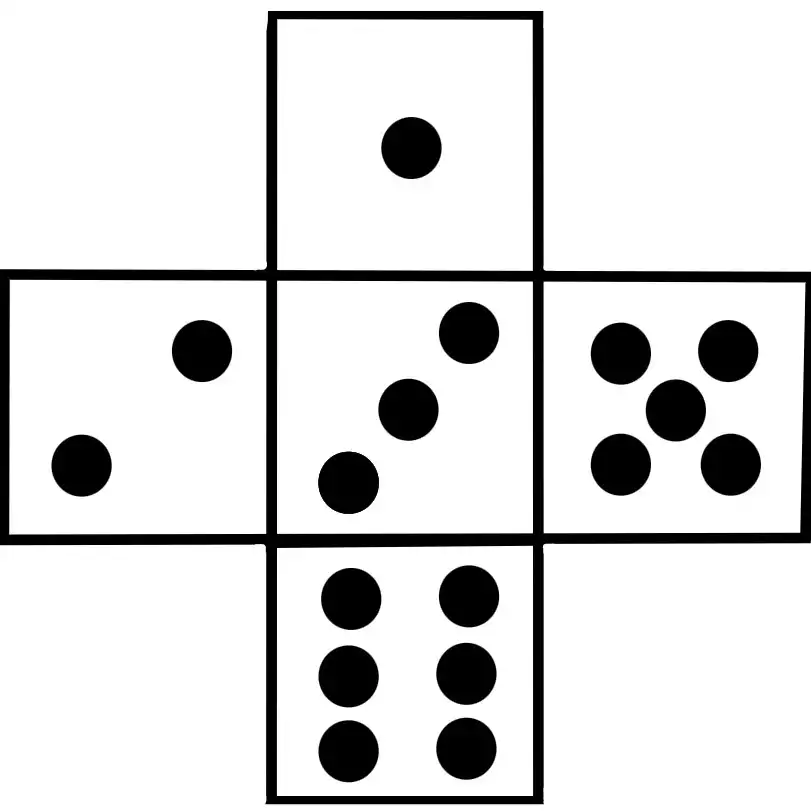
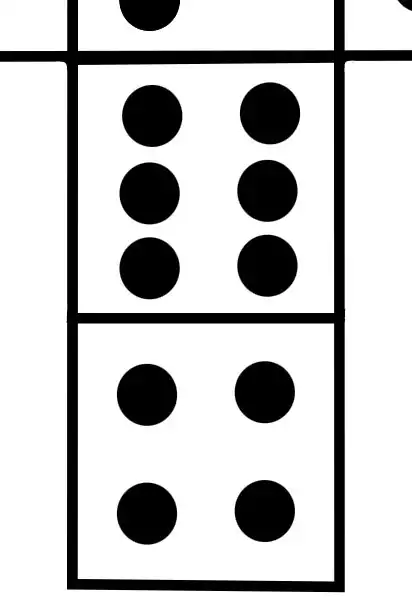
14. With the right sides together, pin and stitch the 4 to the opposite side of the 6.
15. Now we will get to the more awkward sewing portion. With the right sides together, pin and stitch the 1 to the 2.
16. With the right sides together, pin and stitch the 1 to the 5.
17. With the right sides together, pin and stitch the 2 to the 6.
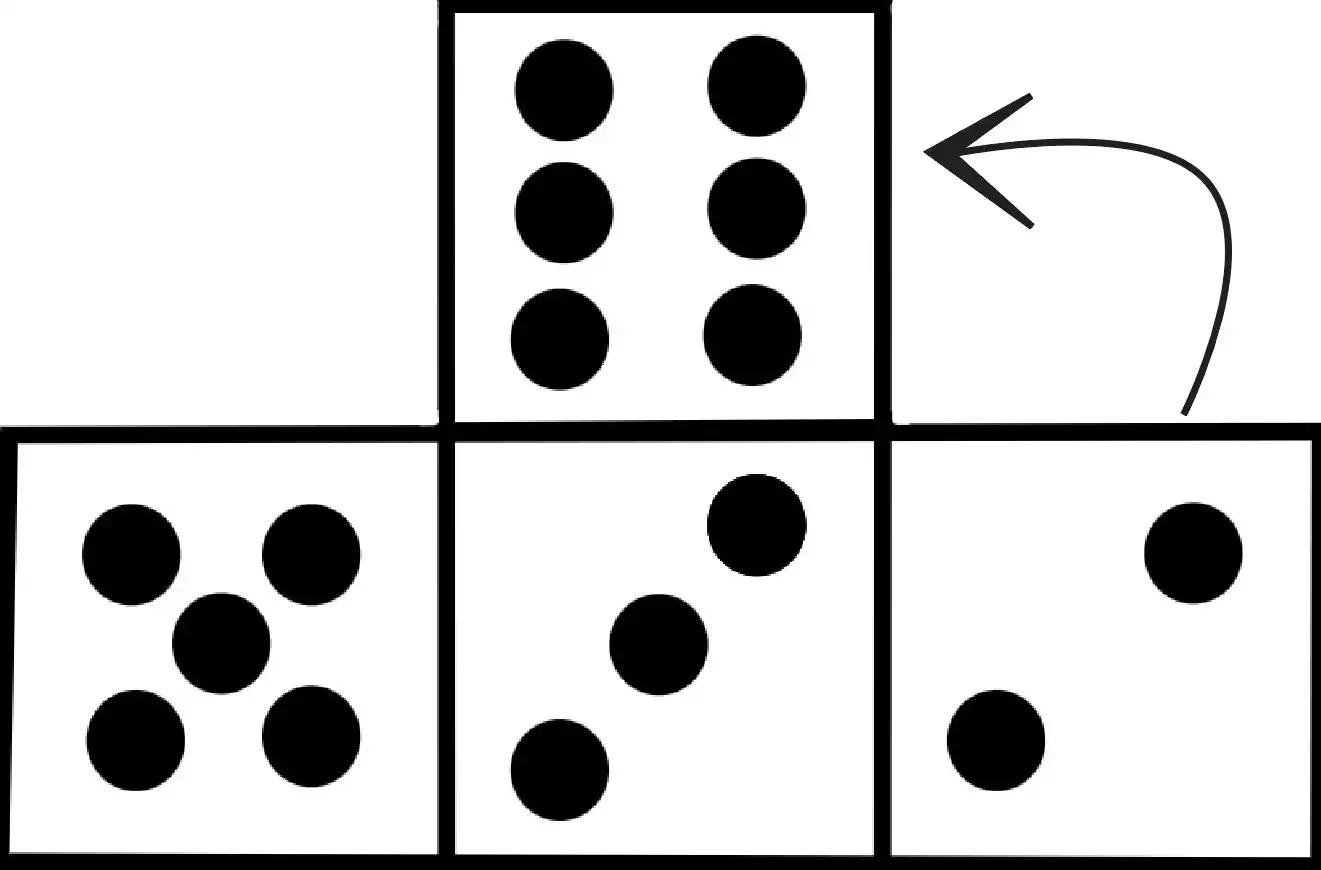
18. With the right sides together, pin and stitch the 5 to the 6.
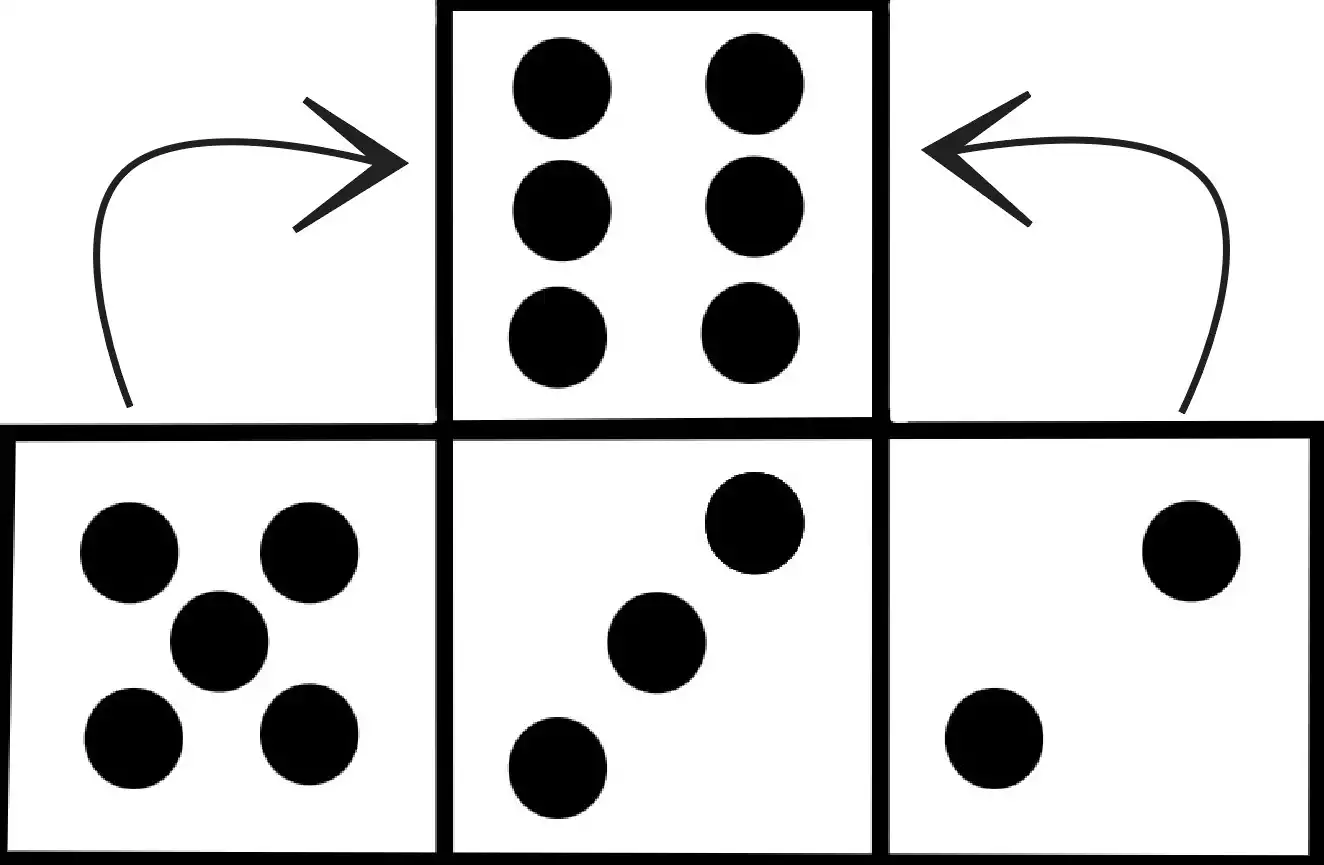
19. With the right sides together, pin and stitch two sides of the four.
20. With the remaining side you can insert a zipper if you plan to continuously add stuffing materials.
But if you are like me you have a lot of existing scraps of fabric, batting, and old clothing that aren’t good for donating anymore that can fill the cube. If you have enough to fill the cube, sew the remaining side leaving an 8” (20cm) opening.
21. Flip the cube right side out.
22. Fill the cube and then with your hand sewing needle and thread that matches the fur, close the opening.