 United States
Embroidered Appliqué Art
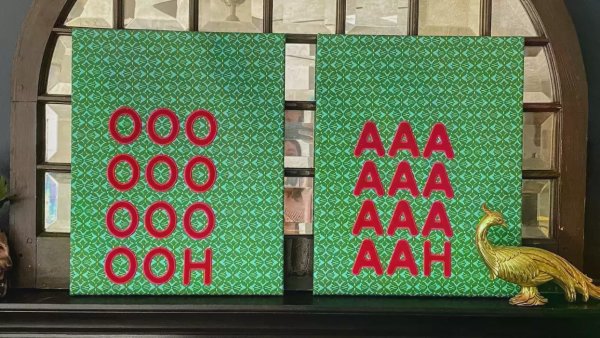
Make a statement with your next embroidery! Explore how to make appliqués with built-in software on the machine, learn how to stitch multiple appliqué embroidery designs two ways, and how to mount fabric on a canvas.
What you need:
- Machine with Appliqué Creator or Design Appliqué
- Art canvas
- Enough base fabric to cover whatever size canvas you get
- ½ yard (45cm) of applique fabric
- Bobbin thread
- Thread to match your appliqué fabric
- Tear away stabilizer
- Small detail scissors
- Upholstery stapler (preferred method)
- or hot glue gun
Creating the Design
1. Open your appliqué program on the machine.
2. Open or scroll down to the Letter menu and select your first letter.
3. Make it about what size you want, choose the satin stitch type that you want, and press OK.
Note: After you press ok it will exit you out of the program and back to Embroidery Edit.
4. Duplicate the design.
Tip: On some machines you can touch and hold duplicate or the design to select Multi-Duplicate and enter the number of duplicates you’d like instead of hitting duplicate multiple times.
5. Arrange the designs on screen in a straight grid pattern.
Tip: Use gridlines to make sure they are perfectly aligned.
6. Repeat steps 1-3 to create the additional letters for your word or phrase.
7. Place the additional letters in your grid pattern filling the hoop.
Stitching the Design
8. Enter Embroidery Stitch-Out. Choose 7 or 8 for your preferred stitch-out method.
9. To stitch each design individually follow these steps. This is good if you want to change the color of each letter or just learn the simple/standard stitching of appliqué designs.
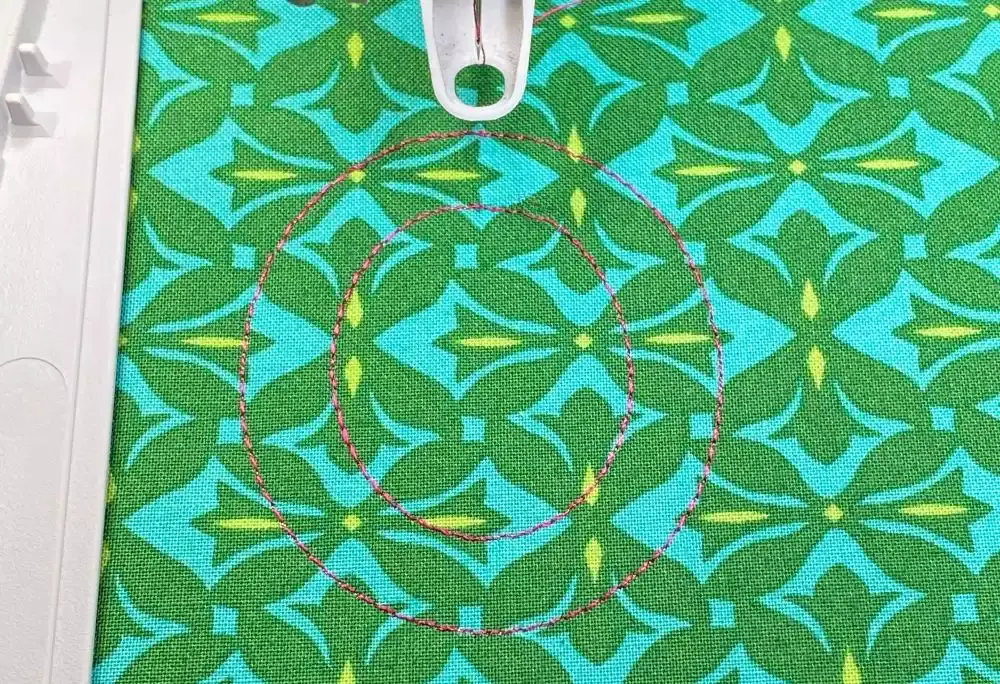
- Appliqué designs stitch in three steps. First, an outline of the design will stitch. This is so you know where to place your fabric. Stitch the colorblock 1:1.
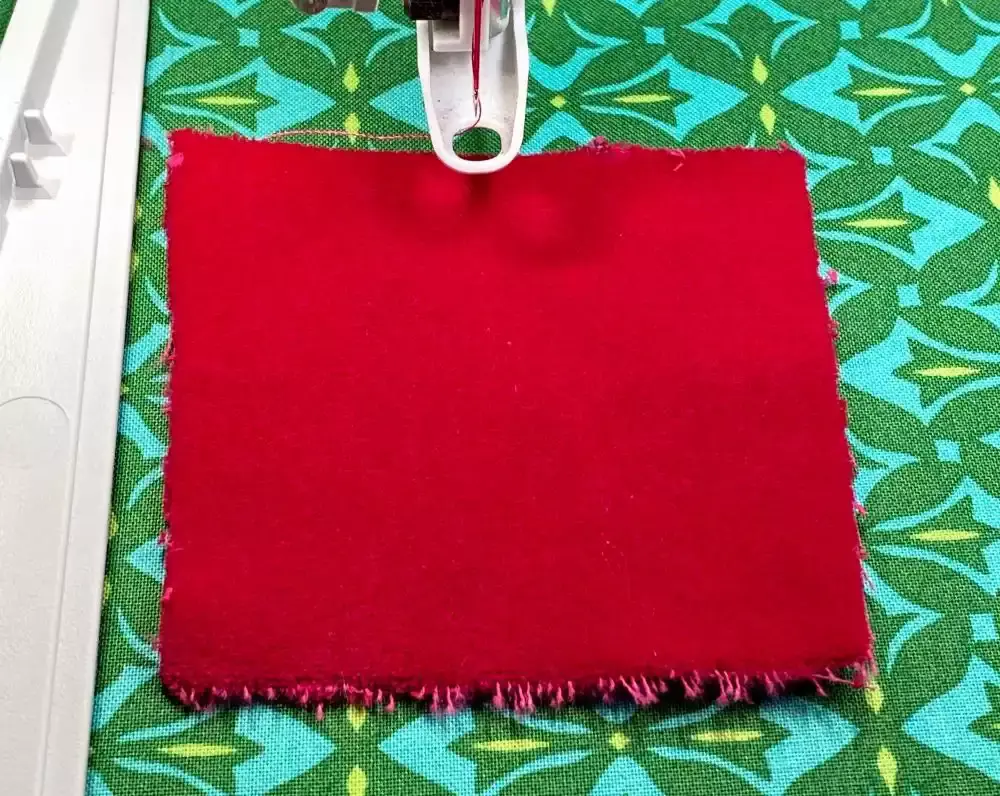
- Place a piece of the appliqué fabric over the outline making sure it’s completely covered.
- The next step/colorblock will be a triple stitch to hold your fabric in place. Stitch the colorblock 1:2.

- Move your hoop to Trim Position or Center/Remove Hoop Position. Trim around the outside edge of the triple stitch with your small scissors.
- Note: Get as close as you can but make sure not to trim the stitching.
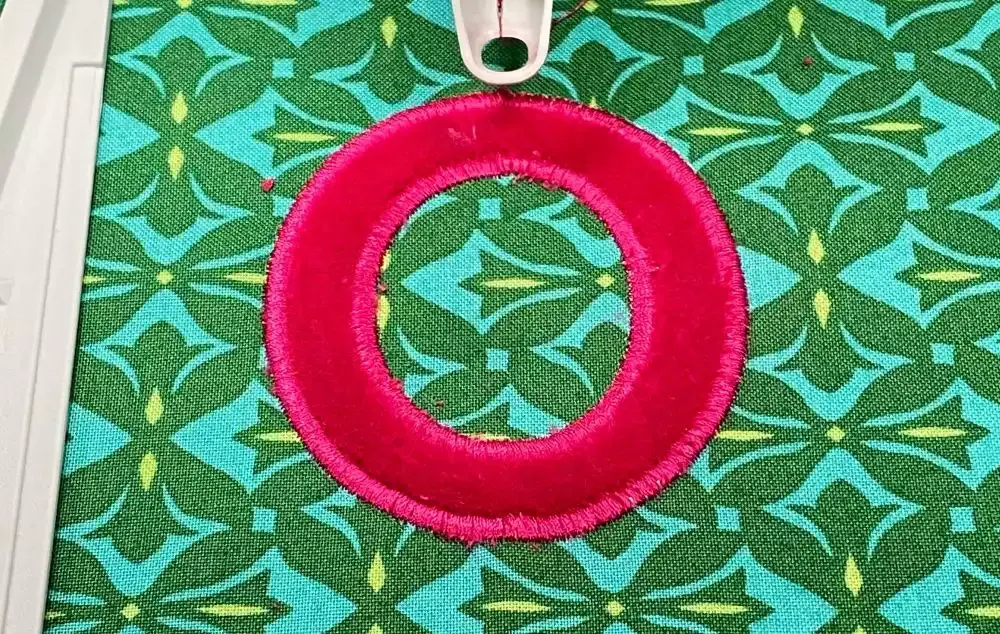
- The last step will cover this edge with a satin stitch, no additional action is required from you for this step. Stitch the colorblock 1:3.
- Repeat this process for each appliqué.
10. To stitch the multiple designs efficiently follow these steps. This method is good to save time if all the letters will be in the same fabric.
- Appliqué designs stitch in three steps. First, an outline of the design will stitch. This is so you know where to place your fabric. Because we filled the hoop with one color appliqué we will skip this step.
- Place your appliqué fabric over the hoop.
- The next step/colorblock will be a triple stitch to hold your fabric in place. We are going to stitch every color block that ends in :2 so 1:2, 2:2, 3:2, etc.
- Move your hoop to Trim Position or Center/Remove Hoop Position. Trim around the outside edge of all the triple stitch outlines with your small scissors. To get inside the O you can carefully lift it with a pin, start a hole with a seam ripper, and cut straight lines from that opening to get closer to the line of stitching so you can trim like you do the outside edge.
- Note: Get as close as you can but make sure not to trim the stitching.
- The last step will cover this edge with a satin stitch. We are going to stitch every color block that ends in :3 so 1:3, 2:3, 3:3, etc.
11. When your design is done stitching remove the hoop and remove the fabric from the hoop.
12. Tear the stabilizer from the back.
Mounting the Fabric
13. Lay your fabric over your canvas to place the design.
14. Fold over the edges of the fabric. Make sure the fabric is pulled taut without stretching it too much.
15. Use the stapler or the hot glue to attach the fabric to the back in the center of each side.
16. Work your way out from the middle pulling the fabric taut as you work. When you get to the corners this is very similar to wrapping a present, you will want to play around with folding the fabric in different ways until you like the look of the corners.
17. Trim the excess fabric down.