United States
Digitizing an Egg Cozy Embroidery Design In-The-Hoop
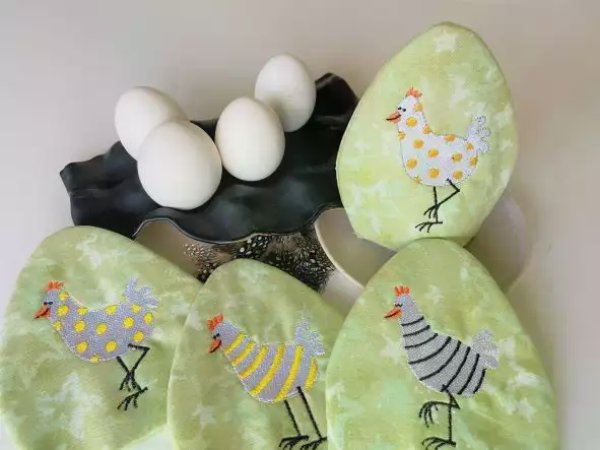
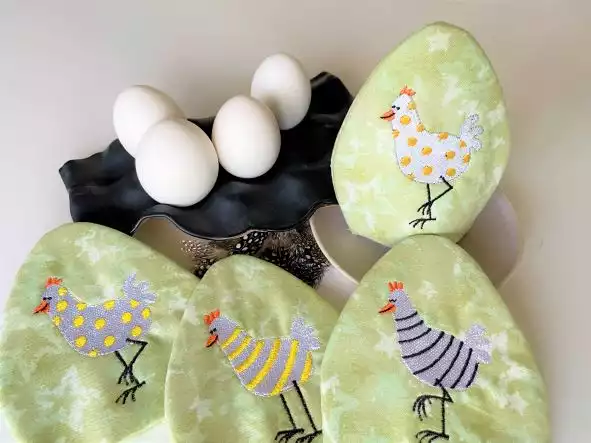
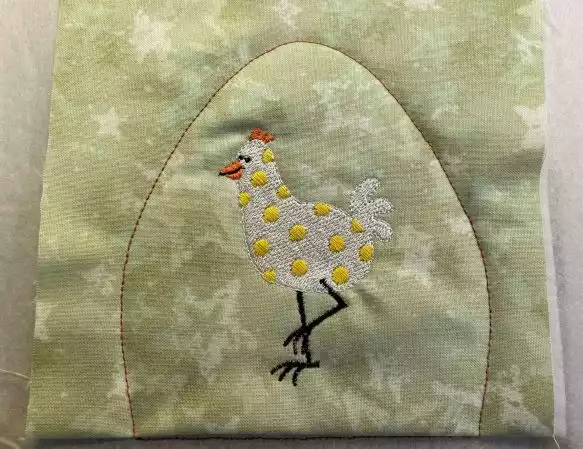
Make your easter breakfast even better and digitize these egg cosies. Fill them with easter embroidery designs from mySewnet library. They will look great with monograms or lettering from the embroidery software too!
With 30-day Free Trial of mySewnet Embroidery Software you will get to try out the most user-friendly and feature rich digitizing software on the market. It works with all embroidery machine brands and is available for both Windows and Mac.
What you need:
- mySewnet embroidery software, Platinum level
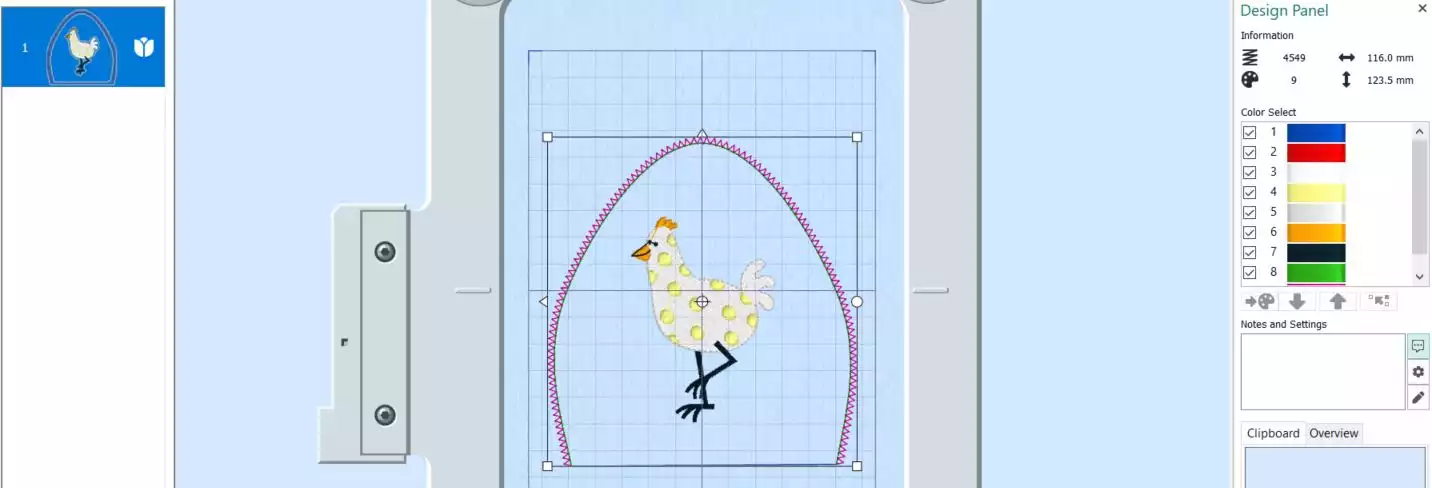
- Embroidery designs for the egg cozy decoration can be found in mySewnet Embroidery Library, click on the links below to find them:
Materials for the stitch out of the project:
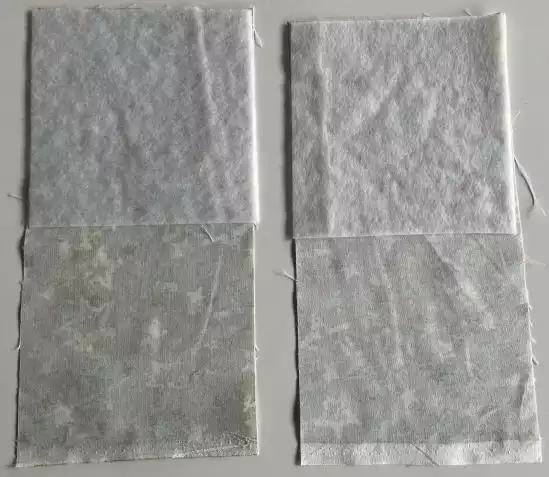
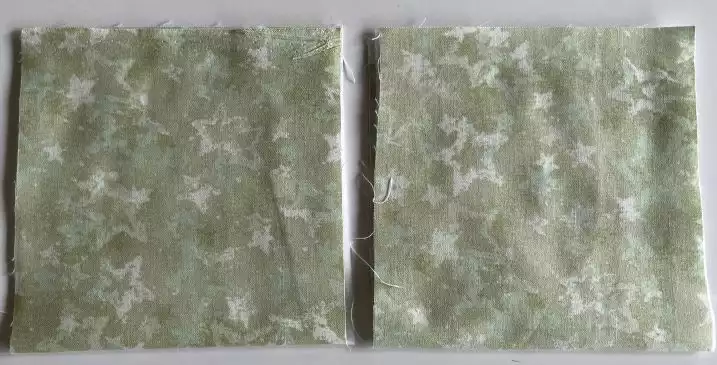
- 2 fabric pieces for the egg cozy 12x6” (30x15cm)
- 2 pieces of thin batting 6x6” (15x15cm)
- Embroidery thread
This is an instruction on how I usually do when I digitize In-The-Hoop projects:
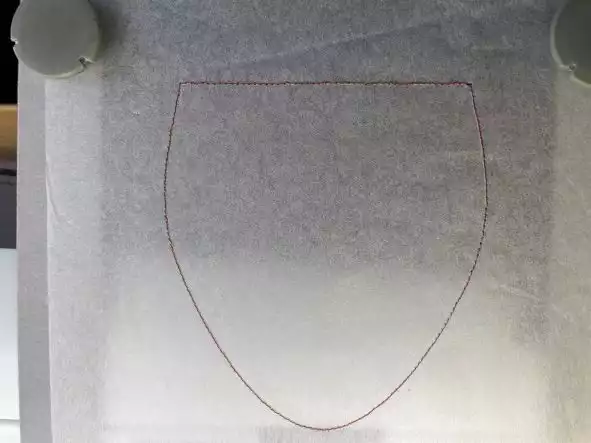
When digitizing a project in the hoop you must do the different steps in a certain order to get a good result. Usually the first step is an outline to show you where to put the fabric in the hoop,the next step is a stitch to secure the fabric and batting.Then comes the embroidery part and finally, the steps to put it all together
Creating the outline
1. Open digitizing
2. Select the 180x130mm Creative Metal Hoop.
3. Go to View tab and make sure the Grid Size is set to 5mm.
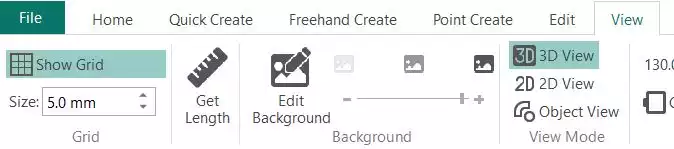
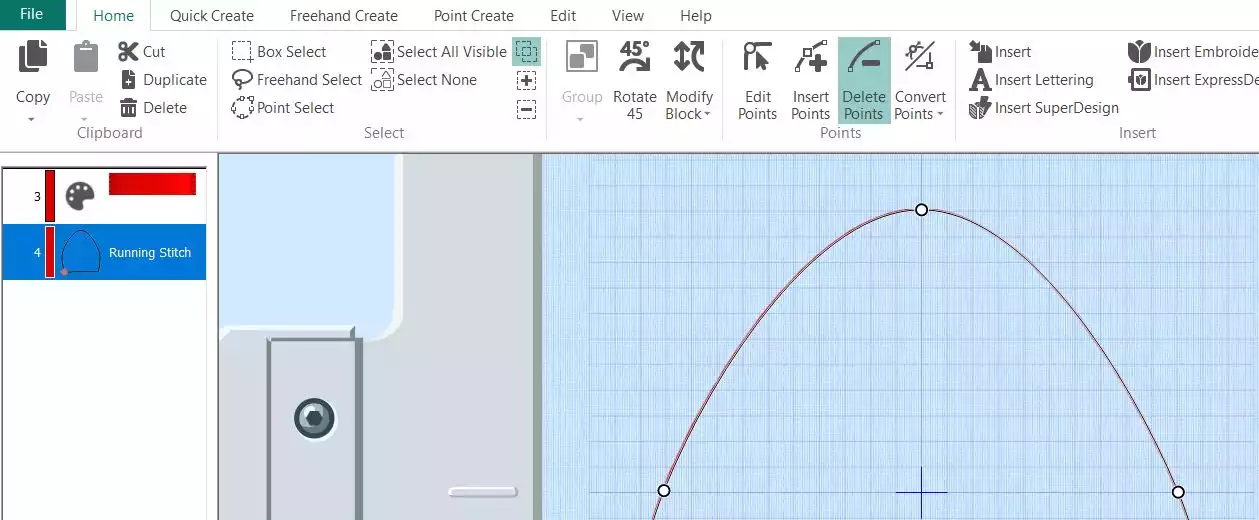
4. Go to Point Create, select No Fill in Pattern Fill, and Running Stitch.

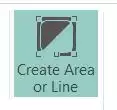
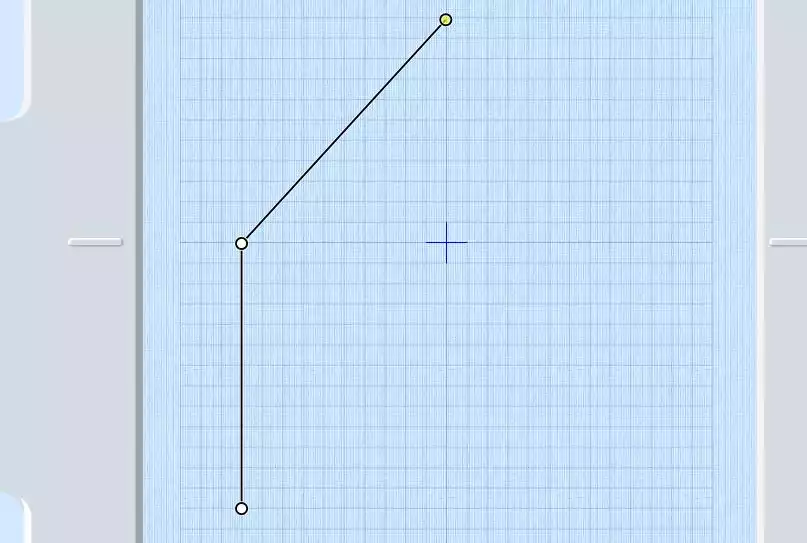
5. Select Fill Area or Line. Set the first dot 5 squares up and three squares in on the lower left side.
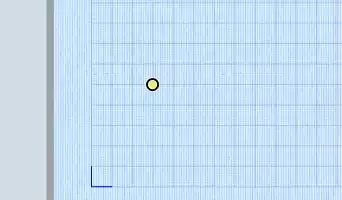
6. Set the next point straight up on the middle line.
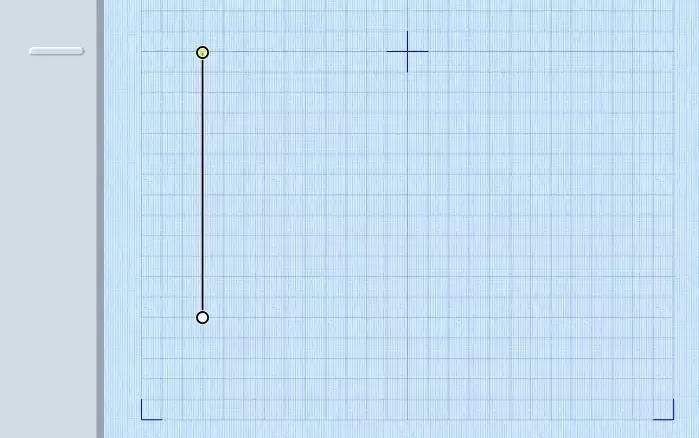
7. The third point is placed 5,5cm above the middle mark (11 squares).
8. Point 4 is placed opposite point 2, three squares in from the right side.
The line will bend but this is ok!
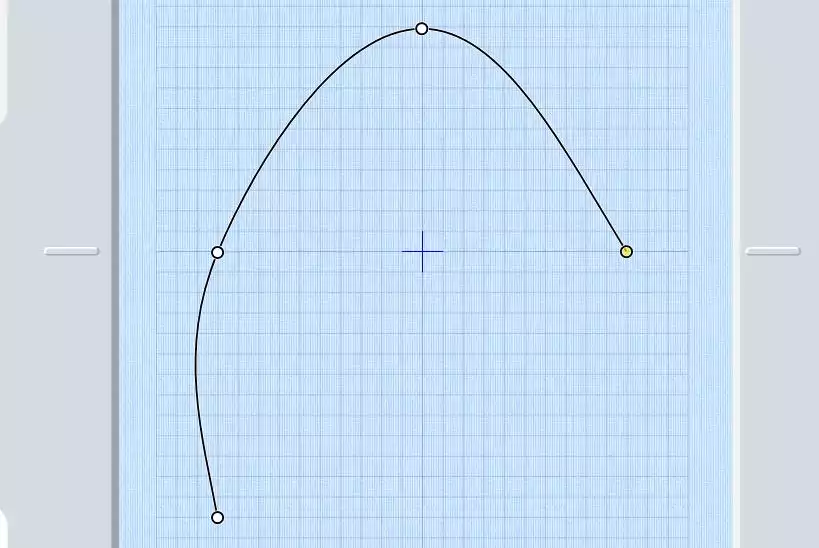
9. Go right down and set point 5 opposite of point 1 three squares in from the right side.
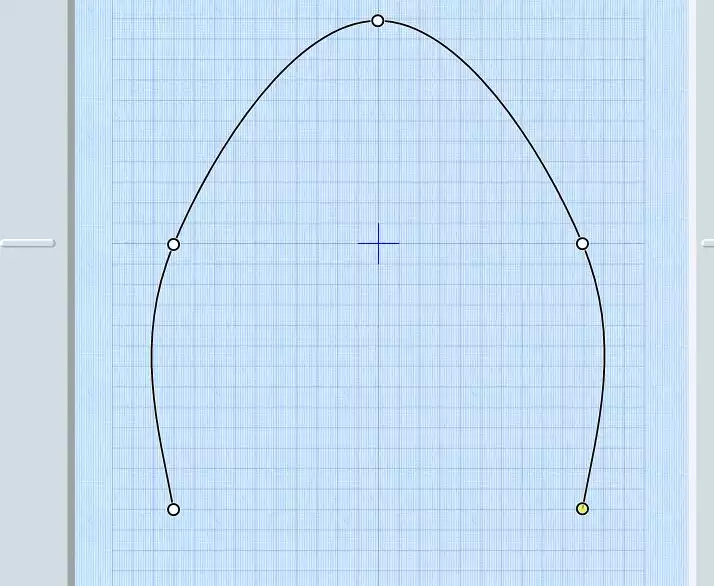
10. Go back and place point 6 one square from point 1.
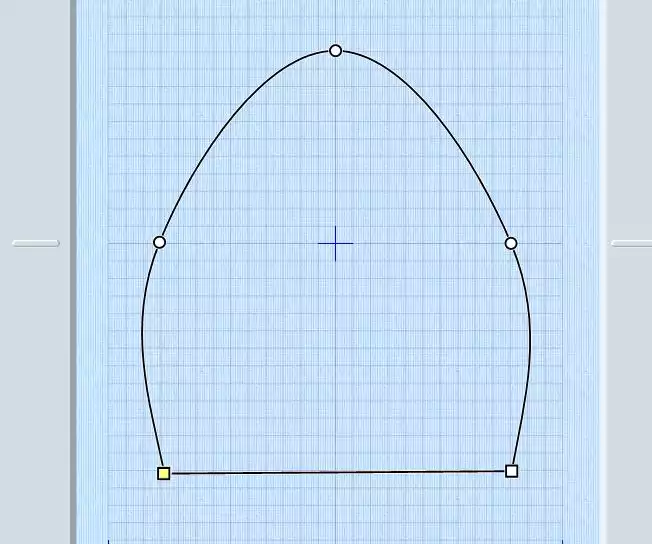
11. Now we will fix the look of the egg cozy. Hold the cursor over point 1 hold down the shift key and click, the point will turn into a square.
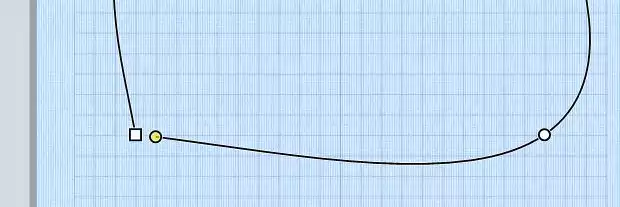
12. Repeat with point 6, and drag it over point 1 before you click.
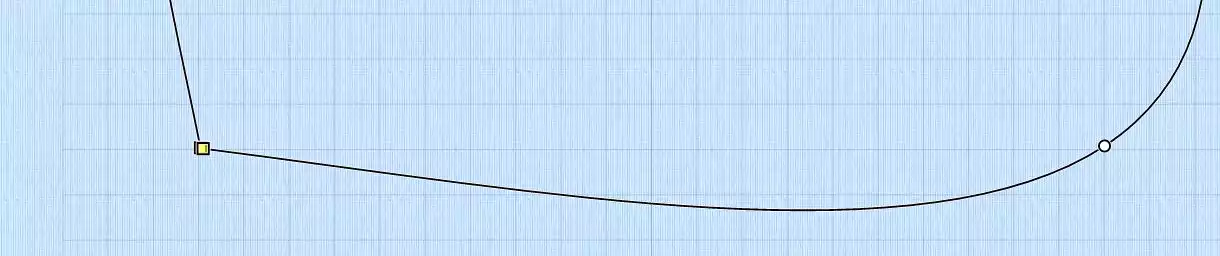
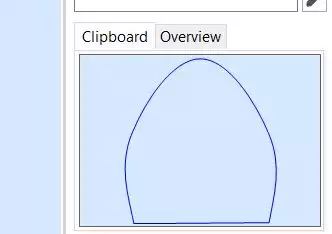
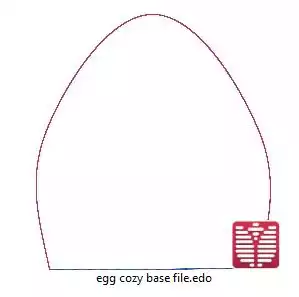
13. Finally repeat with point 5 to make it square. Your egg cozy base is now finished!
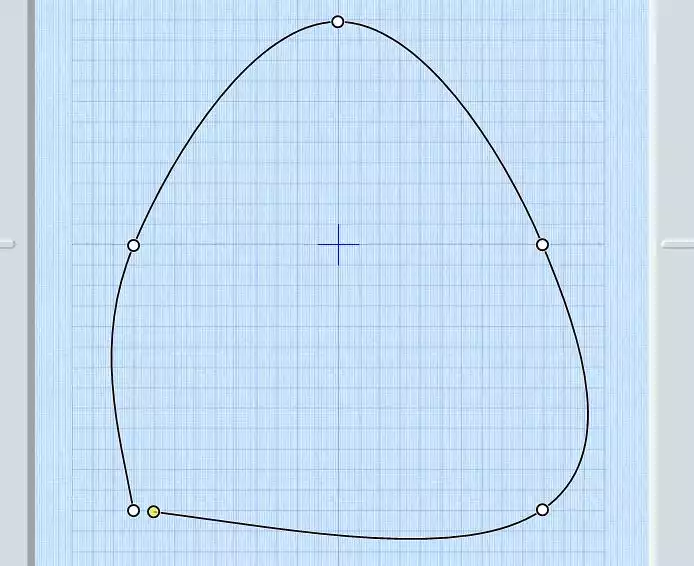
14. Now we will set this into stitches, right click on the embroidery, the line will turn blue and appear in the film strip at the left side on your screen.
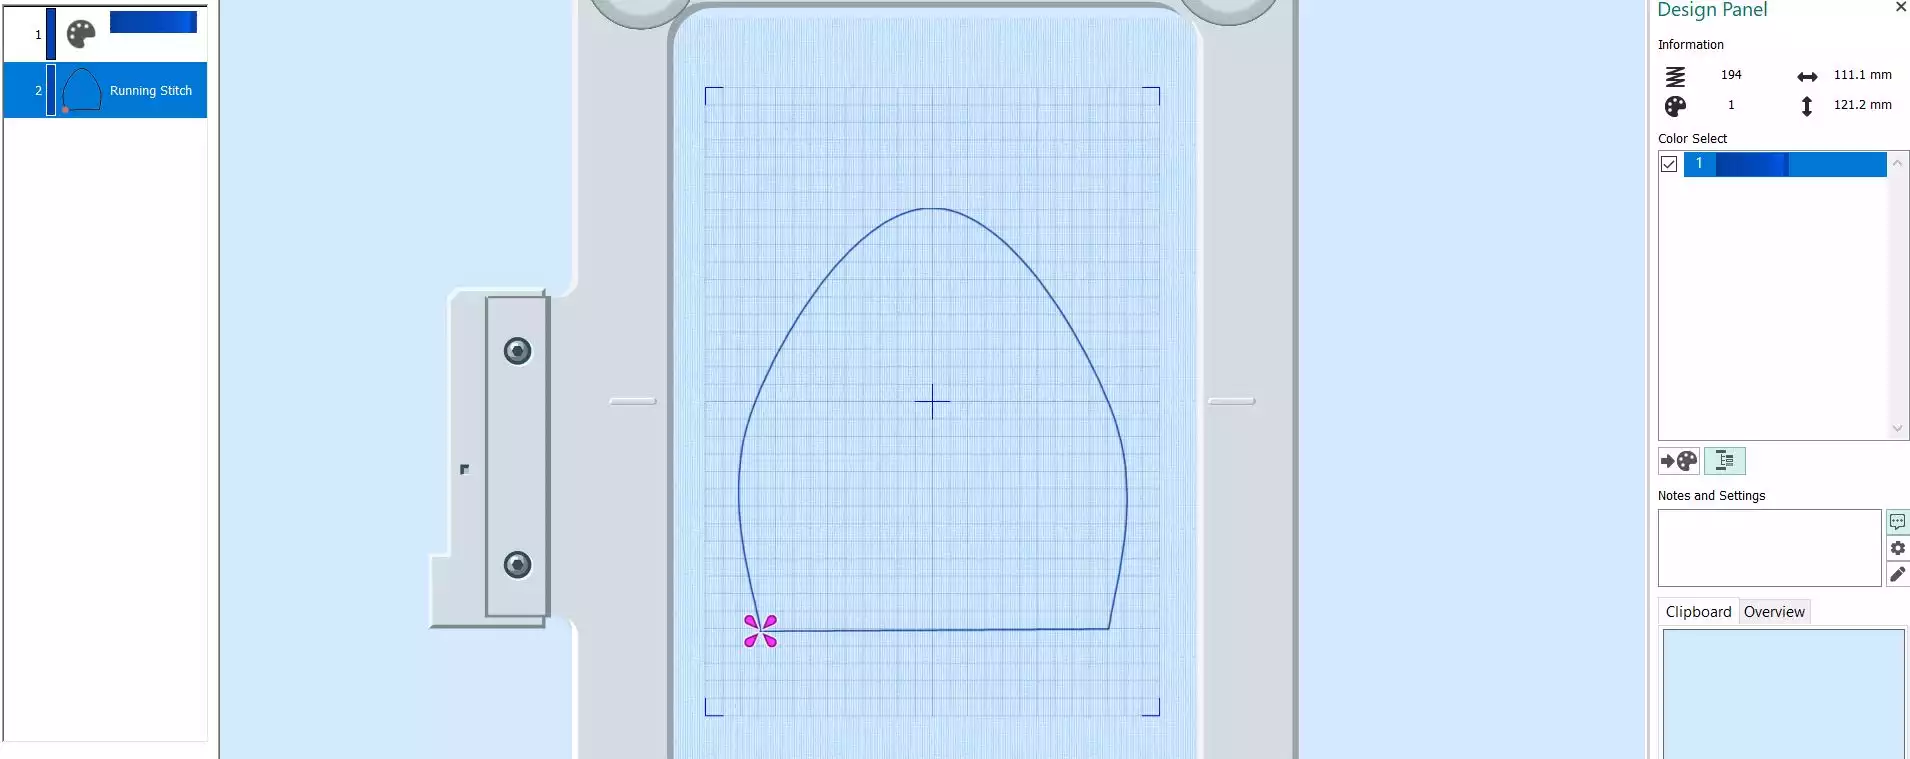
15. To make this an In-The-Hoop project we need to make some more steps, just follow along!
Completing the base project:
16. Make sure the stitches are active (the blue rectangle surrounding the stitches in the Film Strip)and click on Color Change.
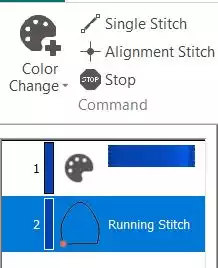
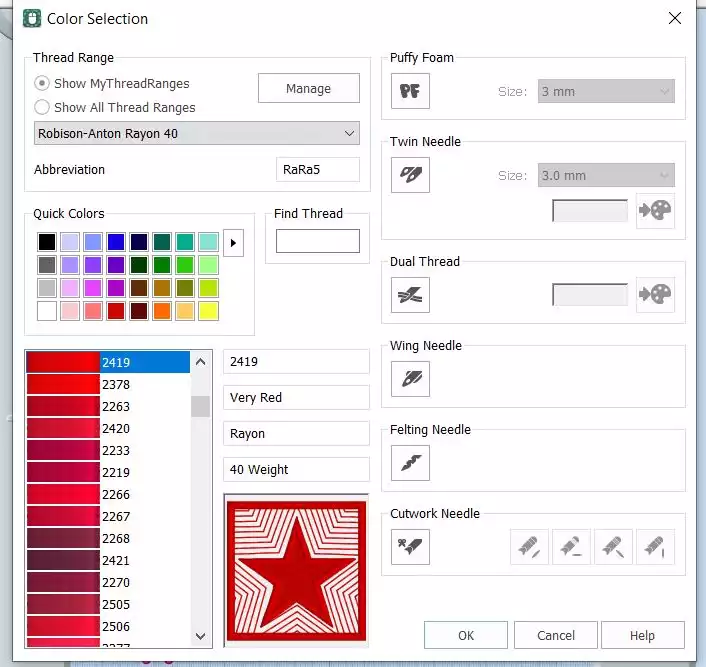
17. A dialog box will appear, choose a red color, click OK.
18. Right click on the stitches in the filmstrip, select Copy. The stitches will now be copied to the clipboard at the bottom of the right hand corner.
19. Click on the red color, the blue rectangle in the Film Strip will move there. Right click and choose Paste. The copy will be placed under the red color in the filmstrip.
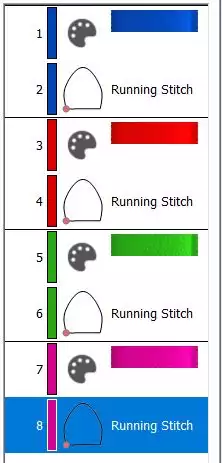
20. Now click on Color Change again choose a green color and right click Paste again.
21. Repeat one more time, choose a pink color.
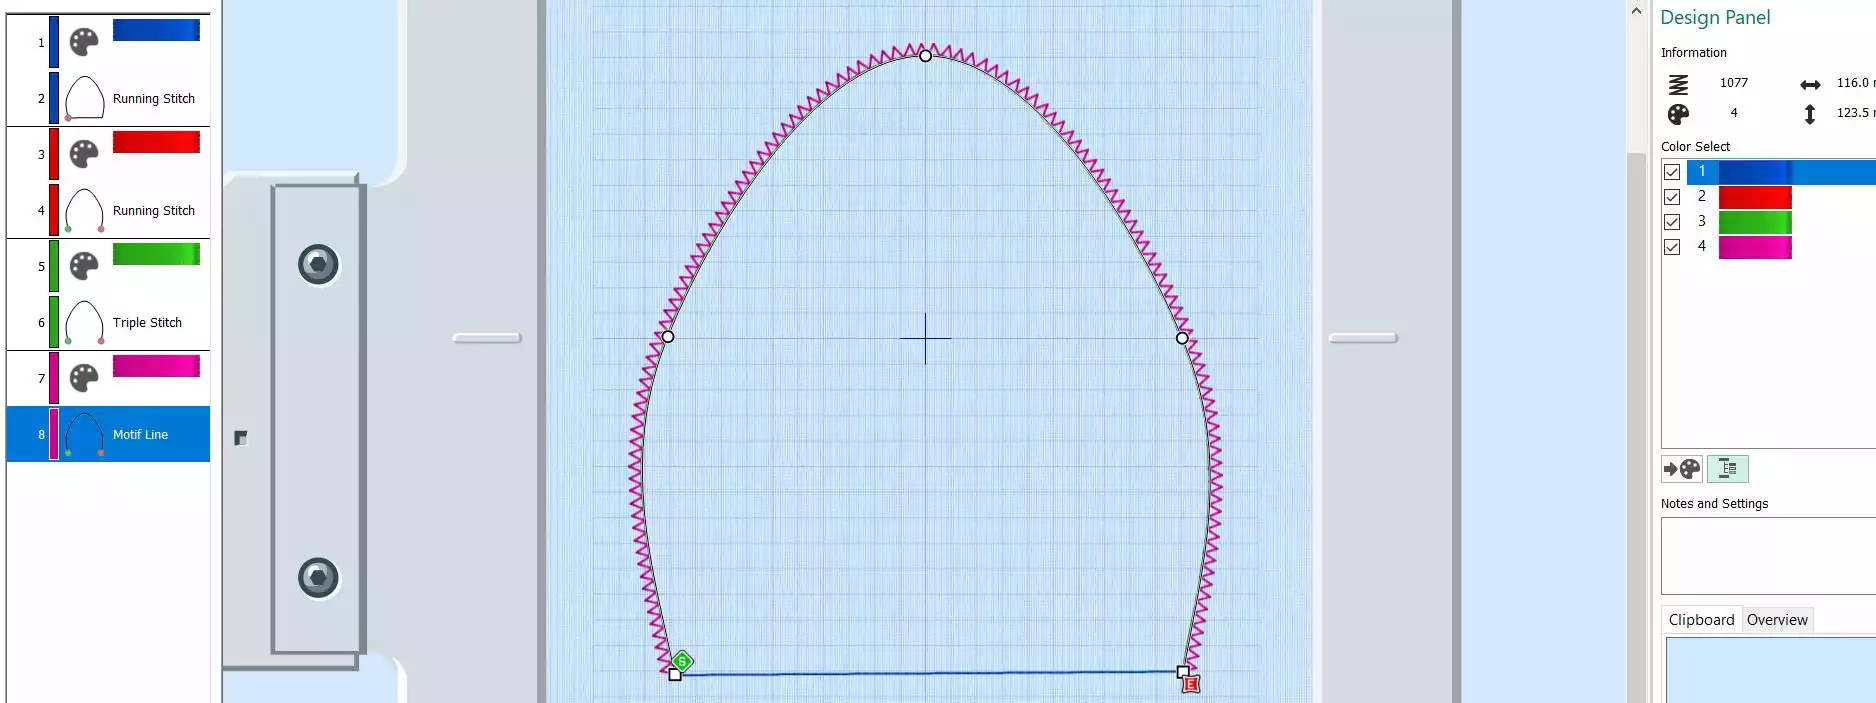
22. Your Film Strip will now look like this:
23. Now we have to make some more adjustments; Go to Home tab, deselect all colors except the red by clicking in the boxes next to the colors on the right side.

24. Click on Delete Points and then click on the embroidery in the Film Strip. The stitch points will appear.
25. In the lower left corner of the embroidery you will find the end point, it looks like this:
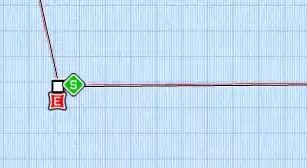
26. Point with the cursor on it and a - will appear instead of the arrow. Click and the point disappears. The design will now look like this:
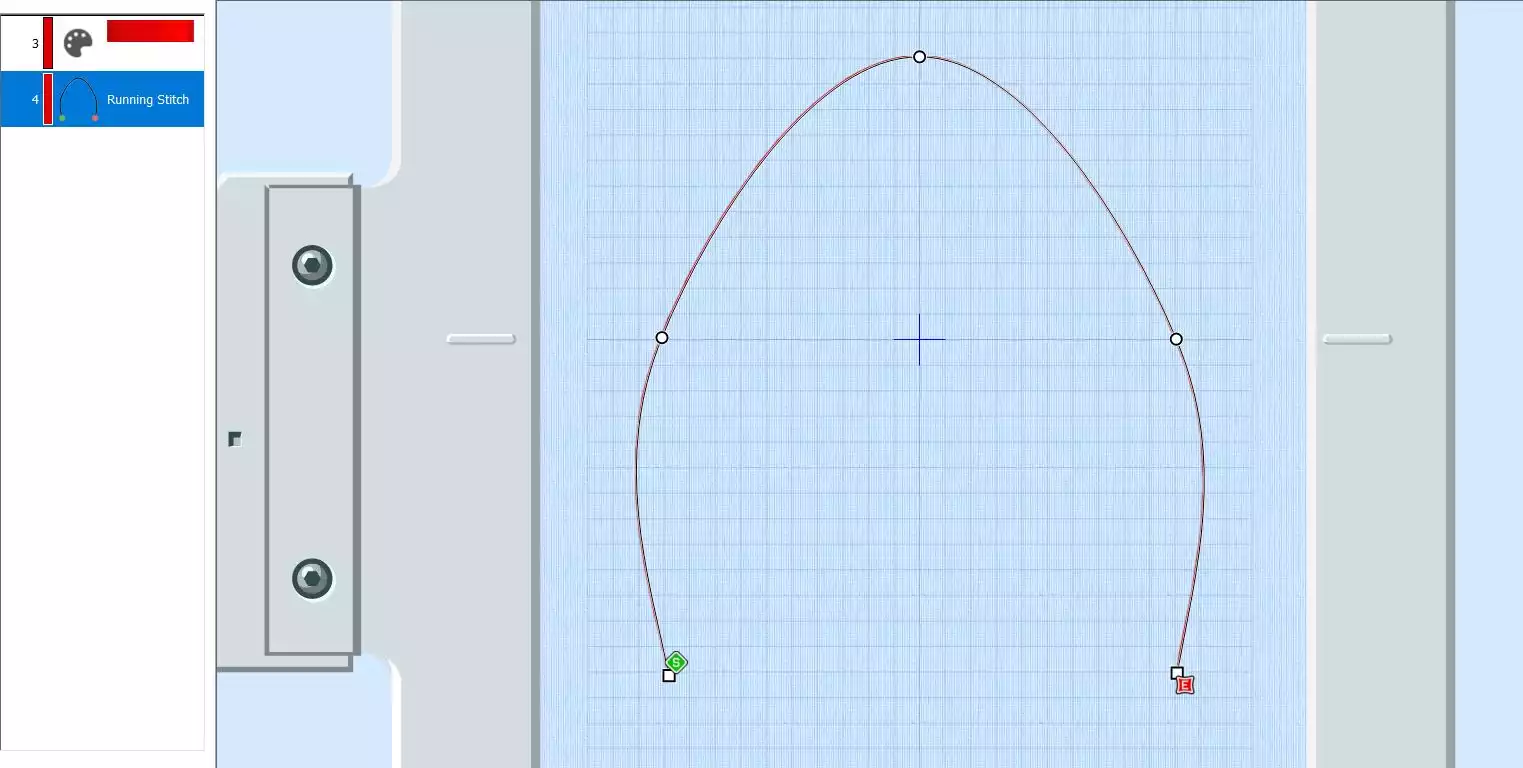
27. Repeat with the green and pink color.
Changing of the stitch lines:
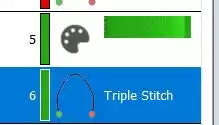
28. Right click on the embroidery file under the green color and choose Properties from the list. A dialog box will appear, choose Triple Stitch instead of Running Stitch and click OK.
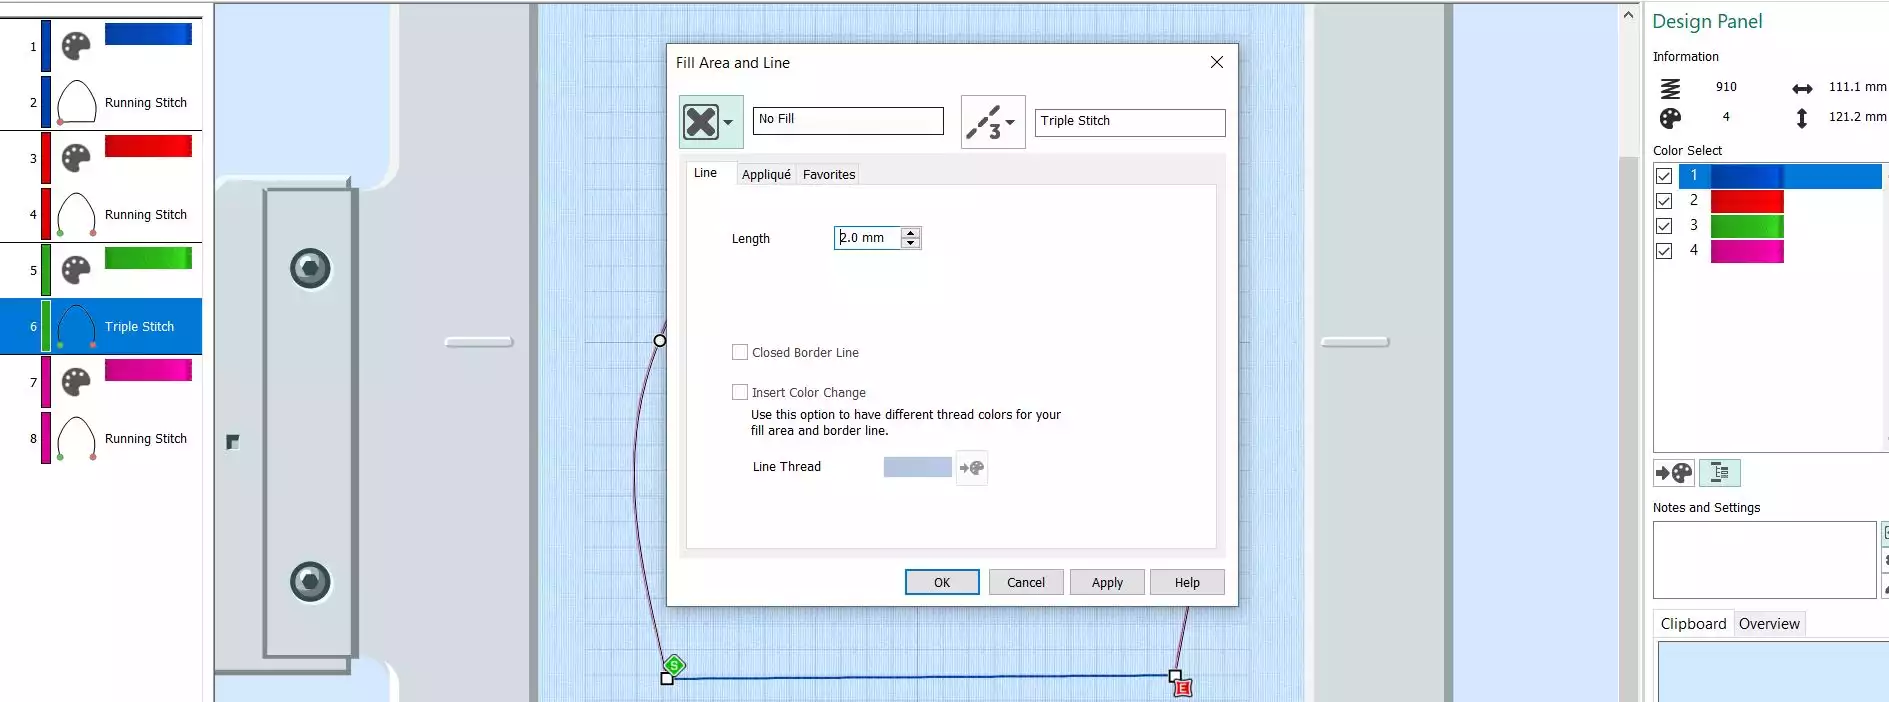
29. In the film strip the text next to the embroidery will change to Triple Stitch.
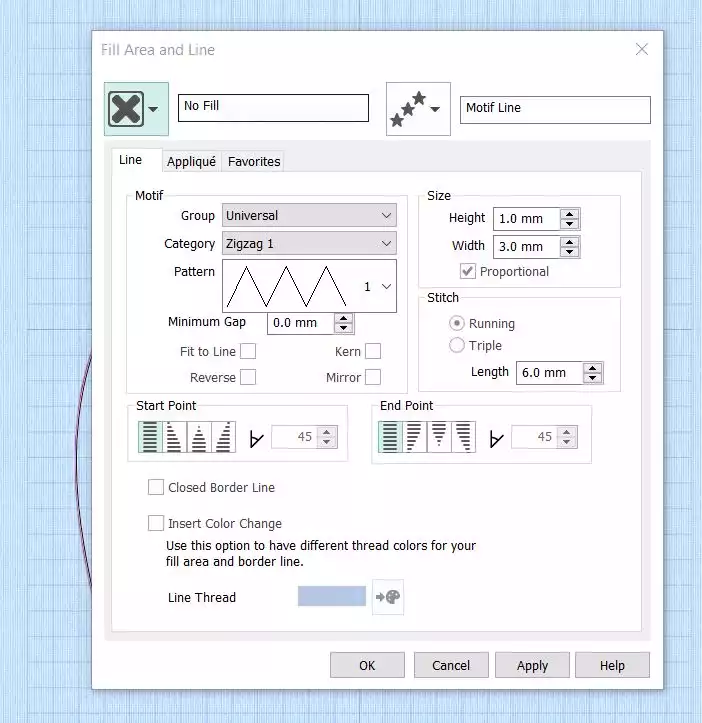
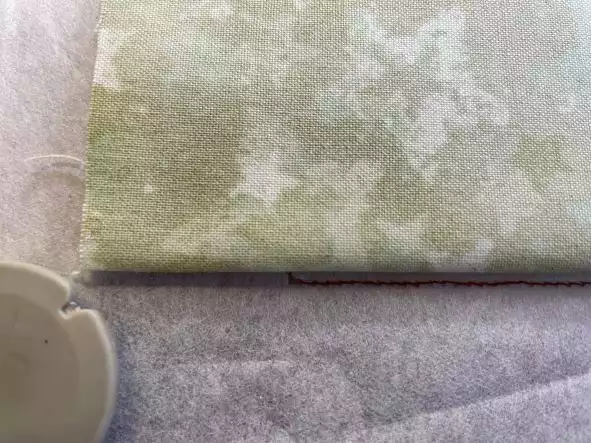
30. Time for the last change! Right click on the embroidery file under the pink color and choose Properties from the list. The dialog box will appear, but this time click on Motif Line instead of Running Stitch and click OK. A new dialog box will appear choose Group Universal Category Zigzag1 and then Pattern 1, the size should be height 2,5mm and width 7,5mm, click OK.
31. Now it will look like this: Your hoop egg cozy is finished, at least the base for it!
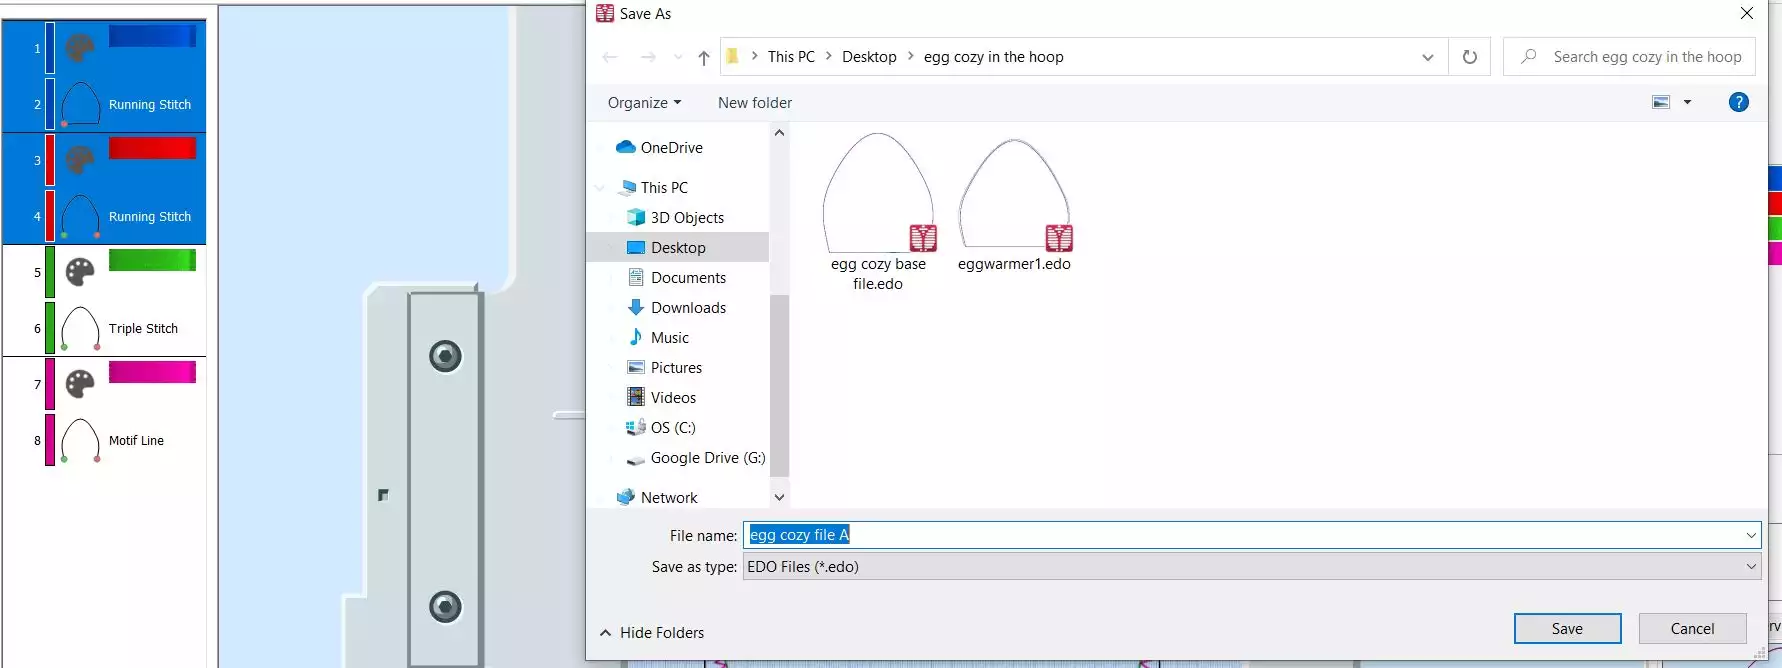
32. Now we have to save it in a smart way, first as an edo file, because it will be easier to change later if we want to. Go to File, Save as and give it the name: Egg Cosy Base File.
Dividing the embroidery file in two separate parts
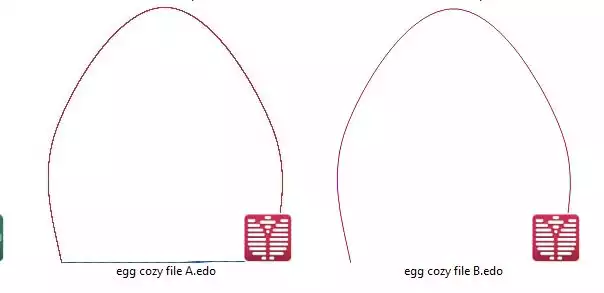
33. To make it easy to add embroidery to the egg cozy we need to divide it into two separate files, A and B. File A is the first two colors (blue and red) and file B is the remaining two (green and pink)
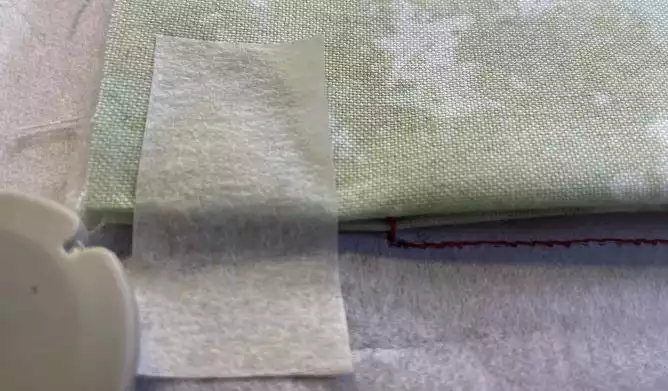
34, Click on the first color in the Film Strip, then Shift-Click on the stitches below the red color. Click on Copy, the selected part will now be visible in the clipboard in the lower end right corner.

35. Go to File, Save As. Give the file the name Egg Cozy File A click on Save.
36. Repeat with the remaining two colors and name the file Egg Cosy File B.
37. You have now separated the embroidery file in two pieces.
38. Export and save the files in your preferred format.
Adding embroideries to the cozy!
39. Open the embroidery software, select Blank Canvas and set the Hoop Size to creative metal hoop 180x130mm.
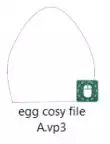
40. choose Insert and select Egg Cosy File A.
41. Click on Insert again.
42. Select the embroidery you want on the egg cozy and place it in position.
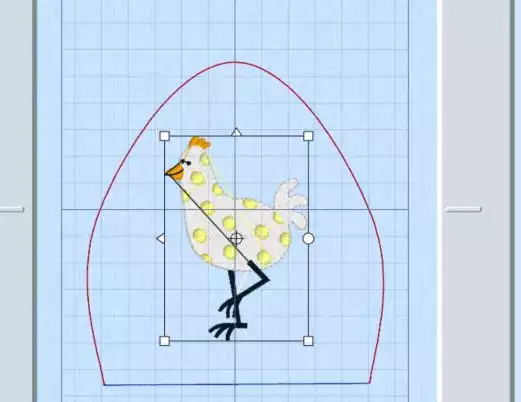
43. Click on Insert and place Egg Cozy File B on top.

44. Click on Combine, Combine all. Export the file in your preferred format, do not Colorsort!
Stitching out the embroidery
45. Hoop tear away or water soluble stabilizer in the 180 x130 mm Creative Metal Hoop. I use water soluble stabilizer if my embroidery has a lot of delicate details.
46. Cut two pieces of fabric and two pieces of thin batting.
47. Fold one piece of fabric over one of the batting pieces, the right side of the fabric out. Press the folded edge slightly to get a crisp fold.
48. Stitch out color 1. This is the placement stitch for the fabric.
49. Place the folded edge along the lower edge of the placement stitches. (the straight line) Be sure to cover the stitching on the rest of the lines with your fabric piece.
50. Stitch out color 2, this will secure the batting and fabric in the hoop.
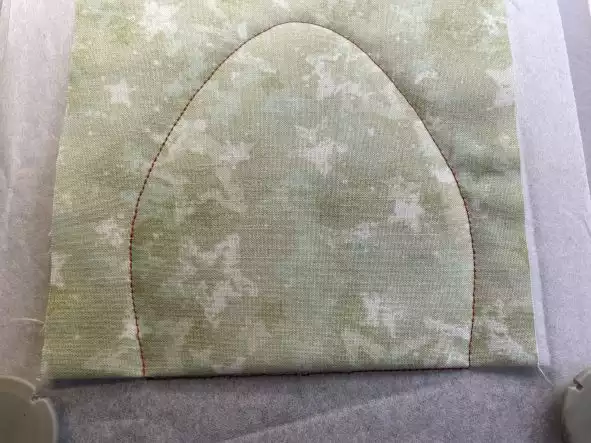
51. Stitch out the embroidery.
52. Fold the remaining fabric piece in the same way as before and place it on top of the embroidered fabric pieci in the hoop. Make sureit covers the outline on the curved side. Be careful to align the folded edges in the lower end. Secure with a piece of tape.
53. Stitch out the next color, this will secure the fabric end batting you just added with a triple stitch. Then stitch out the last color, It is a zig-zag that finishes the edges.
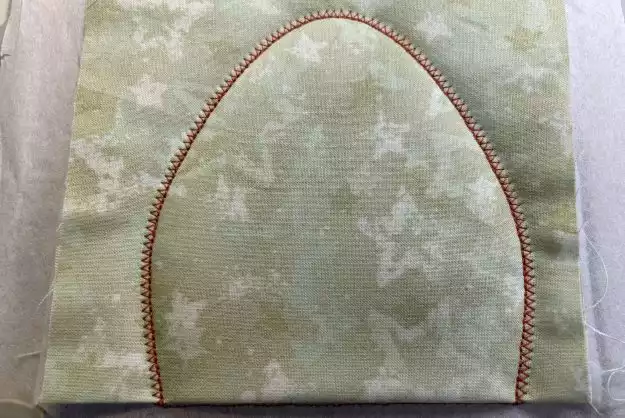
54. Unhoop, cut close to the zig-zag stitches and remove excess stabilizer
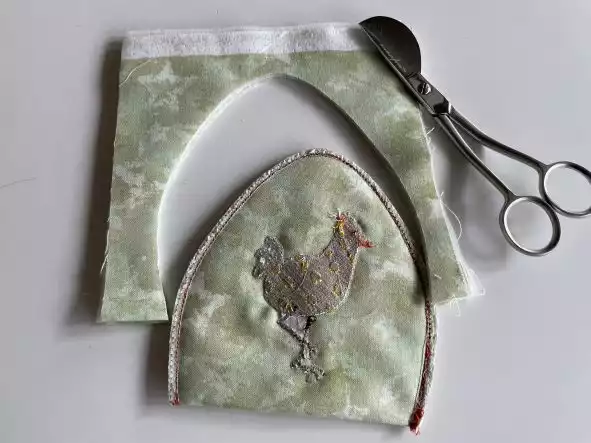
55. Turn right side out, your eggcozy is now finished.