 United States
Bow Tie Picnic Quilt

Collect all your red and blue scraps. Cut them into 4” squares. Serge the magic seams and voila, you have a Bow Tie Quilt! It’s perfect for those summer picnics and is all pieced on your overlock.
What you need:
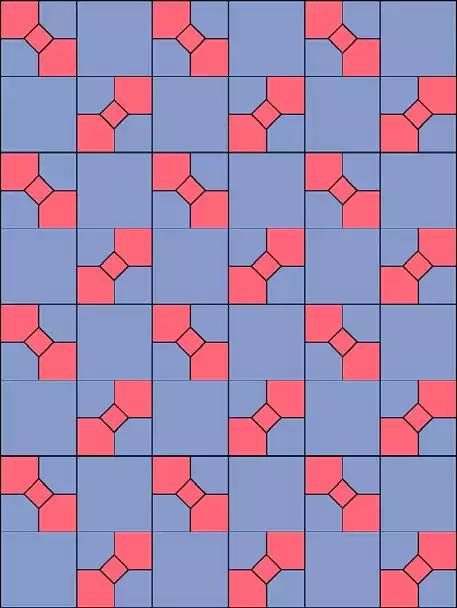
Each block requires three red 4” squares and two blue 4” squares.The resulting block is 7” (6 1/2” finished). We used 24 bow tie blocksand 24 plain blocks in our quilt which measures approximately 40” x 52”.
- Red and Blue Scraps for Bow Tie Squares
- 1 Yard Cotton for Solid squares
- 2 yards Cotton for Backing and Bindin
- Serger Cone Thread
- 30 wt. Cotton Thread for Quilting
How to sew:
1. Cut three red 4” x 4” blocks and two blue 4” x 4” blocks for each block.
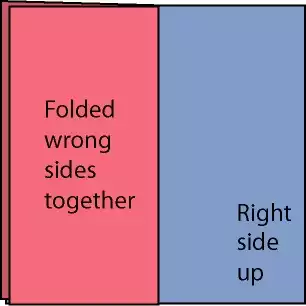
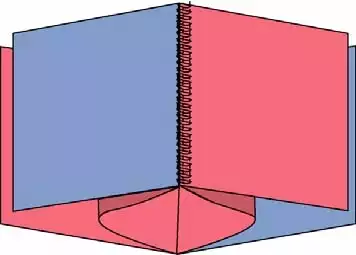
2. Place the first blue square right side up on the table. Fold a red square wrong sides together for the center and place as shown, on top of the blue square.
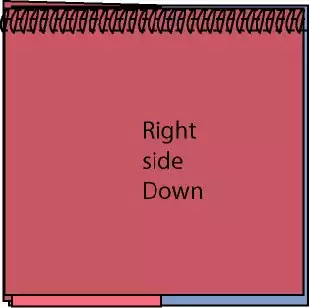
3. Place a red square right side down, on top of the two. Serge across the top edge as shown.
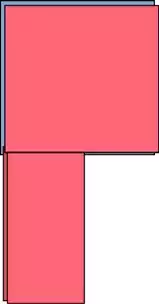
4. Open out so that the red square and the blue square are up and the folded center is down, as shown.
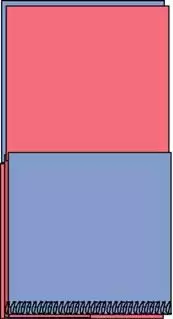
5. Sandwich the bottom of the center folded piece with a blue square on top and a red square on the bottom. Right sides of the squares are together, with the folded center in between them. Serge across the bottom edge as shown.
6. Open out the piece. Place the squares right sides together, matching the seams. The center will open out and get caught in the seam. Stitch across the bottom, catching the center in the seam. You may want to pin this seam, but be sure to keep the pins away from the cutter.
7. Press the blocks.
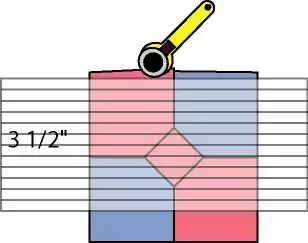
8. Using your rotary cutter and ruler, trim the blocks to 7”. To do this, align the 3 1/2” line on your ruler with the center seam and cut, as shown.
9. Arrange your quilt squares alternating with the solid squares. We alternated the direction of our bow tie squares as shown.
10. Sew first into rows, and then sew the rows together to finish the quilt top.
11. Layer the back and quilt top wrong sides together, with batting in between, to form a quilt sandwich.
12. Safety pin baste the layers together.
13. Select a zig zag stitch 4 Width and 4 Length on your sewing machine. Stitch a zig zag over the seams of the
squares.
14. Bind as desired, here are links to two different techniques: