 United States
Valentine Placemat with Digitizing Instructions
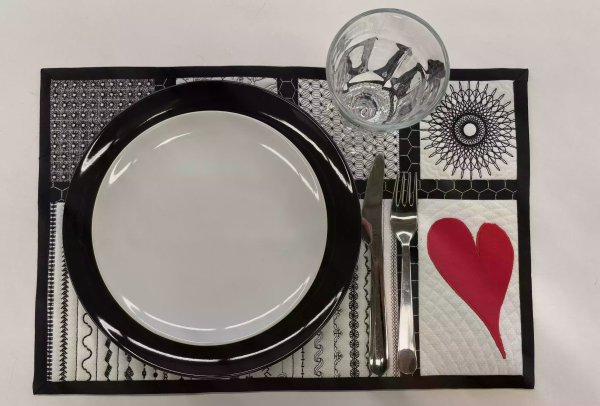
Dinner for two? Show what you feel with this modern placemat. It is a great opportunity to try out all those decorative stitches on your machine as well! You will learn a lot about how to use the mySewnet embroidery software in the process!
With 30-day Free Trial of mySewnet Embroidery Software you will get to try out the most user-friendly and feature rich digitizing software on the market. It works with all embroidery machine brands and is available for both Windows and Mac.
What you need:
For each placemat you need:
MySewnet embroidery software, platinum level to make the blocks
Cutaway stabilizer or old bed sheet. (this will not be visible on the finished placemat)
White cotton fabric for the blocks: four pieces 6x6” (15x15cm) 1 piece 9x6” (22x15cm) 1 piece 16x9” (40x22cm)
Thin batting, the same sizes as the white fabric for the blocks and one piece 19”x12½” (48x31cm)
Fabric for the back of the placemat and the fold-over binding, black cotton 22x15” (55x38cm)
Black sewing thread
Black, white and red embroidery thread
Black cotton fabric 2 strips 1½”wide (4cm) for the sashing
Small piece of red fabric
Making the blocks
There are a total of six different blocks for this placemat.
Large block with rows of stitching
1. Open mySewnet embroidery software, choose Blank Canvas and hoop size 360x200mm. Click Ok
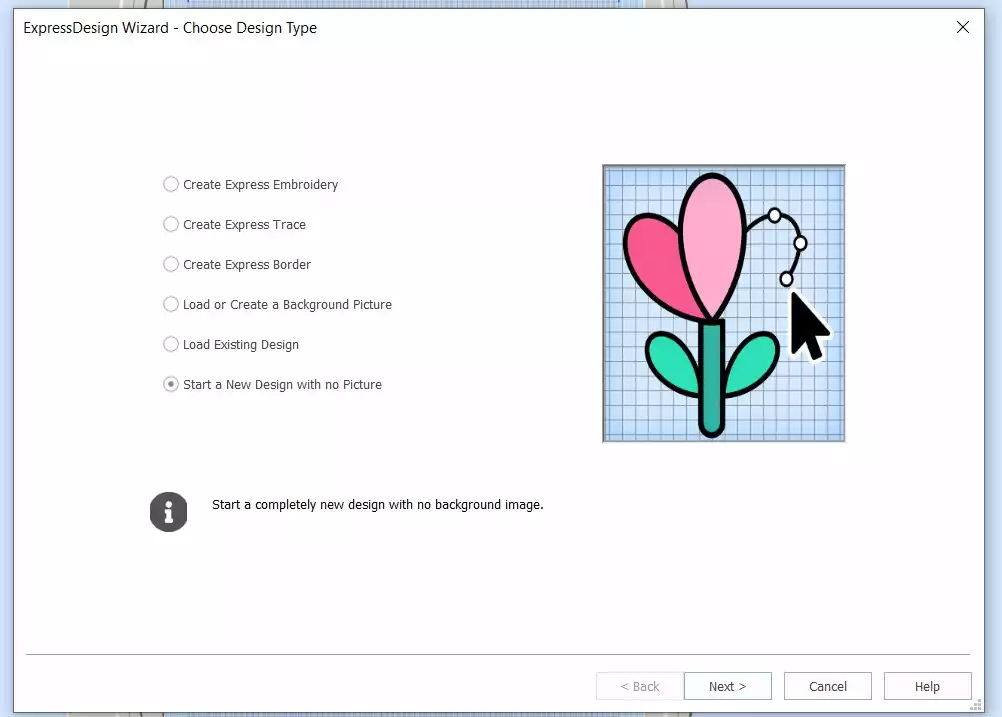
2. Go to Create and select Digitizing. In the dialog box choose Start a New Design with no Picture, click Next.
3. Set the hoop to 360x200mm if not already selected, click Finish
4. Go to the View tab and set the Grid Size to 5mm
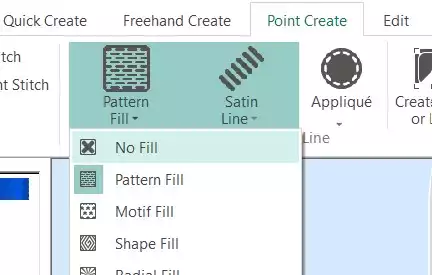
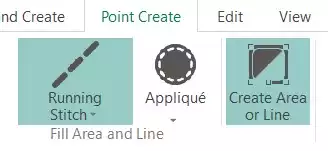
5. Click on point create and then pattern fill, choose No Fill.
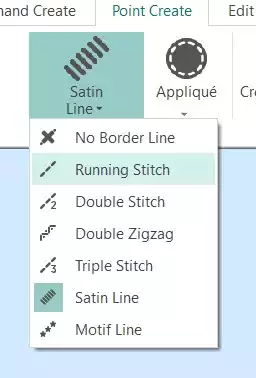
6. Replace Satin Line with Running Stitch in the dialog box.
7. Click on the Create Area or Line box.
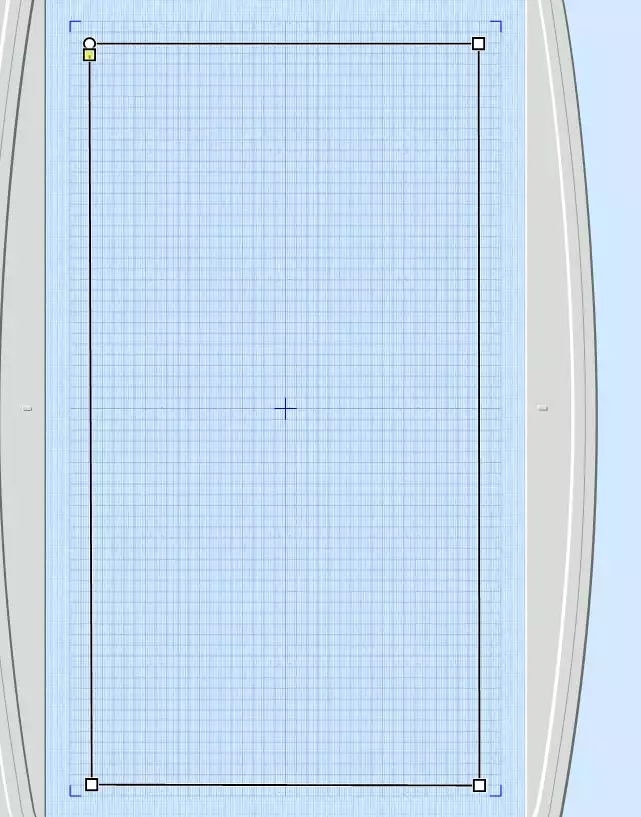
8. Make a rectangle 13¾”x7½” (350x190mm).Hold down the shift key to get square corners. The size does not need to be exact, we will fix this in the next step.right click to set the stitches
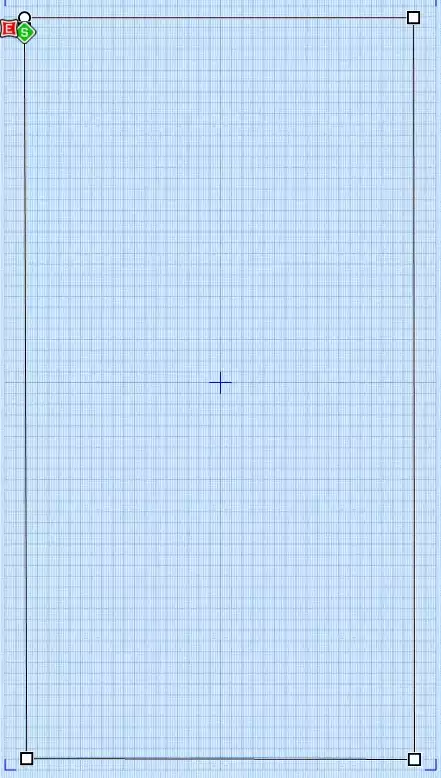
9. Go to Home tab, choose Edit Points and move the corners to get the right size for the rectangle. Zoom in to get the corners in the right position.Hold down shift key when moving the corners to maintain the 90 degree angles.
10. Click on Point Create and then Color Change. Select a color and then click Ok (try to use different colors every time, since this will prevent the colors to be color sorted by mistake later)
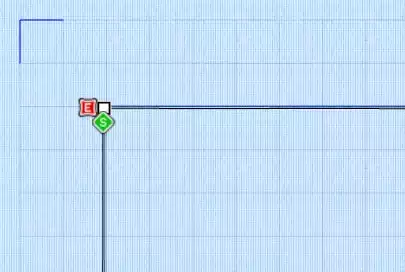
11. Zoom in a little bit and click on Create Area or Line again. Leave the running stitch box as it is, we will change the stitches later. Click to make a line about 1,5cm (⅝”) from the top. Right click to set the line.
12. Go to the Film Strip, right click on the line and choose Copy. 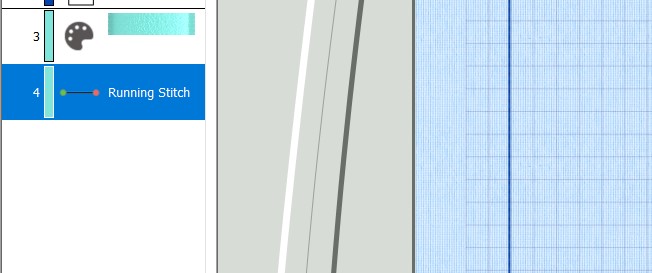
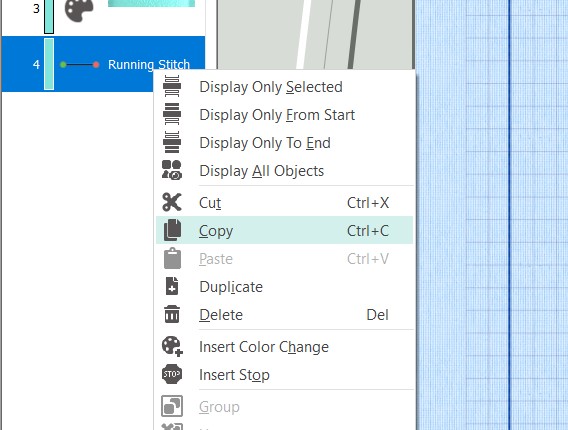
13. Then go to the Home tab and click Paste (you can also right click and choose Paste), move the line about 1,5 cm down from the previous line.You can use the arrow keys for this or move the line with your mouse. (the end points can also be moved individually)
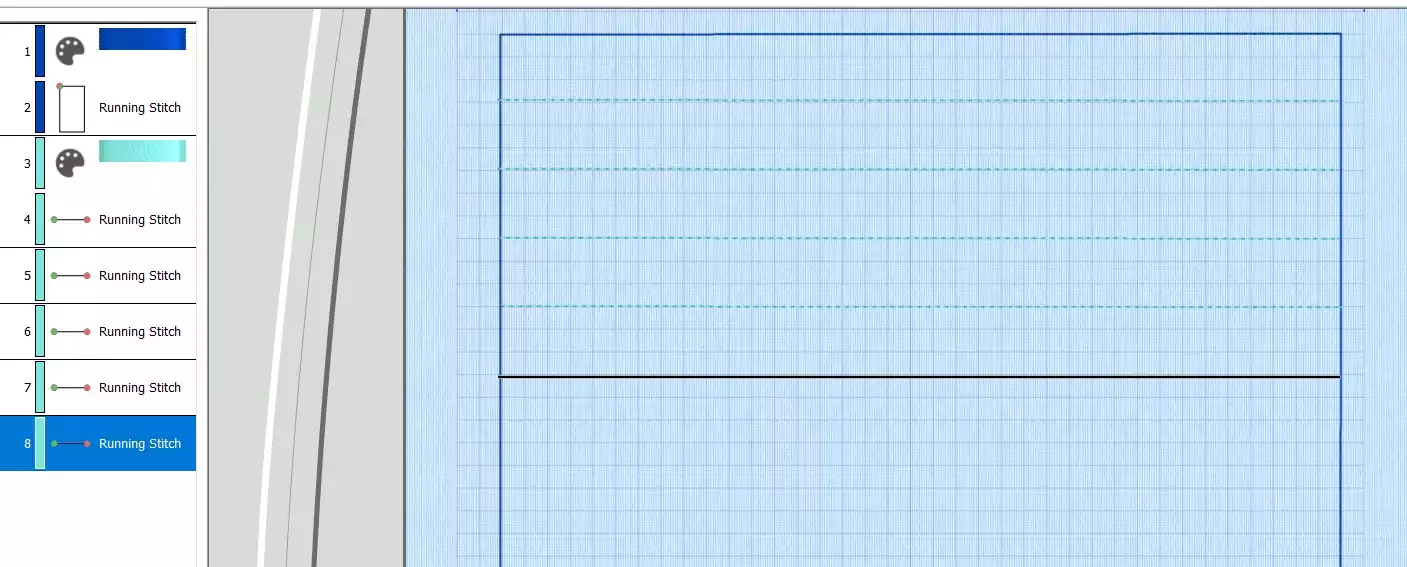
14. Repeat this process and fill the rectangle with lines.
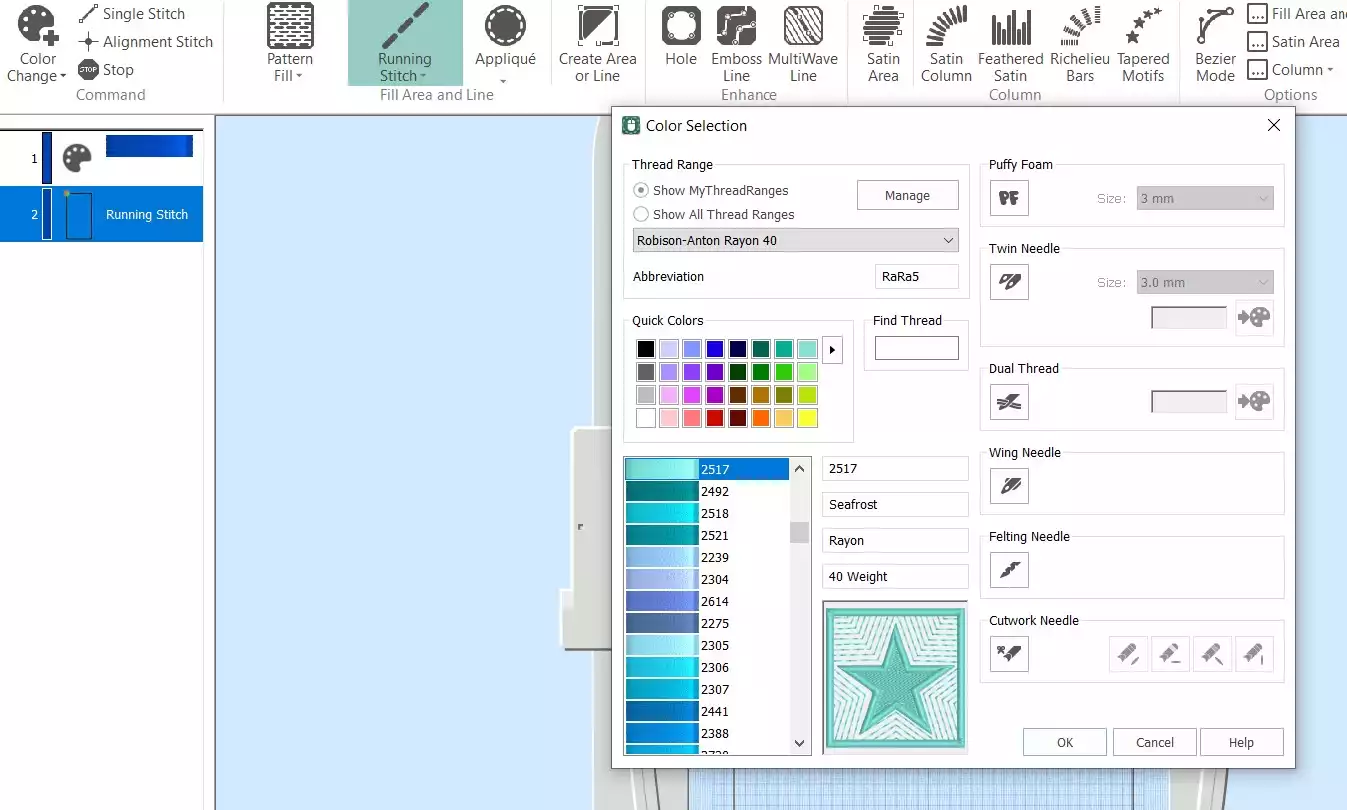
15. Go to the filmstrip on the left, select the first running stitch line and right click. Select Properties. A dialog box will appear, select the Running Stitch and change it to Motif Line
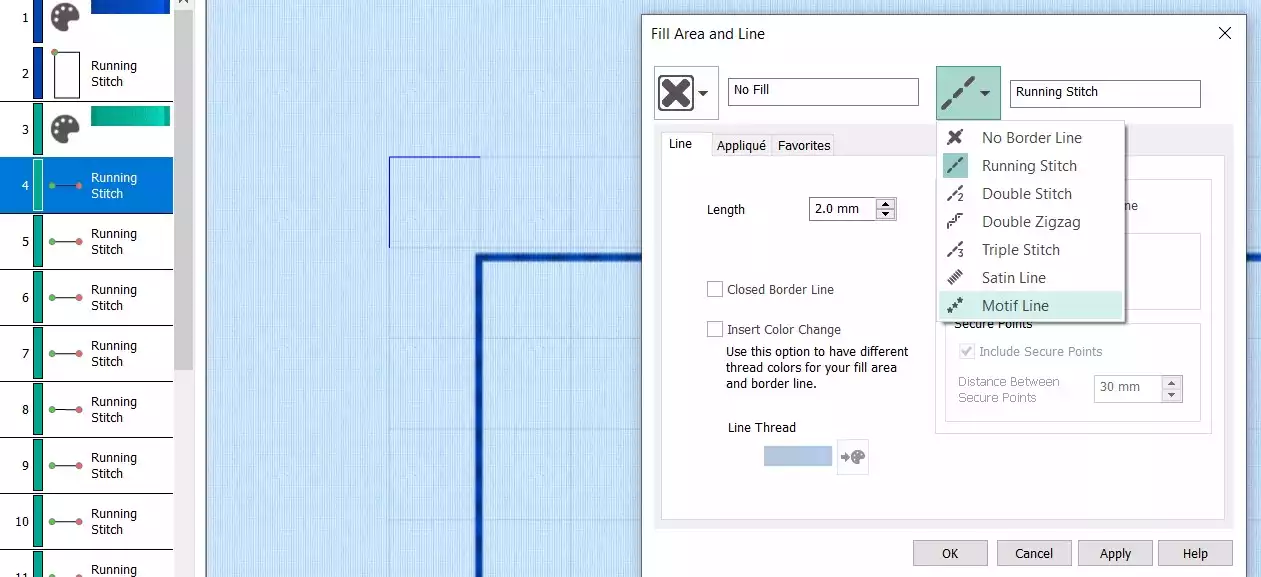
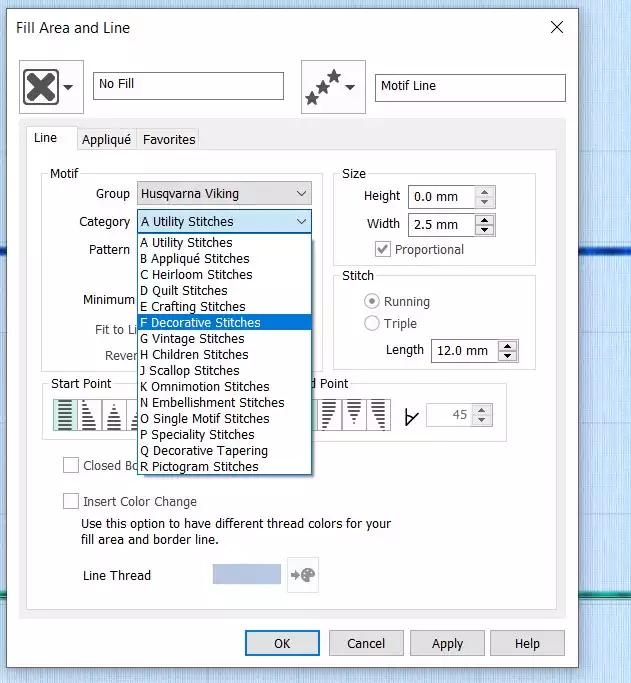
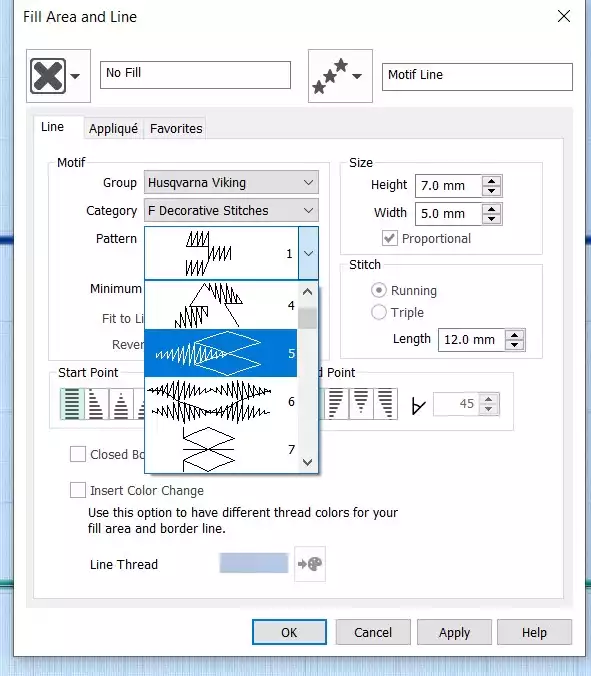
16. The dialog box will change. In the Motif box you have the possibility to choose from all the different Pfaff and Husqvarna Viking stitches as well as Universal stitches. Try them out and find a stitch that you like for the line. then click Apply. Repeat step 15 and 16 on all the lines in the rectangle. You can add, remove or move the lines as needed.

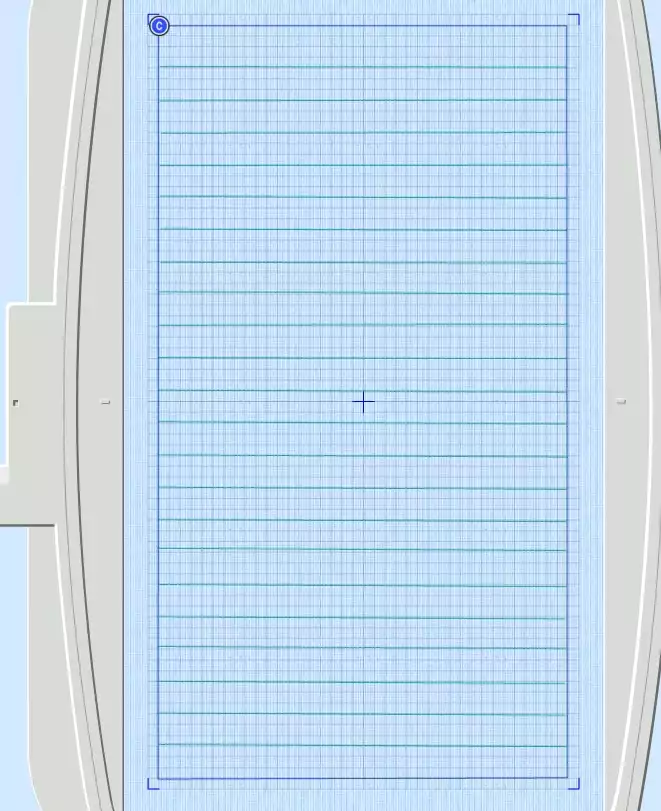
17. This is an example of how the rectangle will look. Leave ⅝” (1,5cm) on top and bottom free from stitching, It will be covered with binding later.
'
18. Go to the File tab and Save the file as an EDO file, this will make it easier to change later if needed. Close the digitizing window. The file will now appear in the open program window. Click on File and Export it in your preferred format, eg .vp3
Rectangle with heart and background quilting
19. Open mySewnet software, choose blank canvas and hoop size 260x200mm.
20. Go to Create and choose Digitizing. In the dialog box choose Create Express Border, click Next.
21. Click on Create New Picture, mySewnet Draw & Paint opens
22. Click on Insert and choose the heart with an irregular shape (73) click on Insert Shape
23. Drag and distort the shape as desired using the handles.
24. When you are satisfied, close the paint window on the X in the top right corner. You will now be back in the express design wizard. Click Next
25. Click Next again.
26. And Next…
27. In this step choose Enter Design Size and set the width to 85mm, click Next
28. Click on Finish
29. Click on the stitches in the film strip, the points of the stitching will be visible. You can move the points if you like to change the outline. You can also delete or add points if necessary. (deleting points can make it easier to get the desired shape, especially rounded shapes). If you change the shape, the original image could be visible underneath. This will not be shown in the finished embroidery. The finished size should be approximately (135x 85mm).Close the digitizing module.
30. The heart applique will now show up in the embroidery program. Go to Home tab and click on copy. The applique will now show up in the Clipboard at the right corner.
31. Next step is to add the background quilting. We will use the Quilt Block Wizard for this: Go to Create tab, click on the Quilt Block. A dialog box will appear. Choose Filled Quilt Block; Inner Embroidery, click next
32. Choose Shape 2 (rectangle) set A-side to 120mm and B-side to 190mm, click Next
33. Click on Paste, click next
34. Set the Margin to 0 mm, click next
35. Select the Curved Crosshatch Fill
36. Click on options. In the dialog box set the Gap to 10mm, the stitch length to 2,5 mm and click the triple stitch option. Click Ok and then finish
37. The quilt block is now completed, but we have to do some finishing steps, Right Click on the first picture in the film strip, the heart. Choose delete. Now Right Click on the quilt embroidery in the film strip, choose Ungroup. The embroidery will be separated with the applique first and then the quilting.
38. We want the the background quilting to be stitched out first so we have to change the order: Click on the applique in the filmstrip, then click on the arrow pointing down to move it
39. Go toHome tab, click on Combine and choose Combine All. click on the second color and change it. This will prevent the colors to be merged together if you use color sort later.
40. Save the embroidery file and export it to your preferred file format eg .vp3
Square with Spiro star and background quilting
41. Open mySewnet embroidery program, choose blank canvas and set the hoop size to 120mm, click Ok
42. Go to Create tab, click on Spiro. A dialog box will appear. Select the size to 100mm. Click on Random. A warning message will appear, click ok. A new spiro will be created. Continue to press the Random button to get the spiro you want to use. You can also use the different handles to refine the look. Click ok when finished
43. Go to Home tab and click copy. The spiro will now appear in the clipboard window.
44. Go to Create, Quilt block and choose Filled Quilt Block, Inner Embroidery, click Next
45. Choose shape number 1, the square and set the side to 120mm, click next
46. Click on Paste ro insert the spiro, click next
47. Set the Margin to 2mm and click next
48. Choose Echo and click on Finish.
49. Your quilt block is now finished, we just have to remove the original Spiro and change the stitchout order
50. Select the first color (spiro) and right click then choose delete. Now you only have the quilt block left. To change the stitchout order, right click on the embroidery in the film strip and choose ungroup
51. Select the first part (the spiro and move it down with the arrow key at the bottom
52. Go to the Home tab and click on Combine, Combine All
53. Your spiro block is now finished. Save it and export it in your preferred format, eg .vp3
Three Squares with surface pattern
You will make three different squares with an overall surface pattern.
54. Open the mySewnet embroidery program, set the hoop size to 120x120mm
55. Go to Create, Digitizing. The digitizing module will start. Click on Start a New Design with no Picture, then Next
56. Set the hoop size to 120x120mm and click Finish
57. Go to Point create, select click on Pattern fill and choose Motif Fill, set the satin line to running stitch
58. Click on Create Area or Line and make a Square 120mm on all sides. Hold down the Shift key to get the corners in a 90 degree angle.Right click when finished. The square will be filled with stitches.
59. Right click in the square. A dialog box will appear after a short moment. Change the motif. In this example we will start with Pfaff, 5.4 Maxi Art Stitches number 5. Go to spacing and set the Offset Horizontal to 50%
60. Now we have a block with flower stitches! Go to File, Save As and save your block.Then go to Export and export the file in your preferred format, eg .vp3. Since the block is very near the maximum size for the hoop you may need to change the hoop size in order to be able to export the embroidery.
61. To make the remaining two squares, repeat the process and choose different Motif Fills. The next square in the example is Pfaff, 5.2 number three
62. The third square is Pfaff 4.3 Borders Number 26 spacing 0%.
Stitching out the blocks
63. Choose the right hoop size for the embroidery. Attach a cutaway stabilizer or an old sheet in the hoop, it will not be visible on the final placemat.
64. Place thin batting and white fabric on top of the stabilizer and use the fix option to secure it in the hoop
65. Stitch out the embroideries, unhoop and cut it along the outside lines of the embroidery.
66. Arrange the embroidered blocks to form the placemat.
Putting it all together
67. From the sashing strip cut three pieces 4 ¾”(12 cm) long, one 7½”(19cm) and one 19” (48cm).
68. The blocks will be sewn together with the sashing strips in between: Take the top left square and sew a 12cm long sashing strip on the right side of the block. Use 1cm seam allowance
69. Fold Sew the next square to the other side of the sashing. The finished result will look like this on the right side and the wrong side:
70. Continue adding sashings between the squares, and between the large and small rectangle. The finished result of this step will look like this:
71. Finally put it all together with the long strip.adjust the size of the left top square if needed to get the right size.
72. Press the placemat and attach a layer of thin fusible batting on the wrong side. Place the backing fabric on the table and lay the placemat on top, right side facing.The backing fabric must extend at least 1” (2,5cm) on all sides.
73. Pin and topstitch close to the outer edges and on top of the sashingCut away excess background fabric, leaving a 1” (2,5cm) margin.
74. Fold the backing fabric towards the edge of the placemat and then one more time to cover the edges. Make the corners mitered. Topstitch close to the folded edge, about ⅜” (1cm) from the outer edge
Try our embroidery digitizing software free for 30 days!