 United States
Valentine Candy Bags
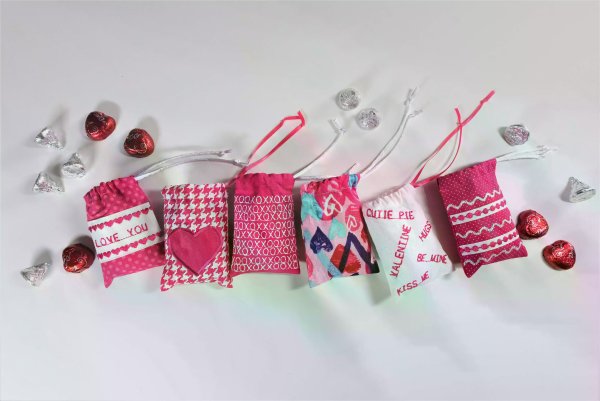
Make these tiny treat bags to share something sweet with your valentine! We’ll start with instructions for how to make a basic bag, followed by some tips and hints for added bags with added embellishments if you would like to customize yours.
Basic Bag Instructions - What you need: 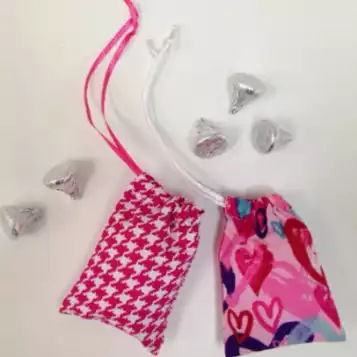
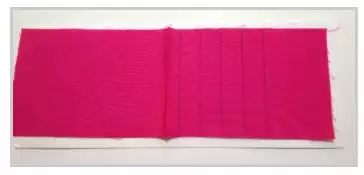
- Various cotton fabric scraps 3½” x 10” (8.9cm x 25.4cm)
- Drawstring cord (rattail, ribbon, etc) 12” (30.5cm) for each bag
- Tear-away stabilizer scraps
- All-purpose sewing thread
- Safety pin
- Water-soluble fabric marker
- Ruler
Sewing Directions
1. For each bag you want to make, cut a fabric piece that measures 3½” by 10” (8.9cm x 25.4cm) Note: Below are instructions for making a basic bag.
Tips for how to embellish the various bags shown in the photo on the first page will follow.
2. On the wrong side of the fabric, use a water soluble fabric marker to mark a fold line 1½” (3.8cm) from each end.
3. To help prevent edges from unraveling, use a zigzag stitch to finish the long edges.
4. With the right sides of the fabric facing, fold the fabric in half, bringing the short ends together. Pin along the sides.
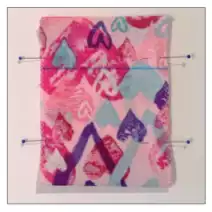
5. Using the edge of the presser foot as a guide, sew along the sides of the bag from the bottom to the fold line marking, reinforcing the beginning and ending of the seams with backstitching. Turn the top edge a scant ¼” (6mm) and press under.
6. To form the casing for the drawstring, fold the top edge down to the fold line marking and pin in place.

7. Stitch close to the folded edge.
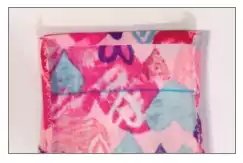
8. After stitching both casings, turn the bag right side out and press. To thread the drawstring cord or ribbon through the casing openings, attach a safety pin to one end of the cord and thread through the first hold, going all the way around and coming out the casing hole. Tie to secure.

Ideas for Embellished Candy Bags
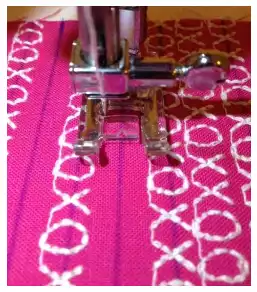
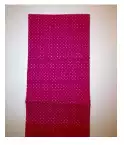
“Hugs & Kisses” - Stitch a combination of X’s and O’s across the fabric to create a fun texture! 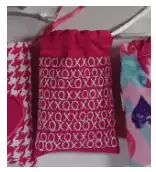
a. Fold the bag fabric in half, right sides together, to determine the half-way mark, then press a crease. Open the fabric flat. Using a water-soluble fabric marker, mark lines above the centerfold at ⅝” (16mm) intervals, stopping about 2” (5cm) from the end (this is where the casing will be). Place a piece of light tear-away stabilizer under the fabric.
b. If your machine stitches include lettering fonts, program a combination of X’s and O’s into a sequence long enough to cover the width of the bag fabric. Attach a Satin Stitch Foot or decorative stitch foot and thread the machine with your desired thread color. Center the foot over the drawn line and sew all rows.
c. Using the fabric marker once again, draw new stitching lines in between each of the stitched rows. Stitch the X’s and O’s on the newly marked lines.
d. When all stitching has been finished, spritz the fabric with water to remove the drawn lines. Construct the bag following the “Basic Bag” instructions.
Heart Applique - Use a zigzag stitch to embellish your bag with a simple applique! 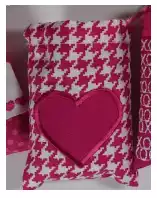
a. Draw a heart about 2” (5cm) wide on the paper side of a small scrap of fusible web. Cut out the heart, then peel away the paper. Set aside for now.

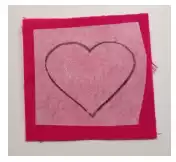
b. Fold the bag fabric in half, wrong sides together, and crease the bottom fold. Position the heart onto the lower area of the bag’s front. Fuse in place, following fusible web manufacturer’s recommendations.
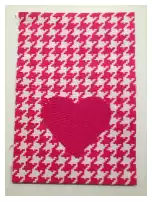
c. Attach a Satin Stitch Foot, Open Toe Foot, or decorative stitch foot. Set the machine for a Stitch Width of 4 and a Stitch Length of 0.3. (Note: Stitch Length setting may need to be adjusted depending on the weight of thread being used, so it is recommended that you test on a scrap fabric first to determine exact satin stitch settings for your machine). Stitch around the heart, enclosing the edges of the applique.
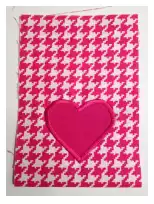
d. When the applique is finished, construct the bag following the Basic Bag instructions.
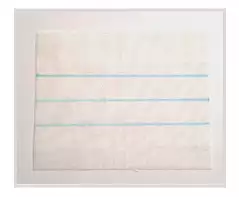
Ribbons and Decorative Stitching - Create interesting surface design by attaching ribbons with decorative machine stitching!
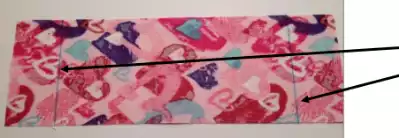
a. With wrong sides together, fold the main bag fabric in half and crease at the bottom. Open the fabric flat. Using a water-soluble fabric marker, mark two stitching lines - one about 1” (25mm) up from the crease, and the other about 1⅛” (3cm) above the first.
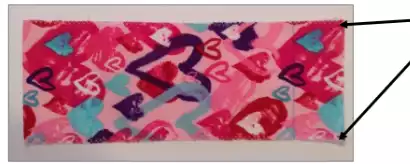
b. Attach an Open Toe Foot and select a decorative stitch. Cut a piece of ribbon that is a little wider than the bag fabric. Place the ribbon over one of the stitching lines, then center the ribbon under the foot. Stitch to secure the ribbon in place. Repeat for the second drawn line.

c. Select another decorative stitch. Place fabric so the left side of the foot rests along the right edge of the ribbon. Using the ribbon as a guide, stitch across the fabric.
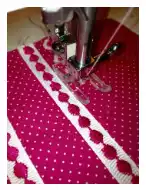
d. Center the foot in between the two ribbons and stitch across the fabric. When stitching is finished, construct the bag following Basic Bag instructions.
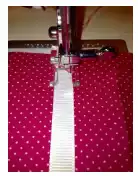
Words of Endearment - Use randomly placed text on this gift bag to express yourself! 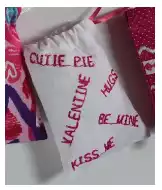
a. With wrong sides together, fold the bag fabric in half and crease the fold. Open the fabric flat.
b. If your machine includes lettering fonts, program a word or phrase that you want to stitch.
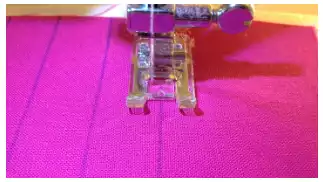
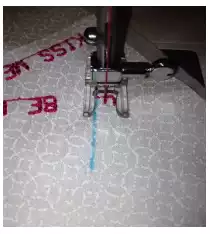
c. Attach an Open Toe Foot. Stitch out the word or phrase first on a fabric scrap, making sure to use light tear-away stabilizer under the fabric. After stitching the word or phrase, measure it with a ruler, which will help indicate how much space the text will need on the bag. In this example, the text is 2” (5cm) long.
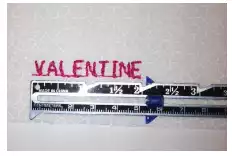
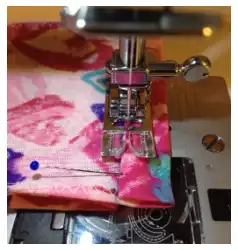
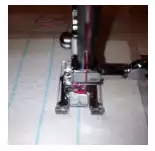
d. Using a water soluble fabric marker, mark a line on the desired location that is the length of the text. Line up the left toe of the presser foot with the line, as shown below. Stitch the text using the drawn line as a guide.
e. Continue stitching more words and phrases on the fabric, as desired. Once stitching is finished, spritz the fabric with water to remove the lines. Construct the bag following the Basic Bag Instructions.
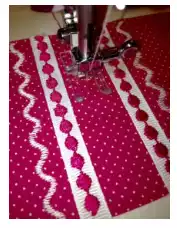
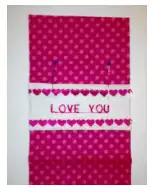
Text and Hearts - Stitch rows of decorative hearts to “frame” your words of expression. 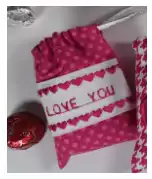
a. With wrong sides together, fold the bag fabric in half and crease the bottom fold. Open the fabric flat.
b. Cut a piece of solid contrasting fabric about 2½” x 4” (6.4cm x 10cm). Using the fabric marker, mark three lines approximately ⅝” (16mm) apart across the fabric.
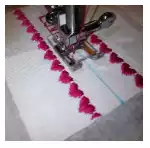
c. Select a “Heart” decorative stitch. Attach a Satin Stitch Foot or decorative stitch foot to the machine. Place light tear-away stabilizer under the fabric. Line up the front notch of the foot with one of the outside lines on the fabric. Stitch, using the drawn line as a guide. When finished, stitch the hearts across the other line (leave the center line free).
d. Program the desired text (in this example, LOVE YOU was used). Stitch the programmed stitch sequence between the rows of stitched hearts.
e. Turn under the top and bottom edges of the stitched fabric piece ¼” (6mm) away from the stitched hearts. Position this piece so it is centered onto the bag front fabric, with the bottom edge of the stitched piece 1” (25mm) from the fold. Pin in place. Stitch close to each edge of the embellished fabric piece to attach it to the main bag fabric. Spritz with water to remove the marked lines.
f. Construct the bag following the Basic Bag Instructions.