United States
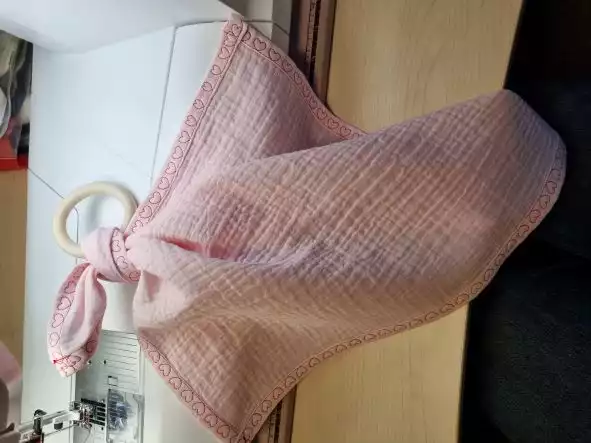
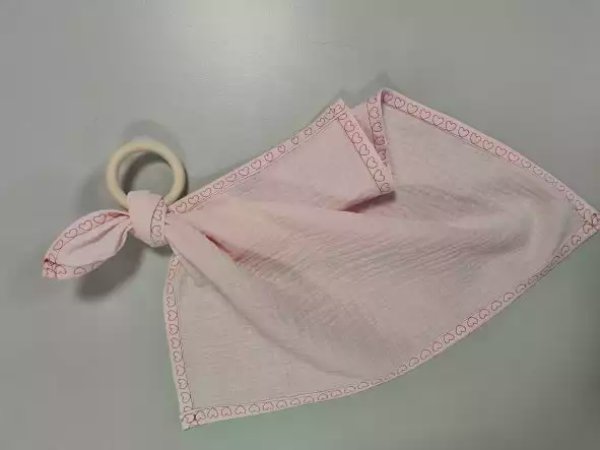
Teething Ring Blanket
Make your toddler or newest addition to the family your valentine this year with this easy to make heart themed blanket. This beginners project will get you started with the basics of sewing.
If you want a bigger challenge you are welcome to check out another version of this project which includes how to sew nice mitred corners. LINK TO “How to “Sew Mitered Corners”
What you need:
- Muslin fabric 20”x20” (50x50cm)
- Sewing thread
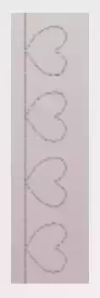
- A heart stitch
- Standard presser foot or edge foot
- Iron and ironing board
- Ruler
Cutting the fabric
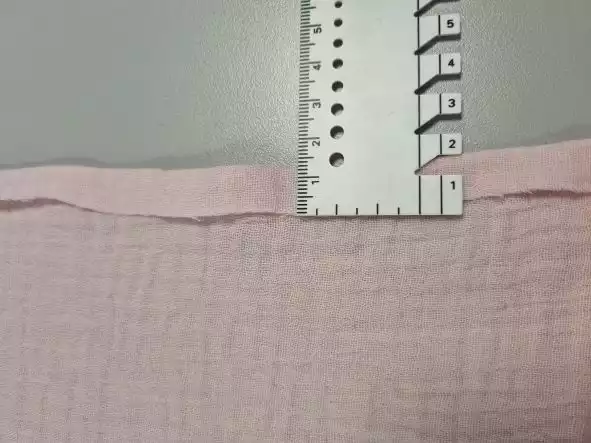
Start by cutting out a square 20”x20” (50x50cm) of your fabric.
Prepare the edges
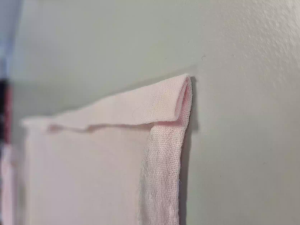
With an iron, press the edges 1/2” (12mm) to the wrong side, do this on all four sides.
Tip: if your fabric has a tendency to stretch itself out, be careful with the ironing to not stretch the fabric even more, but instead try to keep the fabric in place. Much can be prevented with the right ironing technique.
Then fold and press the seam allowance once more. Start by doing this on 2 of the sides, opposite to each other. (Once these two sides are sewn, you will do the last two sides as well.)
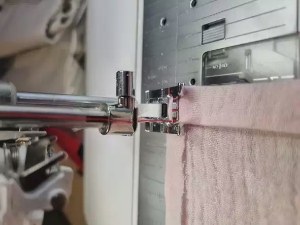
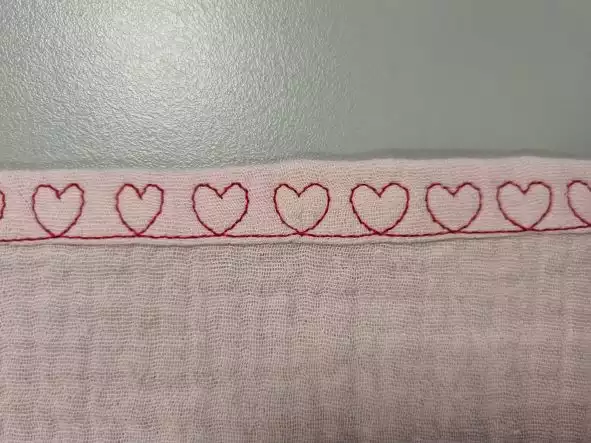
Sew the edges
Go to the sewing machine and select a heart shaped stitch. What is good with the one I have chosen is that it is a straight stitch to the left side which completely closes the folded edges of this blanket.
Use a standard presser foot or an Edge foot.
With your handwheel, pull down the needle at the position where it is just inside of the seam allowance/folded edge (1-2 mm inside) and start sewing. Don’t forget to fix the thread at the beginning and end of the seam using a fix or reverse button.
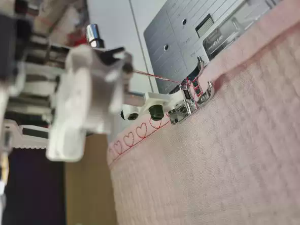
Tip: You can use pins if you want to secure the folded edge even more.
Also, some fabrics can stretch a bit during sewing, to prevent a not so good looking result, make sure not to pull the fabric during sewing and keep the corners nice and aligned so there is no excess fabric when you come to the end of your seam.
Now go back to your ironing board. Press to finish the 2 edges you have just sewn, and fold and press the last two edges to prepare them for sewing.
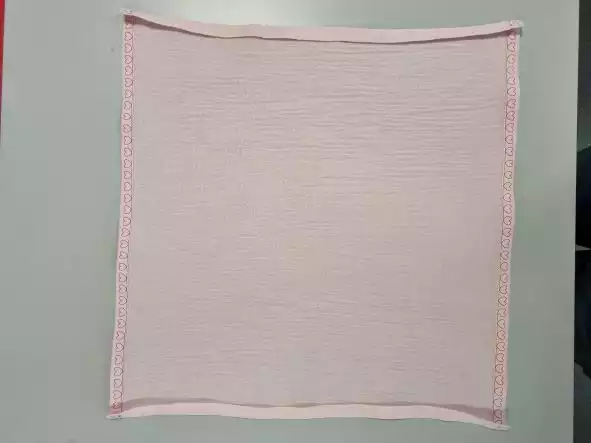
Go back to the sewing machine and finish the last two edges the same way as the others. Give them a last press, and that’s it!
Attaching the blanket to the ring
Knot the blanket around the biting ring with a standard knot, and you are done!