United States
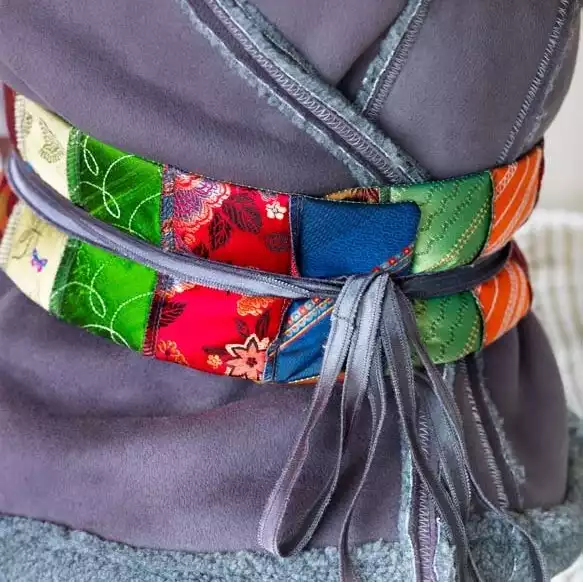
Overlock Belt
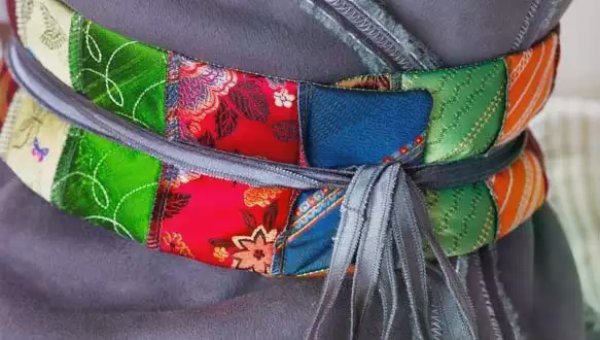
Repurpose old neckties into something new!
Use your overlock and a 4-thread overlock stitch to create this belt. The cool thing is that anything goes! If you don't have any neckties laying around, use other scraps of fabric.
You need:
- Overlock machine
- 5-10 old neckties with different colors and pattern
- 6" x 55" (15 x 140 cm) silk fabric for the backing
- 6" x 55" (15 x 140 cm) fusible batting
- 5 yard (4,5 m) grey ribbon or 1/4 yard (23cm)
- Grey silk fabric for making your own ribbon
- 4 spools grey overlock thread
- Sewing thread matching the backing fabric
- Seam ripper
- Pins
- Cutting Mat
Note: 1/4" (6 mm) seam allowance is included in all measurements.
Cut
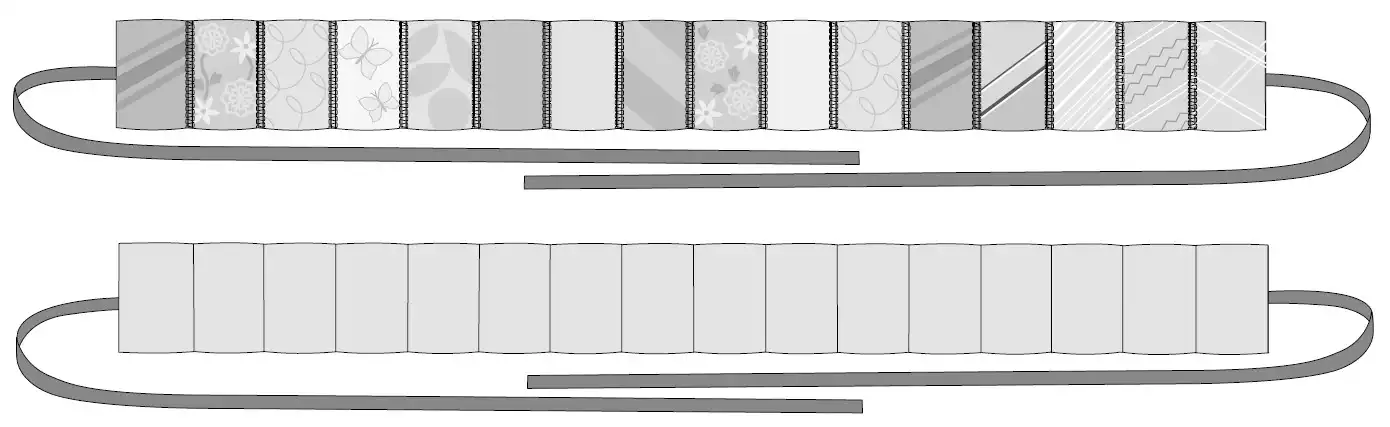
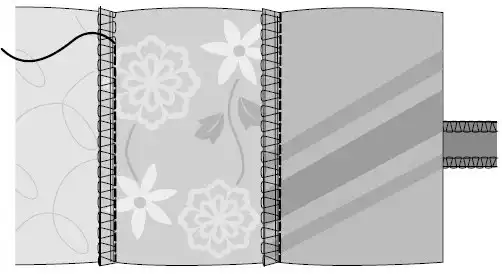
Carefully open the back seams of the ties using the seam ripper. Press the ties flat. Measure your waist. Divide the waist measurement by 6 (the finished width of the pieces). This is the number
of pieces you will need. From the ties, cut pieces 3"x 6" (7 x 15 cm). The number of pieces of each tie depends on how many different ties you are using. Arrange the pieces in an order you like. View illustration.

Sew
Thread your overlock machine with grey overlock thread and set it for 4-thread overlock. Start to sew the two first cut tie pieces, wrong sides together. Continue with all the other pieces. Press all the seam allowances in the same direction.
Make sure the length of piece matches the width of your waist. If not, add more pieces or take away pieces until it fits you comfortably. Cut the width of the belt down to 4" (10 cm) or to the width you want. Press fusible batting to the wrong side. Cut the backing fabric the same size.
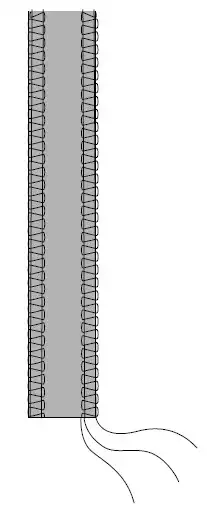
Make ribbons:
From grey silk fabric, cut two 1" (2,5 cm pieces) x the width of fabric. Set the overlock for three thread narrow edge. Before you start to sew, test sew on a scrap of fabric and adjust if necessary. Overlock both sides of the pieces. When overlocking the second side, let the left edge of fabric follow the left edge of presser foot. That will make a ⅝″ (1cm) wide ribbon.
Pin the ribbons at the right side of the short ends of front piece. Set your sewing machine for straight stitch and sew the ribbons in place.
Place the backing piece on the right side of front piece and pin in place. Sew around all sides, and leave a 6" (15 cm) opening, on one of the long sides. Press the seam allowances. Turn to right side through the opening. Press. Close the opening by hand stitching.
To keep the layers together and to get a fashionable, quilted look, sew along each overlock seam through all layers.
Finished!