 United States
Open Heart Quilt
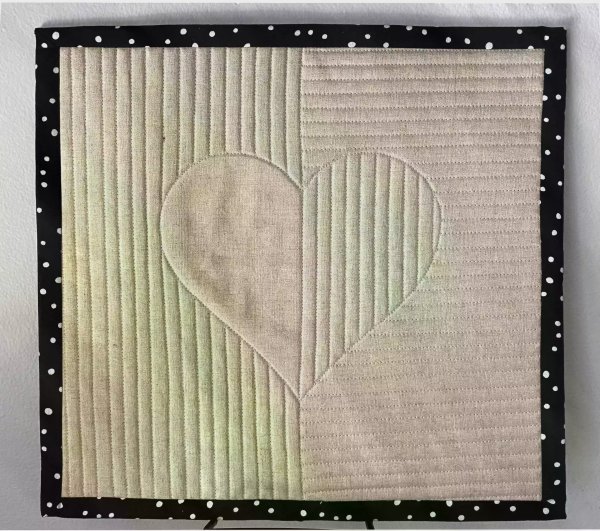
Open your heart to the art of quilting with this simple project. Create this 12in (30cm) block for a fun introduction to relief quilting that you can make into a mini quilt wall hanging or a pillow or more.. It’s amazing to see plain fabric transform into a modern design that fits any space.
What you need:
- ½ yard (45cm) or one fat quarter of plain cotton
- Foam batting
- Thread matching the fabric
- Fabric Marking tool
- Ruler/straight edge
- Quarter inch foot
- Spray fabric adhesive
- Printed template (on last page)
- Optional: Open toe foot
Preparing Fabric
- Before doing anything, make sure to iron your fabric so you have an even surface to work with.
- Cut one 14” (36cm) square of fabric.
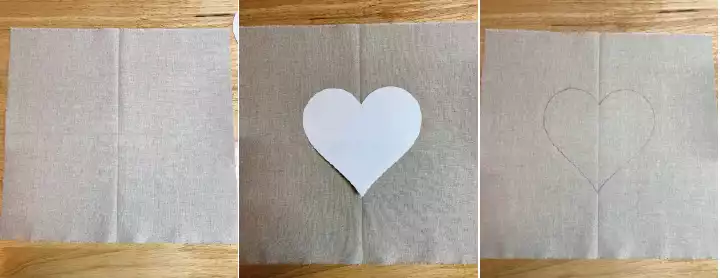
- Cut out your heart template.
- Find the center of your fabric by folding it in half both ways and then do the same with your heart template.
- Line up these folds and trace your heart in the center with your fabric marking tool.
- Cut your foam batting into a 15in (38cm) so it’s slightly larger than your fabric.
Tip: If your foam batting has folds in it, set your iron to a lower setting and use a lot of steam to get it flat.
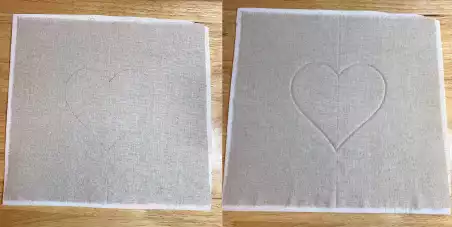
- Spray one side of your foam batting with the fabric adhesive. Lightly lay your fabric down centered on the batting and when you are happy with the placement smooth the fabric out from the center outwards.
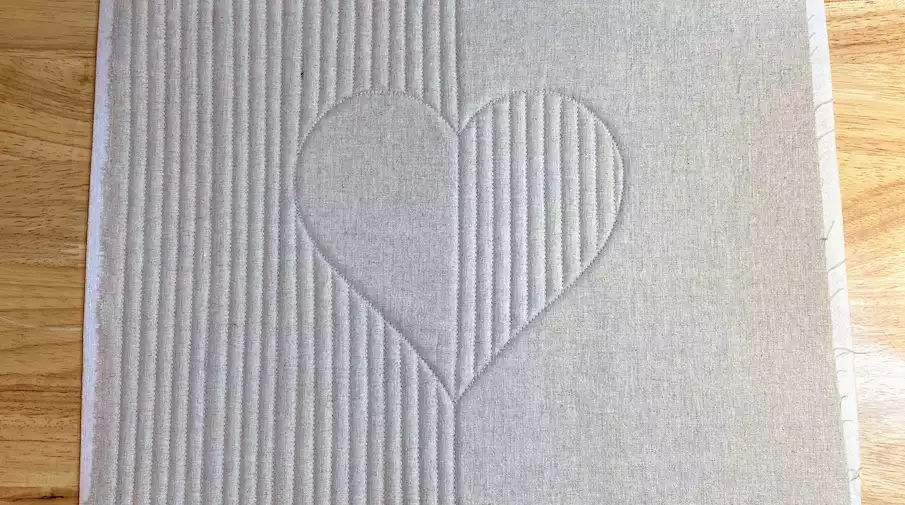
Sewing the Design
- Sew the outline of the heart. You’ll see the difference the stitching makes immediately!
Tip: Using an open toe foot will give you the best visibility of your traced line.
- Now since we don’t always sew perfectly on our traced lines, mark the new center based on the points of your sewn heart.
- Attach your quarter inch foot and start sewing to the left of the line on either side of the heart. Continue all the way to the end of the fabric.
Tip: Flip your fabric after each line so you are sewing in opposite directions for each line. Also, if you feel like you are starting to get off slightly, use a ruler to mark where the next ¼” line would be with your fabric marking tool.
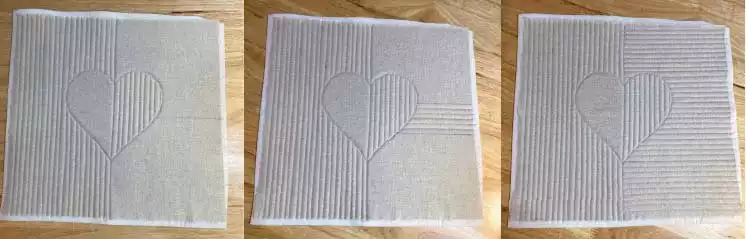
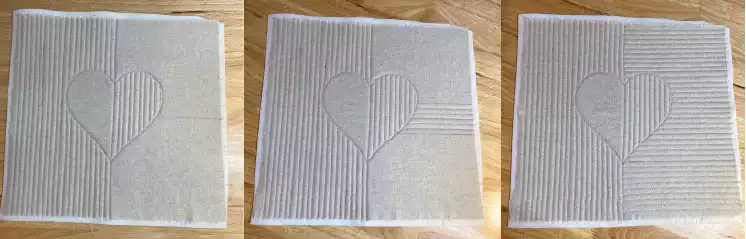
- Repeat this same process inside the heart on the opposite side.
- Mark the center of the otherside. Sew along this center line and then repeat the process sewing from the center outwards.
- Trim your block down to a 12.5in (32cm) square and create something great! You can add a back and bias tape around the edges to create a mini quilt wall hanging like I’ve done or you can make a pillow, a bag, this is easy to fit into a wide variety of projects.

© mySewnet Studio