 United States
It's a Snap Bag
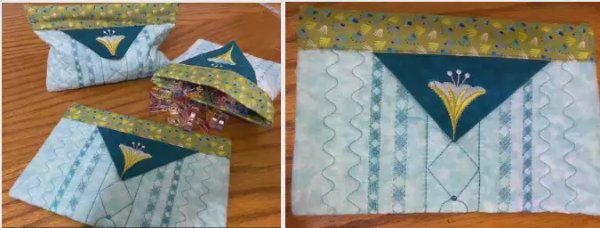
Make this fun and easy Snap bag that has so many uses. They can be made in any size. It is perfect to hold sewing supplies - like my quilt clips! But can be used for crayons, small toys, make up or even tablets!! Make a really small one for a gift card holder. There are no zippers, buttons or snaps - but it will be a “snap” to make!! Your embellishment options are endless, everything from decorative stitches to optional embroidery! See examples of others at the end.
What you need:
3 coordinating or complimentary fabrics cut to the measurements below
- 12” x 10” (30x 25cm) cotton fabric for outside of bag
- 16” x 10” ( 40x25cm) cotton print for lining and top edge of bag
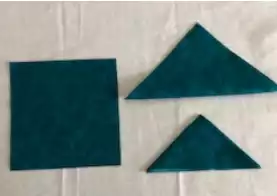
- (2) 6” x 6” (15x15cm) for triangle points
- 12” x 10” (30x25cm) cotton batting or felt
If you want your decorative stitches to show - then your outside fabric should be a solid ot tone on tone. If you want to add embroidery to your triangle pieces, then they should also be a solid or tone on tone.
- ¼” piecing foot
- Multi Line decorative foot
- Edge Joining or Narrow Edge Foot
- Sewing thread to match your lining fabric
- Sewing bobbin
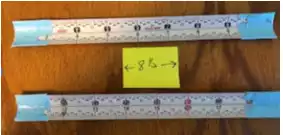
- (2) pieces of metal tape measure cut to 8 ½ ” (21,5cm)
- Duck tape or electrical tape
- Straight pins or quilting clips
- 6” (15cm) ruler
- Ironing station
Prepare
1. Fold the 6” (15cm) squares in half diagonally. Fold in half again and press. Set aside
If you want to add embroidery to your triangles like I did - you want to do that now. I folded and pressed my triangle first - so that I could see where my design needed to be placed - as well as how big it could be. Unfold your triangle. Hoop your stabilizer and use the basting function in embroidery mode to hold your fabric in place. Use your design placement program to position your design of choice and complete your embroideries on both pieces.
2. Cover each end of your tape measure with the duct tape or electrical tape. The ends will be sharp, so covering them protects you and keeps the sharp metal edges from cutting your fabric. Set aside.
Sew
First we are going to quilt the 3 layers of fabric together using decorative stitches.
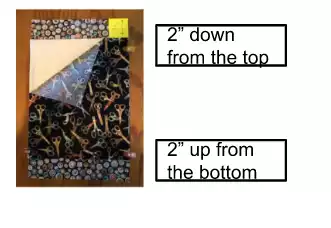
3. Place your lining fabric right side down. Measure down 2” (5cm) from the top of your lining and place the batting piecedown. Put your front piece on top of the batting with the right side facing up. Pin or clip to hold the 3 layers together. You should have an extra 2” (5cm) of the lining fabric showing at the top and at the bottom.
4. Choose any decorative stitches from your machine and starting at the top middle of the 3 layers, stitch from top to bottom. You can stitch several rows of decorative stitches, spacing then as desired. The Multi-Line Decorative foot is very helpful for spacing. Or if your machine has a projected guide line capability - you can use that. You might want to adjust your stitch length to be a little longer since you are sewing through 3 layers.
5. Your last rows of stitching should be about 1 ½” ( 4cm) from the sides.
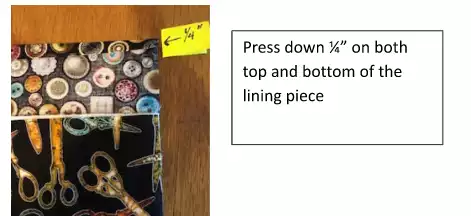
6. Turn the top and bottom edges of the lining fabric down; wrong sides together. ¼”(6mm) and press.
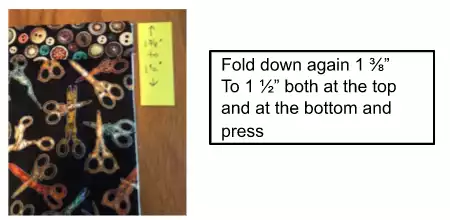
7. Fold again, over the top of the outside fabric piece. Press in place. You should have about 1 ⅜” to 1 ½” (3,5 to 4cm) folded down on both top and bottom. Make sure both ends are folded down the same amount. Clip or pin the edges to hold in place.
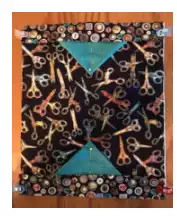
8. Slip the triangle pieces in as shown; making sure you have them centered and at least ¼”(6mm) of an inch of the triangle under the fold. If you embroidered your triangles, make sure the embroidery is right side up.
9. Select a straight stitch, adjust stitch length to 3.0.
10. Line the folded edge of the lining fabric (the folded edge that the triangle is inserted into) against the blade on your foot. Adjust the needle position so that you sew on the lining fabric - close to the fold. This will sew your lining fabric down and secure your triangle at the same time.
11. Take your 2 pieces of tape measure with the taped ends and slide one into the casing at each end. Slide it in so that the slight curve of the tape measure is curving towards the inside of the bag.
12. Fold your bag in half right sides together and stitch the sides with a ¼”(6mm) stitch. Use your ¼” foot for this. Be sure to sew forward and backwards at the beginning and end to secure your stitching. Also make sure the tape measure is out of the way!!
13. Turn right side out and you are finished!!! Pull the triangles to open your bag, then just let it “snap” closed again!
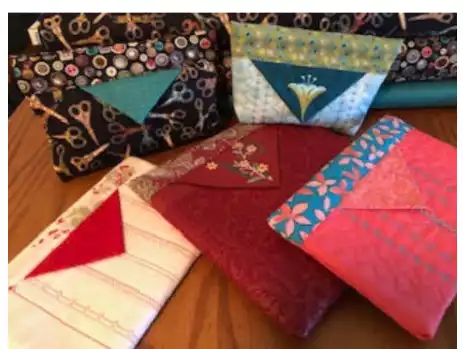
Just think of all the creative opportunities in this bag! You can easily adjust the size to accommodate your purpose, just cut your lining 4” (10cm) longer than your outside piece. Cut your tape measure pieces 1 ½” (4cm) shorter than the width of your pieces.
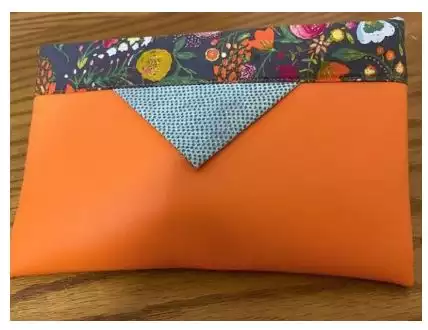
Experiment with different fabrics. The orange fabric is a marine vinyl.

On this one I made it bigger to fit my tablet. I used faux leather for the outside and did an all over embroidery design that I got from the mySewnet Library, this gave me the look of embossed leather (Search in the library for single color designs).Then I embroidered a monogram on the triangle. Since I was using leather - I actually cut a triangle shape instead of folding a square so that it wasn’t too thick. I also made ones for each of my grandchildren with their names on them to hold crayons, matchbox cars or small treasures!! Make more and have fun sewing!!!