 United States
How to Sew Laser Stitches Part 1
Create a unique embellishment using Laser Stitches in menu”I” on HUSQVARNA VIKING DESIGNER EPIC II.
What you need:
- HUSQVARNA VIKING DESIGNER EPIC ll
- Fabric
- Stabilizer
- Tread in desired color
- Fabric Marking Pen
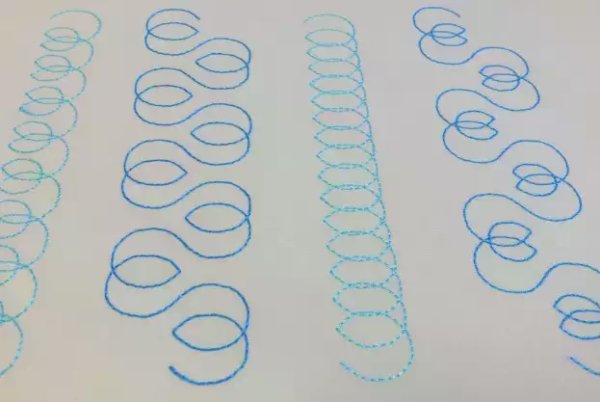
The principle of Laser Stitches
Laser Stitches are designed to make you able to create your “own” large pattern with the help of the "building blocks” you find in Menu I on Designer Epic ll
Combining these stitches with each other or with themselves can give you a wide range of unique patterns.
Sewing large stitches is challenging, the Laser guide is a great help in this mission. (hence the name of the stitches) Each stitch repetition has an automatic stop at the end, which also helps you to align and correct the sewing direction all the time. This automatic stop also gives you the possibility to create your design instantly by mirroring the current stitch, use another stitch or change the sewing direction.
Tip:
It is important that you sew each stitch till the very end till the machine stops automatically. Use the Start/Stop button.
Deactivate the Automatic FIX in Default sewing settings. Since you sew the stitches connected to each other, there is no need to fix at each start.
Activate Needle Down function, that helps you to keep your fabric in position when you reach the end of the current repetition.
Preparations 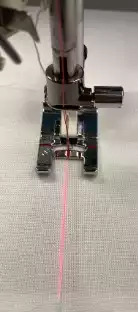
Draw a straight line with a (erasable) Marking Pen on your fabric. Put a stabilizer underneath your fabric.
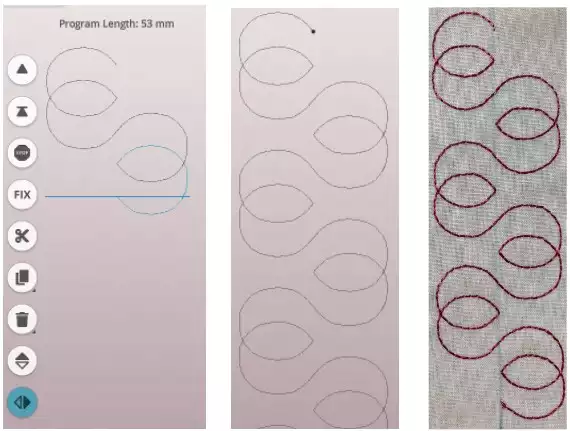
Go to menu I in your Epic II and select the stitch you want to work with. In this example stitch I:24 is selected. Snap on Presser Foot S. Activate the Laser Guidance, make sure that the laser line is centered.
Sewing
Activate needle down function and start sewing. Sew till the machine stops automatically. The stitch should start and finish on the line.
Continue sewing additional repetitions as long you have reached the desired length of your embellishment.
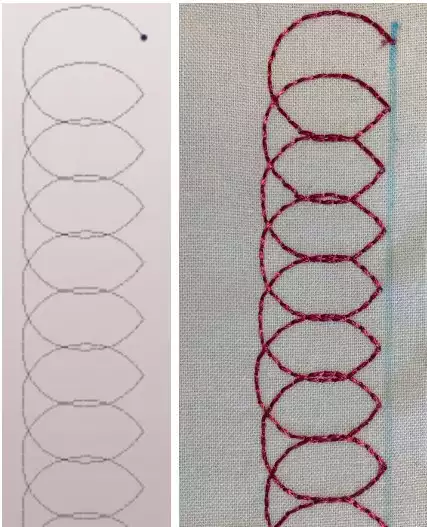
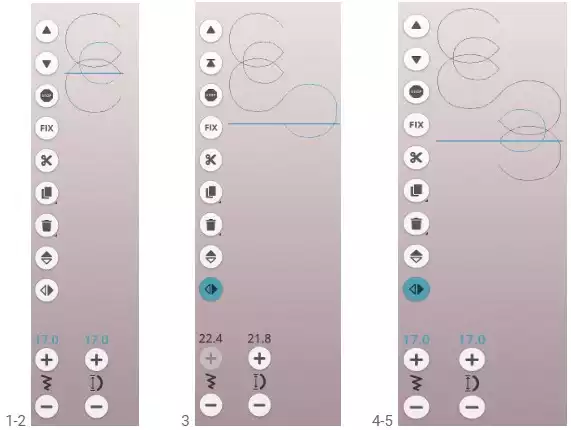
Programming in advance - 1
1. Go to programming, menu I and select I:24.
2. Add two repetitions of this stitch, and mirror the second one sidewise.
3. Touch OK ![]()
Activate needle down function and start sewing. Continue as long as you have reached the desired length of your embellishment. The machine will return to the center line with each stop, which helps you to control if you are on the right course or if you need to adjust the direction to be able to follow the straight line.
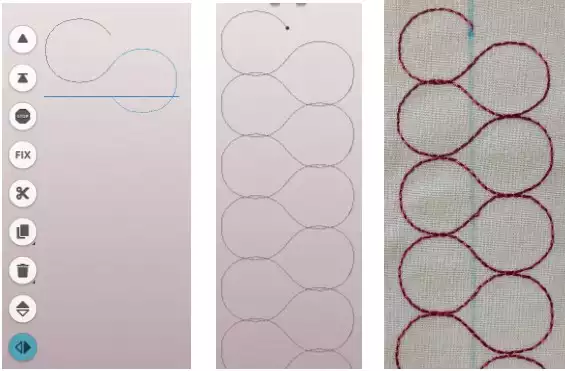
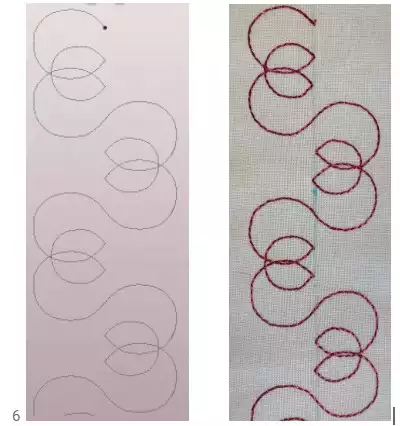
Programming in advance - 2
1. Go to programming and select stitch I:24 and add three repetition of it.
2. Mirror the third repetition and touch Duplicate.
3. Touch OK ![]()
Activate needle down function and start sewing. Continue as long as you have reached the desired length of your embellishment.The machine will return to the center line with each stop, which helps you to control if you are on the right course or if you need to adjust the direction to be able to follow the straight line.
Activate needle down function and start sewing. Continue as long as you have reached the desired length of your embellishment. The machine will return to the center line with each stop, which helps you to control if you are on the right course or if you need to adjust the direction to be able to follow the straight line.
Tip: You can sew Laser Stitches also on a curved line. The process is exactly the same but you follow a curved line instead of a straight. The stitches will be evenly spread along the curved line.
