United States
Velvet Knot Headband

This headband is a quick and easy project using stretch velvet. This headband can easily dress up an outfit. It is a great project for when you are starting out sewing and working with stretch fabrics. You can easily add ribbon to the end where the headband is sewn together for a cleaner look.
What you need:
- Sewing Machine
- Roller presser foot
- ½ yard stretch velvet
- Stretch needles
- Thread
- Rotary cutter/scissors, ruler, and mat
- Hand sewing needles
- Ribbon (optional)
Cutting and prepping fabric
1. Cut two strips of the stretch velvet measuring 20.5” x 4”, (test this and add or take away length as needed), make sure that the strips are cut with the stretch going around your head.
2. Fold fabric in half lengthwise, with right sides together and raw edges lined up.
3. Due to the nature of velvet to creep when sewn, I recommend hand basting the strips instead of pinning to prevent this from happening

Sewing the Headband
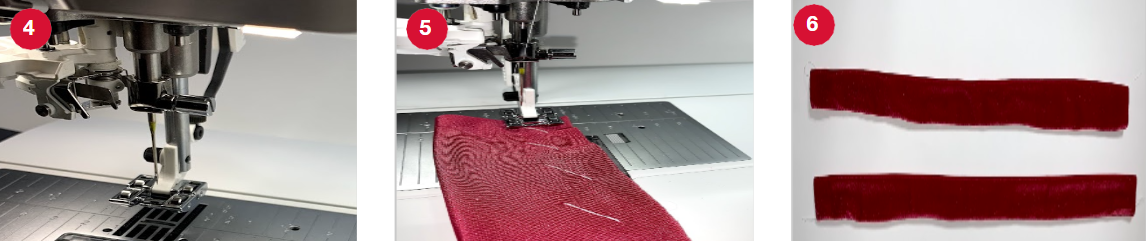
4. Attach the roller foot to the machine and change the needle to a stretch needle, you will also want to test the stitch width and tension on a scrap piece of velvet to make sure you have the right settings
5. Once the machine settings are correct, it is time to sew the sides of each stip together, I used a ⅝” seam allowance
6. After you have stitched the sides of each strip, remove the hand basted stitches and turn them right side out
Creating the Knot
7. To create the knot, take and fold each stip in half as shown, the unstitched ends should be together so that you have a loop at the other end
8. Take and feed one strip through the other so that the loops create the knot, as shown
9. With the two strips looped together, you will stitch the ends of each loop together

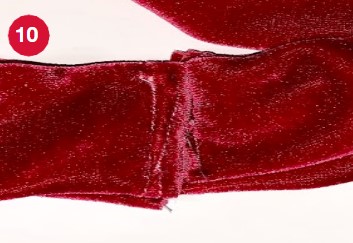
10. Stitch the 2 ends together to connect the headband and form a circle. You can choose to add ribbon or other decoration to cover the seam.