 United States
Photo Stitch Fun
Welcome to mySewnet embroidery Newsletter. Many of you may have created portraits from photos with the easy steps in PhotoStitch, but today, we’ll also take a look at stitches with a different twist! Let’s explore the PhotoStitch Wizard / Assistant, found in the Create tab in mySewnet Embroidery module/app, Platinum level.
With 30-day Free Trial of mySewnet Embroidery Software you will get to try out the most user-friendly and feature rich digitizing software on the market. It works with all embroidery machine brands and is available for both Windows and Mac.
With a few simple steps, PhotoStitch quickly transforms an image into thread painted stitches!
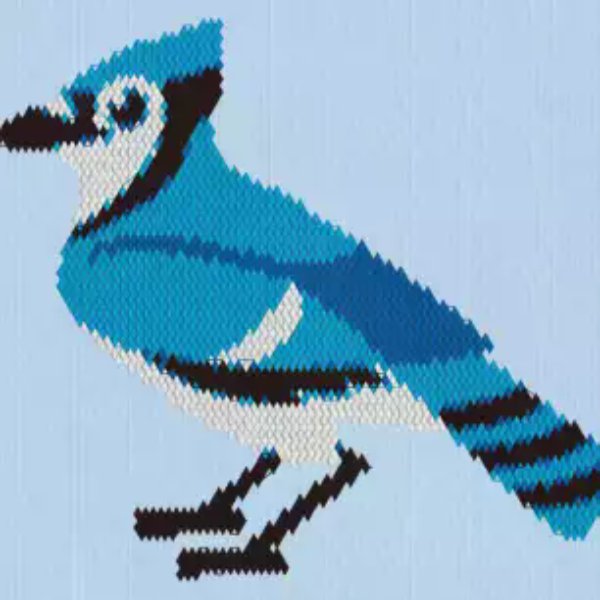
Blue Jay designed from Samples, Digitizing, Pics, Birds 4. PhotoStitch Wizard/Assistant, PhotoStitch Into Hoop, Create Color Tile PhotoStitch Embroidery, Flood Erase background color, Autolevel, Diamond Tiles, 3mm, Satin, Side-to-side.
Features of the PhotoStitch
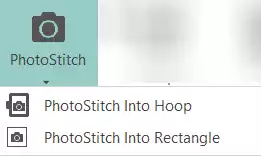
The PhotoStitch Wizard ![]() is found in the Create tab in the Windows ribbon bar, and in the Control Panel in Mac. Choose PhotoStitch into Hoop to maximize design size in the selected hoop, or PhotoStitch Into Rectangle to drag a box, so you can control the size.
is found in the Create tab in the Windows ribbon bar, and in the Control Panel in Mac. Choose PhotoStitch into Hoop to maximize design size in the selected hoop, or PhotoStitch Into Rectangle to drag a box, so you can control the size.
PhotoStitch recognizes many image file types, and works equally well with a digital photo or a simple drawing or clip-art.
Each PhotoStitch Type has a step-by-step Wizard/Assistant to guide you through selecting a picture, cropping background, adjusting color, selecting threads, and changing up individualized settings for each PhotoStitch Type!
How do I PhotoStitch?
1. Select from five different PhotoStitch Types: 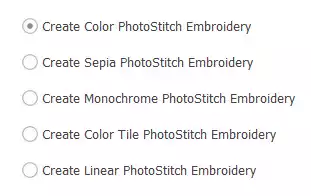
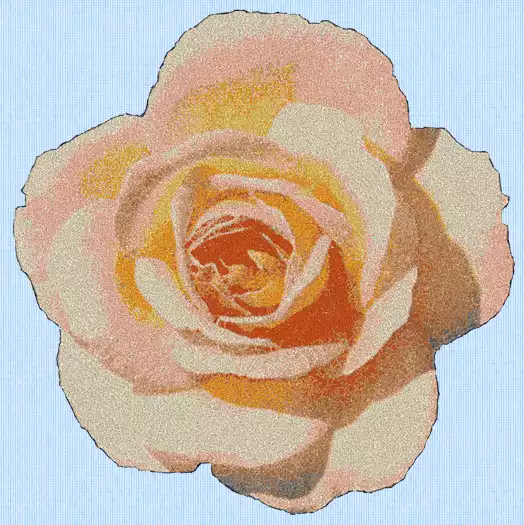
Create Color PhotoStitch crafts a color portrait-style embroidery with blended free-motion style stitches, great for transforming your favorite photo into a memory, or a simple color clipart into texture!
Color Photostitch below designed with the Rose2 image from Samples, Sketch, Pics. Background erased, Autolevel unchecked, Density 1.
Design with a photo to make a color portrait, or with clip-art to make color thread painting.
Create Sepia PhotoStitch Embroidery, great for sepia photos, Sepia PhotoStitch applies the colors with sepia tones (creams through browns) for a more heirloom or software appearance.
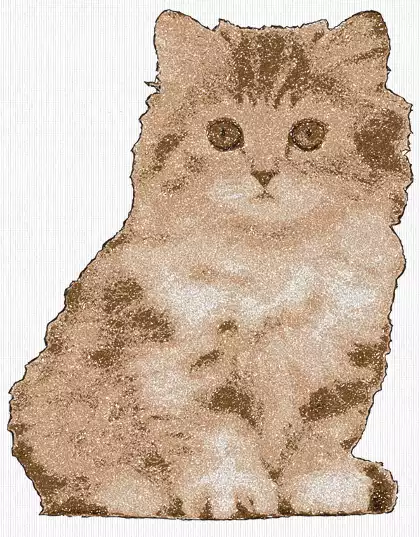
PhotoStitch below designed with PhotoStitch Into Hoop, Create Sepia PhotoStitch Embroidery, Load a Picture, Samples, Embroidery, Photos, KittenNoBackground. Uncheck Autolevel, 7 colors, Density 2, uncheck Enhance Detail.
Create Monochrome PhotoStitch Embroidery blends black, white and gray to produce a monochrome (black and white) finish. Give images a great retro look with monochrome!
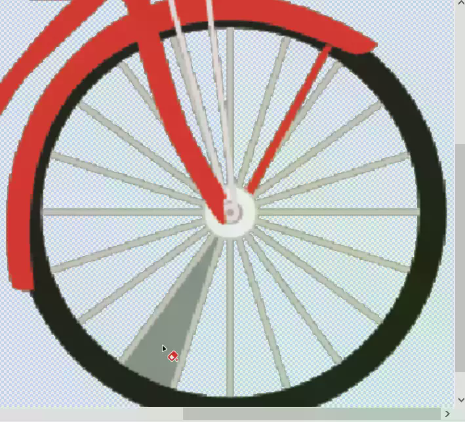
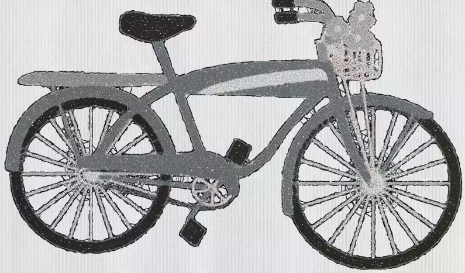
PhotoStitch shown below designed with PhotoStitch Into Hoop, Create Monochrome PhotoStitch Embroidery, Load a Picture, Samples, Digitizing, Pics and Bicycle. Crop to bicycle art, Flood Erase all mid-grey background, uncheck Autolevel, no change in Color Selection.
Create Color Tile PhotoStitch Embroidery is a specialty stitch type that emulates tapestry or needlepoint.
Shown below, PhotoStitch into Rectangle, Create Color Tile PhotoStitch Embroidery, Create New Picture, Insert in Draw & Paint. Design Gallery,
Gallery/Bugs and Insects/ Butterfly 01. Change Line width to 1.5mm. Change body colors to Red in Quick Colors. Close Draw & Paint to return to PhotoStitch Wizard or Assistant. Crop artwork, 3mm Diamond Tiles, Satin stitch with Options Density 4, Side-to-Side.
Inset from Life View, Zoomed and Rotated.
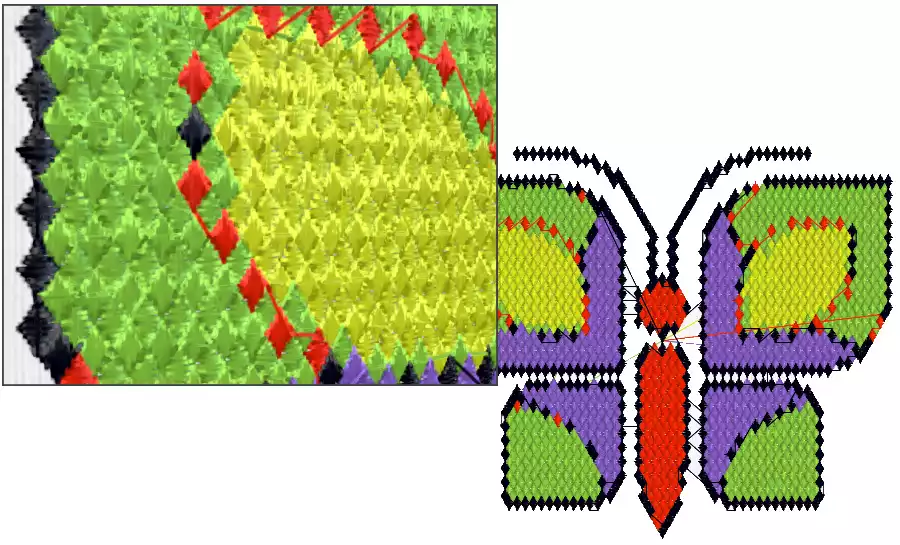
Don’t forget to check out Square and Hexagon tiles, too!
Create Linear PhotoStitch Embroidery has some unique options for stylizing stitches that step outside the box from a portrait to artistic style.
If you are striving to design some out-of the box stitches for embellishing a quilt block, a tote bag, or a simple summer top, Linear PhotoStitch has some very unique options for you!
Shown below, PhotoStitch into Hoop, Load a Picture, Rubber Duck from Samples, Digitizing, Pics. Flood Erase background, checkmark in Autolevel, Thread Color to a deep gold, Artistic Effect at Spiral, Angle 0, Shade Range 0, Shade Range at 10, uncheck Enhance Detail, Scan Depth at 4, and Density at 4.
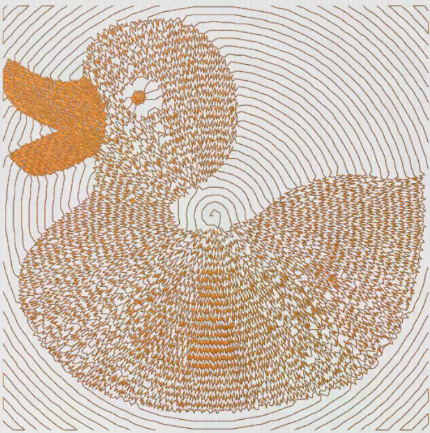
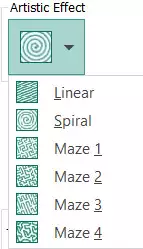
Don’t forget to try out the other types of Artistic Effects as well.
And a Little Bit More!
Are you interested in a PhotoStitch video lesson? Be sure to check out this tutorial by Karina Thompson of the UK education team:
https://www.youtube.com/watch?v=WtBmPeYAiuw&list=UUL54CAAN0zRM6msdbeIoo1Q&index=19
Would you like to take a Photo and produce a Photostitch from your phone? Download the mySewnet App from the Play Store for Android, or from the App Store for iPhone!
Have a fabulous day from the software team at mySewnet Embroidery Software !
Try our embroidery digitizing software free for 30 days!