 United States
Memory Shirt Pillow

A wonderful way to preserve the memory of your loved one is by making a memory pillow out of their shirts. As an added extra, you can embroider a label and add it to the shirt with a motto or message that will remind you of that person.
What you need:
- Sewing machine and embroidery machine
- Overlock machine
- 1 collared shirt (can be long or short sleeve)
- 16” pillow form
- Fabric for the label
- Cut away stabilizer
- Pins
- Iron and ironing surface
- 15” square ruler
- Rotary cutter, ruler and mat
- Chalk marker
- 50wt sewing thread in matching color
- 40wt rayon thread
- 60wt bobbin thread
- Polyester invisible thread
- 3 spools overlock thread in matching color
- Universal needle size 80/12
- Embroidery needle size 80/12
- Open Toe Foot
- Foot with a Guide
- 1⁄4” Foot
- Extension table
- Embroidery foot
- Embroidery hoop 120 x 120mm
- mySewnetTM Embroidery Software (optional)
- Scissors
- Seam ripper
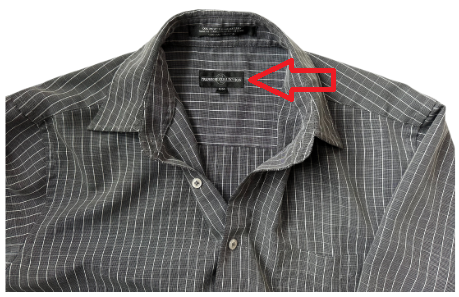
Prepare the Shirt
1. Use a seam ripper to remove any labels inside the shirt.
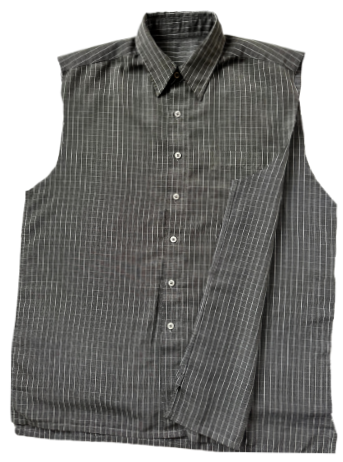
2. Use scissors to cut off the sleeves at the armholes.
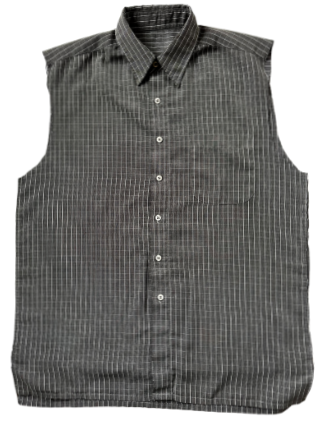
3. Cut open the side seams.
4. Fold the shirt at the shoulder seams and press with an iron.
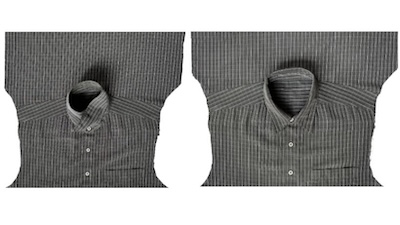
5. Pull shoulder seams towards the back of the shirt until the neck opening is filled with fabric.
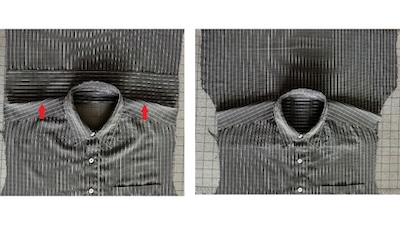
6. Pin the shoulder seams down.
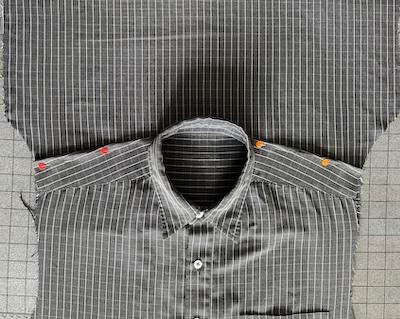
7. Lift up the collar and pin around the front of the neckline.
Sewing Machine Set Up
1. Insert a Universal needle size 80/12 in your sewing machine.
2. Attach the Extension Table; this will give you a larger sewing surface and better support for your project.
3. Thread the top and bobbin with 50wt sewing thread to match the shirt.
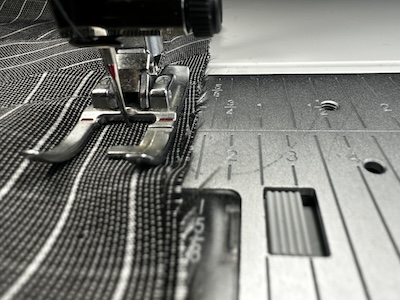
4. Attach the Foot with a Guide.
5. Select a Straight Stitch.
Sewing the shirt
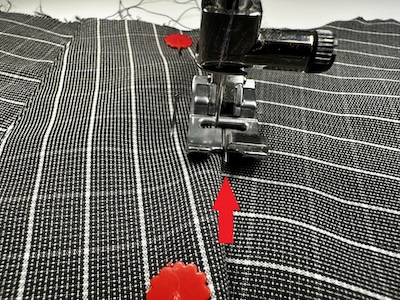
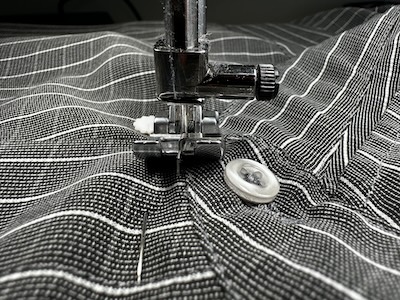
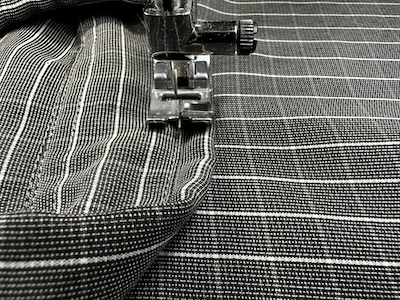
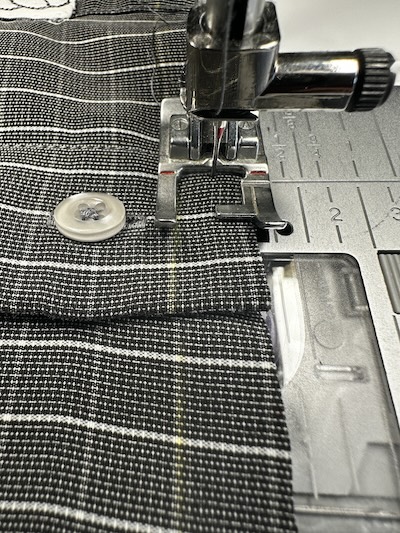
1. Sew along the shoulder seam. Line up the guide against the fold and move the needle position so it stitches into the shoulder seam. Stop when you get to the collar stand.
2. At the collar stand, change the needle position to the center. Pivot and stitch along the collar stand and around the front until you get to the other shoulder seam.
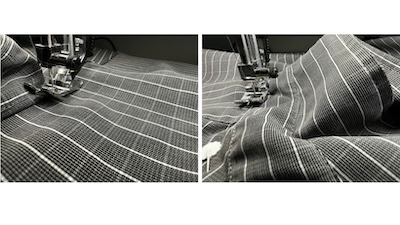
3. At the other shoulder seam, change your needle position so that you are stitching in the shoulder seam.
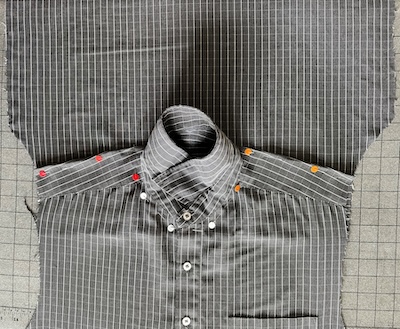
4. Once you have finished stitching fold the collar down.
5. Pin the inside of the collar stand through all the layers.

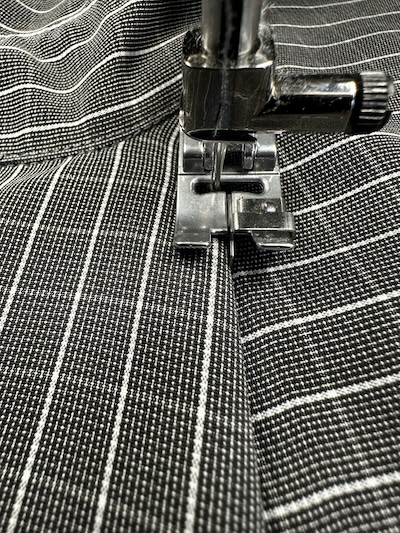
6. Stitch in place along the bottom of the collar stand with the needle in the center position. Stitch as much as you can to secure it in place.
7. Flatten the back collar as best as you can and pin it in place.
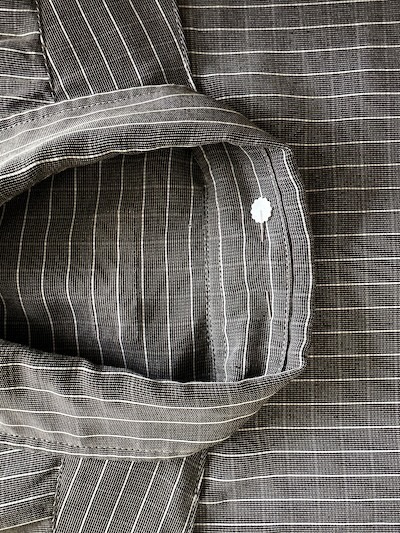
8. Stitch along the collar to hold it in place.
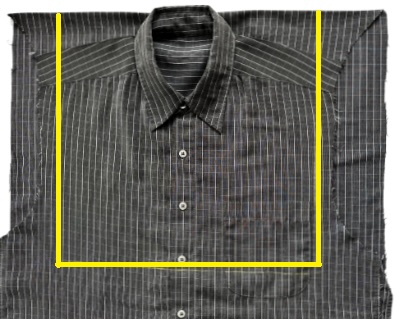
9. Fold the shirt at the upper collar edge. Place on a cutting mat.
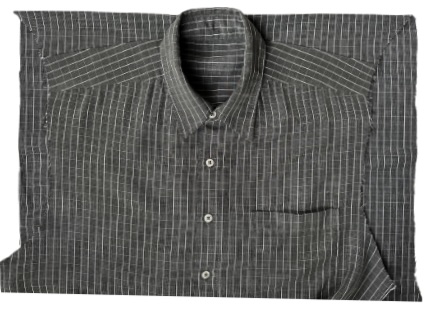
10. Center the 15” square ruler on the shirt and trace around it with a chalk marker.
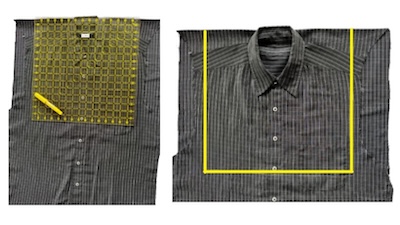
11. Use a large ruler and line up the 1⁄2” line on the ruler with the marked line. Cut a 1⁄2” seam allowance on the three marked sides of the shirt. Set aside.
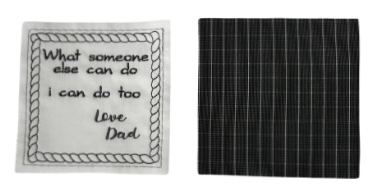
Creating the Label
1. You can create the lettering for your embroidered label using mySewnetTM Embroidery Software or you can use the embroidery
fonts on your embroidery machine.
2. Design your label and add a frame to fit into the 120 x 120mm hoop.

Sewing Machine Set Up
1. Insert an Embroidery needle size 80/12 in your sewing machine.
2. Thread the top with 40wt rayon thread and the bobbin with 60wt bobbin thread.
3. Attach the Embroidery Foot.
4. Attach the Embroidery unit.
5. Load the embroidery design on your machine.
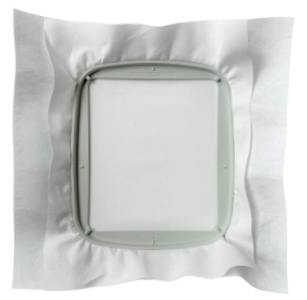
6. Hoop your fabric and cut away stabilizer in the 120 x 120mm hoop.
Tip: If designs are placed close together, e.g. lettering or stitch sequences, turn off the automatic jump stitch trim and cut the threads manually.
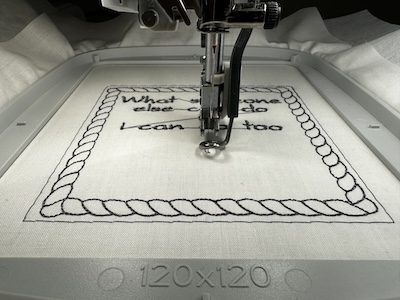
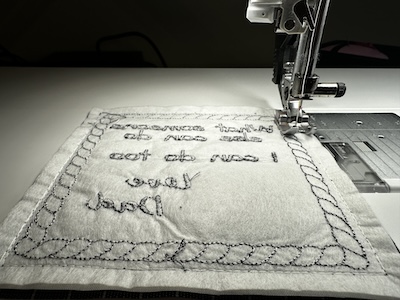
Embroider the label
1. Attach the hoop to the embroidery arm and embroider your label.
2. Once your embroidery is completed, trim the jump stitches.
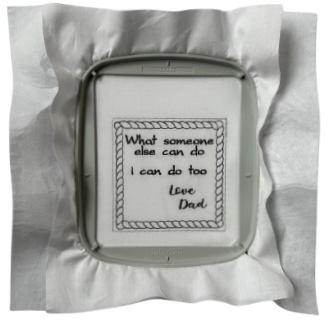
3. Remove from the hoop.
4. Press.
5. Cut to the size you want your label to be.
6. Cut a piece of leftover shirt to the same size, it will be your label back.
Sewing Machine Set Up
1. Insert a Universal needle size 80/12 in your sewing machine.
2. Remove the Embroidery Unit.
3. Attach the Extension Table.
4. Thread the top and bobbin with 50wt sewing thread to match the shirt.
5. Attach the 1⁄4” Foot.
6. Select a Straight Stitch.
Sewing the Label
1. Place and pin the label front and back right sides together.
2.Stitch around the label.
3. Clip the corners on an angle to reduce the bulk.
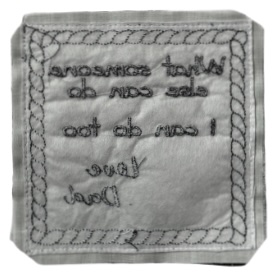
4. Cut a small slit in the back fabric and turn the label through the opening. Push out the corners and press.

Sewing Machine Set Up
1. Thread the top with polyester invisible thread and the bobbin with 60wt bobbin thread.
2. Attach the Open Toe Foot.
3. To create an invisible appliqué stitch, select the Blind Hem Stitch and shorten the Stitch Width to 1.0 and the Stitch Length to 6.0.
Attaching the Label
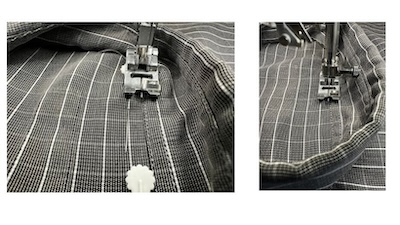
1. Pin the label to the bottom corner of the shirtfront, be sure to position so it will be seen when the pillow is stuffed.
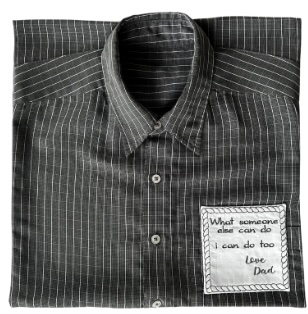
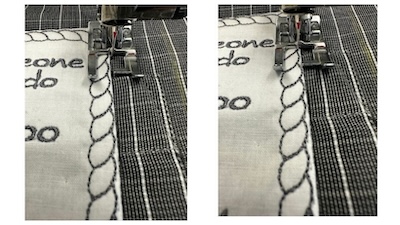
2. Stitch it onto the shirt with the straight portion of the stitch on the shirt and the zigzag portion on the label.
Sewing Machine Set Up
1. Thread the top and bobbin with 50wt sewing thread to match the shirt.
2. Select a Straight Stitch.
Finishing Steps
1. Sew along the bottom front edge with a straight stitch.
2. Fold the shirt right sides together and pin along the two sides and the bottom.
3. Stitch around using a 1⁄2” seam allowance.
Overlock Machine Set Up
1. Thread your overlock machine with overlock thread and set up for a 3-thread wide overlock
stitch.
Finishing Steps
1. Serge around the three sides of the pillow without cutting off any of the seam allowance, you just want to have a clean finish on the edges so it does not ravel.
2. Open the buttons on the shirtfront and turn right side out.
3. Put the pillow form inside the pillow through the shirtfront.
4. Button up the buttons and you are done.