United States
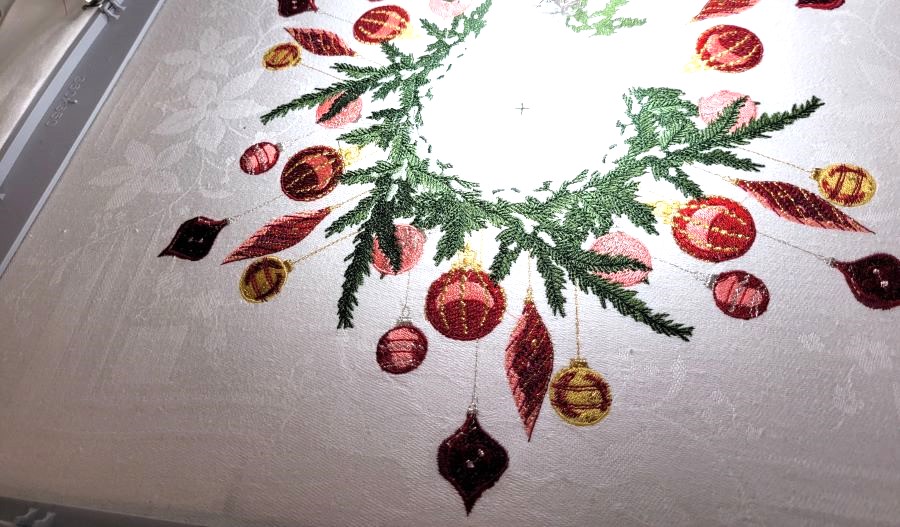
Make a Large Christmas Wreath with Encore
This Christmas wreath is easy to make with the help of the Encore feature. Make the most of your designs by repeating them! Just follow the instructions to learn how to do this. With the encore feature you can build large embroideries and stitch them out in the 360x350 mm turnable hoop
What you need:
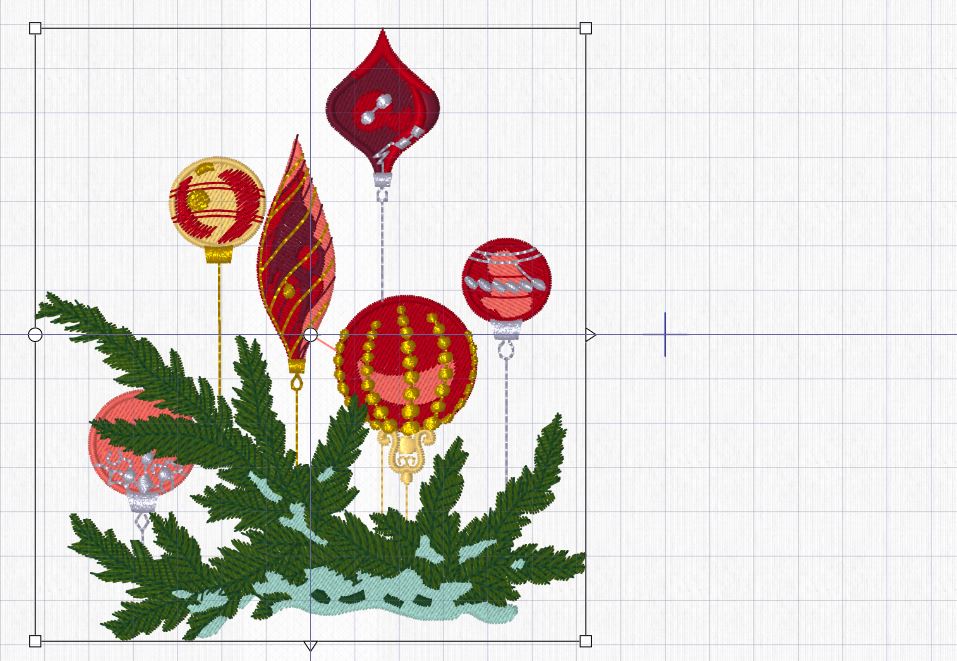
- Embroidery design, find it Here:
- mySewnet Embroidery Software, Silver level or higher
- To stitch out the design you need the 360x350mm turnable hoop
How to do
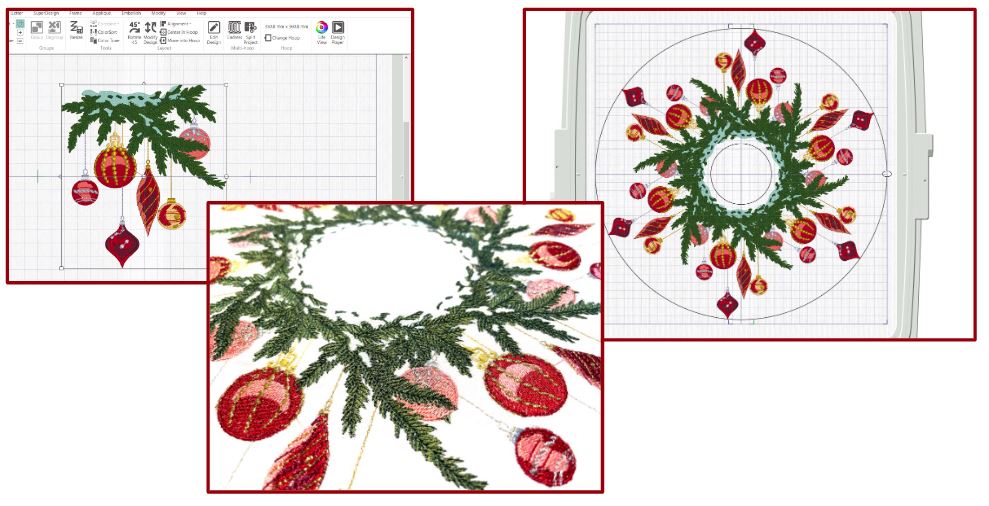
1.Open the embroidery program, set the hoop size to 360x350mm turnable hoop. Go to File Insert and select the embroidery file.
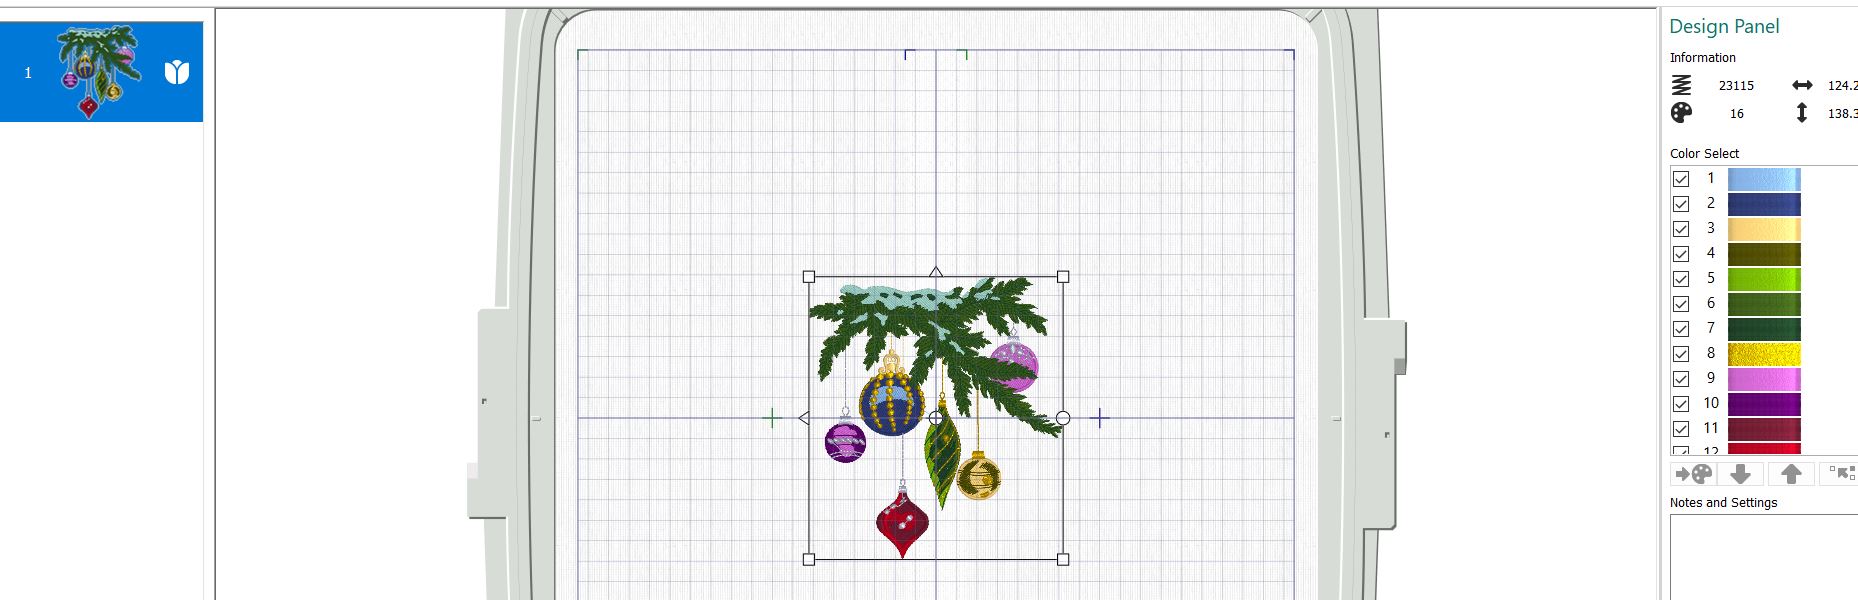
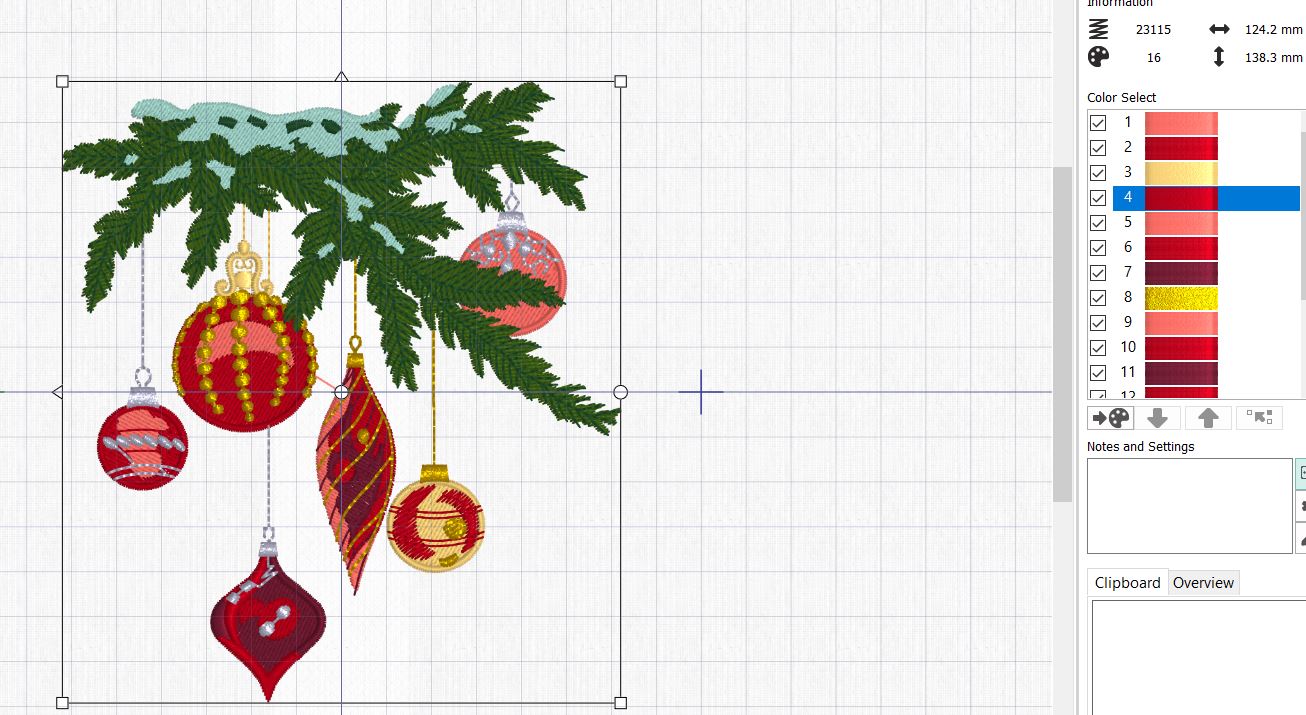
2. First we will make some color changes. I would like the Christmas decorations to be in red and gold. Click on the colors in the Design Panel to the right and change them to the same red color scheme, you need three different colors , I selected Robison Anton light red 2414 medium red 2263.dark red 2249. In the decorations that only have two colors I selected the light and medium color.
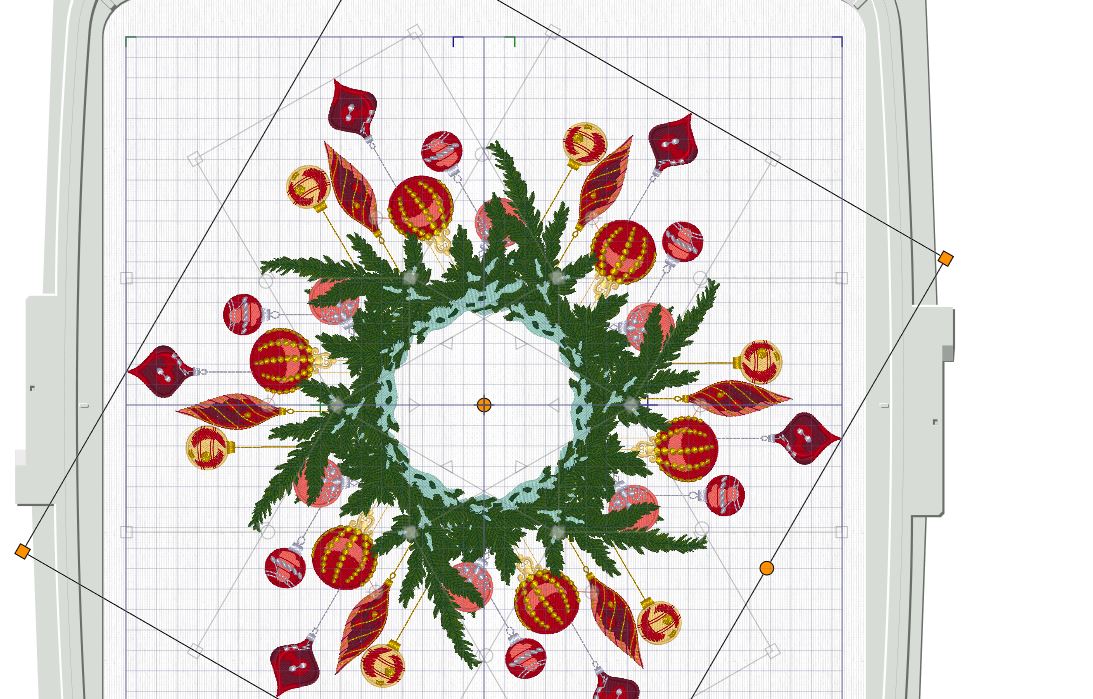
3. Go to Home tab and rotate the design using the 45 degree tab four times, It should look like this:
4. Go to Encore, make sure the circle option is selected (to the left of the window) select six repeats and click on Preview
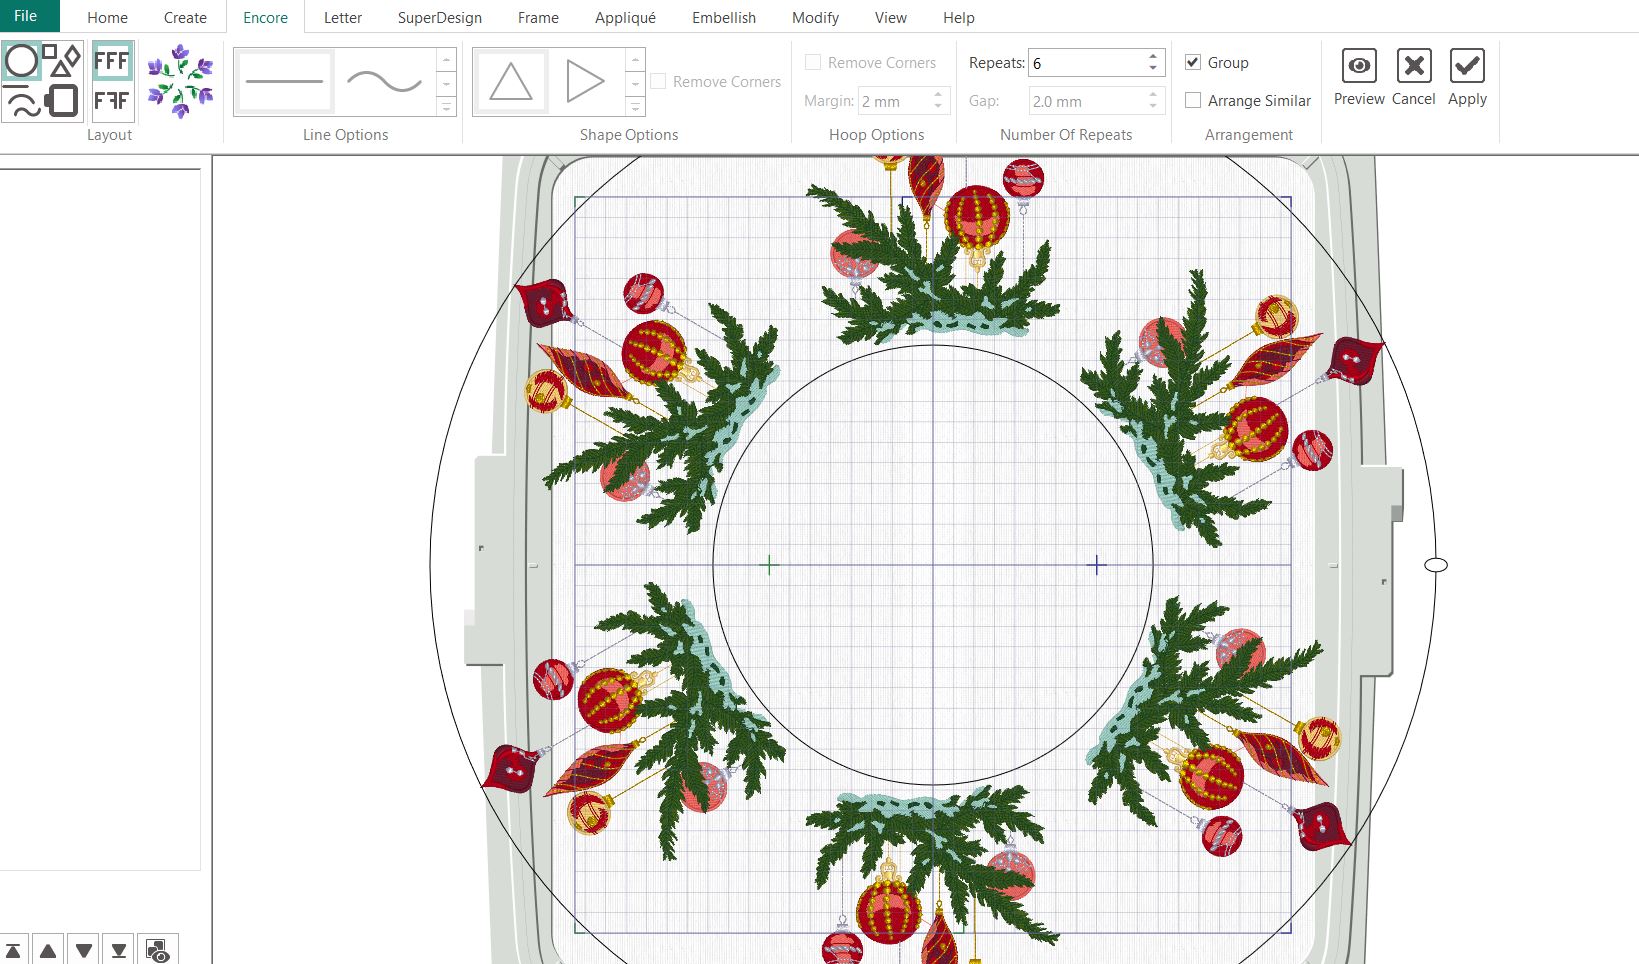
5. Move the cursor over the inner circle. When it turns to a + sign, drag the circle towards the center line. The embroideries will merge together. Stop when the whole embroidery is inside the embroidery area in the hoop.
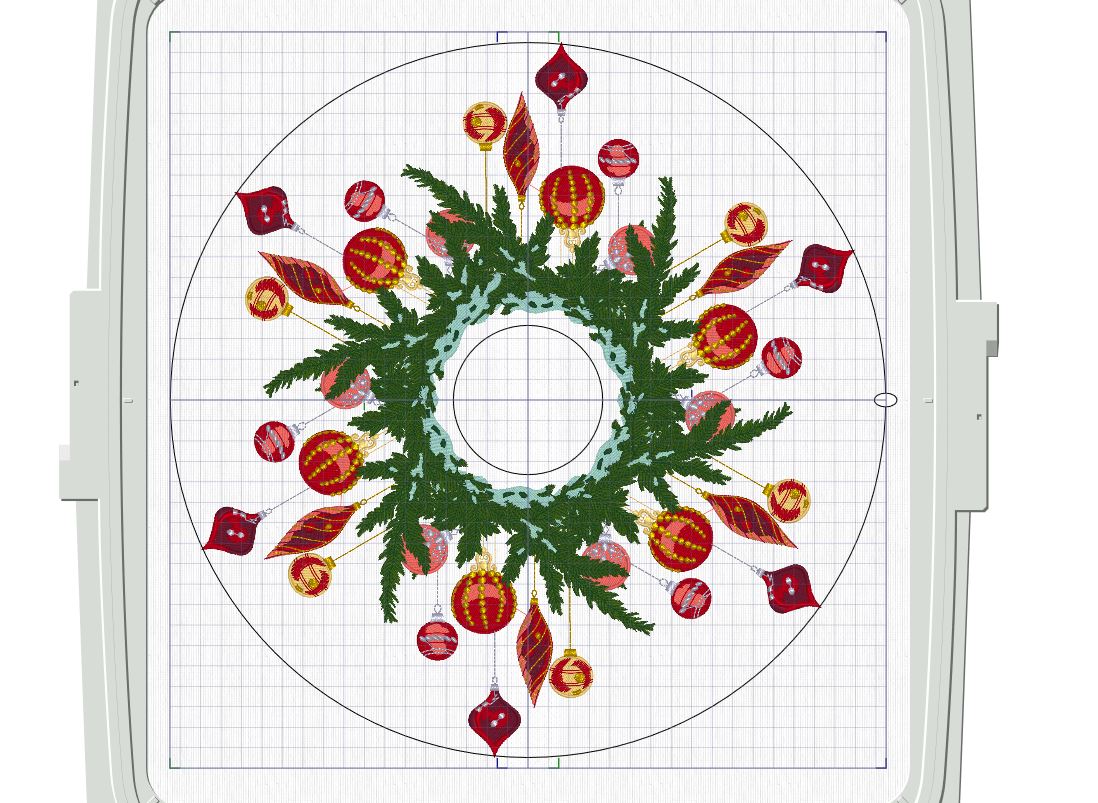
6. Click on Apply.
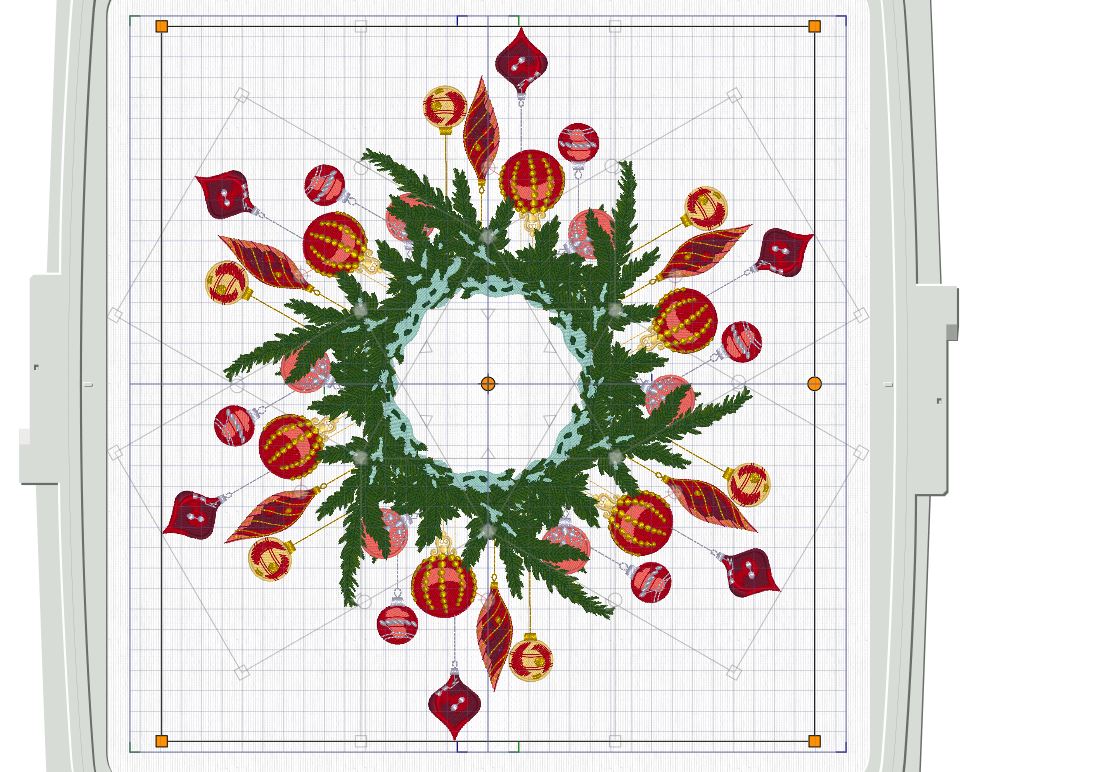
7. On the right side of the embroidery there is a circle, use it to rotate the embroidery to get the overlap between the embroideries in line with the overlap, see image below.
8. Click on Combine, Combine All.
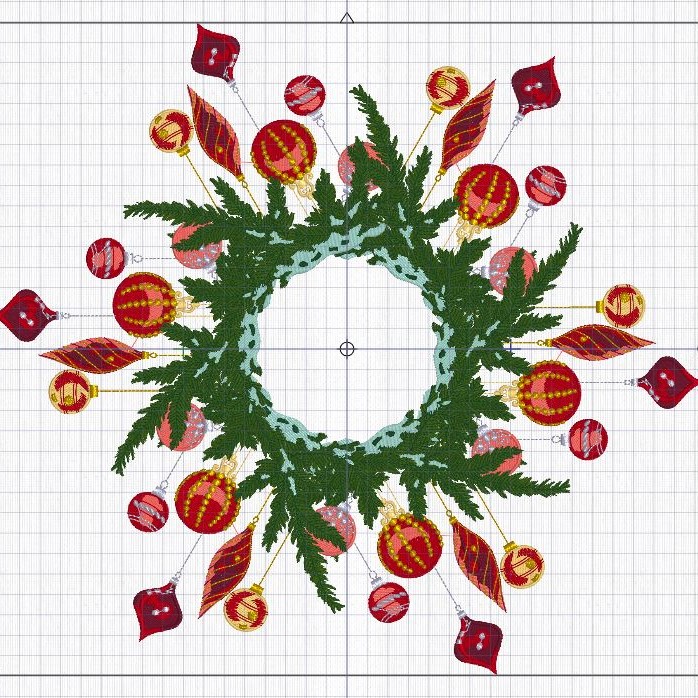
9. Click on Colorsort to reduce the color changes to a minimum.
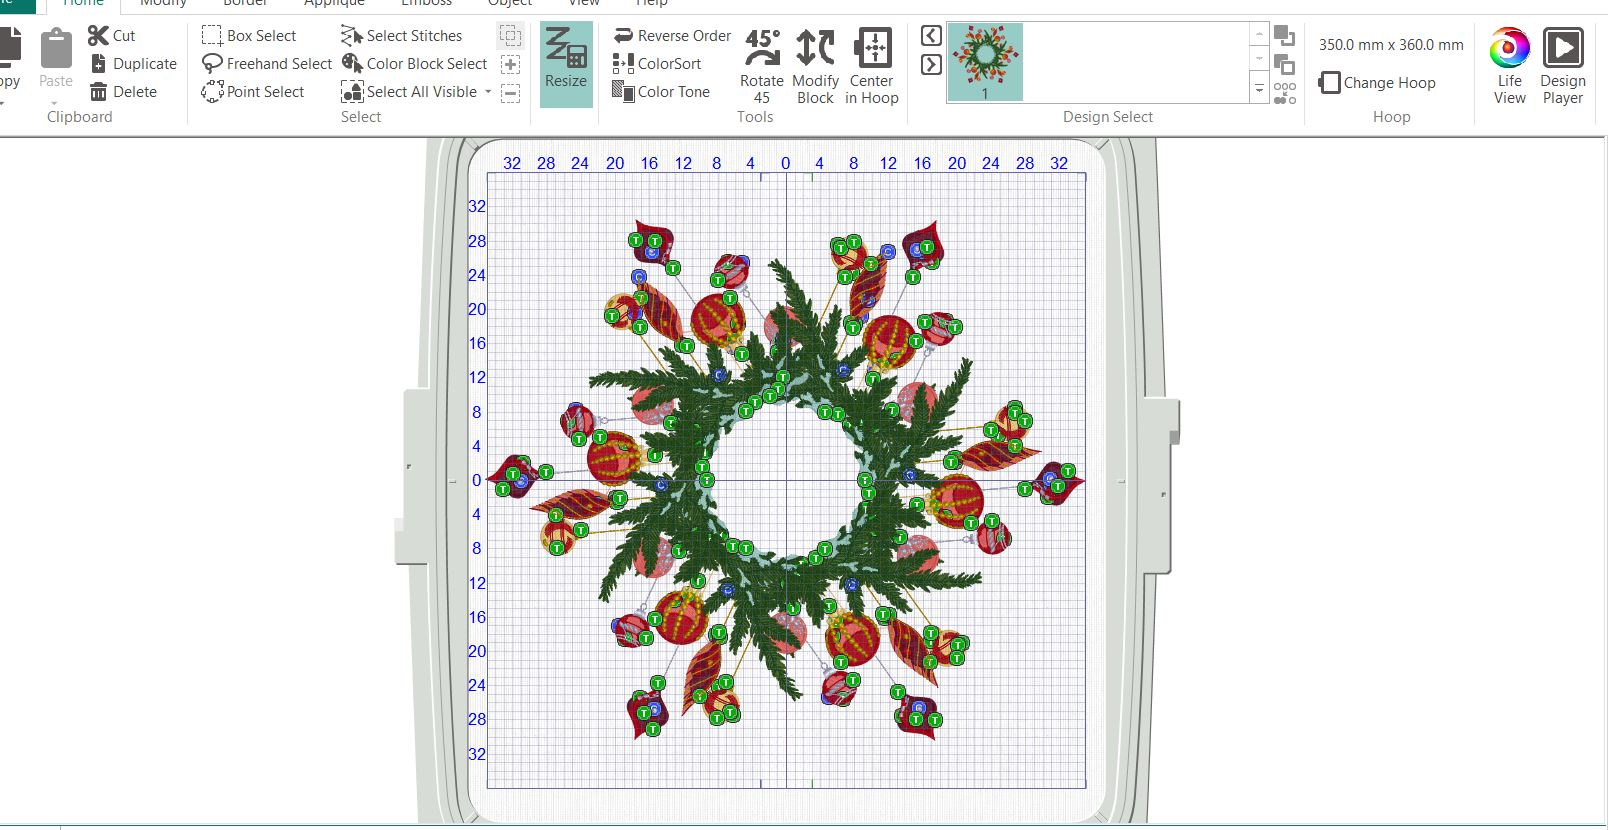
10. Now we will edit the design to reduce thickness and remove unnecessary stitches Click on Edit Design. Stitch Editor will open in a new window.
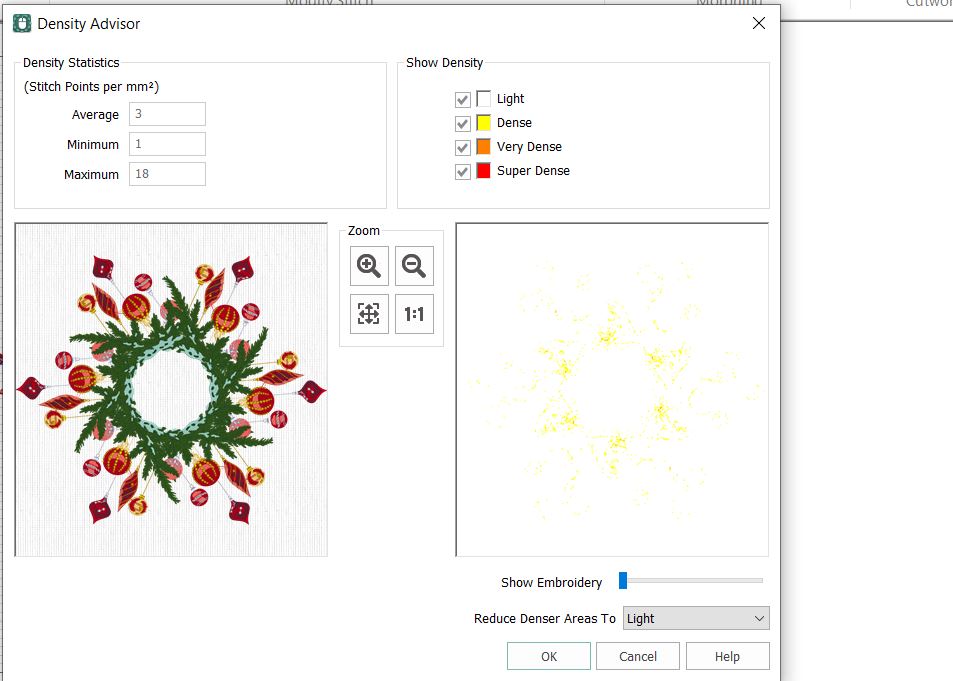
11. Go to the Modify tab and click on Density Advisor. A new window will open shoving the design and if there are dense areas. Make sure the option is Reduce Denser Area to Light and click OK.
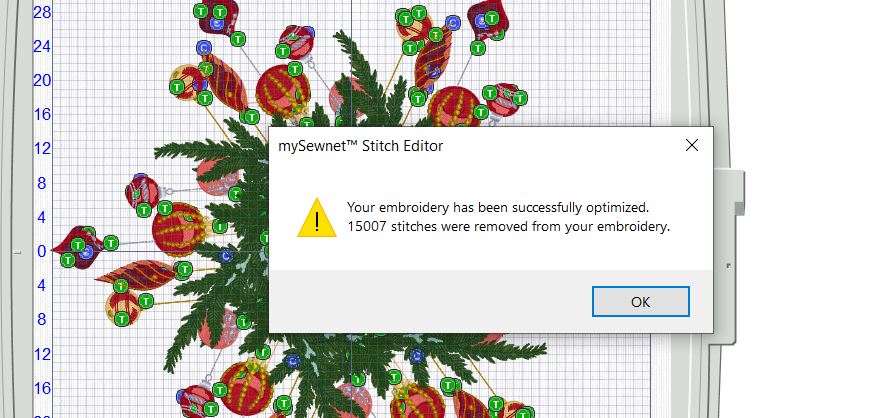
12. Click on Stitch Optimizer. This reduces any unnecessary stitches, in this case over 15000 stitches were removed.
13. Close the Stitch Editor.
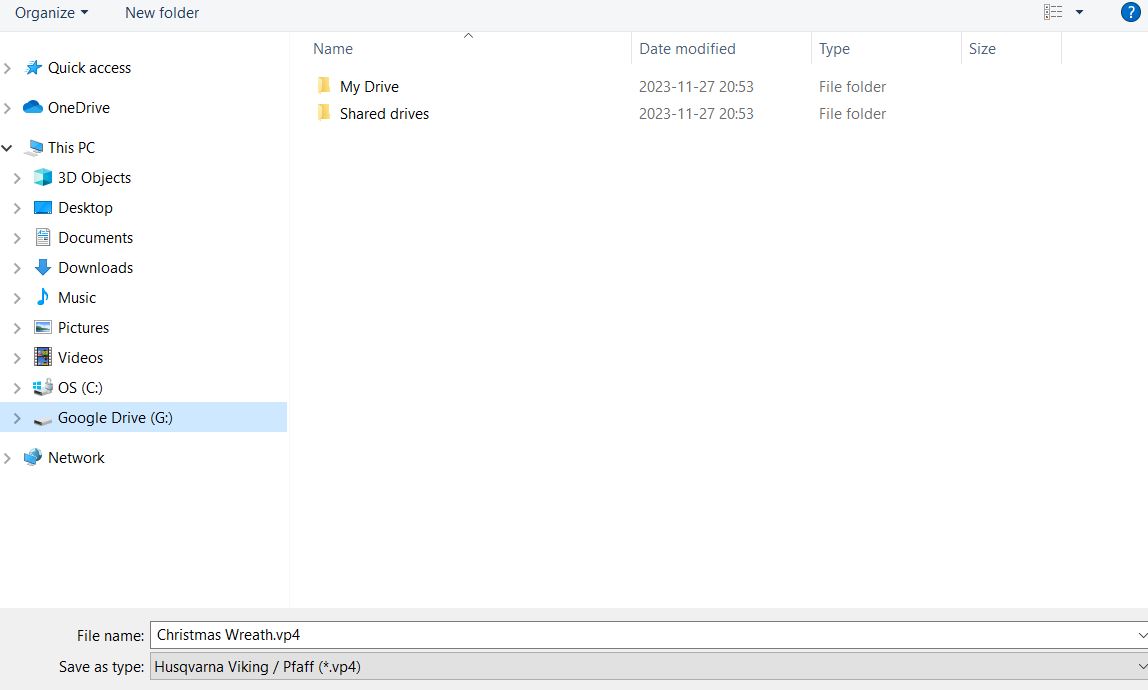
14. Click on File Save As and save the file as Christmas Wreath.
15. To stitch out the embroidery it needs to be exported. Click on file, Export and save in your preferred format.
Stitch out the design in the 360x350mm hoop.