 United States
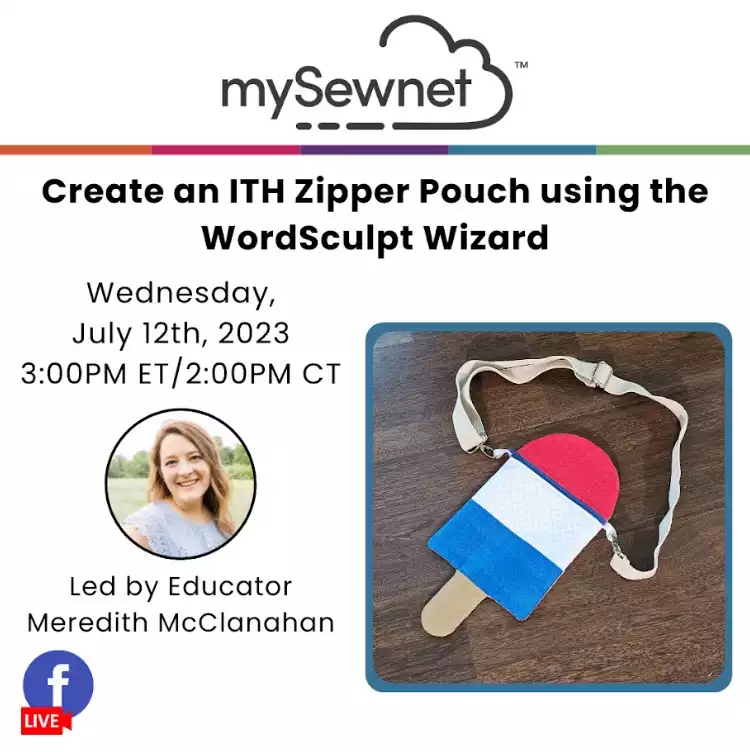
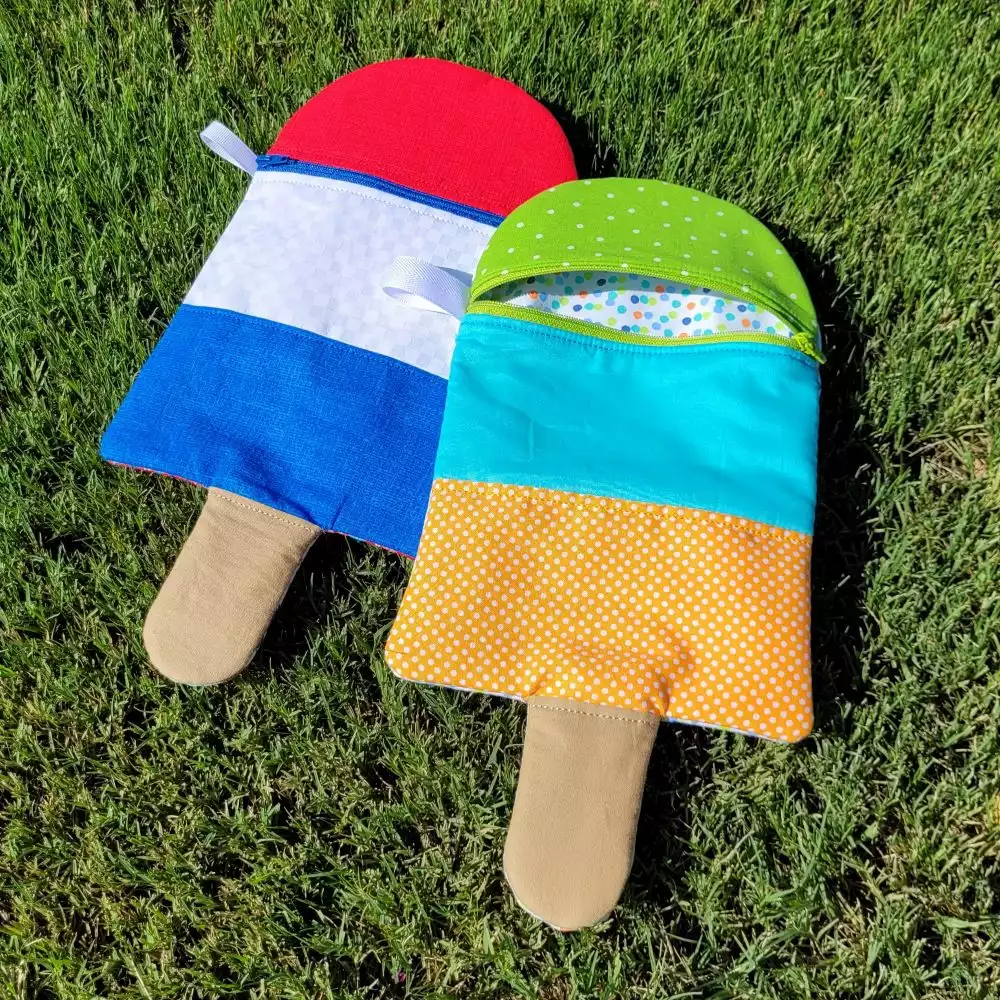
In The Hoop Ice Pop Zipper Pouch
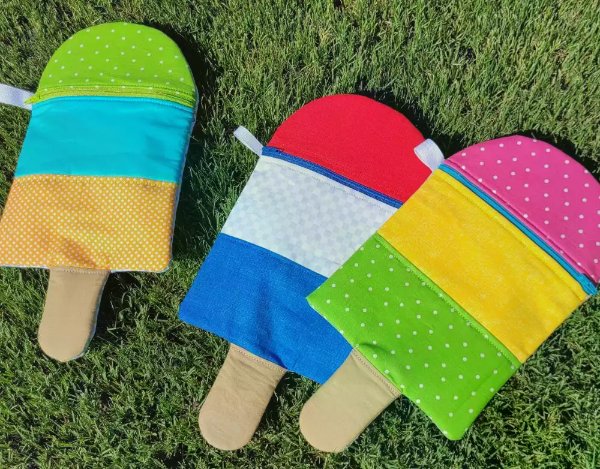
Make these cute zippered pouches on your embroidery machine, It is easier than you might think, and so fun!
Materials needed:
- Embroidery Machine
- Popsicle Fabric - x3 coordinating fat quarters or scrap fabric
- Popsicle Stitch Fabric - fat quarter or scrap fabric
- Lining and Backing Fabric - ¼ yd
- Warm and Natural - ¼ yd
- Coordinating Ribbon or Twill Tape
- Coordinating Zipper at least 10” long
- Coordinating Embroidery Thread
- Embroidery Needles
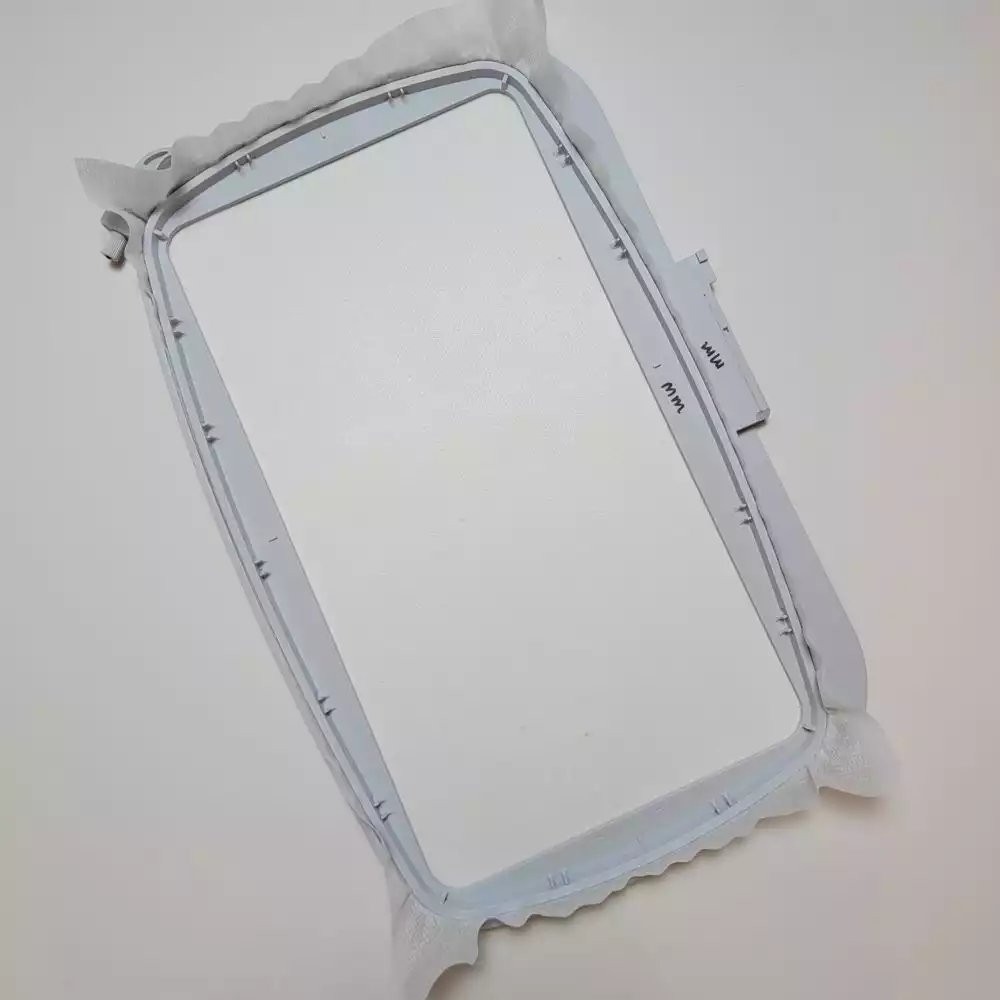
- 360mm x 200mm Embroidery Hoop or Larger
- No-Show-Mesh Stabilizer
- Embroidery Foot
- Applique Scissors
- Rotary Cutter and/or Fabric Scissors
- Cutting Mat
- Straight Edge Ruler
- Painters Tape
- Embroidery Design Provided
Fabric Preparation:
- Popsicle & Popsicle Stick Fabric - x1 of each color - 6” x 8”
- Lining & Backing Fabric -x1 - 6” x 8”, x1 - 8” x 12”, x2 - 8” x 16”
- Warm and Natural -x1 - 6” x 8”, x1 - 8” x 12”, x1 - 8” x 16”
- Ribbon or Twill Tape, x1 or x2 - 4” long
Join HUSQVARNA® VIKING® Educator Meredith McClanahan when she creates an ITH Zipper Pouch using the Word Sculpt Wizard! Watch the Facebook LIVE done on July 12th or just follow the instruction below!
Instructions:
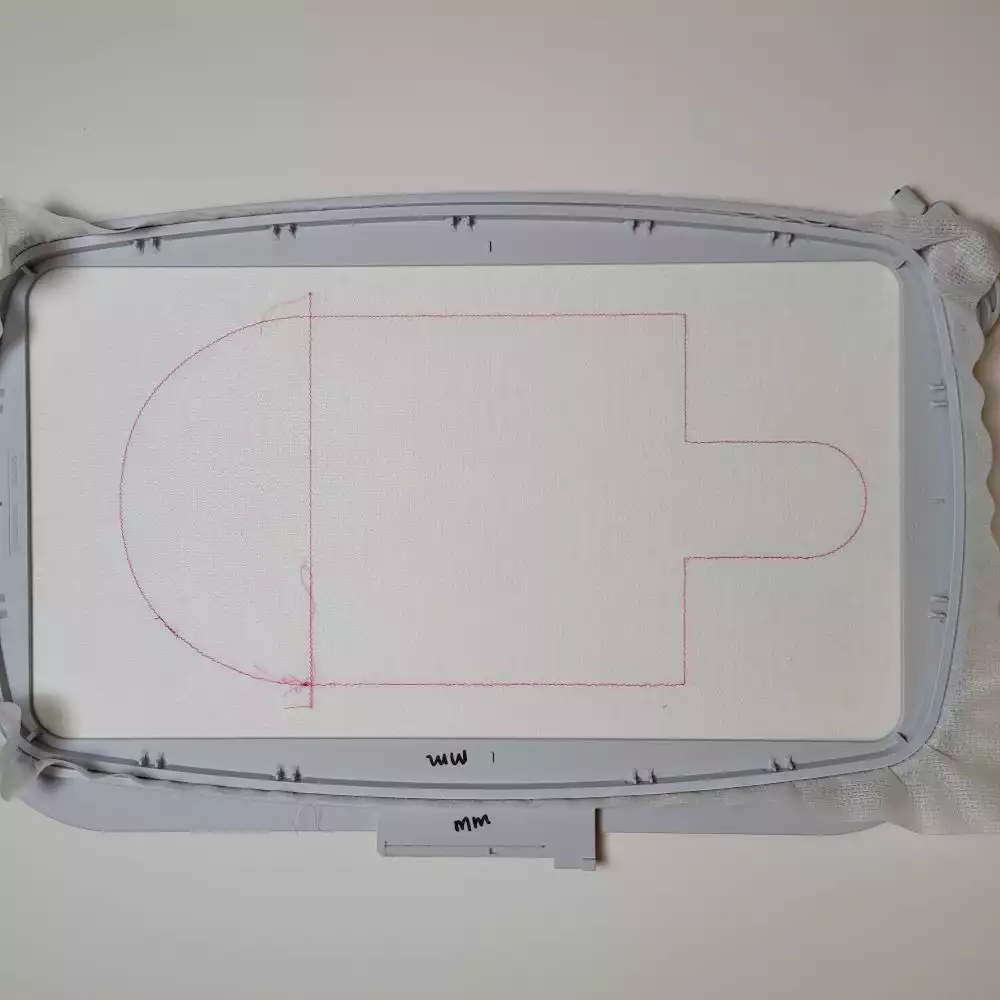
1. Hoop No-Show-Mesh stabilizer into 360mm x 200mm embroidery hoop.
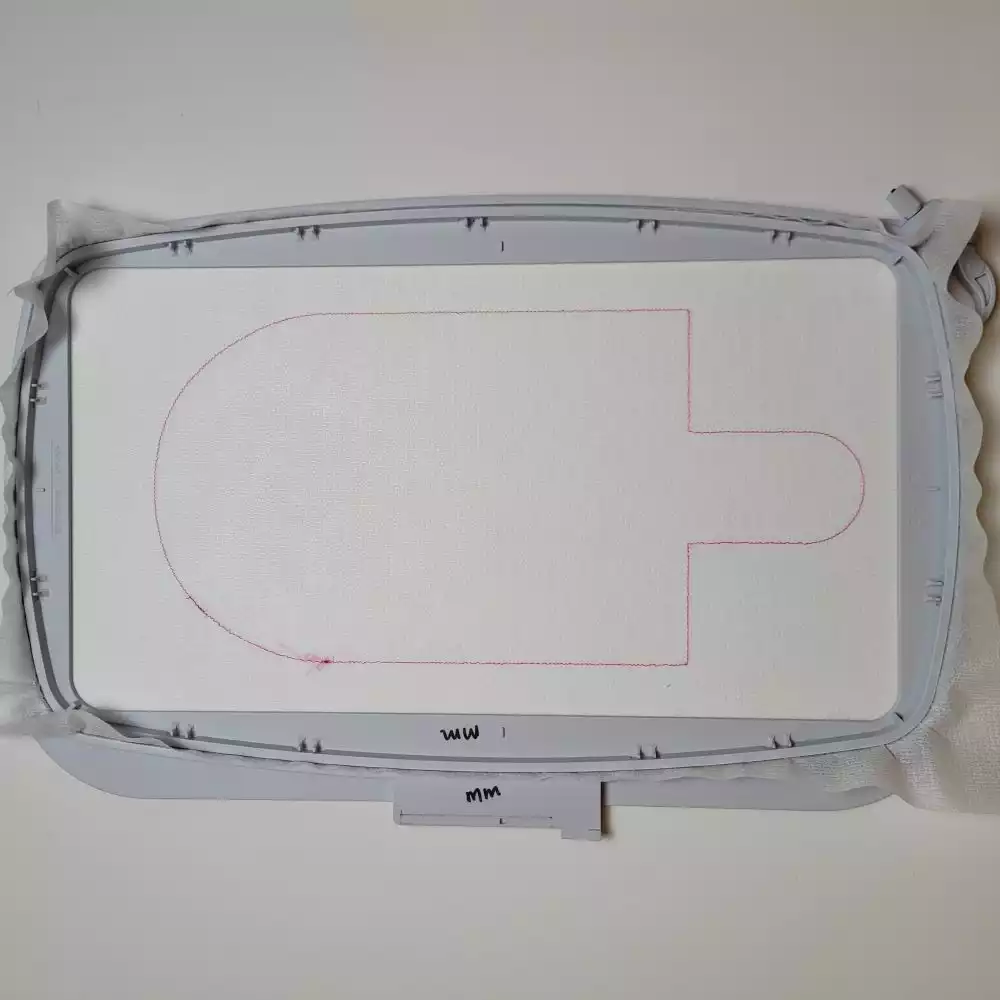
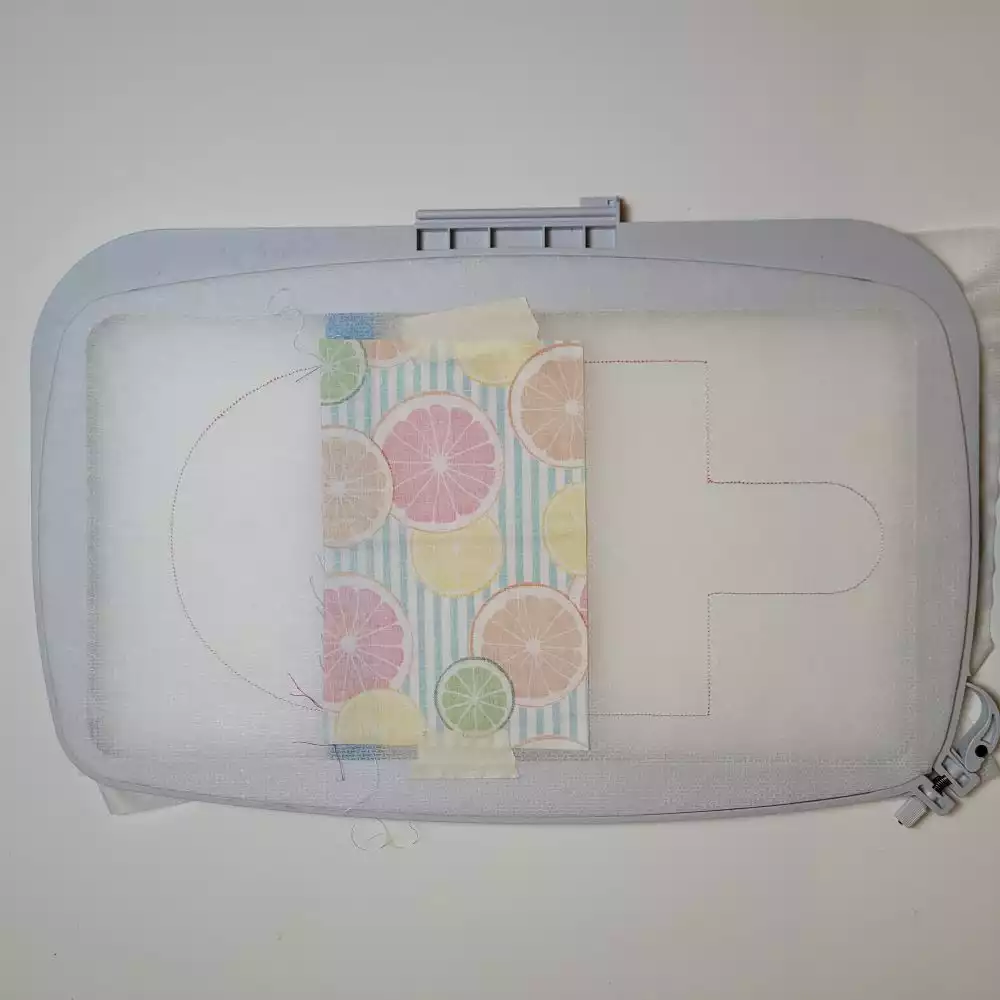
2. Stitch 1 - Popsicle outline stitch.
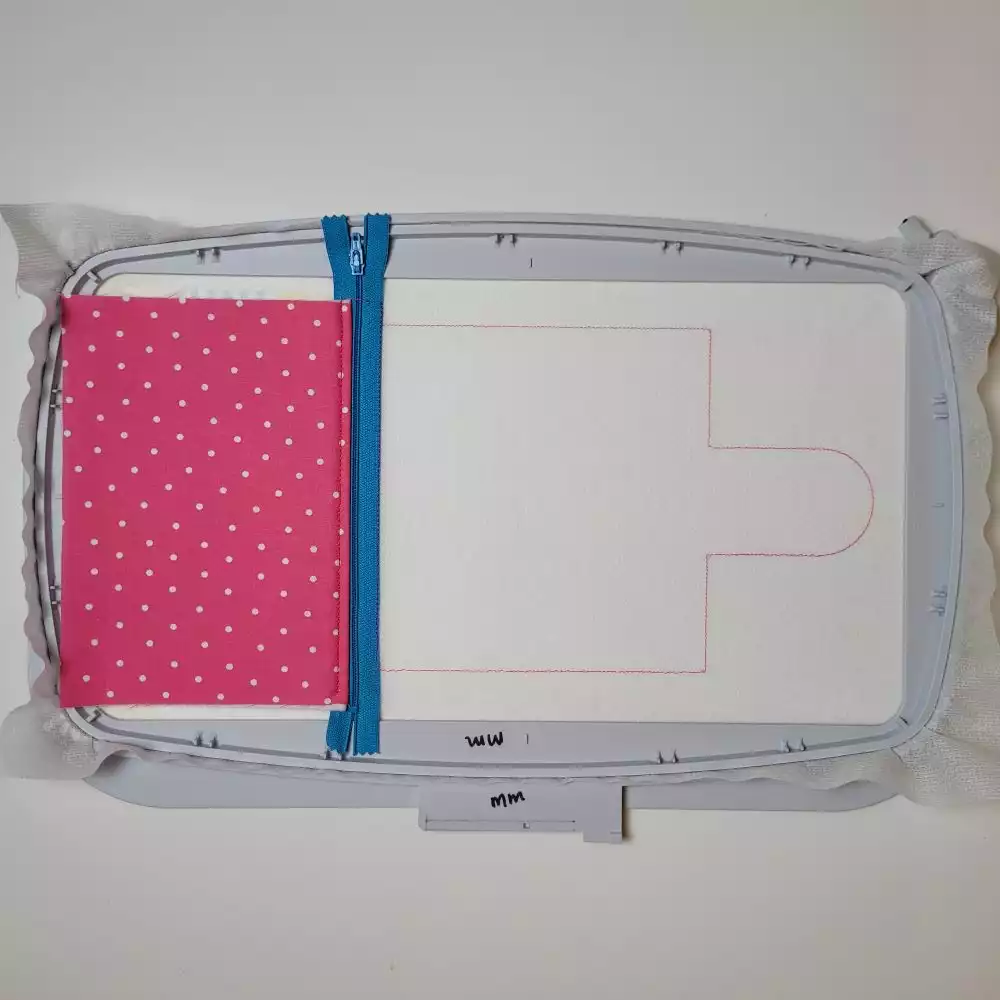
3. Stitch 2 - Zipper placement line.
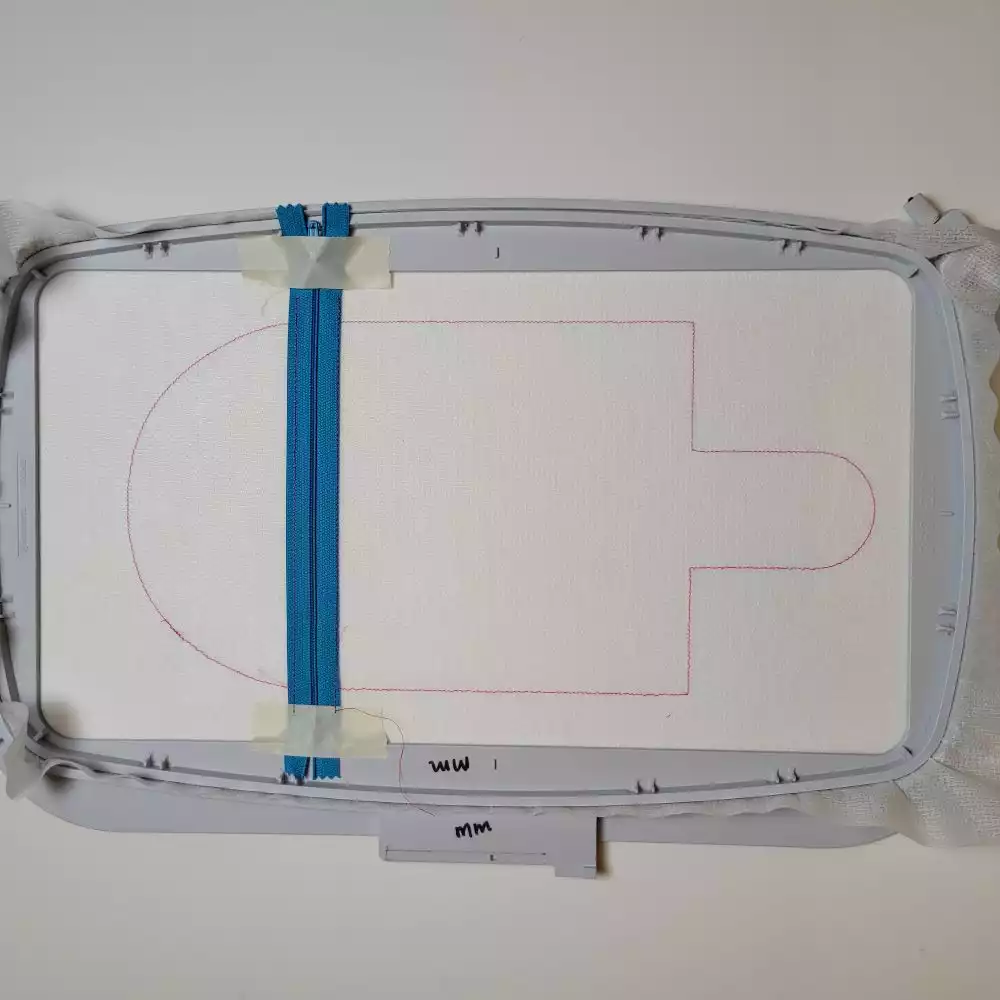
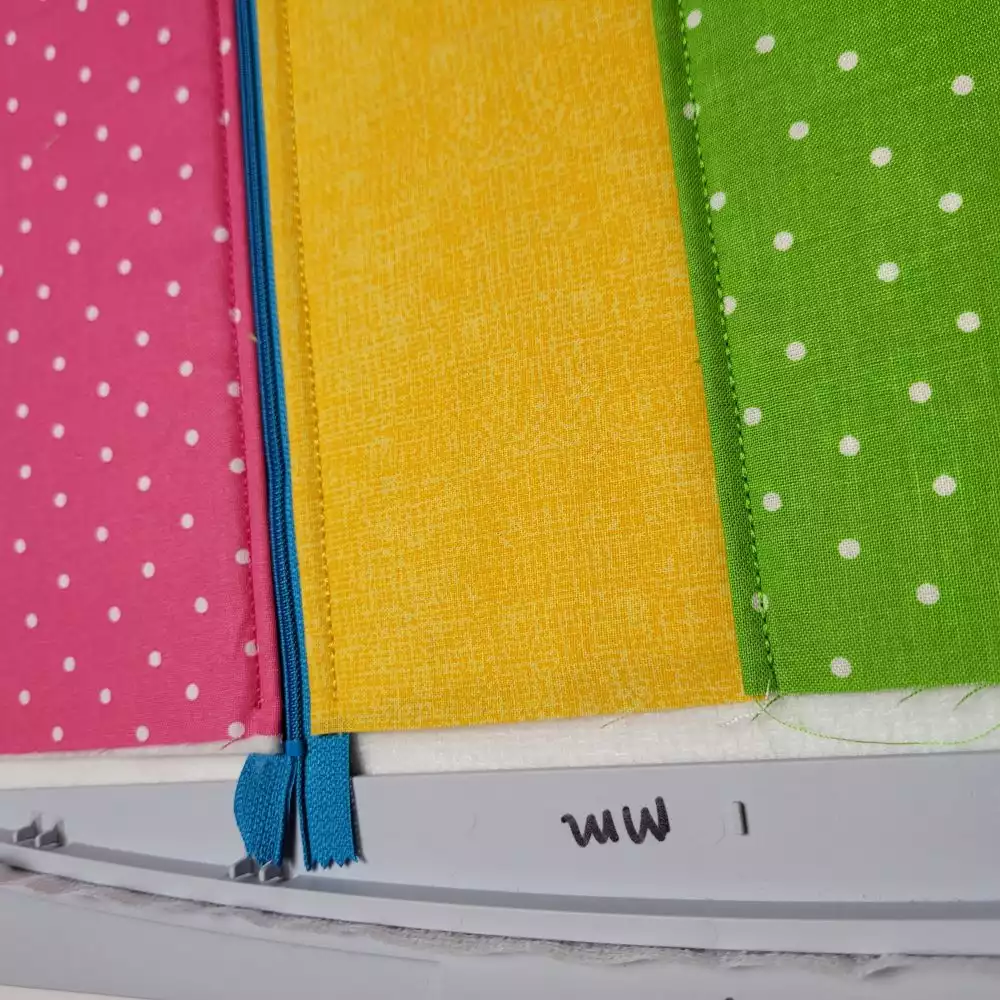
4. Place the zipper over the zipper placement line, lining up the zipper teeth with the line. Tape to hold in place.
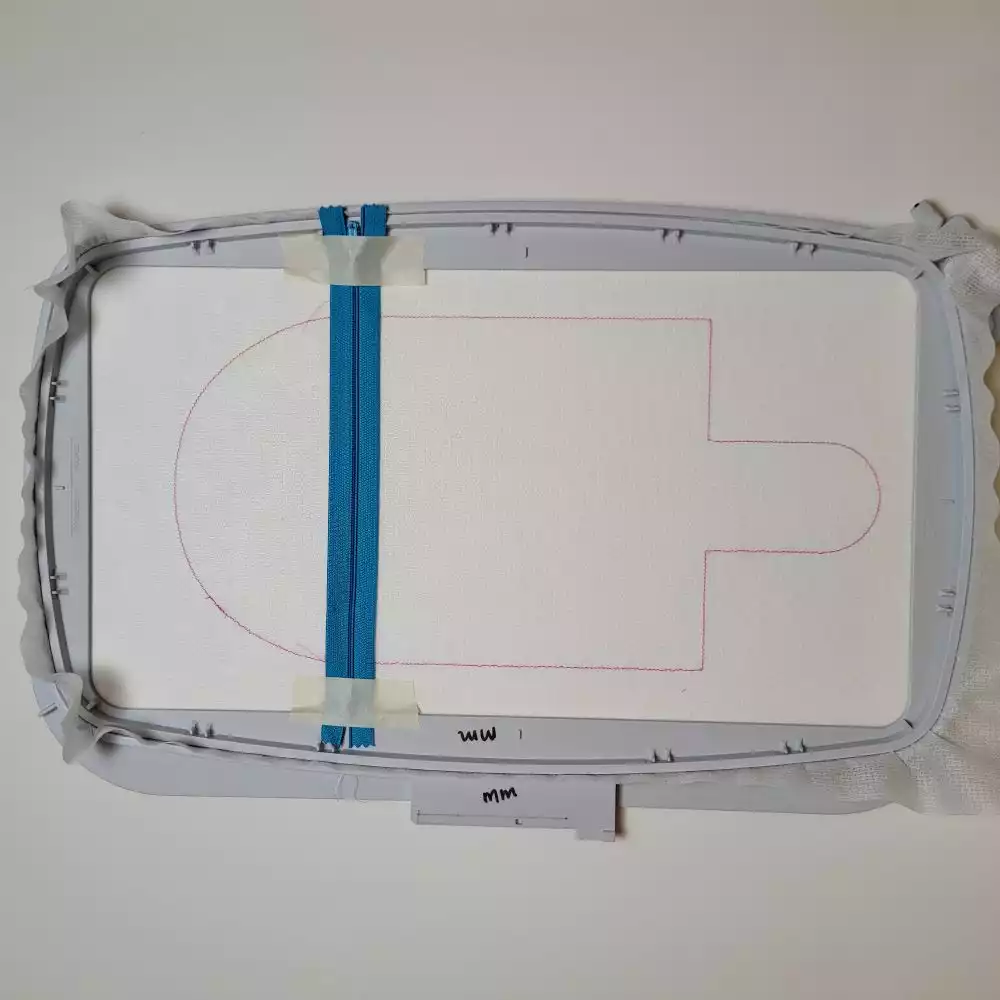
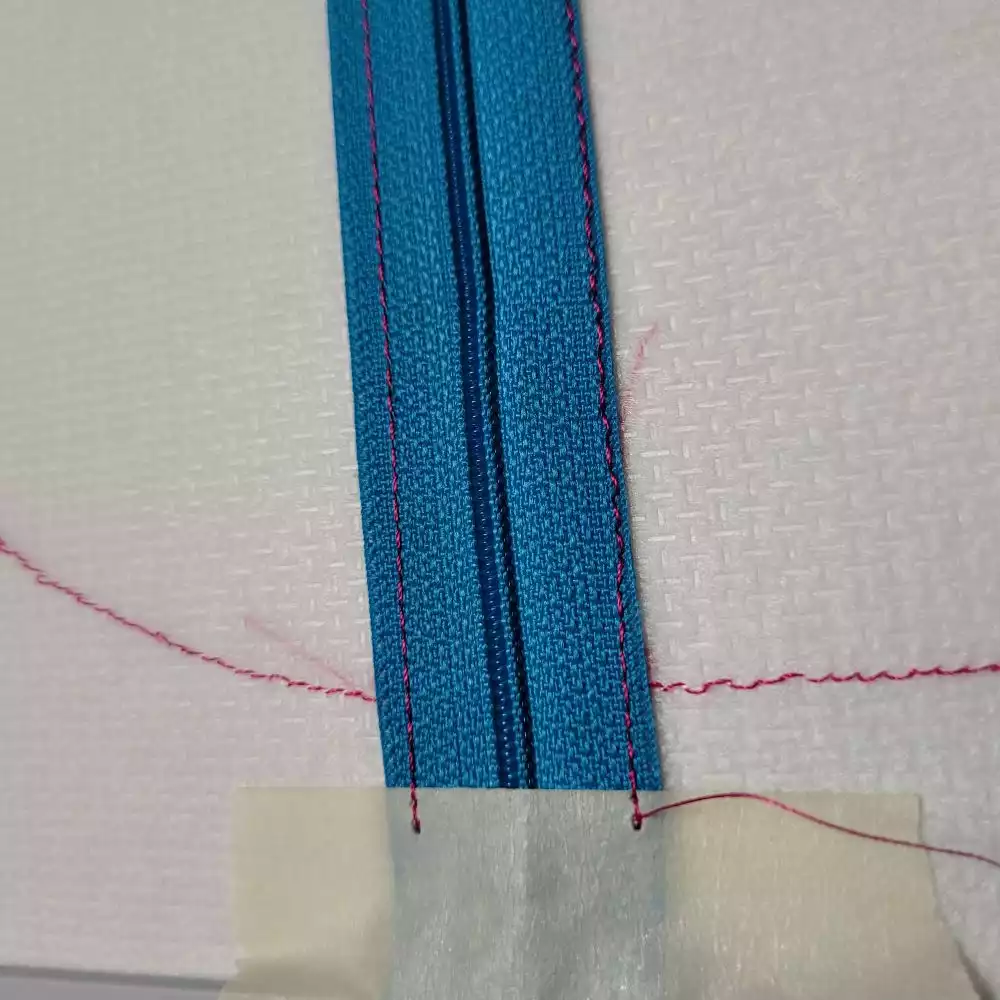
5. Stitch 3 - Zipper tack down stitches.
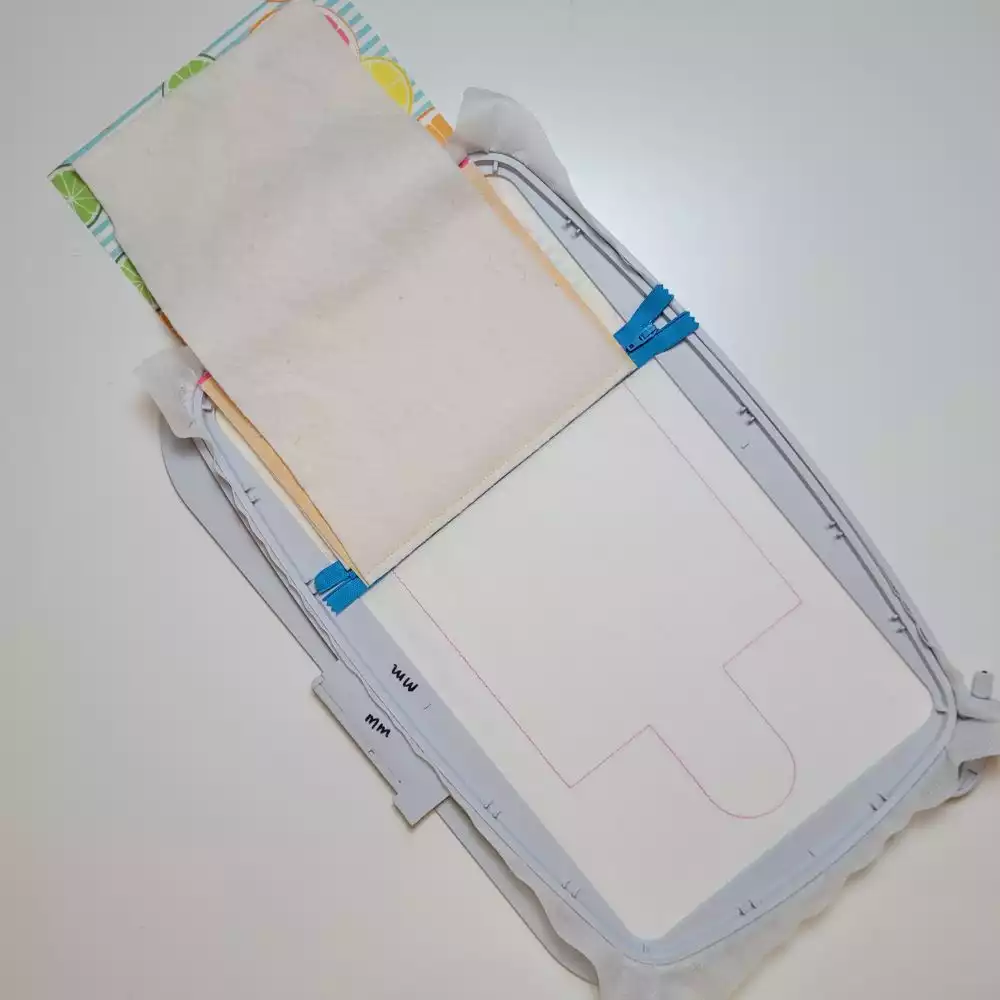
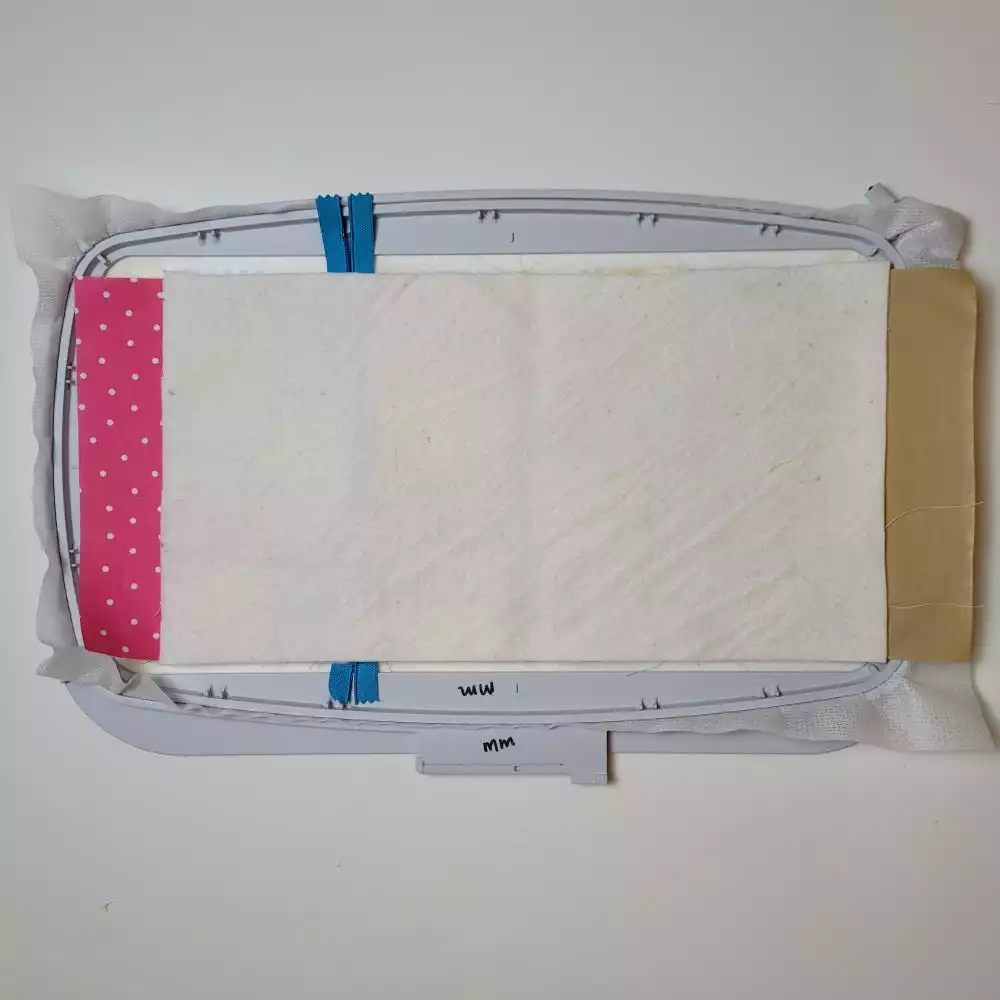
6. Turn the hoop over to the back side, place the lining piece (a - 6” x 8”) right side down, lining the raw edge up with the top of the zipper. Tape to hold in place.
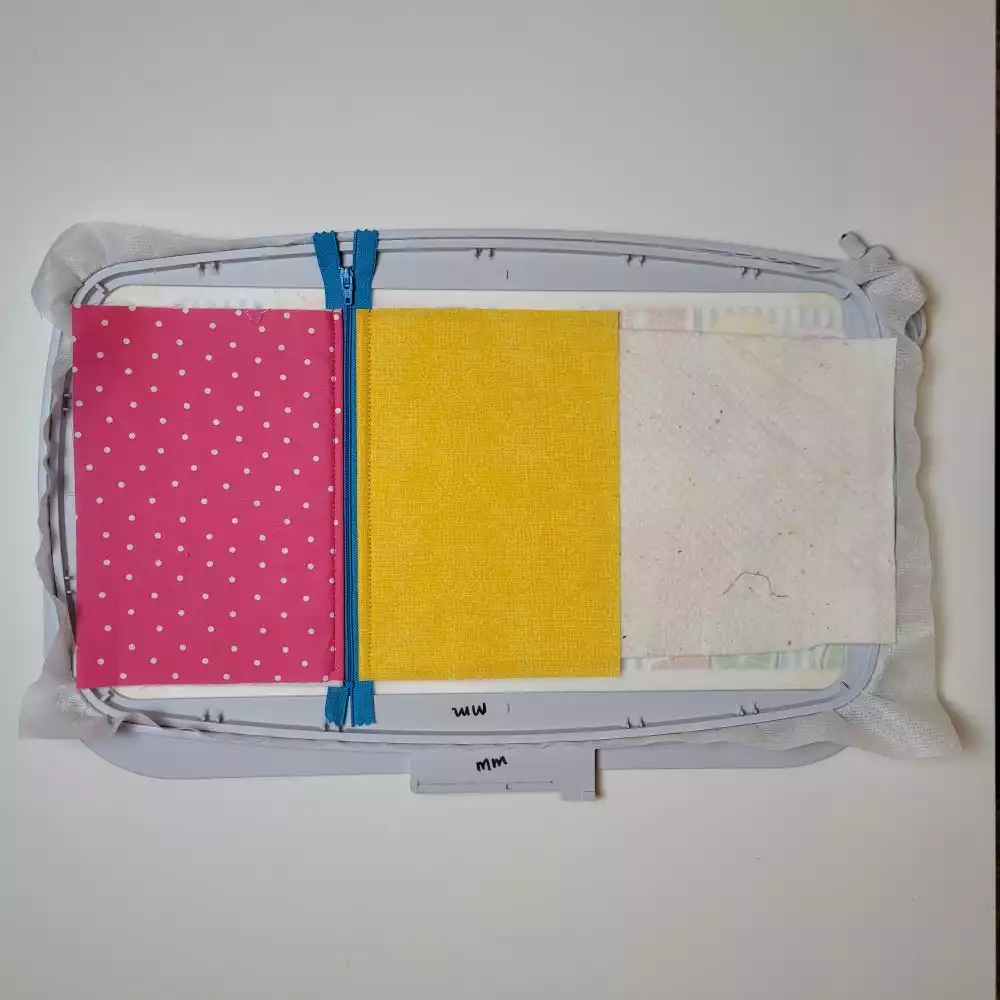
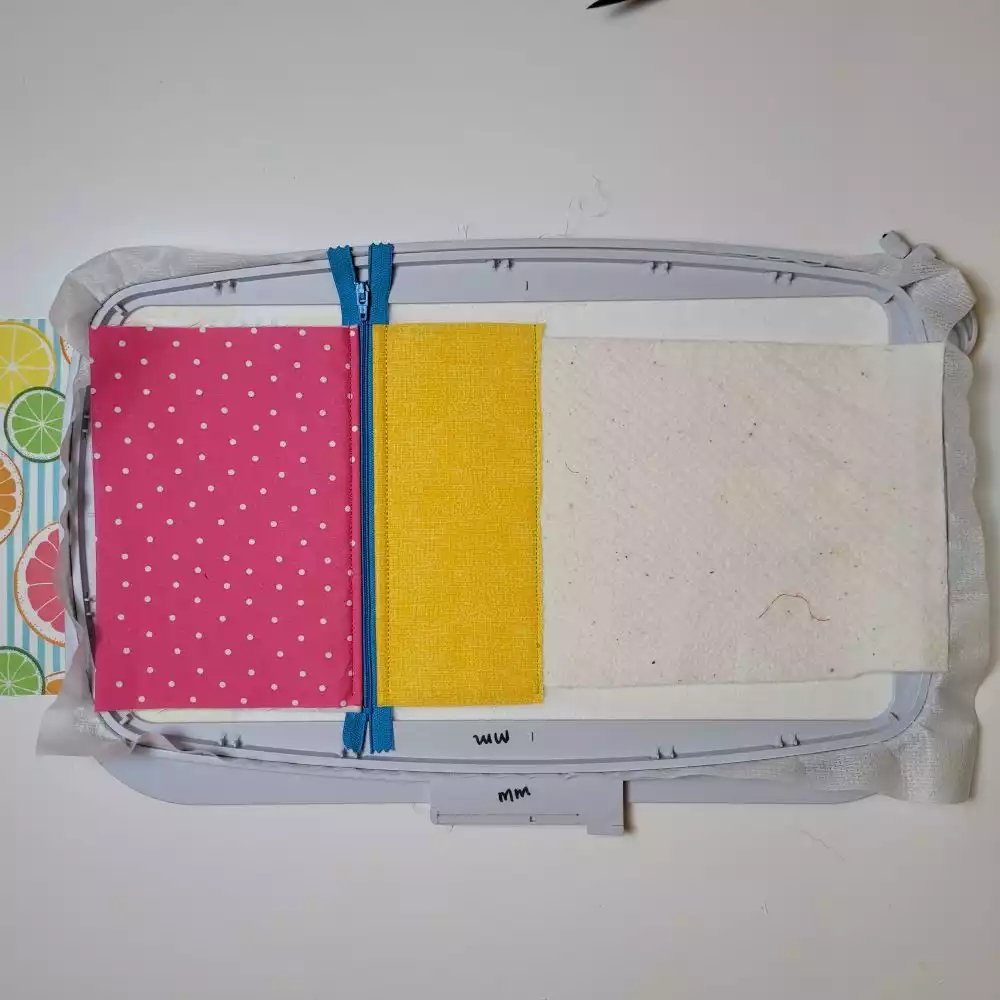
7. Turn the hoop over to the right side, place the top popsicle outer piece (6” x 8”) right side down, lining up the raw edge with the top of the zipper.
8. Place the batting piece (a - 6” x 8”) over top of the top piece. Tape to hold in place.
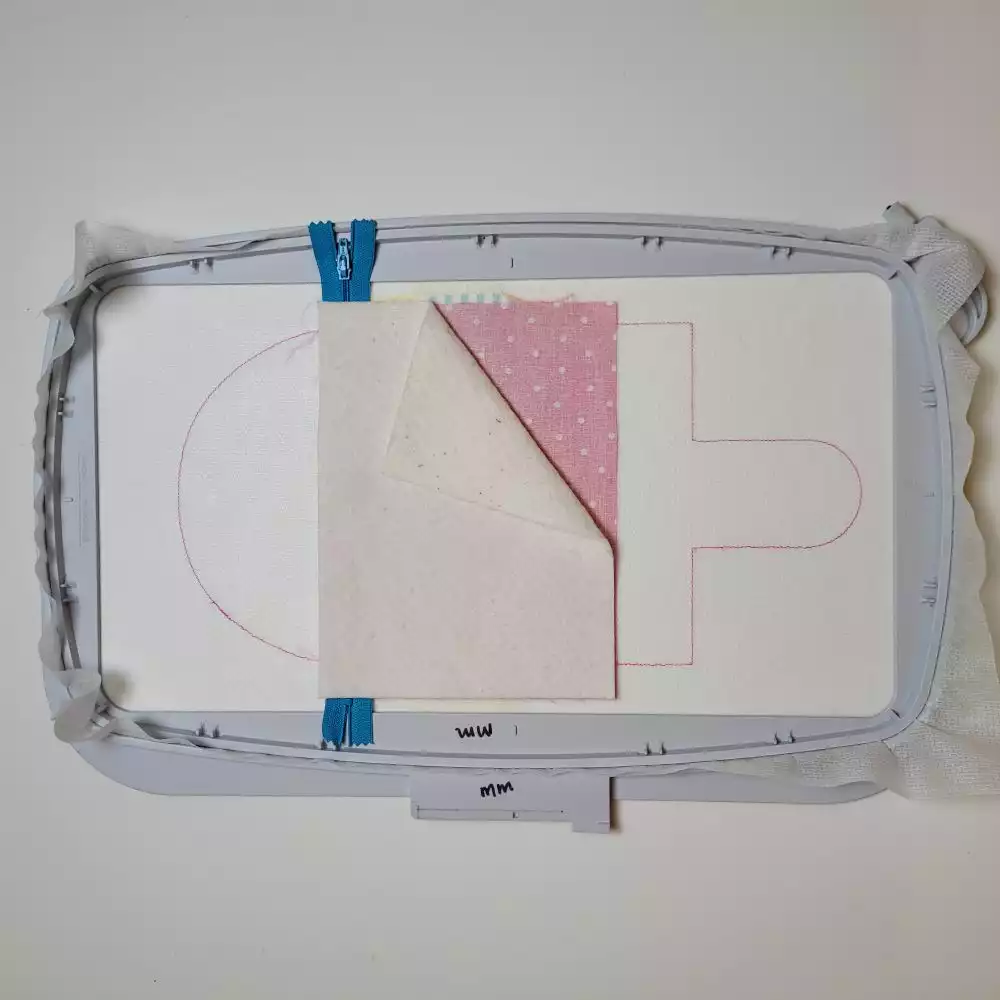
9. Stitch 4 - Top piece tack down stitch.
10. Flip both the top and lining pieces right side out. Tape the corners to hold in place.
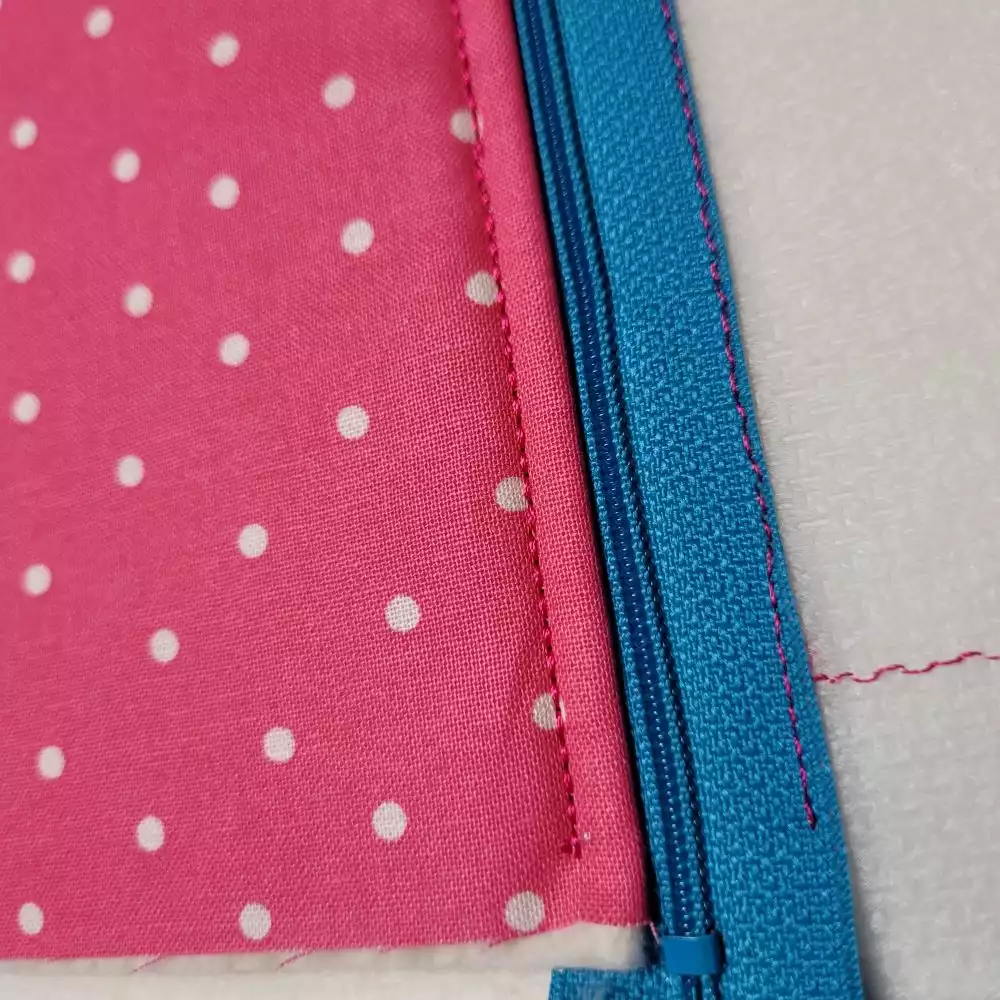
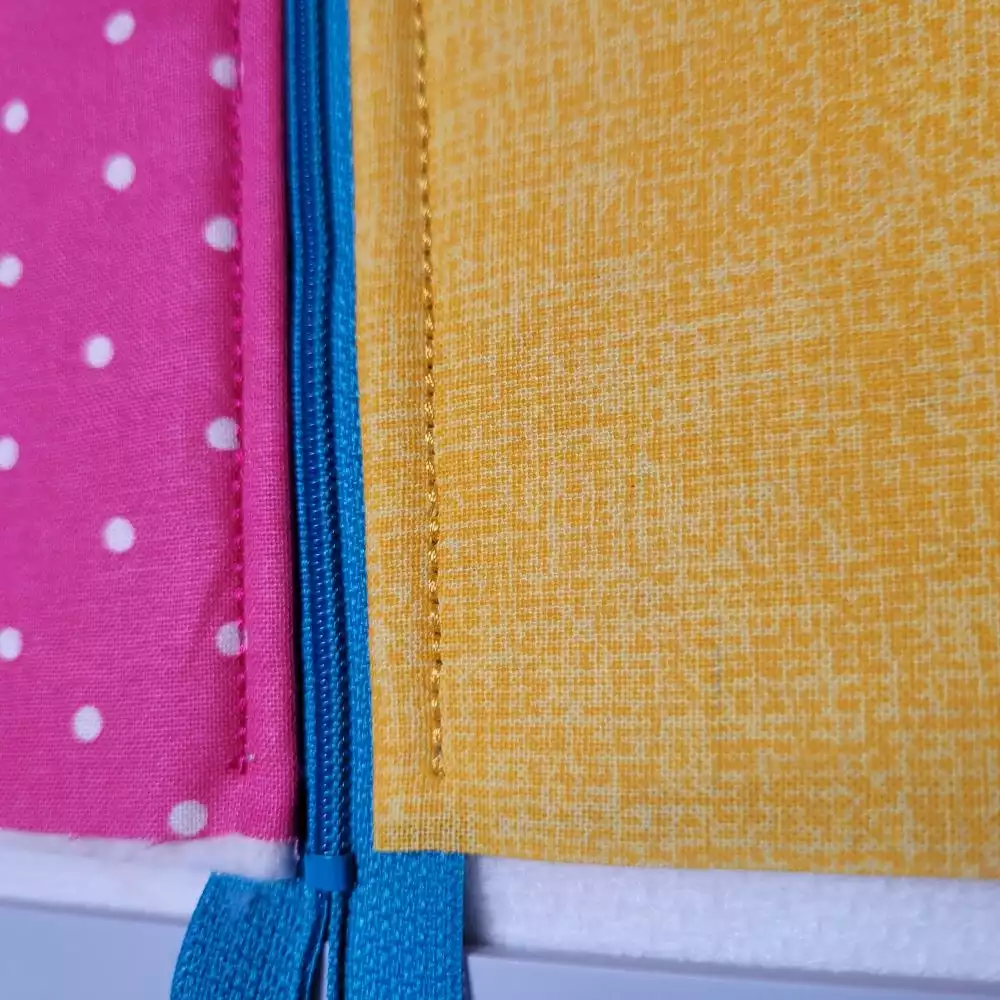
11. Stitch 5 - Top and lining piece topstitch.
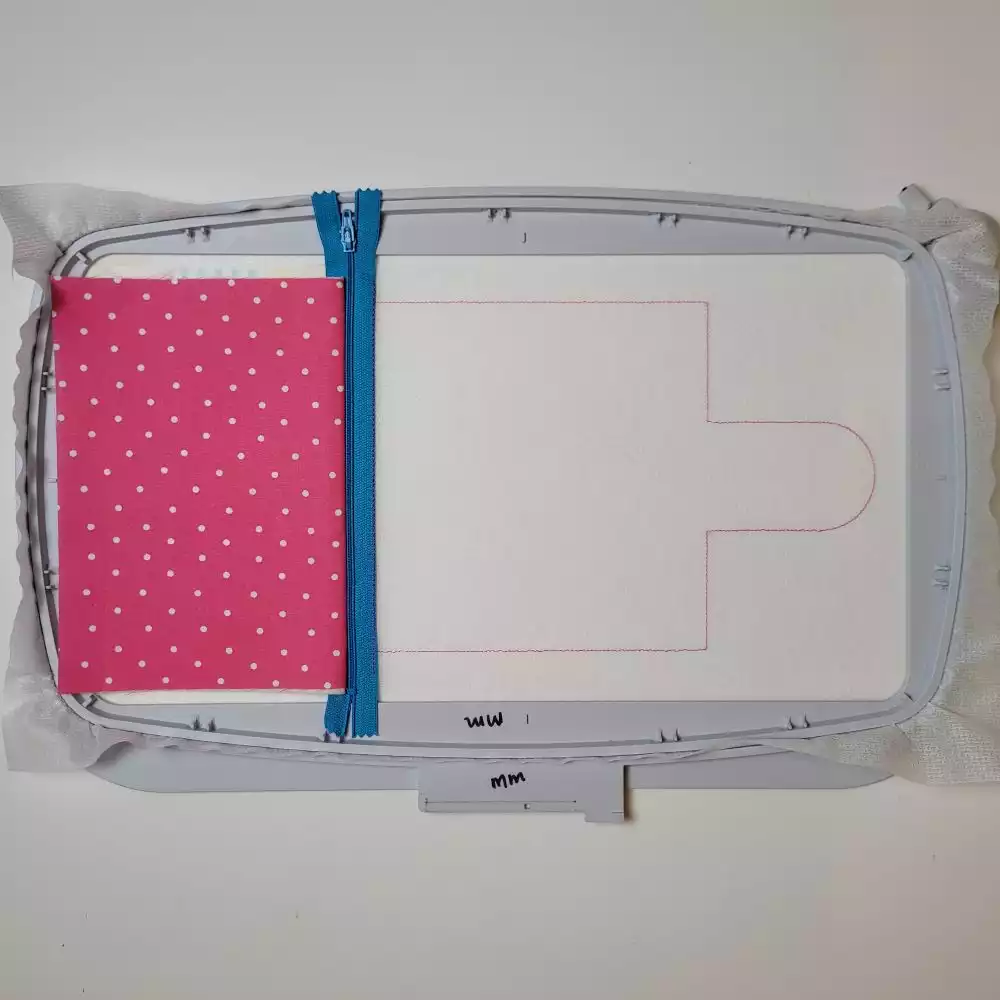
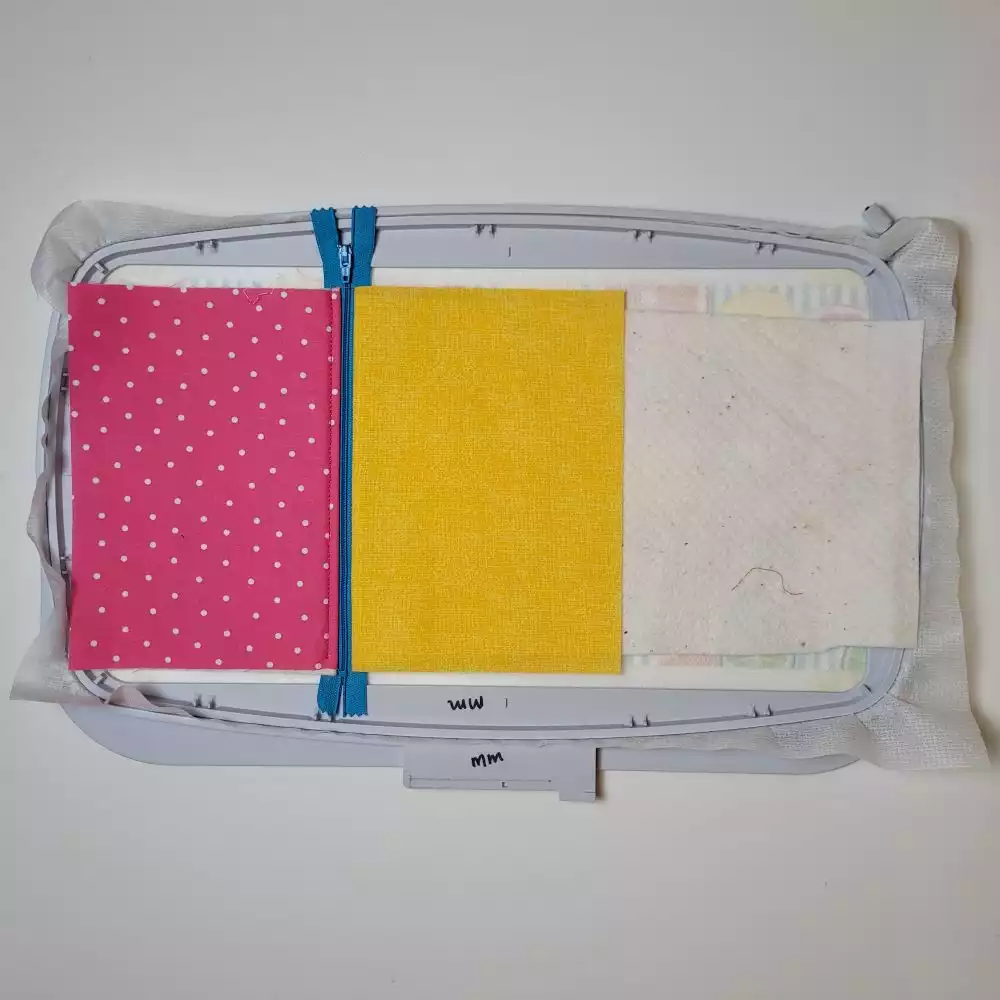
12. Turn the hoop over to the back side, place the lining piece (b - 8” x 12”) right side down, lining the raw edge up with the bottom of the zipper. Tape to hold in place.
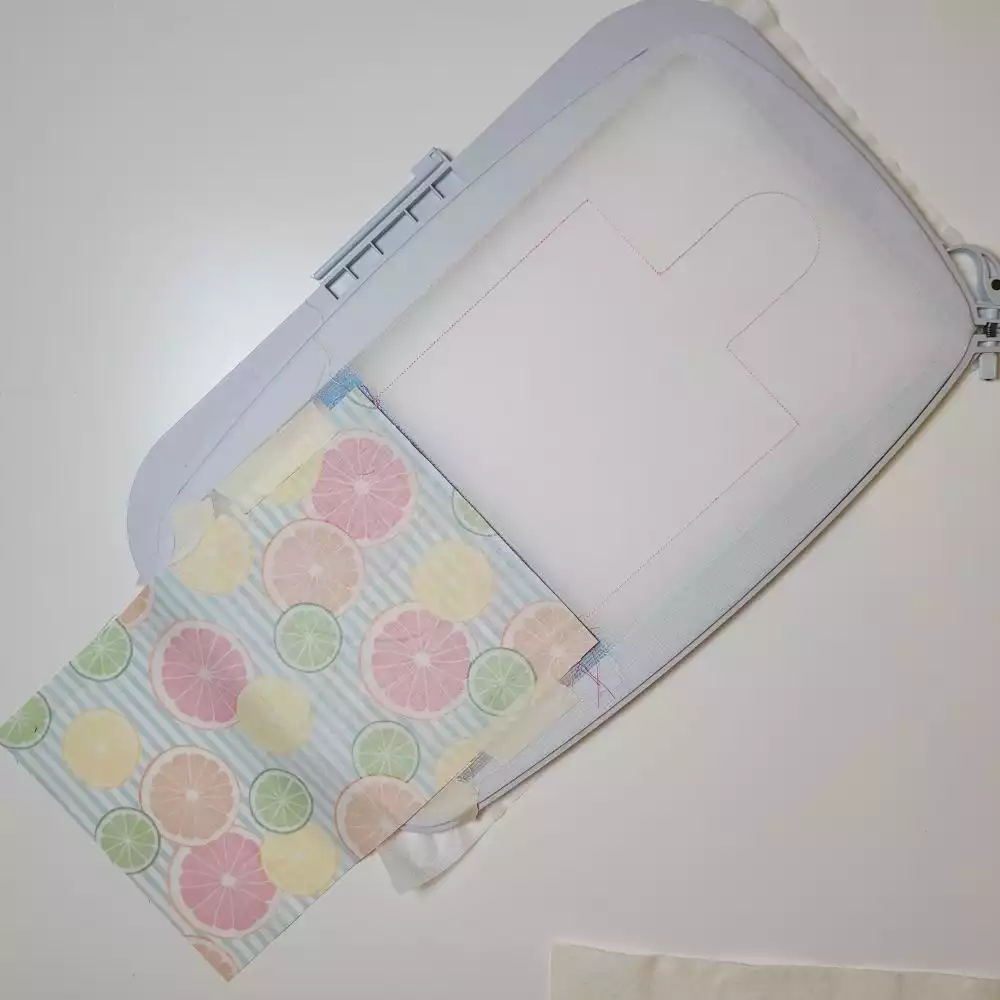
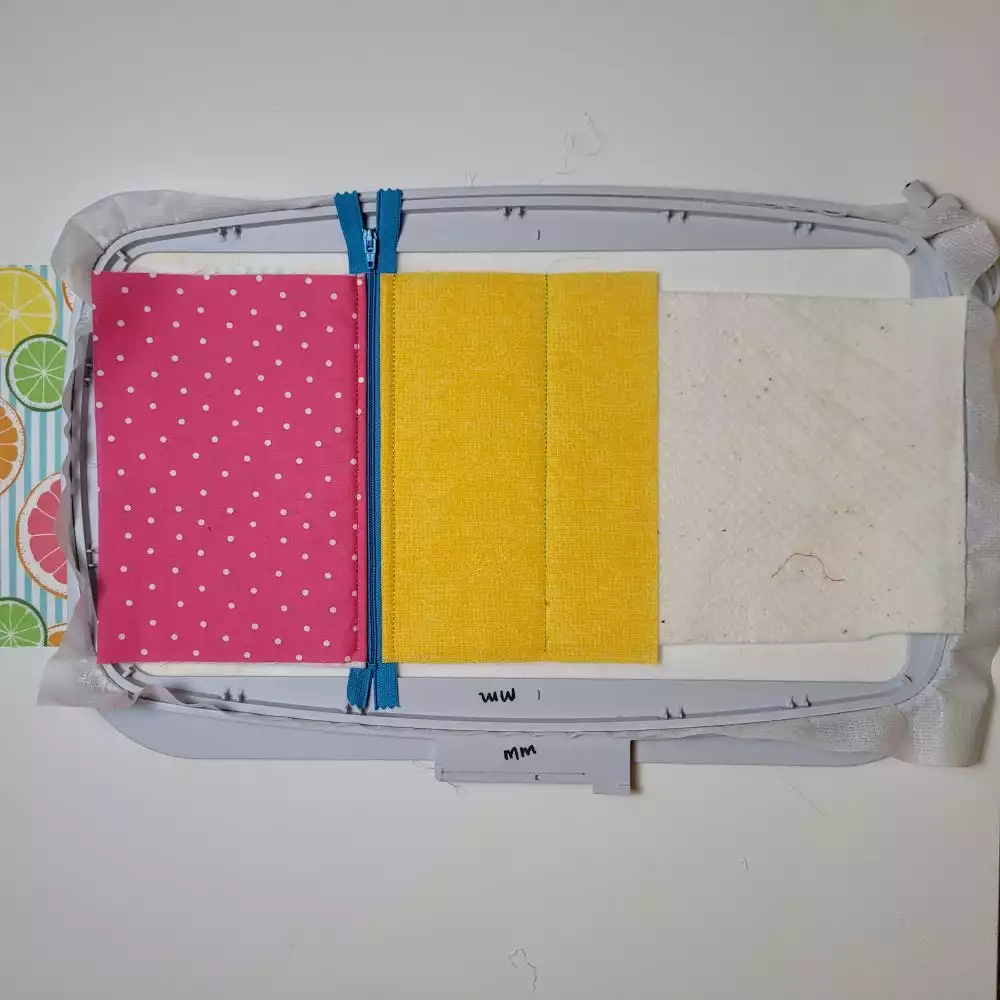
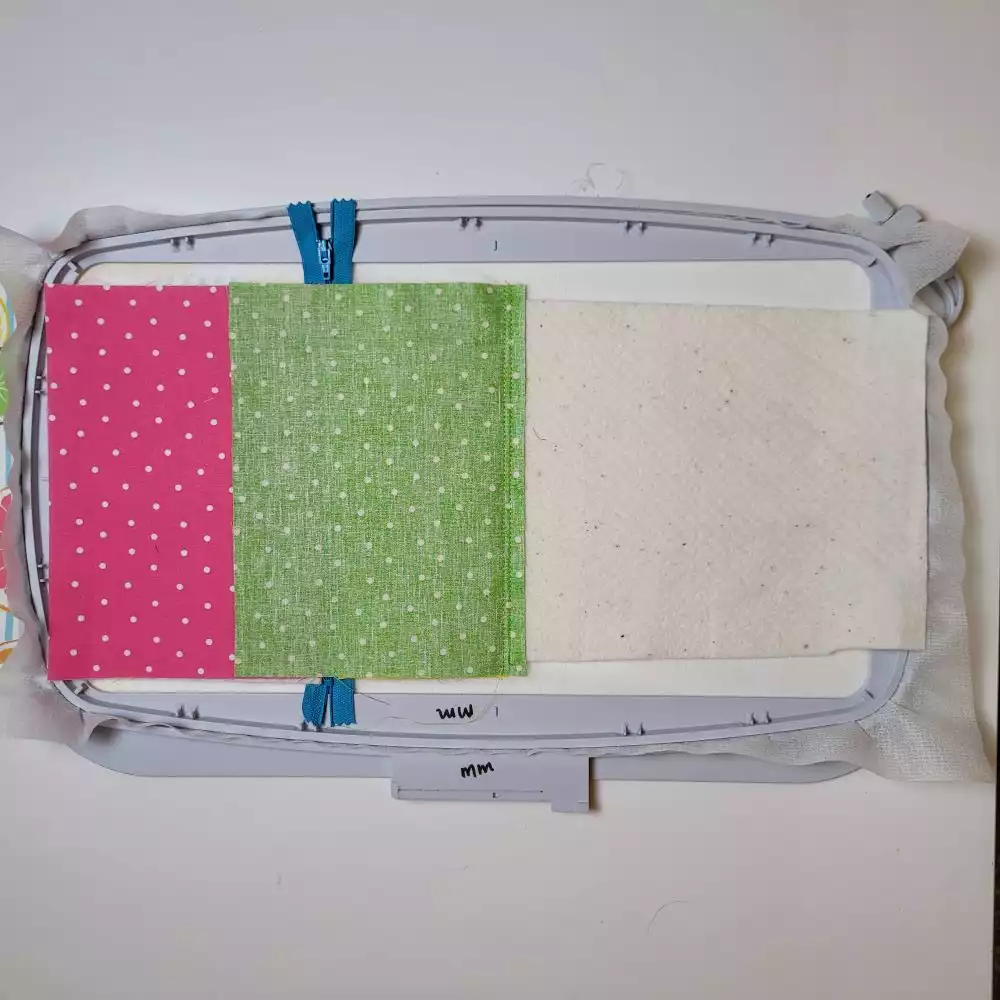
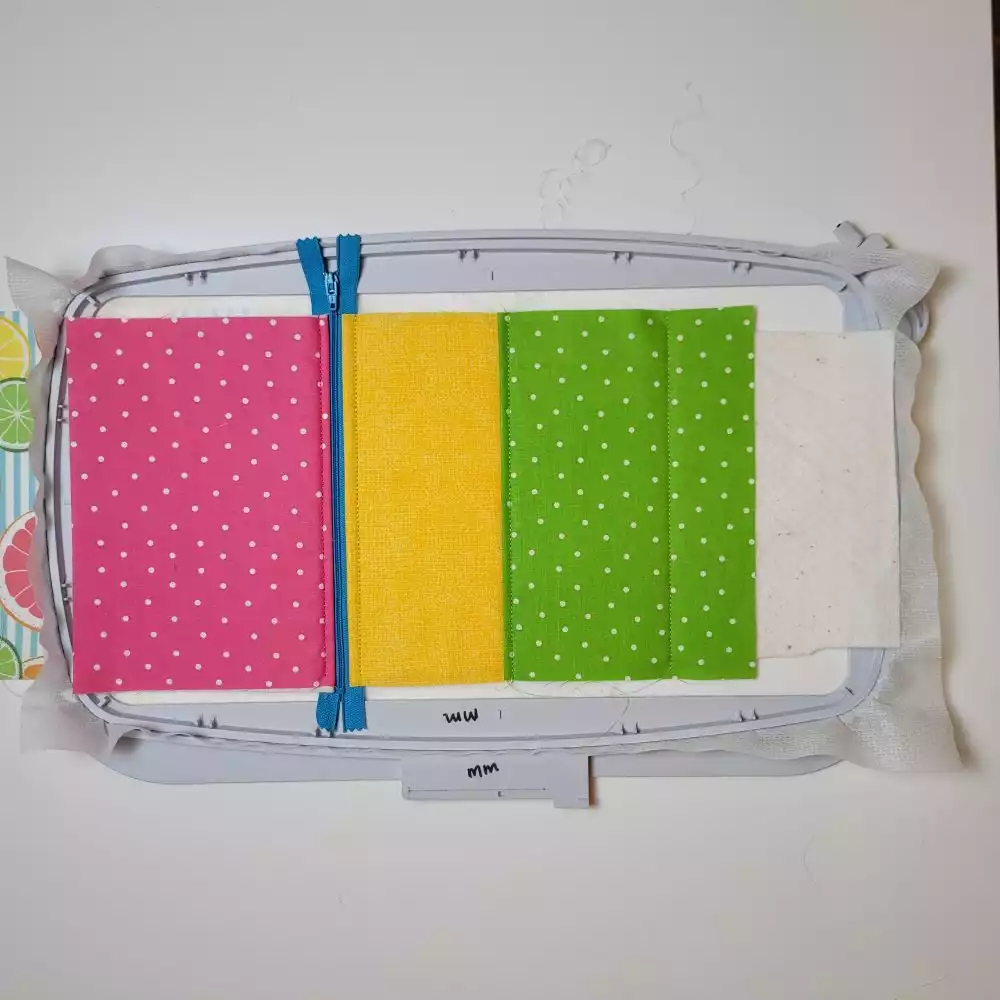
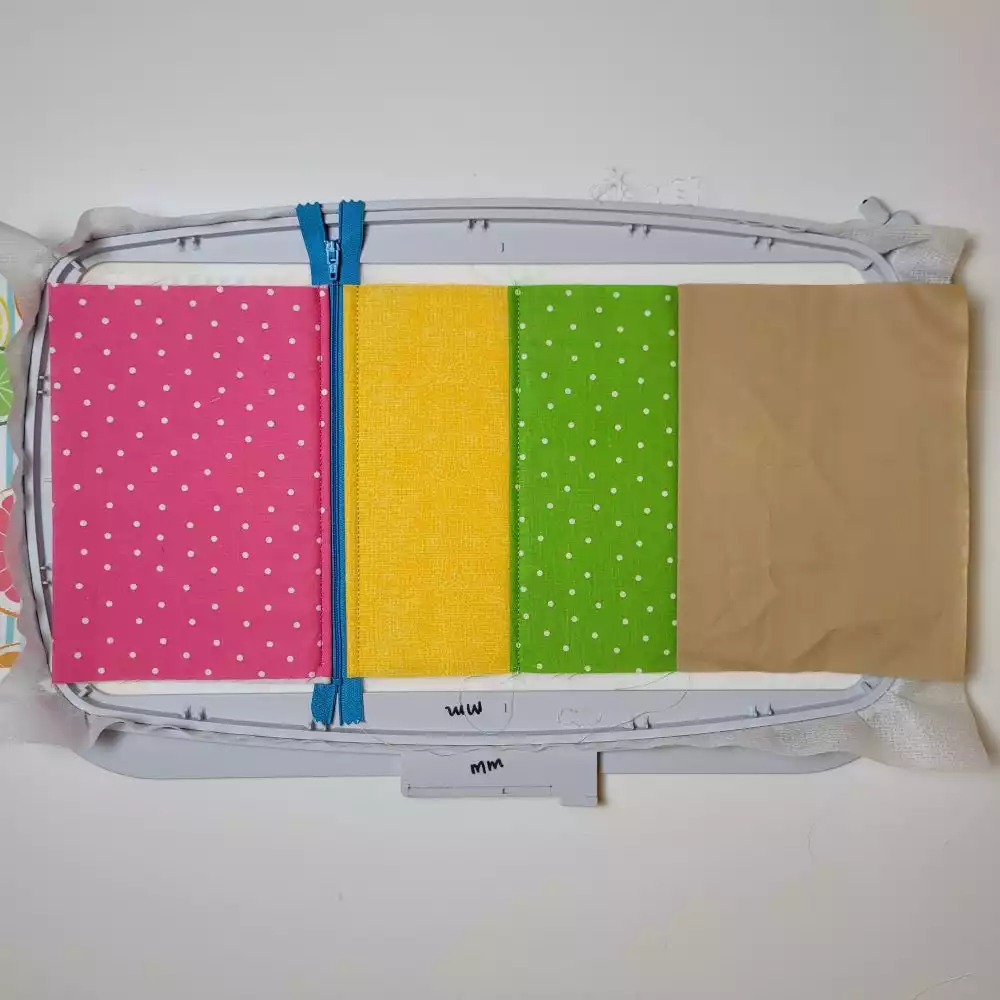
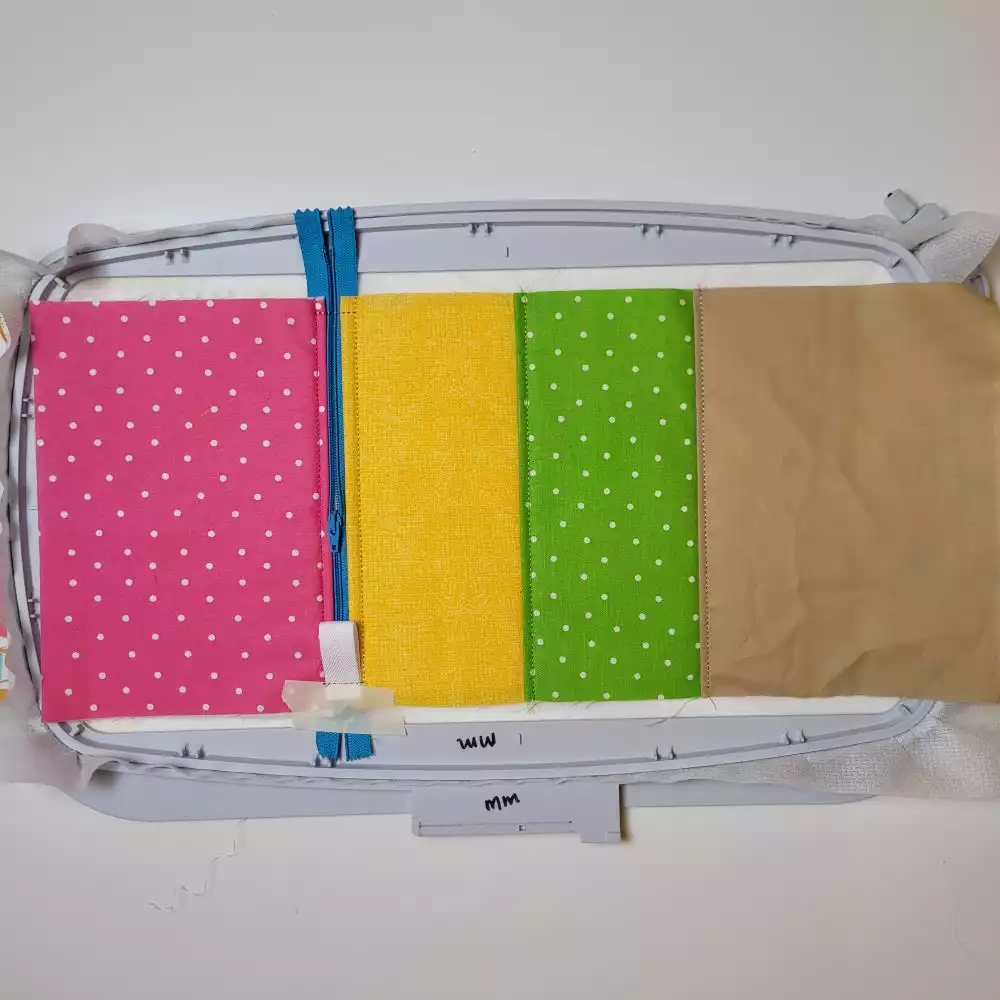
13. Turn the hoop over to the right side, place the middle popsicle outer piece (6” x 8”) right side down, lining up the raw edge with the bottom of the zipper.
14. Place the batting piece (b - 8” x 12”) over top of the middle outer piece. Tape to hold in place.
15. Stitch 6 - Middle piece tack down stitch.
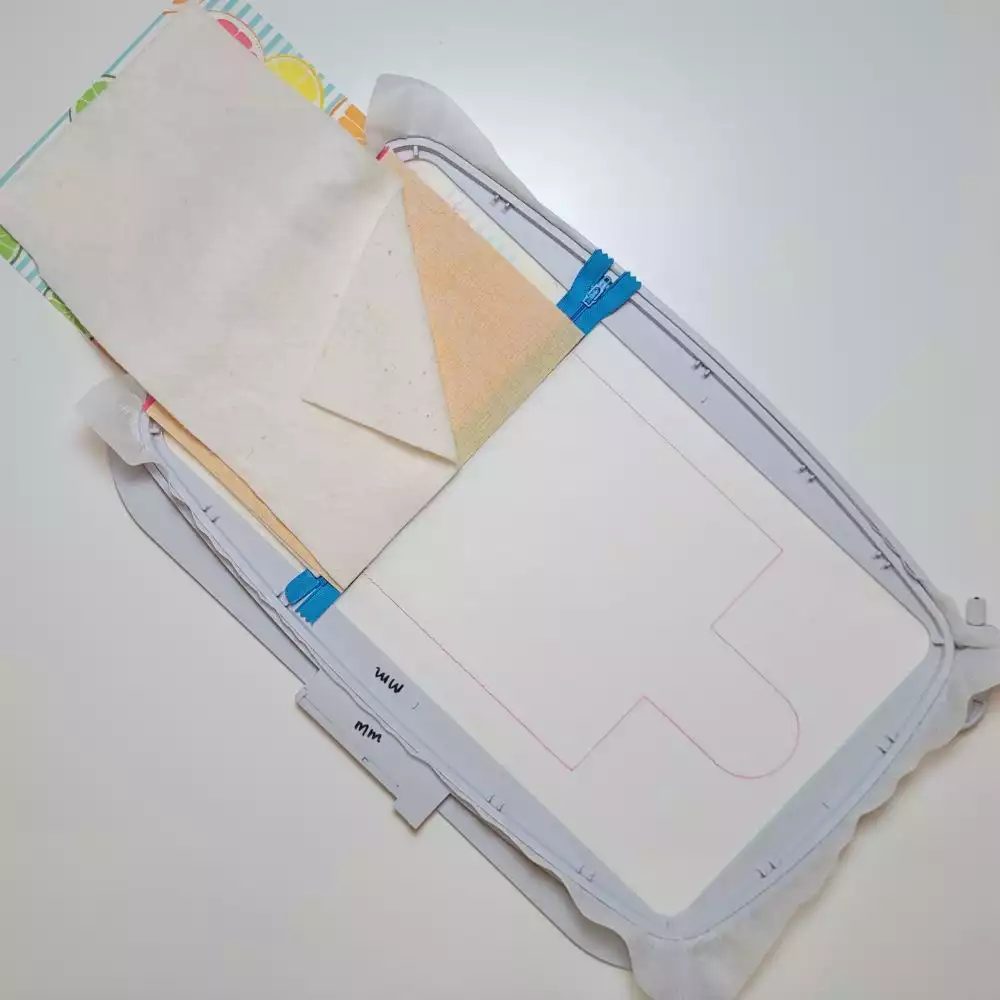
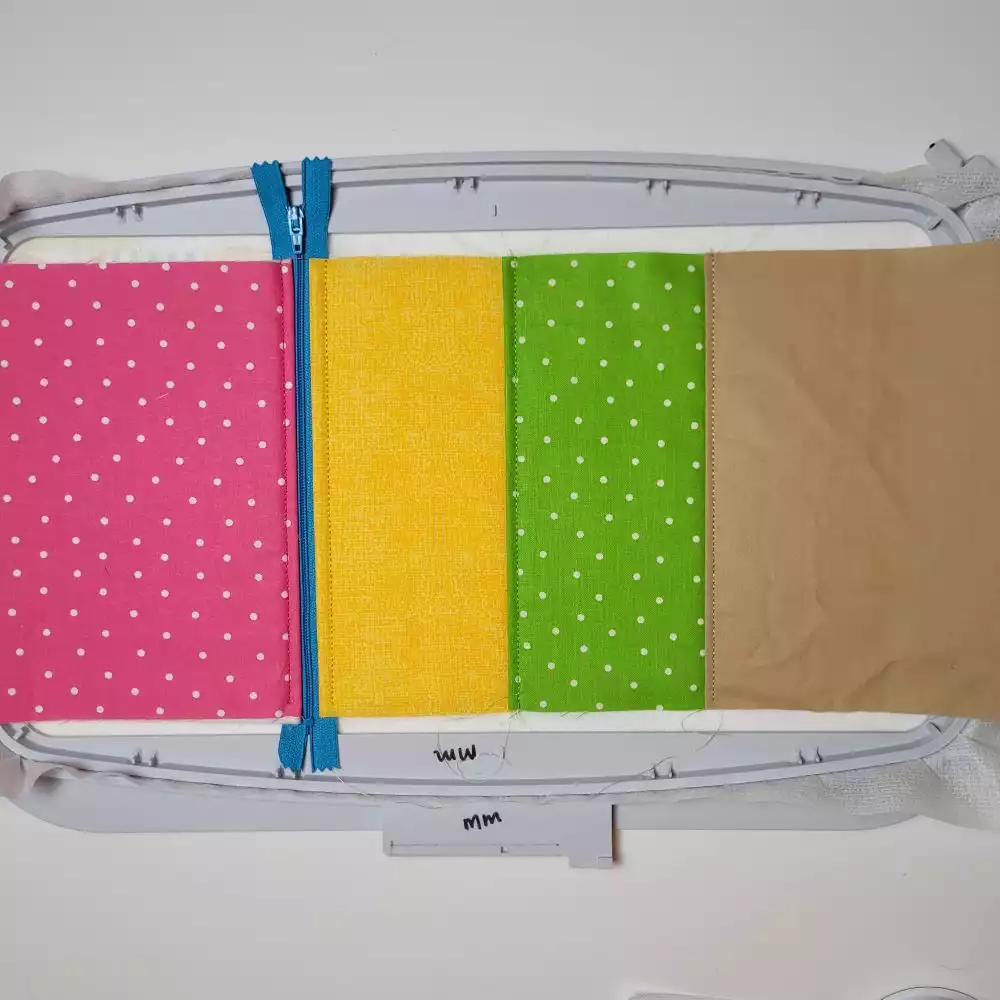
16. Flip both the middle and lining pieces right side out. Tape the corners to hold in place.
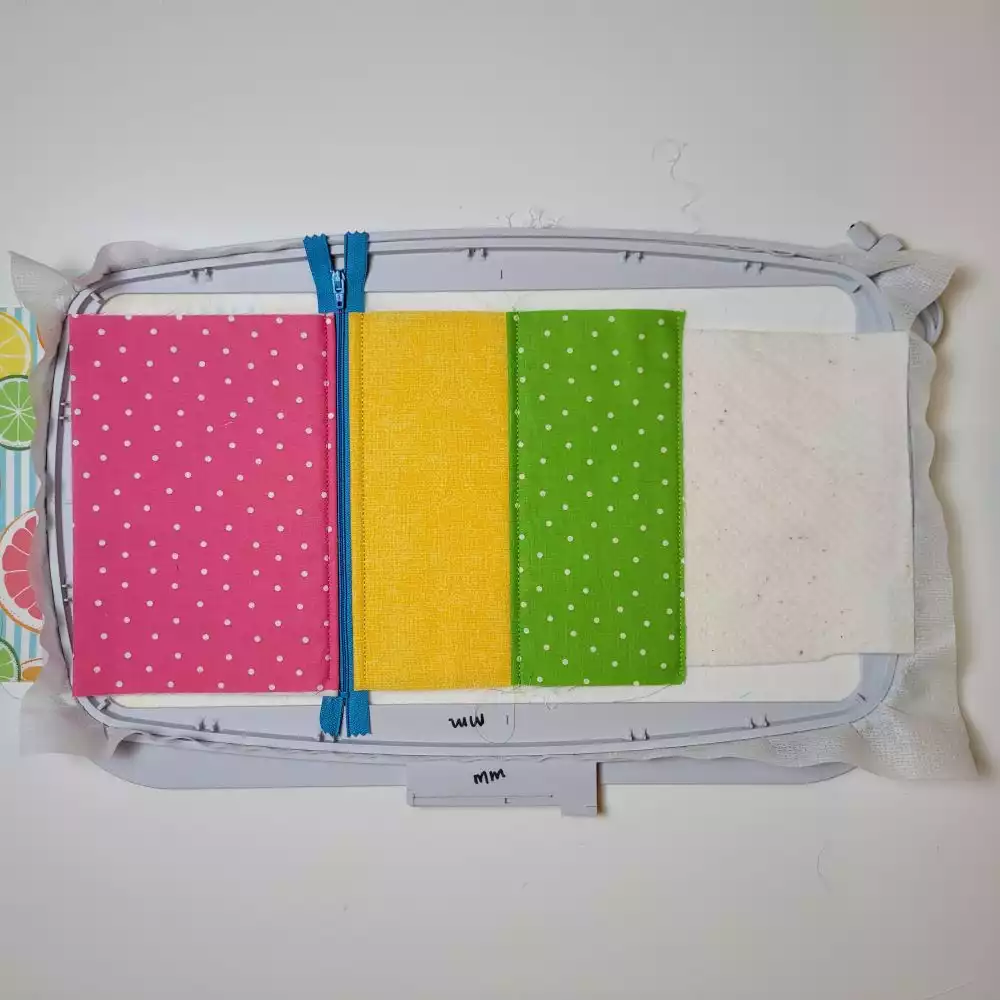
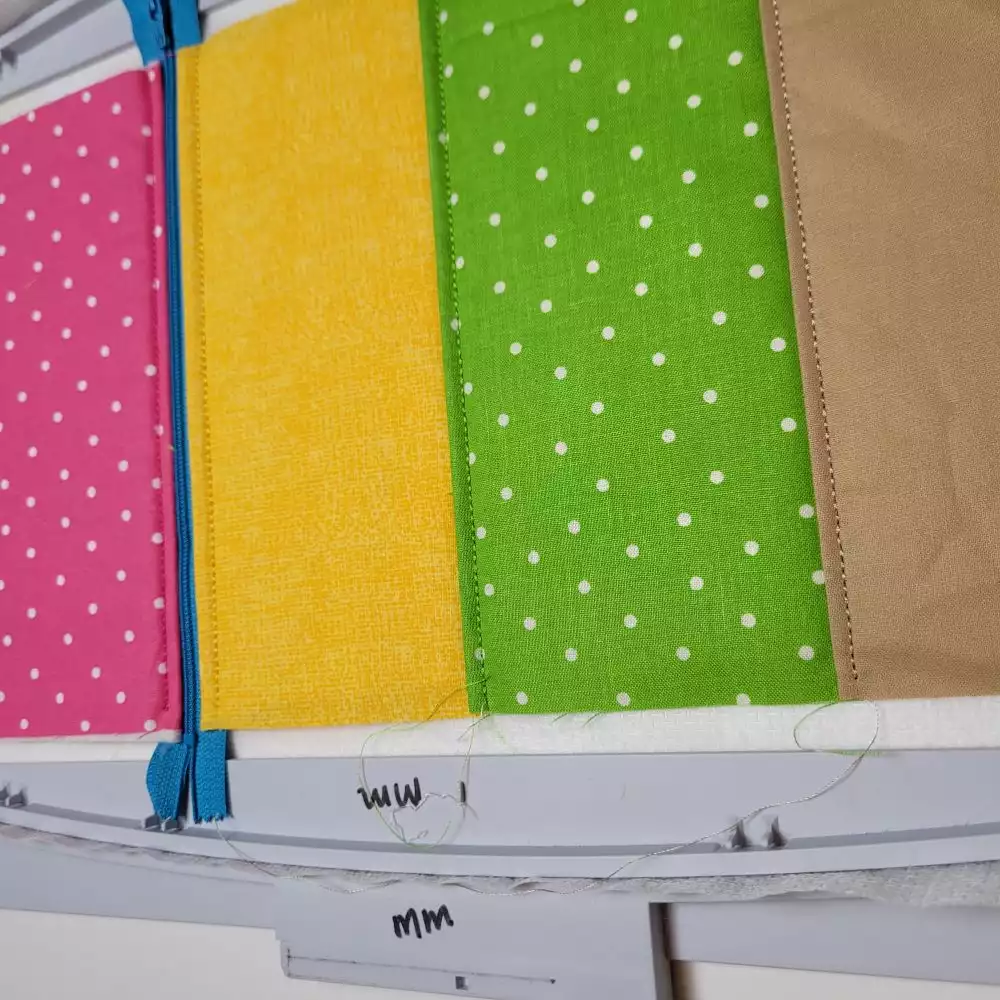
17. Stitch 7 - Middle and lining piece topstitch.
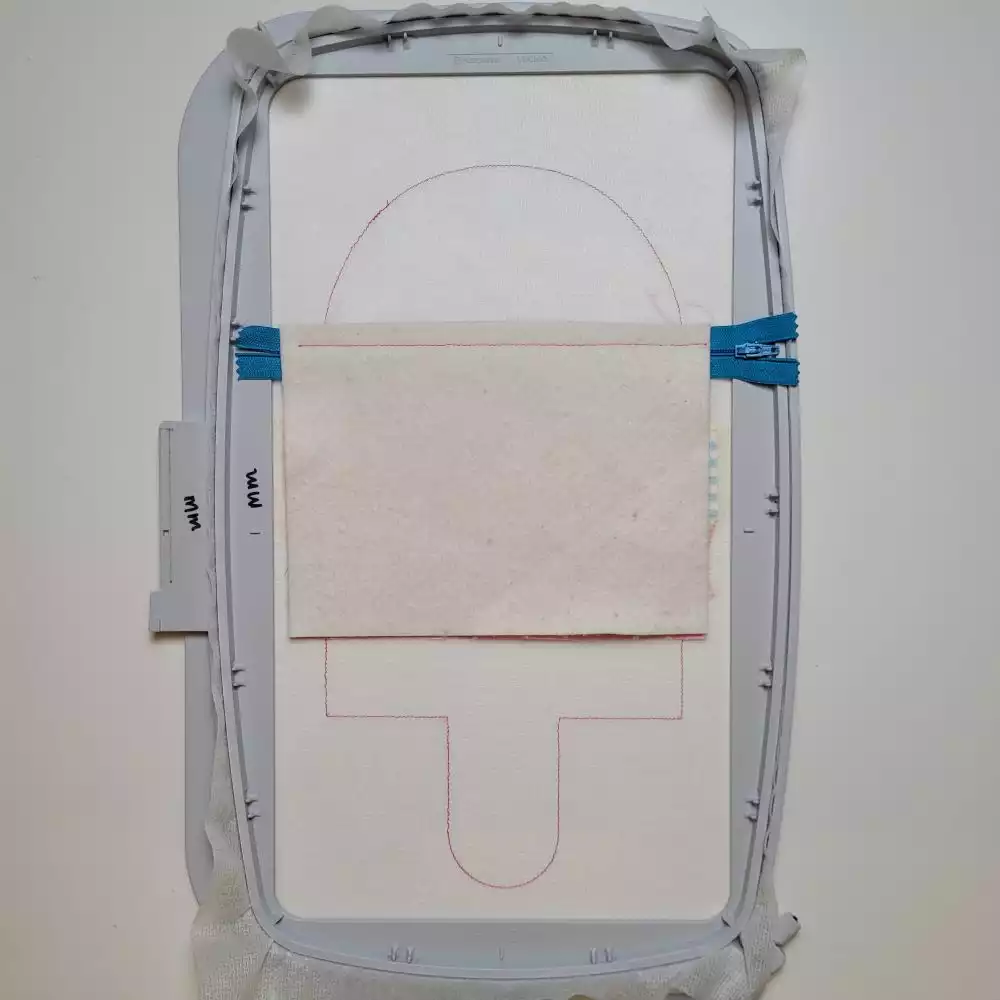
18. Turn the hoop over to the back side, flip the lining piece (b - 8” x 12”) back up to the wrong side. Tape to hold in place.
19. Stitch 8 - Bottom placement stitch.
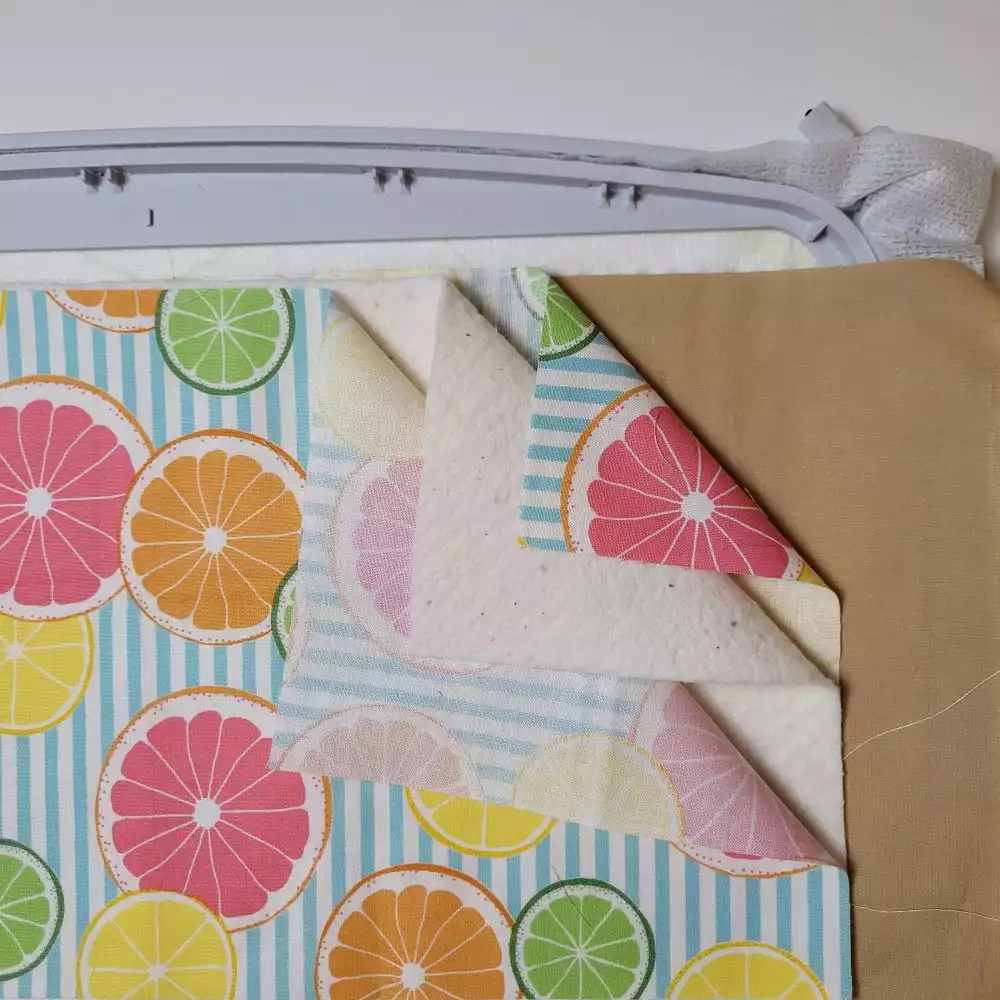
20. Cut away any excess fabric from the middle popsicle piece. DO NOT cut away the batting.
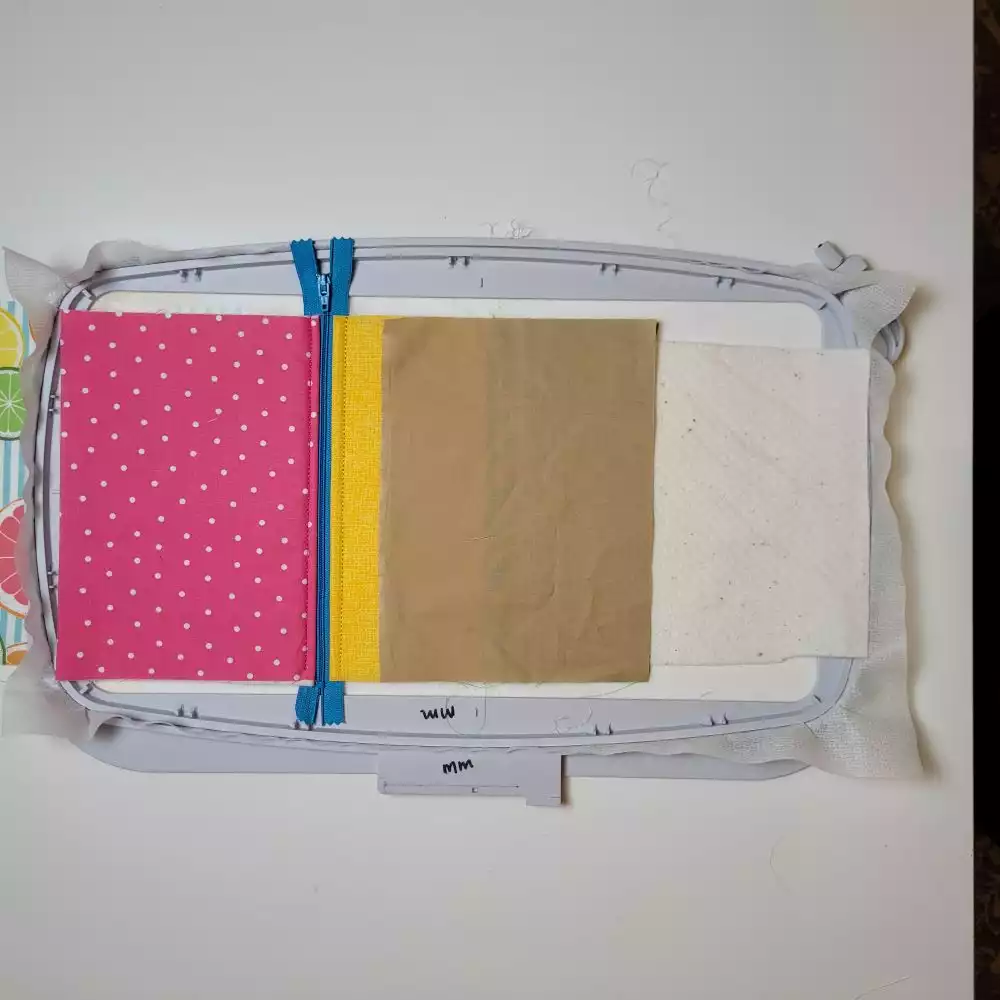
21. Place the bottom popsicle outer piece (6” x 8”) right side down lining up the raw edge up with the #8 stitch placement stitch.
22. Stitch 9 - Bottom piece tack down stitch.
23. Flip the bottom piece right side out.
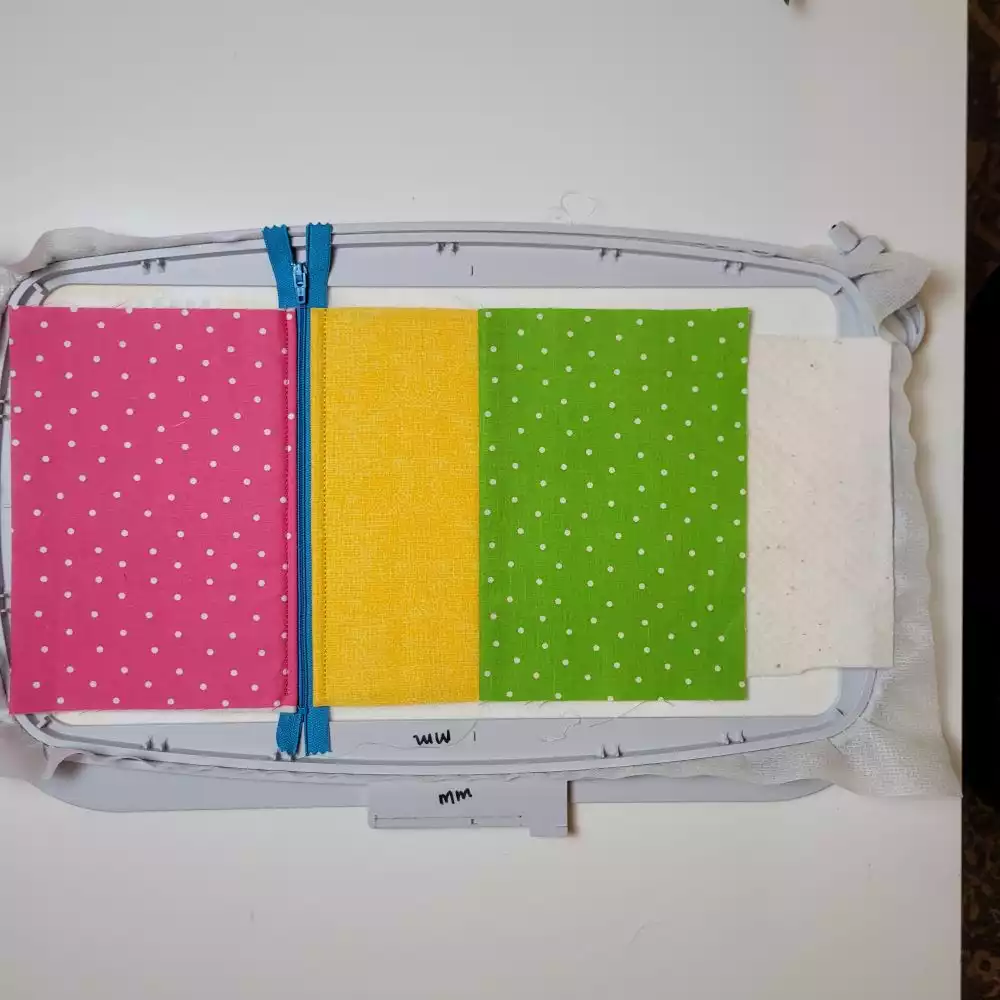
24. Stitch 10 - Bottom piece topstitch.
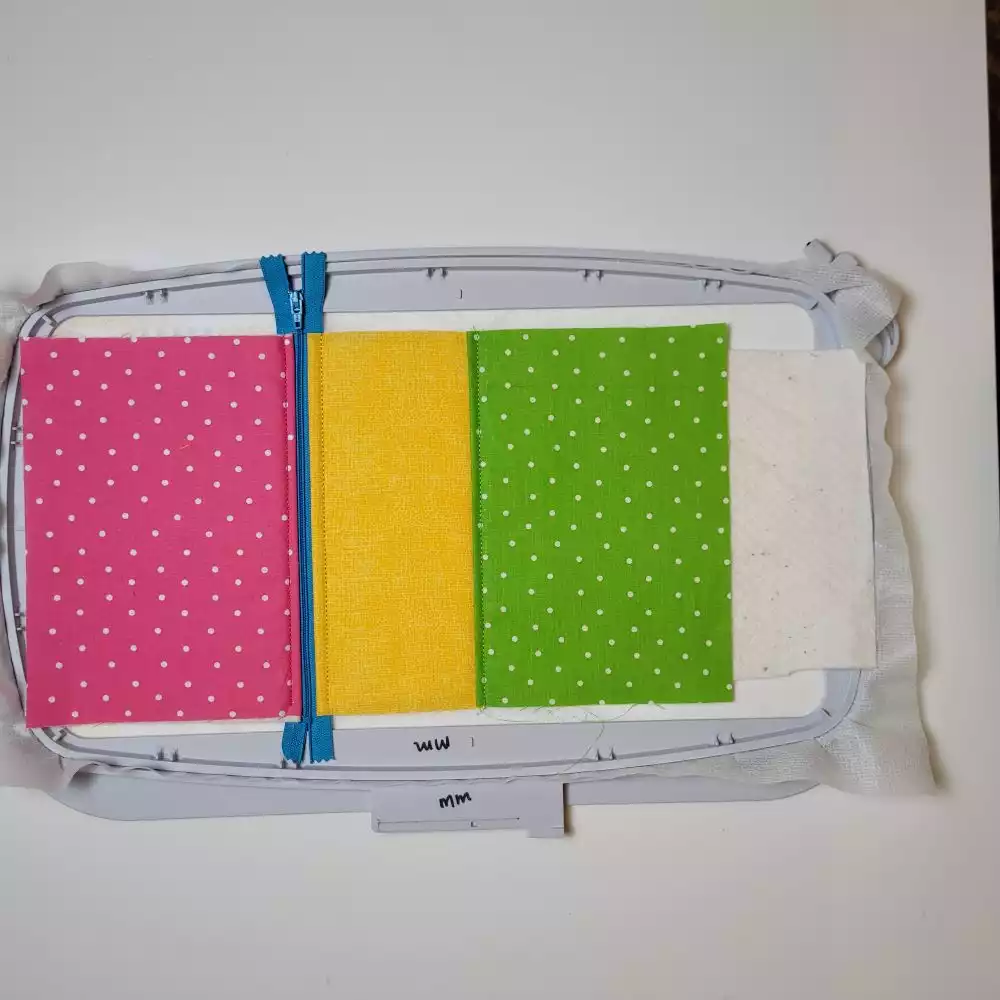
25. Stitch 11 - Popsicle stick placement stitch.
26. Cut away any excess fabric from the bottom piece. DO NOT cut away the batting.
27. Place the popsicle stick fabric (6” x 8”) right side down lining up with the #11 stitch placement stitch.
28. Stitch 12 - Popsicle stick tack down stitch.

29. Flip the popsicle stick fabric right side out.
30. Stitch 13 - Popsicle stick topstitch.
31. Open the zipper up at least half way.
32. Turn the hoop over to the back side. Move the lining piece (b - 8” x 12”) so that it is right side up. Tape to hold in place.
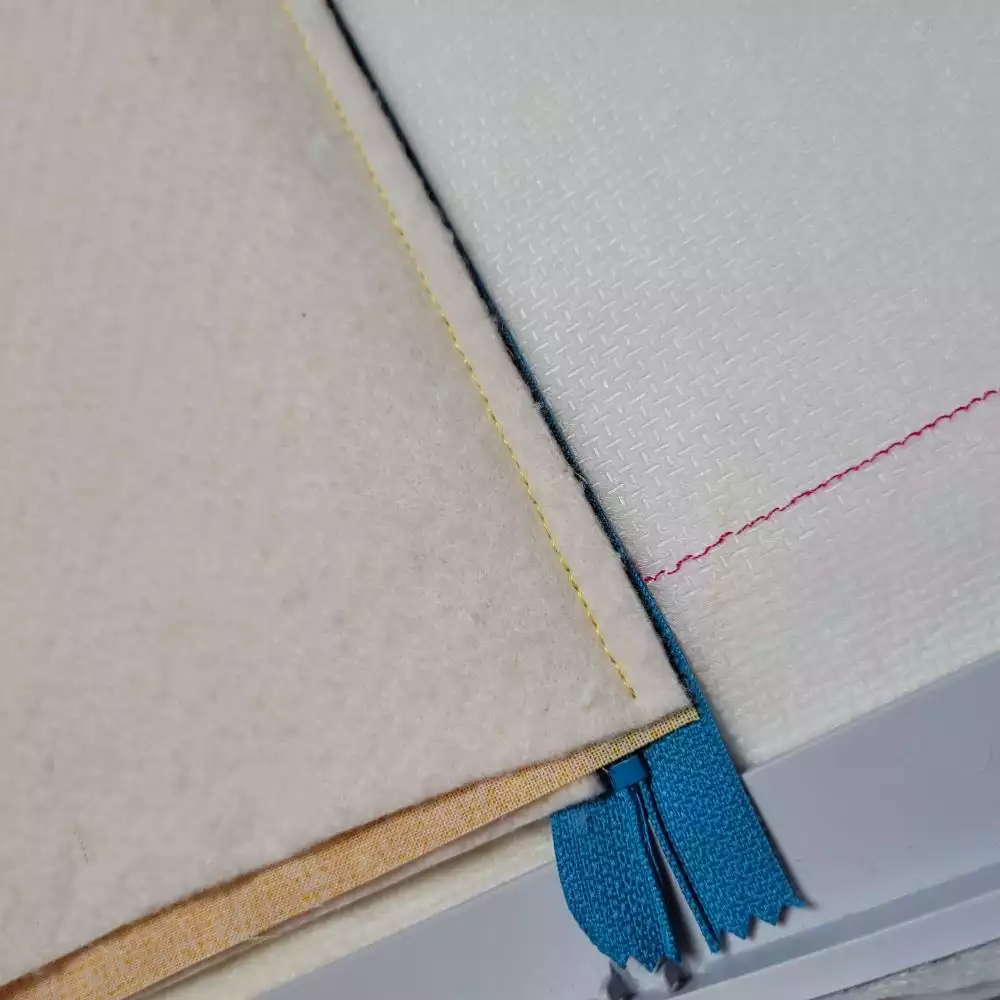
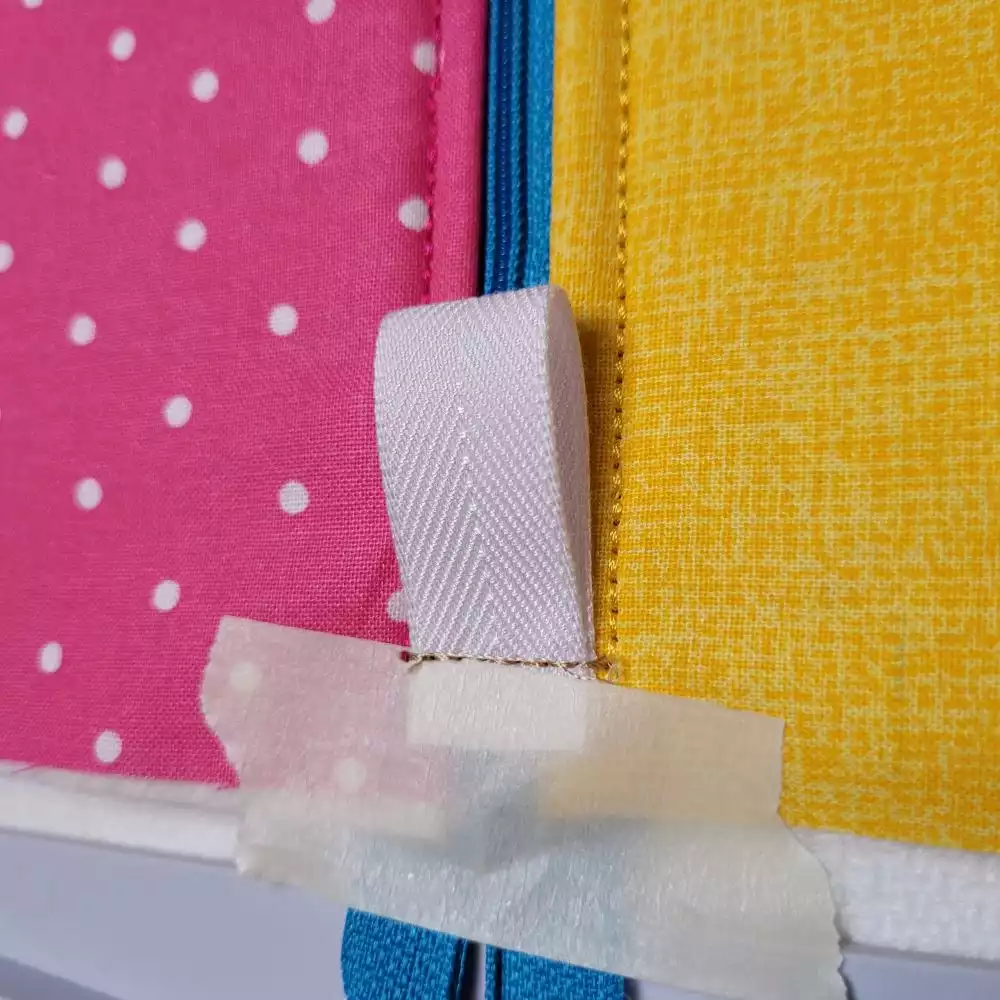
33. Place ribbon or twill piece or pieces folded in half against the zipper, lining up the raw edge with where the topstitch lines start and end. Tape to hold in place.
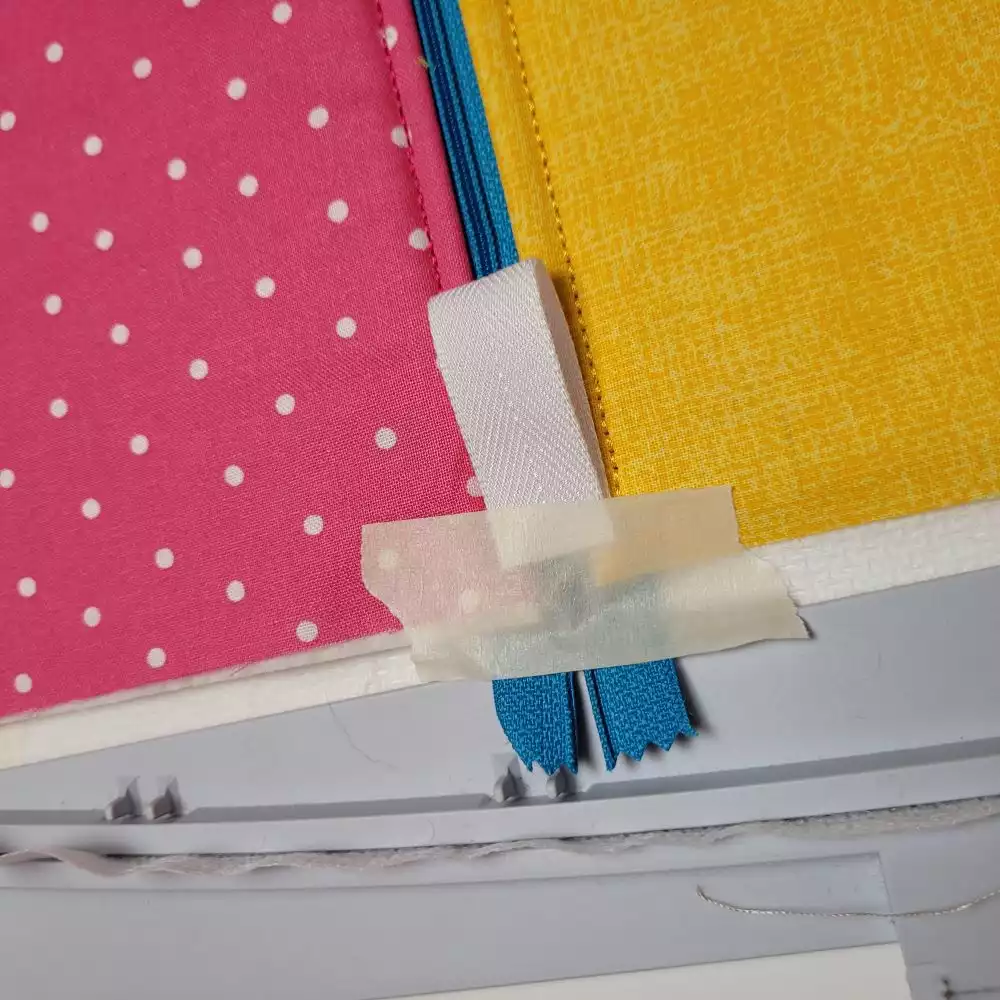
34. Stitch 14 - Ribbon or twill piece tack down stitches.
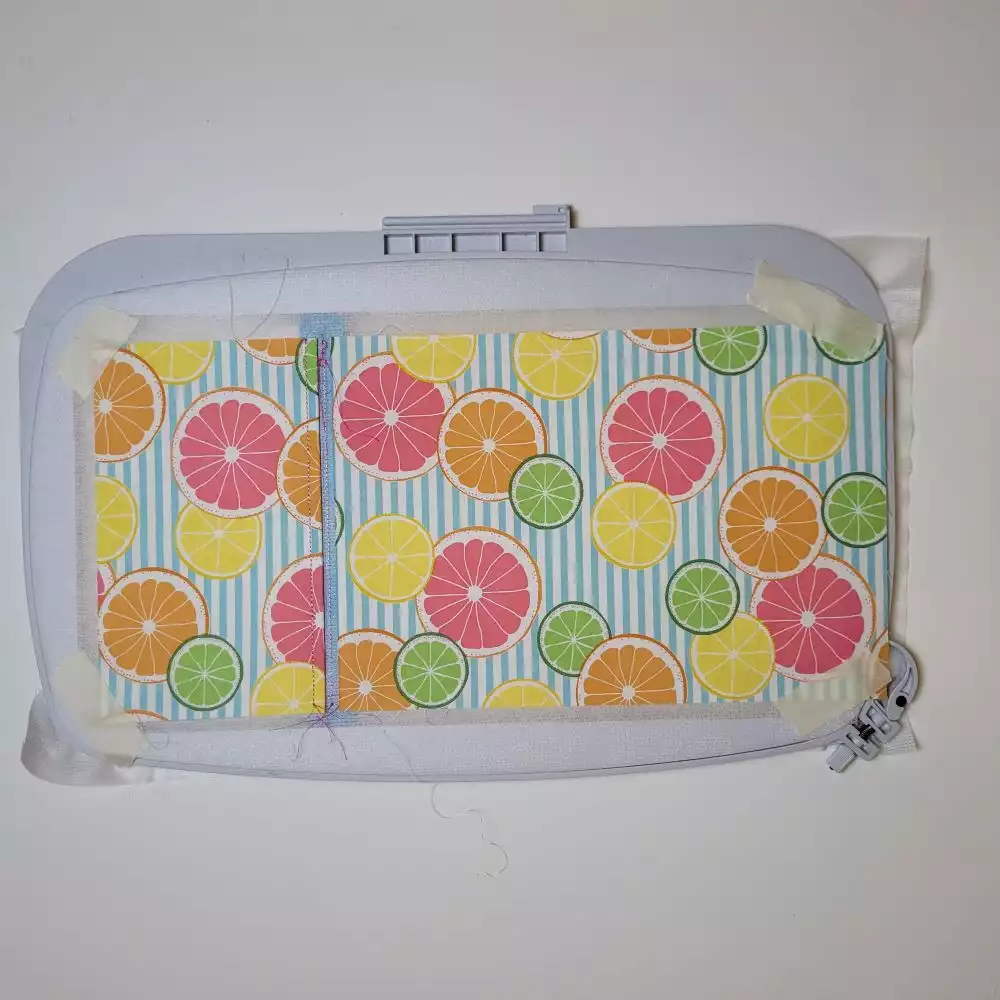
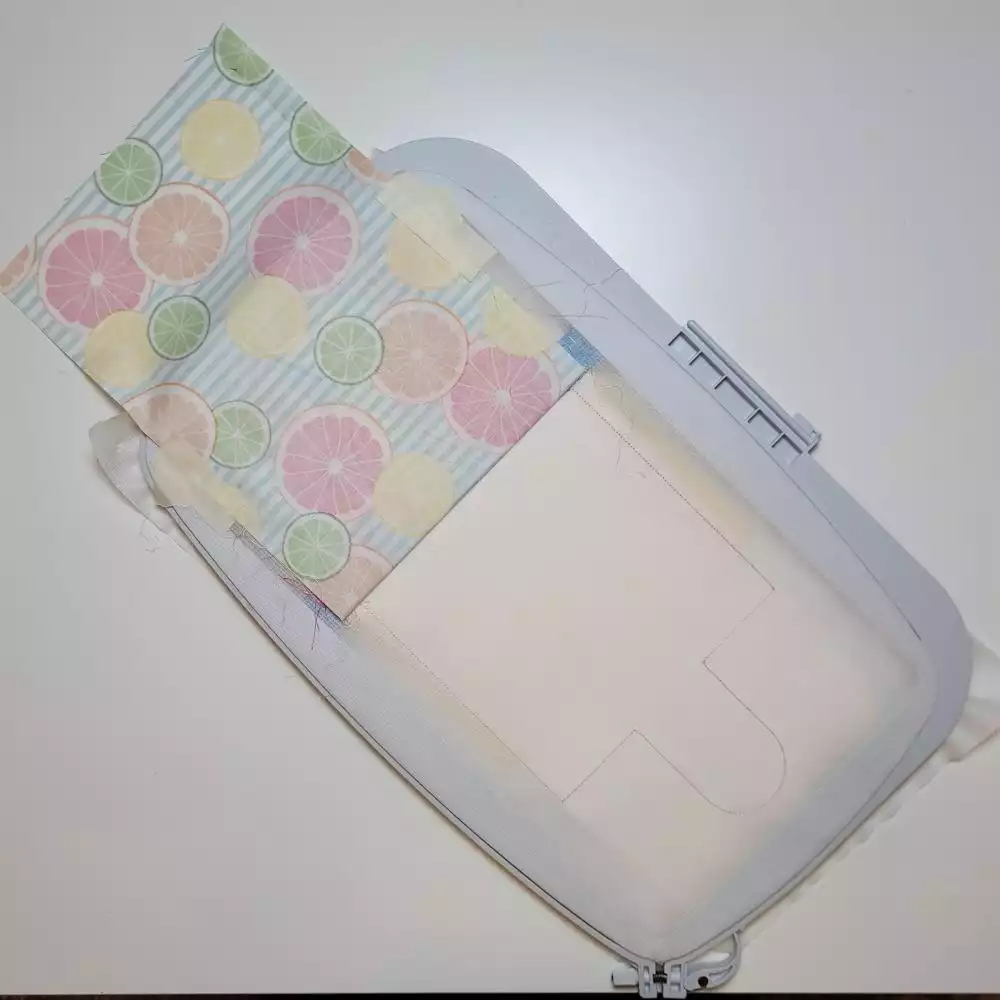
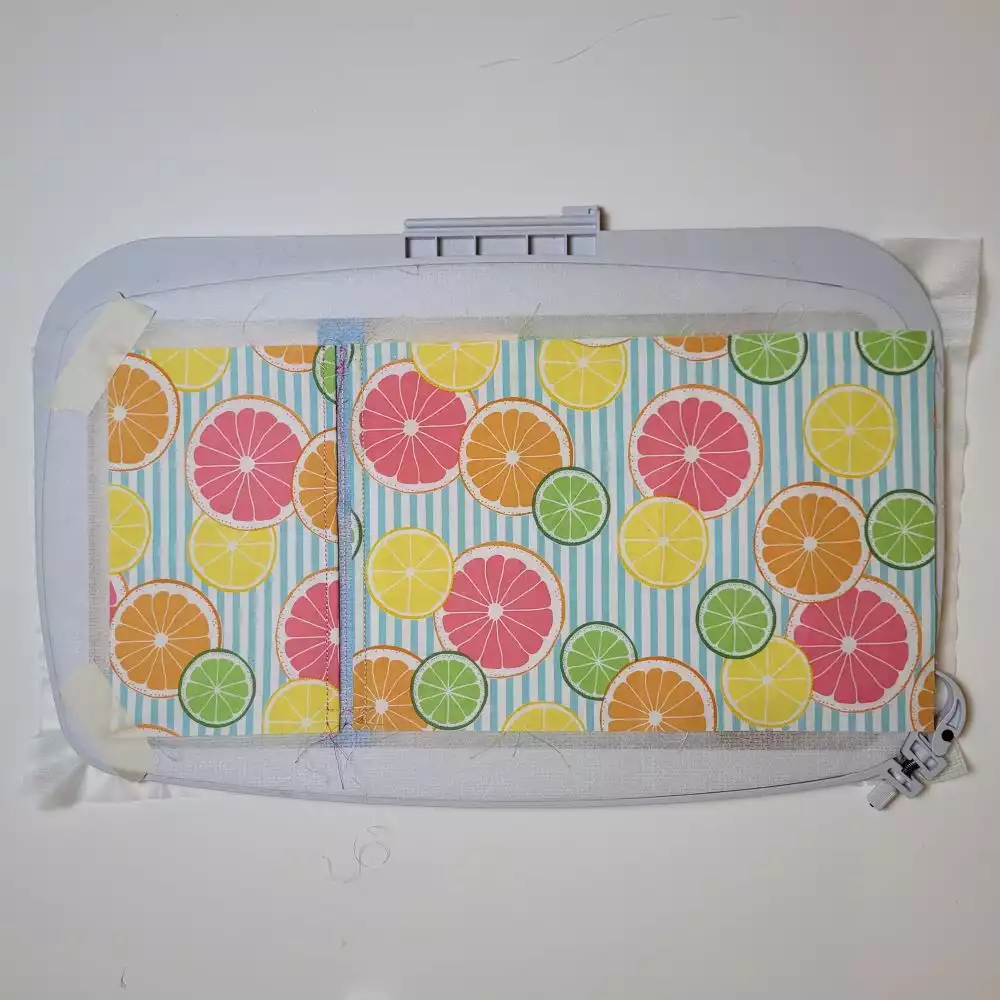
35. Place the outer back piece (c - 8” x 16”) right side down on the front of the hoop.
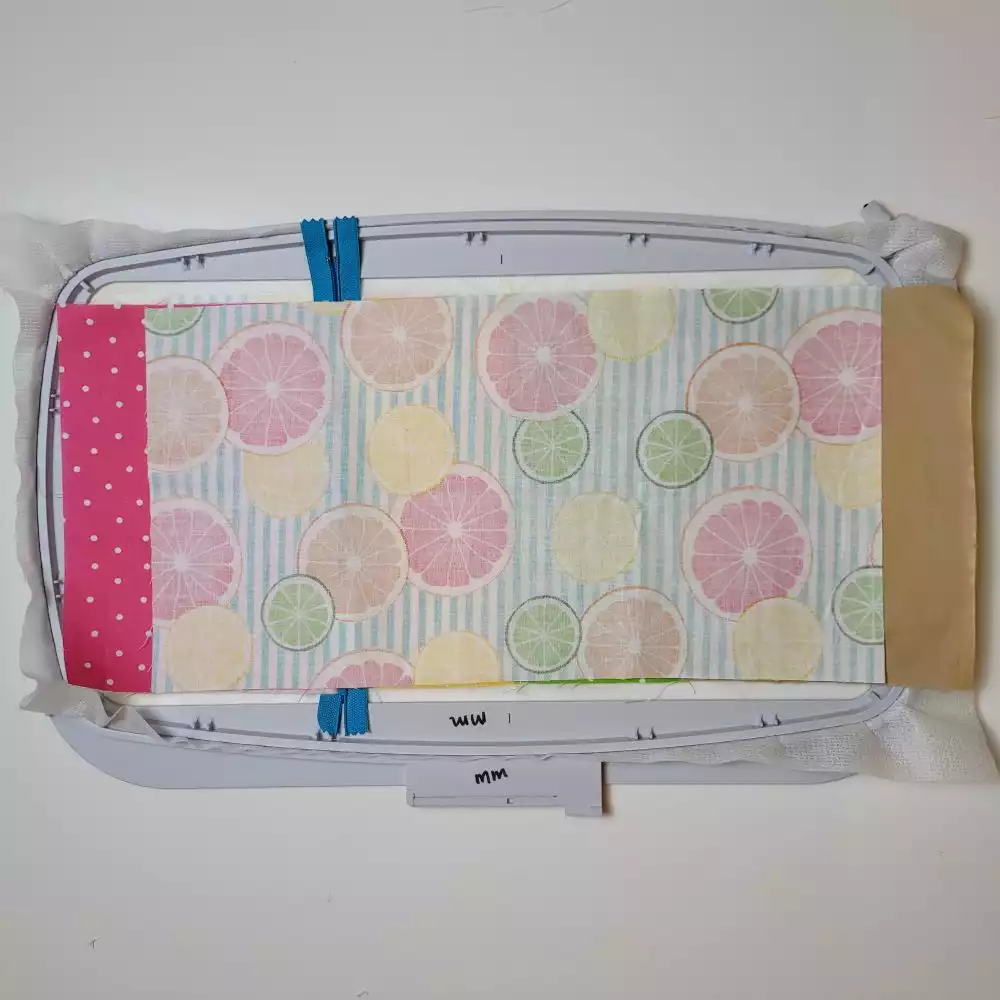
36. Place the batting (c - 8” x 16”) piece over top.
37. Place the second lining back piece (c - 8” x 16”) right side up over top. Tape to hold in place.

38. Stitch 15 - Popsicle outline and zigzag stitches.
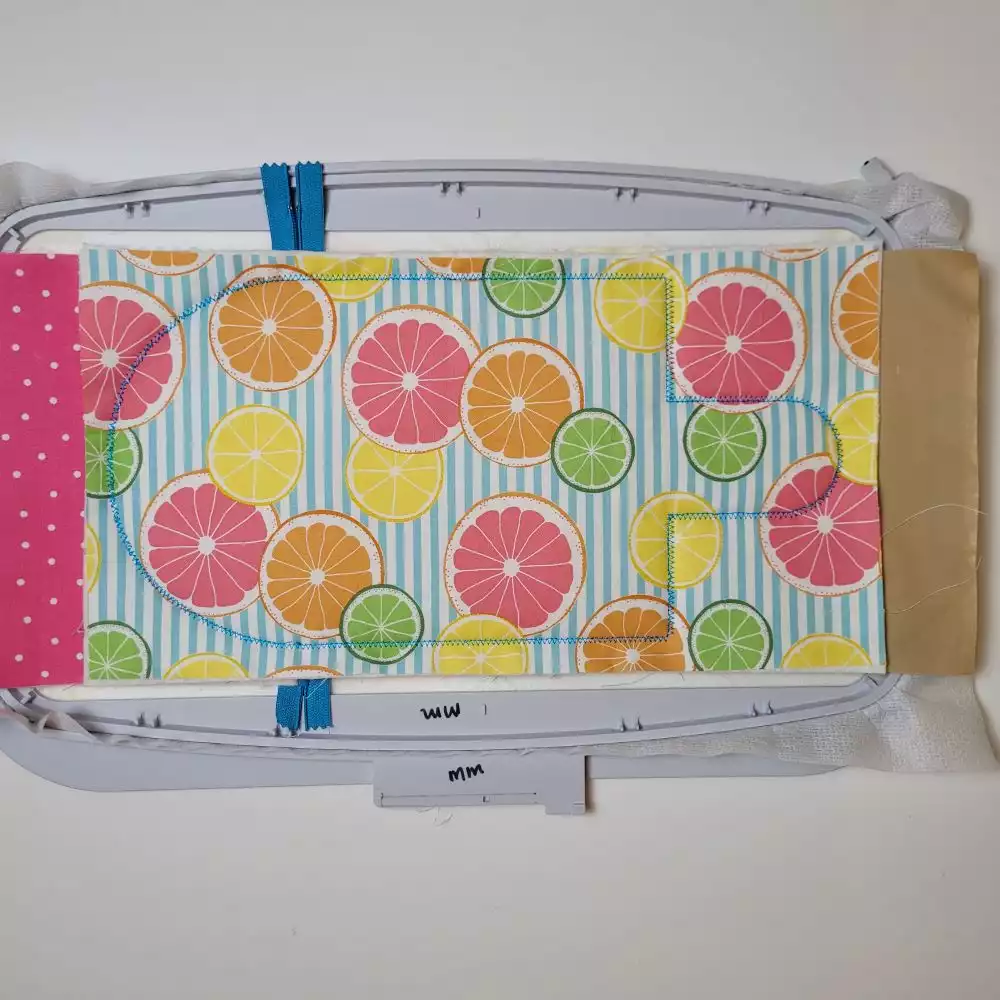
39. Remove the zipper pouch from the embroidery hoop.
40. Cut around the popsicle outline being mindful not to cut any of the stitches.
41. On the backside of the popsicle pouch carefully cut out the stabilizer that is over the zipper between the two pieces.

42. Turn the zipper pouch right side out through the zipper opening.
43. If you choose to place two ribbon or twill pieces add a strap to create a crossbody bag and enjoy!
20230719_095310.jpg