 United States
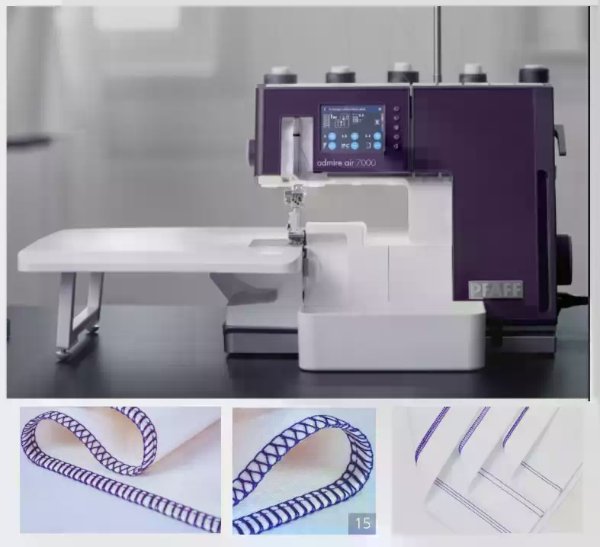
How To Start Sewing on a Serger
What you need to know:
Once you have threaded your serger or overlock machine for your desired stitch, keep these tips in mind:
1. It is always best to test sew on a sample of your fabric before sewing on your project or garment.
- Make desired or needed adjustments on your test fabric
2. Bring all threads over the stitch plate and slightly to the left under the presser foot.
- Ensure the upper cutter moves against the stationary cutter correctly by turning the hand wheel slowly toward you.
- If the upper cutter blade does not move correctly, check for fabric or waste thread stuck between the blades
3. Hold the threads and apply a slight tension.
4. Turn the hand wheel toward you 2 or 3 complete turns to start making a thread chain.
- Check if all threads wind around the stitch finger on the stitch plate
- If the threads do not wind around the finger, make sure each thread is threaded correctly
5. Continue holding the thread chain while pressing the foot control.
- Sew until the chain is 2”-3” (5-8cm) long Stitches -
6. Place fabric under the front of the presser foot and sew a test sample.
- Guide the fabric slightly with your left hand while sewing
- Do not pull on the fabric as this may deflect the needle, causing a needle to break
7. When you reach the end of your fabric, continue sewing while drawing the finished fabric gently backwards and to the left.
- This is called chaining off
- It prevents the threads from coming undone and prepares for next sewing
8. Cut the threads with the thread cutter, leaving 2”-3” (5-8cm) long at the end of the fabric.
- Pull the threads under the thread cutter from the back, then towards you
Thread Tension Adjustments
Fine-tuning the tension is needed depending on the type of stitch and type and thickness of your fabric; your needle size; size, type, and fiber content of your selected thread.
Correct Tension 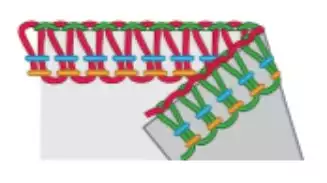
Lower looper thread and upper looper thread should be well balanced with the same tension. Both looper threads should cross at the edge of the fabric. Needle threads should be equally balanced, as well.
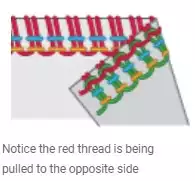
Upper Looper Tension 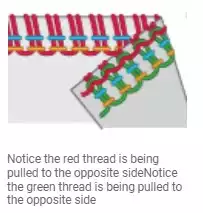
When the upper looper thread is too loose, tighten the thread tension of the upper looper or loosen the thread tension of the lower looper.When the upper looper thread is too tight, loosen the thread tension of the upper looper or tighten the thread tension of the lower looper.
Notice the red thread is being pulled to the opposite sideNotice the green thread is being pulled to the opposite side
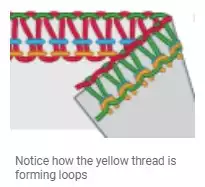
Lower Looper Tension 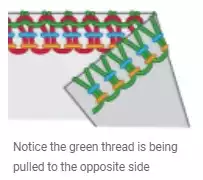
When the lower looper thread is too loose, tighten the thread tension of the lower looper or loosen the thread tension of the upper looper.
Notice the green thread is being pulled to the opposite side
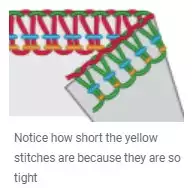
 When the lower looper thread is too tight, loosen the thread tension of the lower looper or tighten the thread tension of the upper looper.
Notice the red thread is being pulled to the opposite side
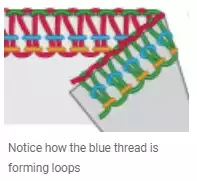
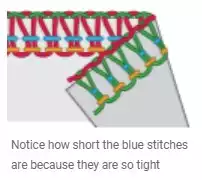
 Left Needle Tension
When the left needle thread is too loose, tighten the thread tension on the left needle or loosen both looper threads.
 When the left needle thread is too tight,loosen the thread tension of the left needle.
 Right Needle Tension
When the right needle thread is too loose, tighten the thread tension of the right needle.
 When the right needle thread is too tight, loosen the thread tension of the right needle.