 United States
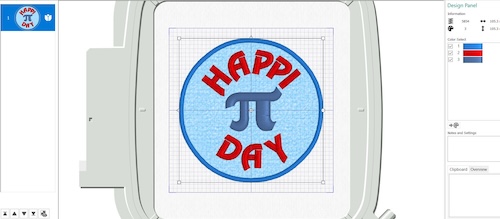
How to Make a PI-Day Badge
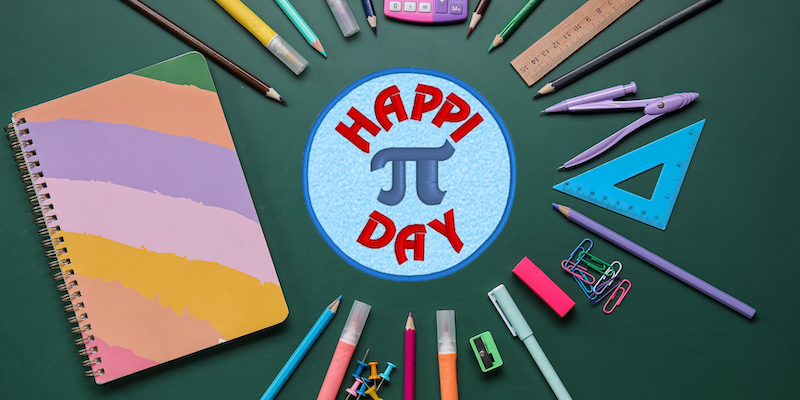
Unlock your creativity this Pi Day with a step-by-step guide on crafting a unique Pi Day badge using mySewnet embroidery software. Celebrate the mathematical constant in style with personalized designs tailored to your taste. Dive into the world of embroidery and commemorate Pi Day with flair!
With 30-day Free Trial of mySewnet Embroidery Software you will get to try out the most user-friendly and feature rich digitizing software on the market. It works with all embroidery machine brands and is available for both Windows and Mac.
What you need:
- mySewnet embroidery software silver level or above
- Pi Day Embroidery File
To stitch out the embroidery you need:
- Embroidery hoop 120x120mm or larger
- Tear away stabilizer or water-soluble stabilizer
- Fabric for the badge
- Embroidery thread
How to make the Badge
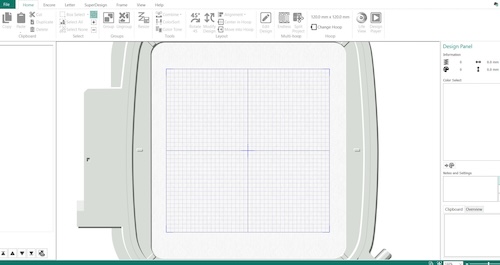
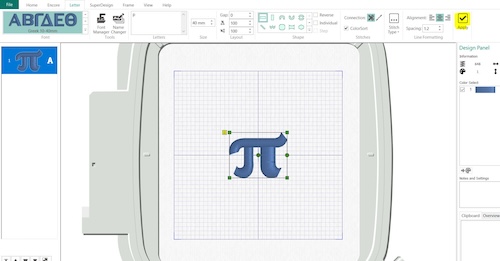
1. Open mySewnet embroidery software, select Blank Canvas. Set the Hoop Size to 120x120mm Hoop.
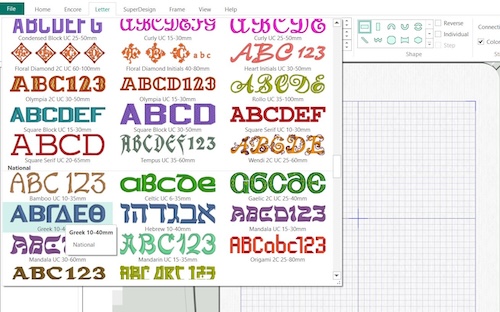
2. Go to Letter, National and select Greek 10-40mm.
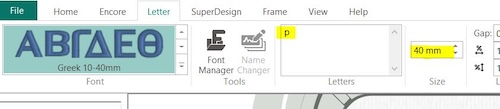
3. Write the letter “p” in the text box and set the size to 40mm.
4. Click on Apply.
5. Go to letter again, select Modern, Revue.
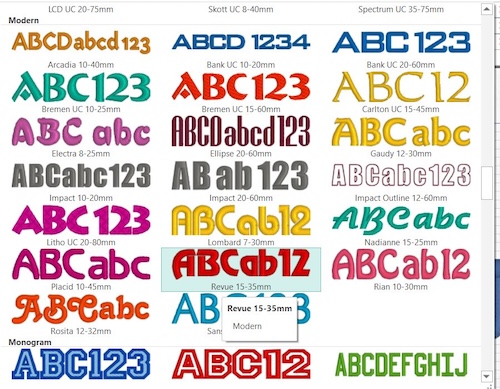
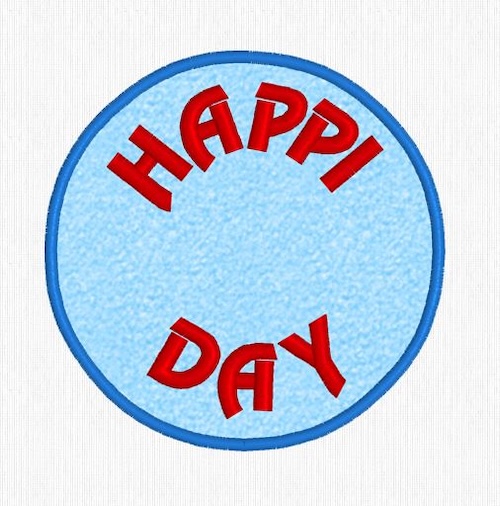
6. Write “HAPPI”, (the misspelling is intentional for a funny effect, but you can do as you like.) Click enter and then “DAY”. Set the size to 20mm and set the Shape to Circle with two parts.
7. Click Apply. Use the green handles to drag the circle to the right size (about 90mm height). Use the green square handles in the circle to center the text on top and bottom.
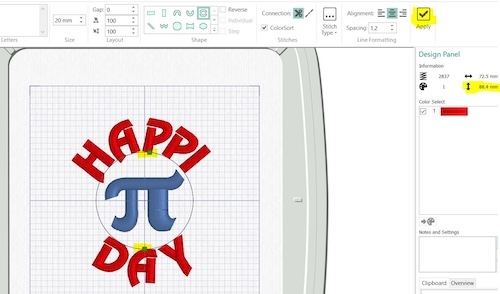
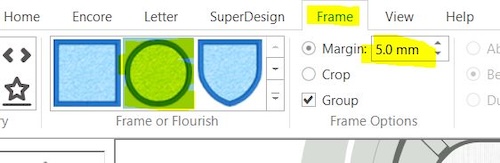
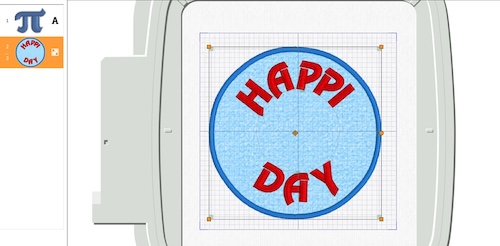
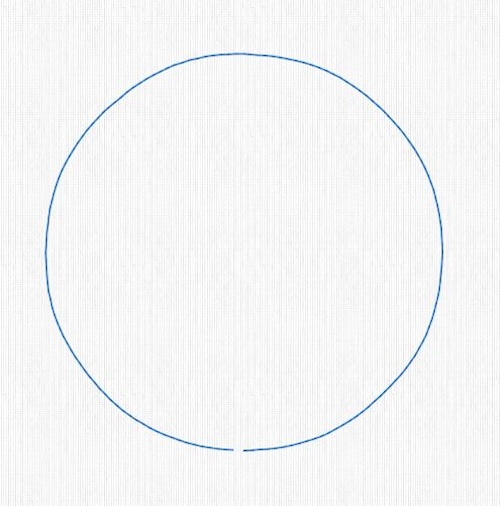
8. Time to make the badge, go to Frame, click on the round shape, and set the margin to 5mm.
9. Click Apply. Now it will look like this:
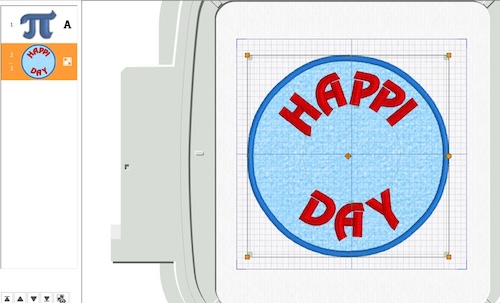
10. Go to Home tab. As you can see at the filmstrip on the left, the pi character is stitched out first, so it needs to be moved. Click on the pi character in the filmstrip to select it and then drag it down, below the badge.
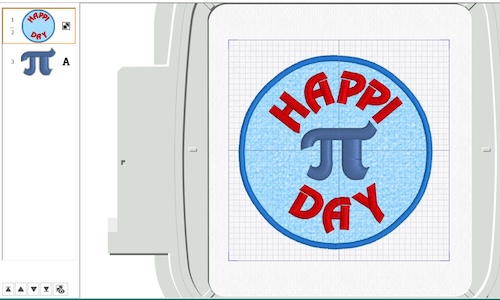
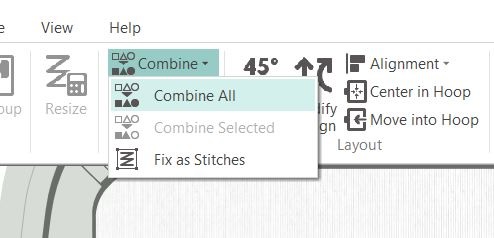
11. Go to Combine, select Combine all.
12. Your embroidery is now finished.
13. Save the file on your computer. It will be saved in .vp4 file format.
14. To be able to stitch the file out you need to export. Uncheck the Colorsort option to avoid getting the embroidery stitched out in the wrong order.
Stitching out the badge
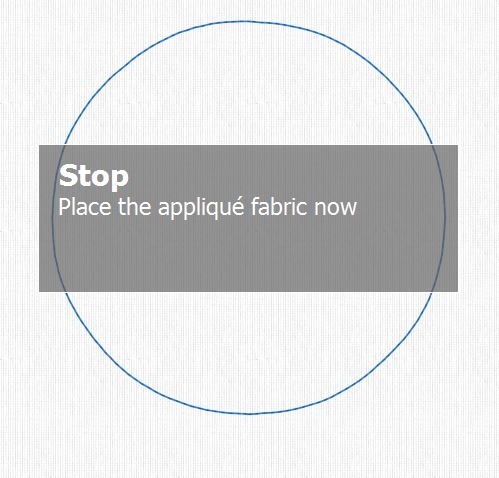
15. Hoop stabilizer and the fabric or garment you want to stitch out the badge on. If you just want to make the badge itself, use water soluble stabilizer instead.
16. The first row of stitches will show where to place the applique fabric.
17. When the machine stops, place the fabric on top of the stitching, make sure it extends outside the stitching on all sides.
18. The next row of stitching will secure the fabric in place.
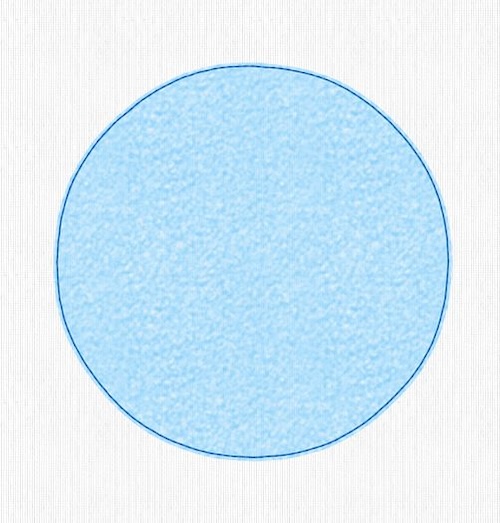
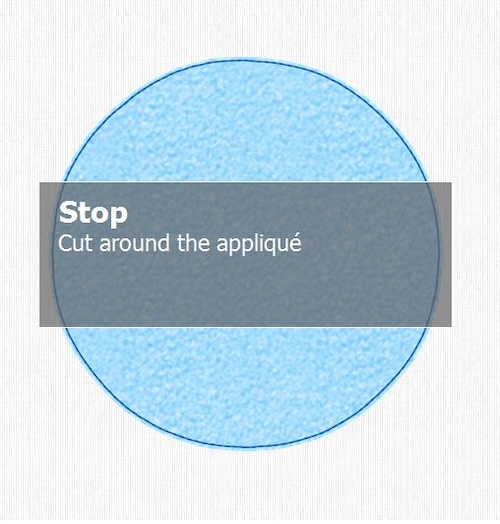
19. When the machine stops cut around the shape close to the stitching.
20. The next rows will be stabilizing stitches and finally the satin edge.
21. After the satin edge is finished the text will be stitched out.
 22. Finally, the Pi-Character is embroidered on the badge.
23. Your badge is now finished!
