 United States
How To Digitize Summer Placemats, part 3 - Quilt Block Creator and Assembly
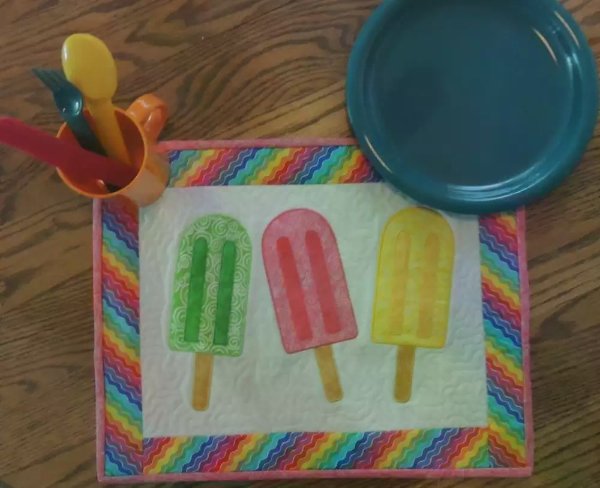
In this final lesson for the Summer Placemat, you will use mySewnet™ Platinum embroidery software to design the placements of the popsicles that were digitized in lesson 1, add quilting around the applique designs and add a fabric border Quilt as You Go style.
With 30-day Free Trial of mySewnet Embroidery Software you will get to try out the most user-friendly and feature rich digitizing software on the market. It works with all embroidery machine brands and is available for both Windows and Mac.
What you need: (supplies listed for one placemat)
In mySewnet Software
1. Open mySewnet Software and select Blank Canvas. When the Hoop Selection window opens, select Universal for the Hoop Group and 360mm x 260mm for the Hoop Size. Natural Orientation. Click OK.
2. Click on Insert and navigate to the location where the “popsicle applique” from lesson one to bring it into the hoop.
3. Select the popsicle and click on Duplicate twice. There should now be three popsicles in the hoop.
4. Position the popsicles to your liking. Change the colors for two of the popsicles by selecting the popsicle and double clicking on the color in the Design Panel.
5. Click on , and click on (The Orange handles around the design indicates that the designs are Grouped)
6. Click on Cut (all three of the popsicles are now placed on the Clipboard and no longer in the hoop area)
7. Click on the Create tab and select Quilt Block When the Quit Block Wizard window opens, select Filled Quilt Block; Inner Embroidery. Click Next.
8. Select shape 2 next to Shape, leave the Angle at 0 and change A to 360mm and B to 260mm under Enter Size. Uncheck Include a cut line around my Quilt Block under Cut Line. Click Next.
9. Click Paste Under Clipboard. and click Next.
10. Leave the Angle at 0, and change the Margin to 2 Under Outline. Click Next.
11. Select Stipple and click on Options. When the Quick Stipple Fill window opens, select Curve under Style and for Spacing, change the Gap to 10. Click Finish. (These options are only suggestions, feel free to explore all the quilting choices in this window to get the look you want)
12. Click on File, Export and Save the file as “Quilted Popsicle” send the design to the embroidery machine.
Assembling the Placemat
13. Hoop the No Show Mesh stabilizer and the white background fabric centering them both in the hoop.
14. Load the “Quilted Popsicle” and stitch out the applique. When the machine stops for the quilting. Remove the hoop from the machine, slide the batting and backing under the hoop and pin in place from the front of the hoop through all the layers. (This will make a “quilt sandwich”). Return the hoop to the machine and stitch the quilting portion.
15. When the embroidery is complete, remove the hoop from the machine, remove the fabric from the hoop and trim 1 ½” from the edge of the quilting along all four sides.
16. Take one of the 2” x 18” strips of fabric and place it right side down with the raw edge on the top of the placemat at the edge of the quilting. Stitch in place using a ¼” seam. Fold the strip back and press in place. Repeat for the bottom.
17. Repeat step 4 for the placemat sides.
18. Square up the placemat and bind.
Congratulations! You made it through all three lessons. Now you can take the skills you have learned and apply them to your own creations.
Try our embroidery digitizing software free for 30 days!