United States
Hearts on a String With Superdesign and Quilt Block Wizard.
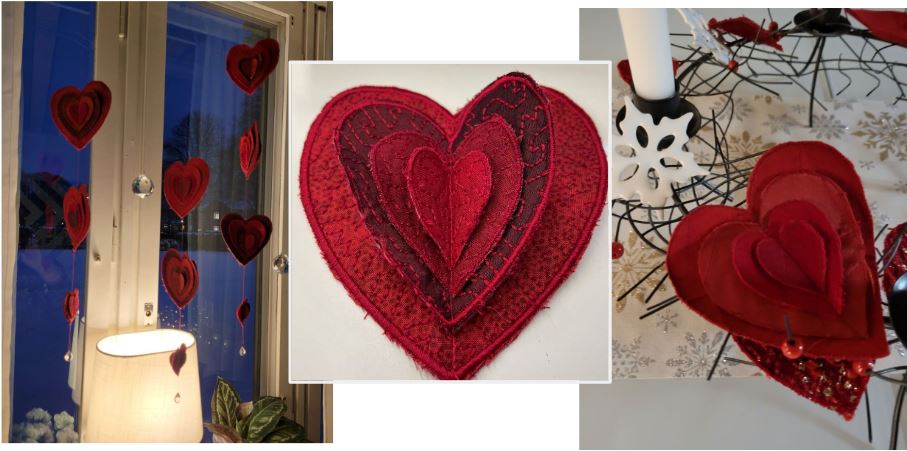
The three dimensional hearts can be used as individual decorations or used together in a string to decorate your window for christmas. They are easy to stitch out and the digitizing is easy with the help of quilt wizard and superdesigns!
What you need:
- mySewnet embroidery software, gold level or above.
With 30-day Free Trial of mySewnet Embroidery Software you will get to try out the most user-friendly and feature rich digitizing software on the market. It works with all embroidery machine brands and is available for both Windows and Mac.
For each of the heart sets (one large and one small three dimensional heart) you need:
- Water soluble stabilizer
- 2 pieces of red fabric for maximum variation use 2 different fabrics
- Embroidery thread
How to do:
1. Open mySewnet embroidery software, select blank Canvas and change the hoop to 240x150cm, Creative Grand Metal Hoop.


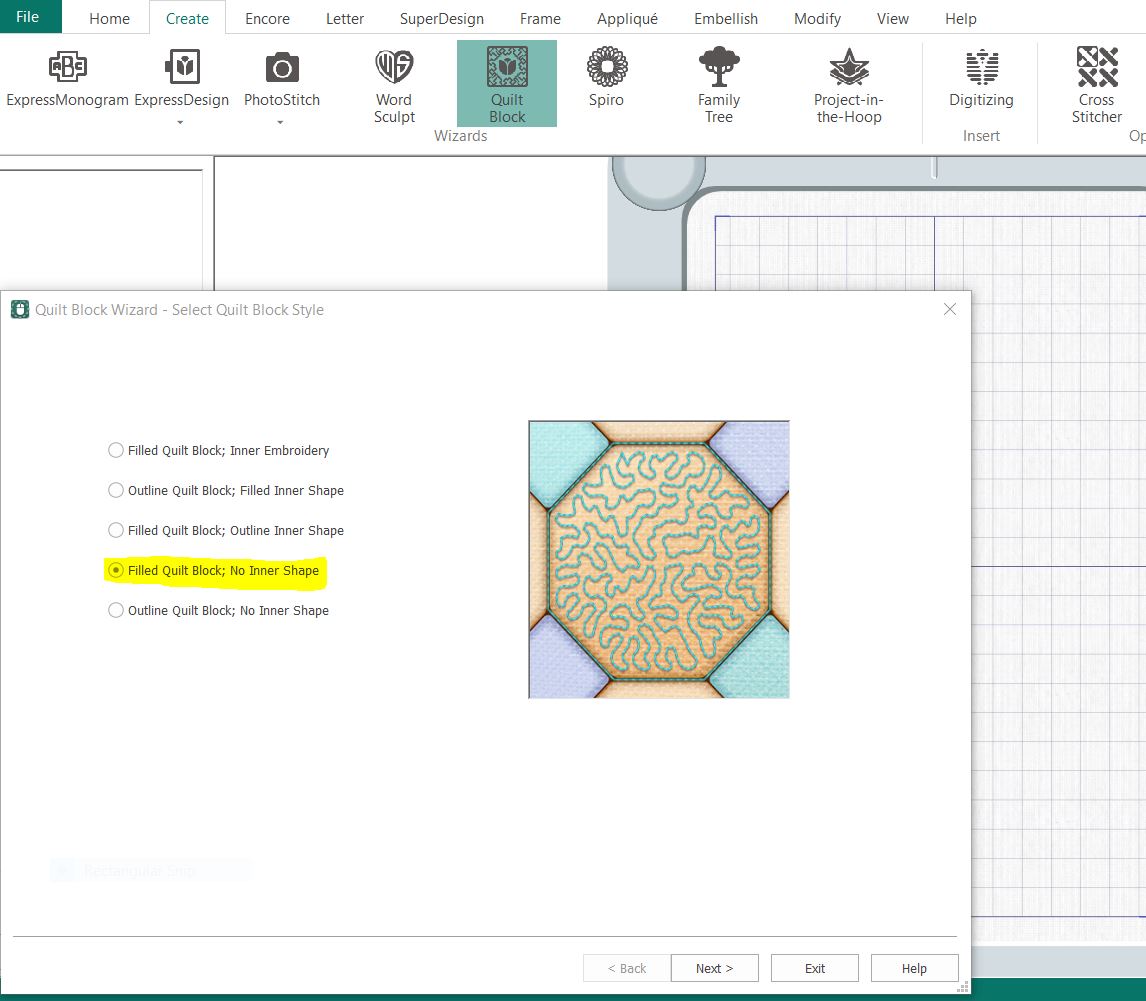
2. Go to Create, select Quilt Block and select Filled Quilt Block; No Inner Shape. Click Next.
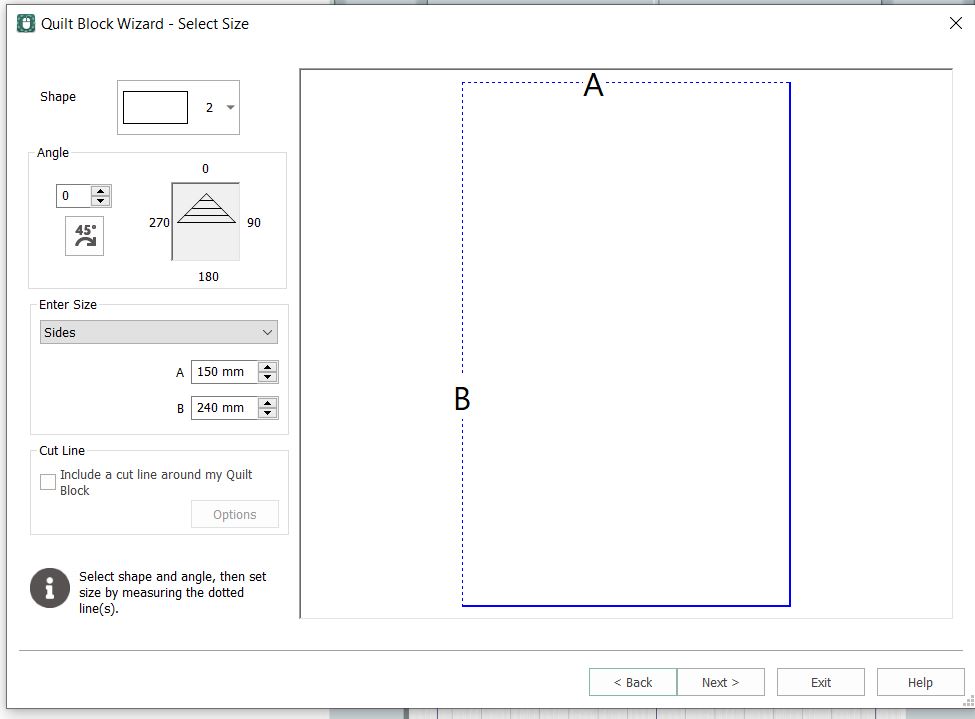
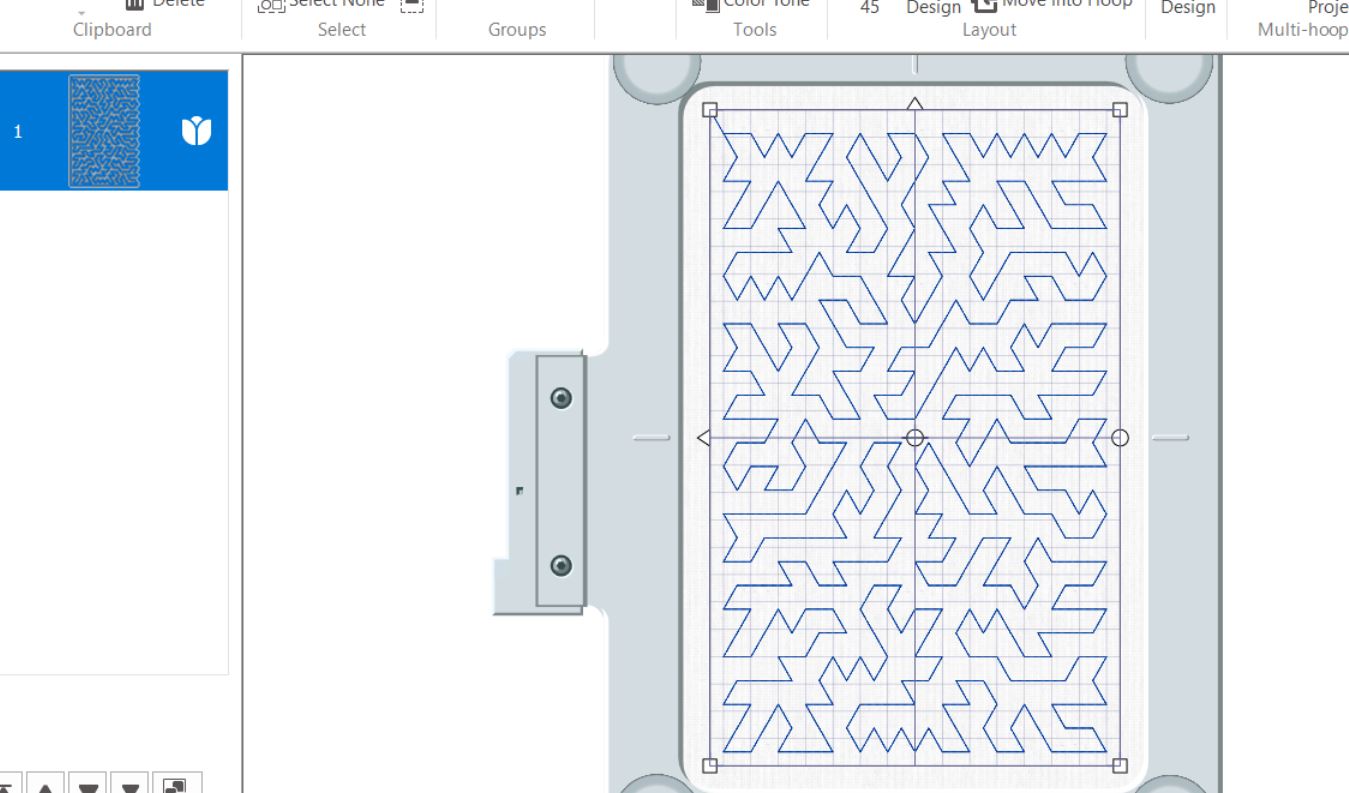
3. Select Shape 2 (rectangle) set side A (height 240mm and B (width)150mm, click next.
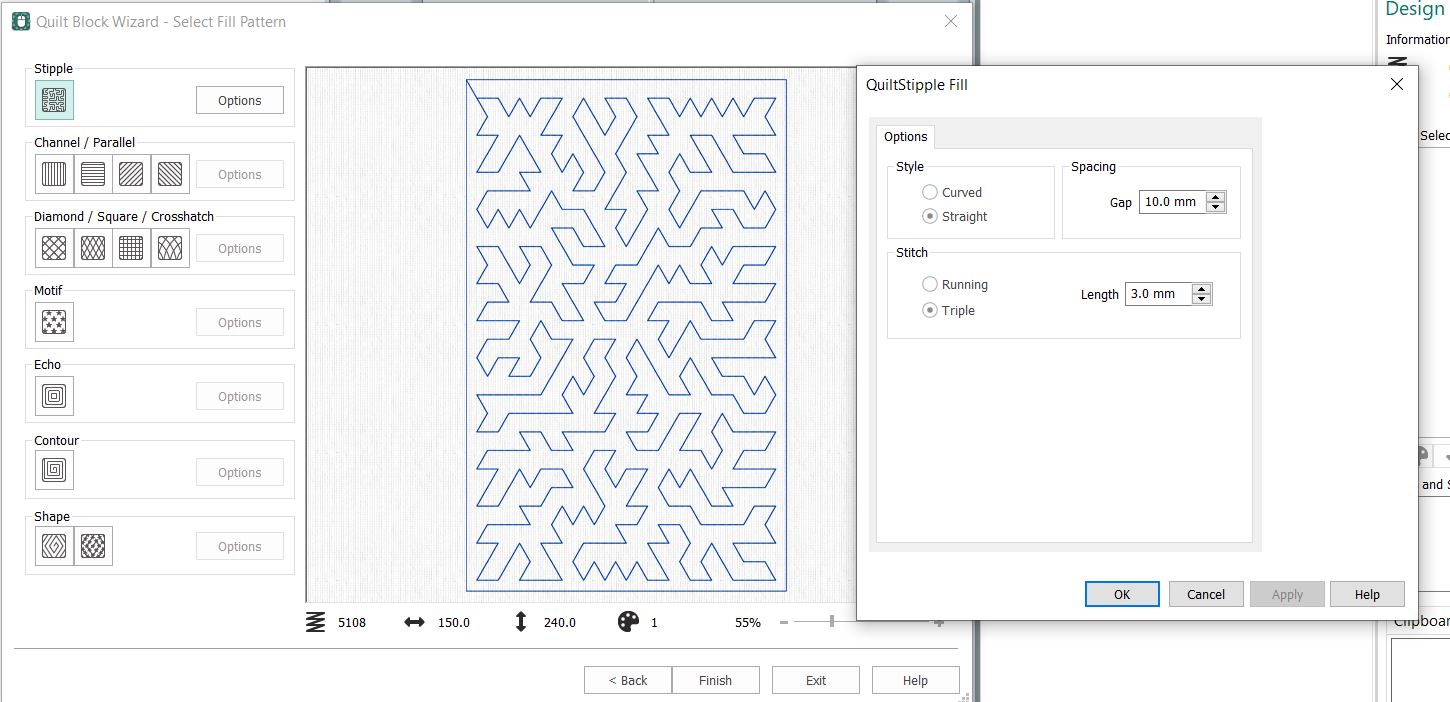
4. Next we will select Fill Pattern. You have a lot of choices here, try them out and see what you like! In this example I clicked on Stipple and then Options. Style: Straight, GAp; 10mm and Stitch: Triple stitch 3mm. This makes a good background for the hearts. Click Finish.
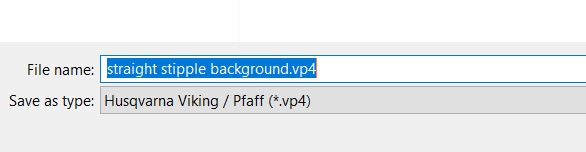
5. Now the background for the hearts is finished, Click on File, Save and give it the name straight stipple background.
6. Now it is time to make the hearts:Open a new file with the same hoop option. 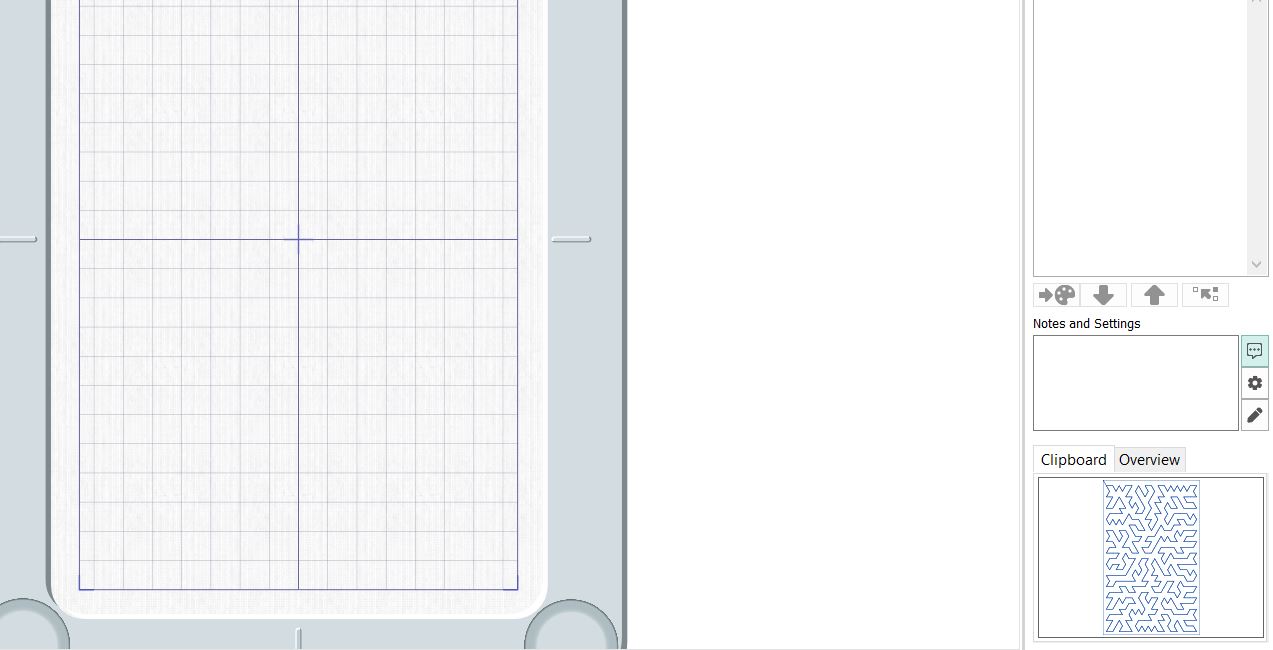
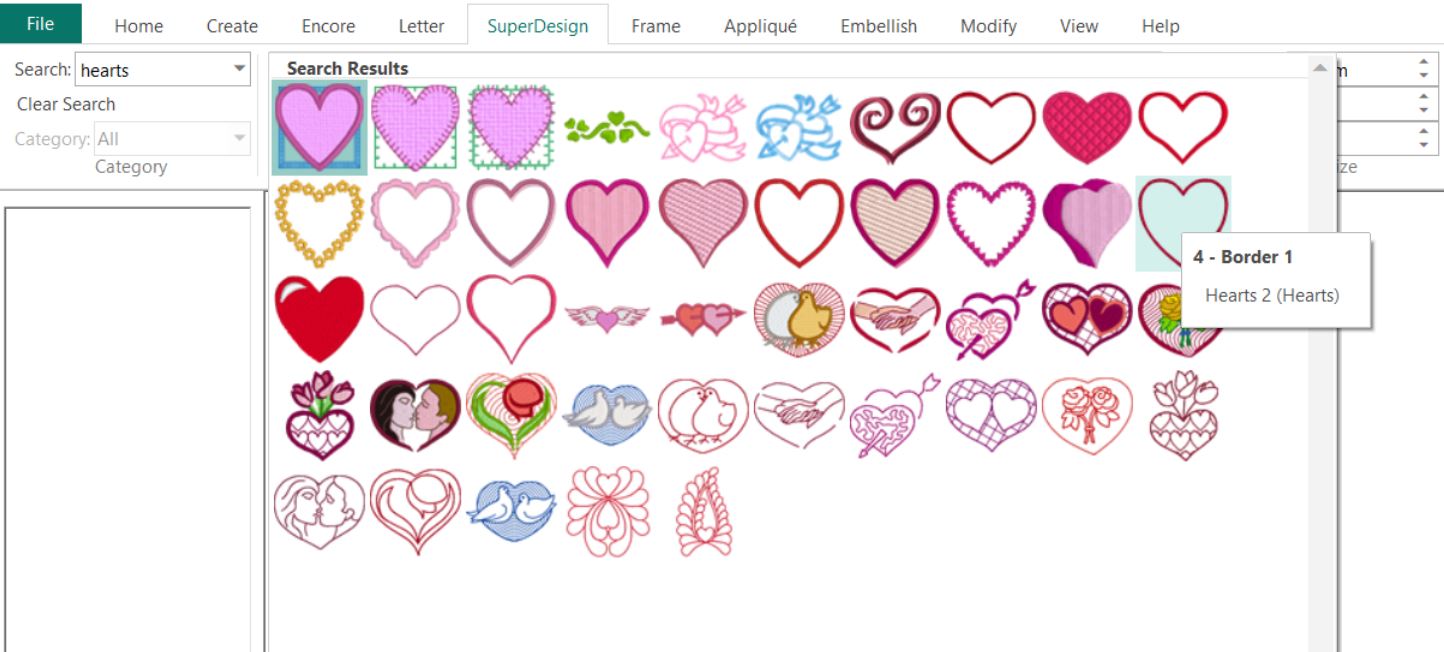
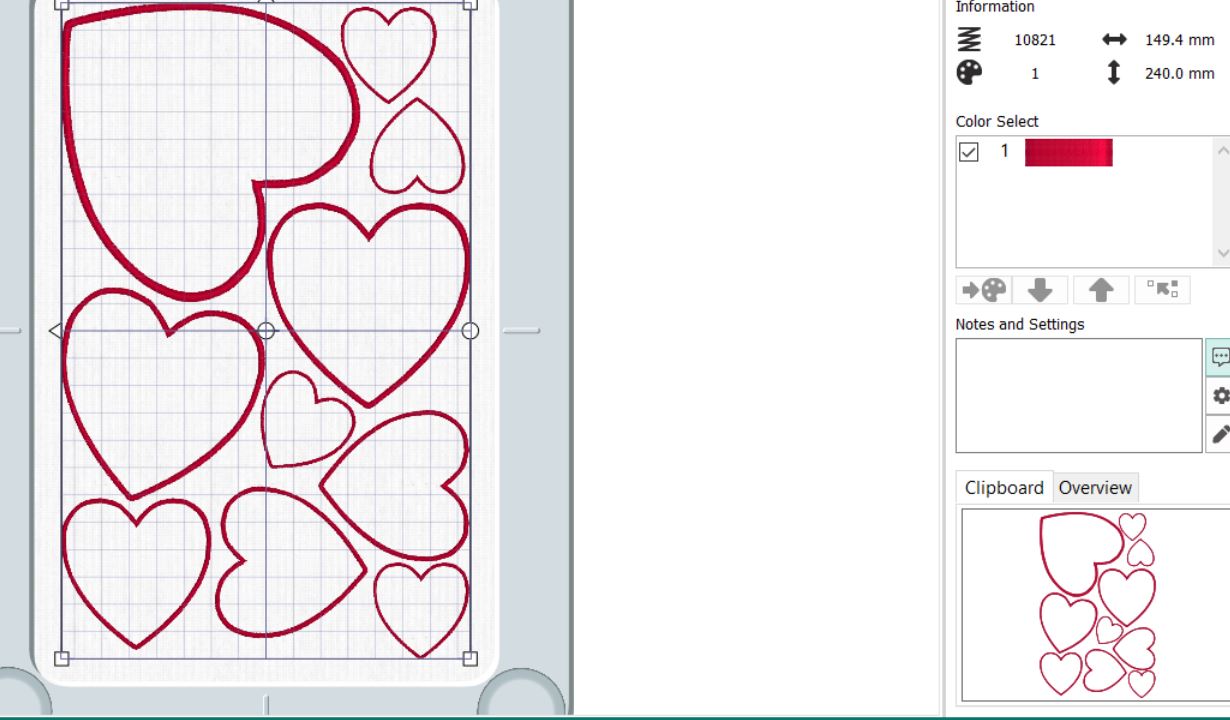
7. Go to Superdesign, type Hearts in the search box and click enter, then select the 4- Border 1 Hearts 2 (hearts)
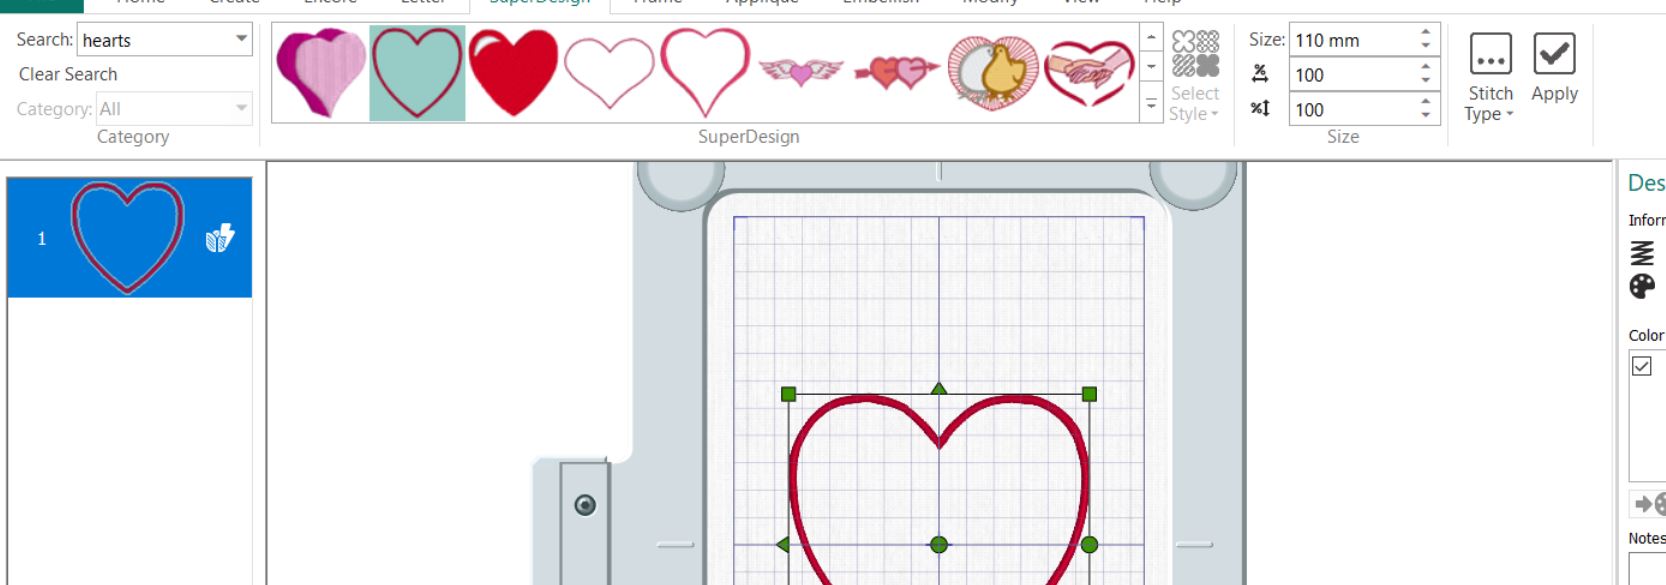
8. Set the Size to 110mm and click Apply
9. Next set the heart size to 75mm and click apply 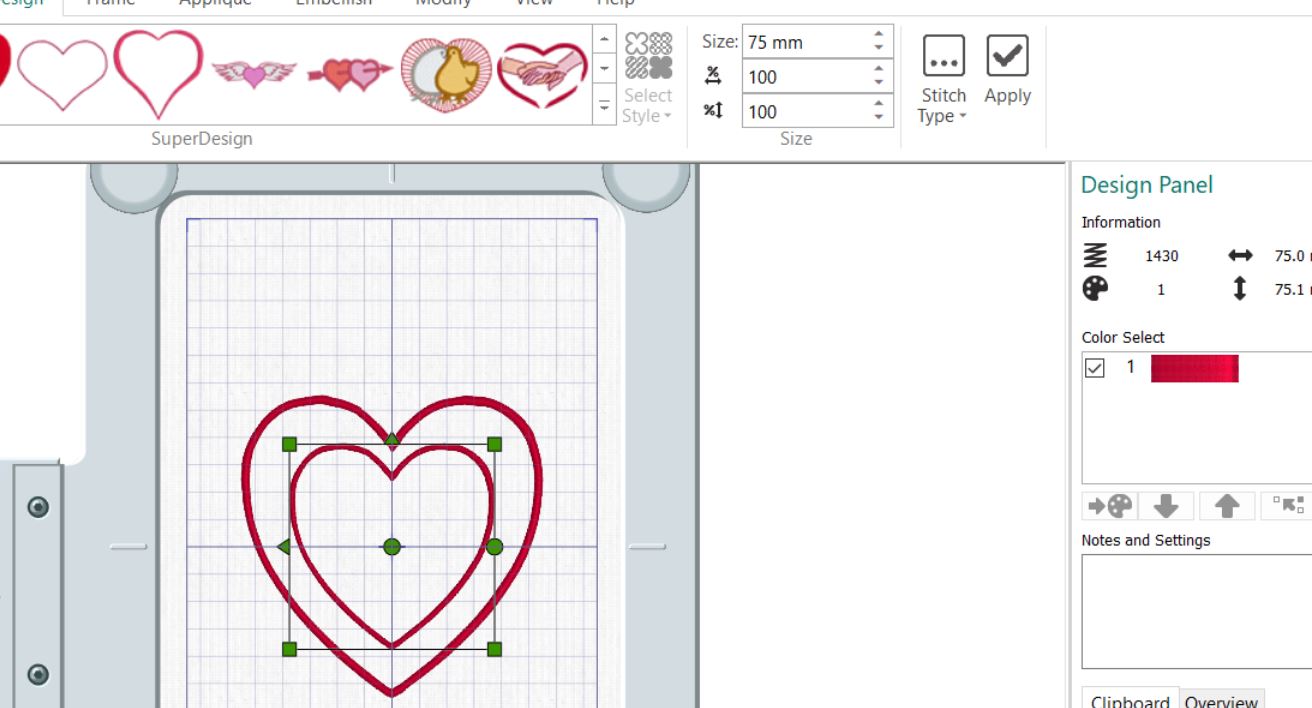
10. Repeat with the sizes 55mm and 35mm.
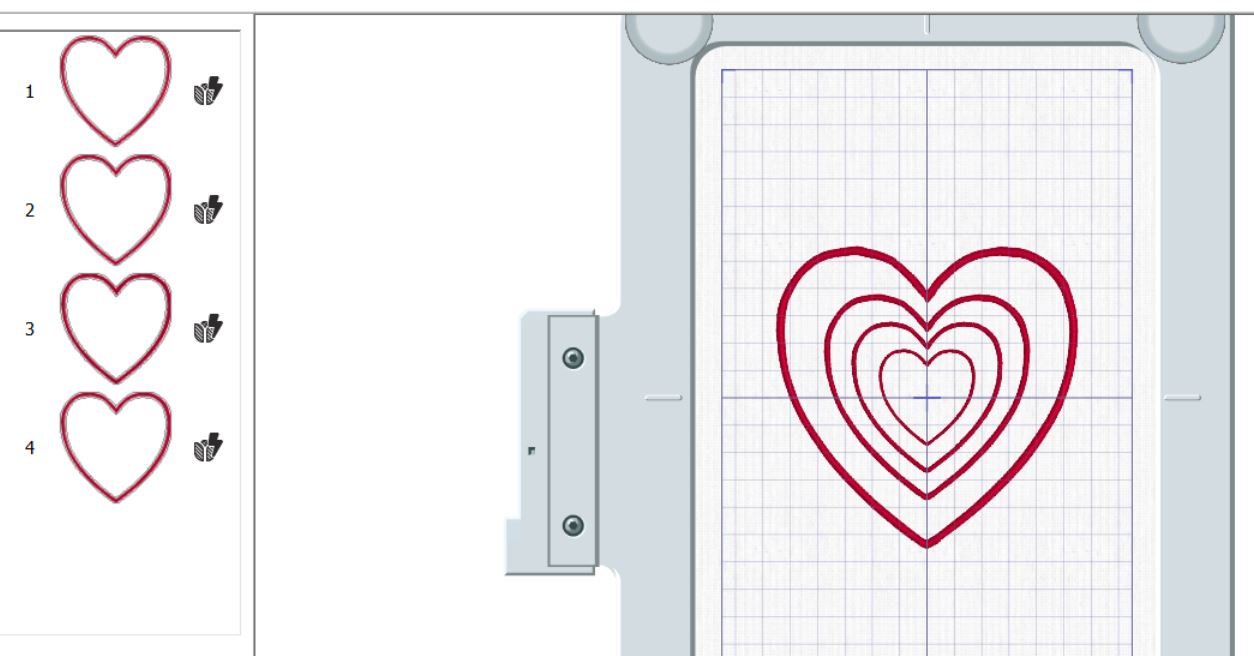
11. Now we will make copies and arrange them in the hoop:Go to Home tab, Make one copy of the 75mm heart, make two copies of the 55mm heart and four copies of the 35mm heart.
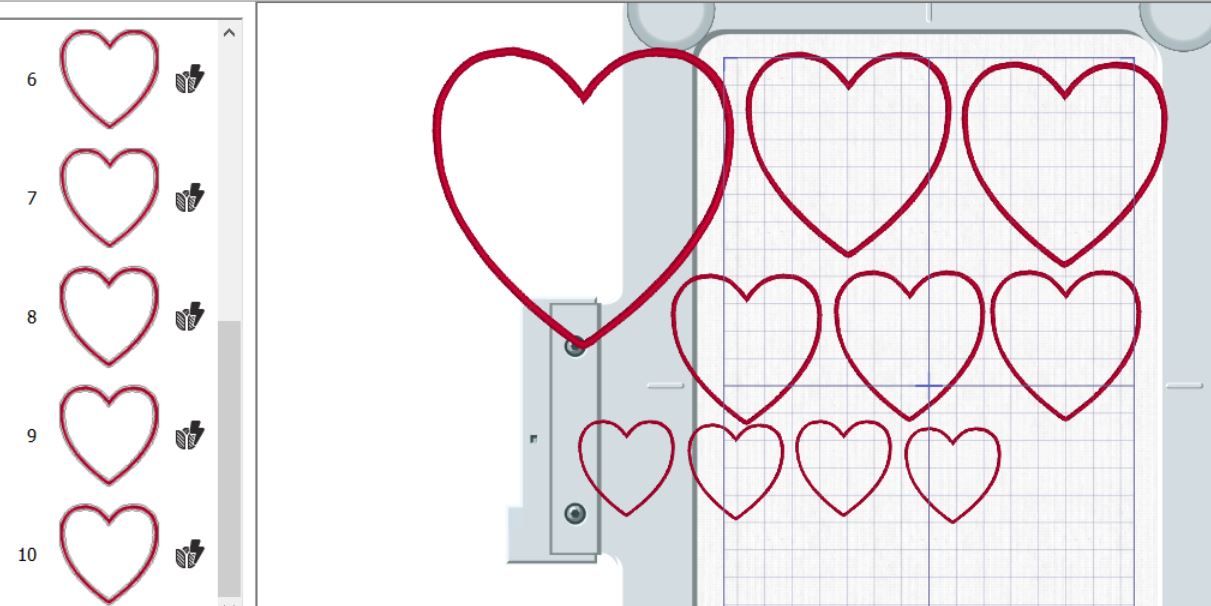
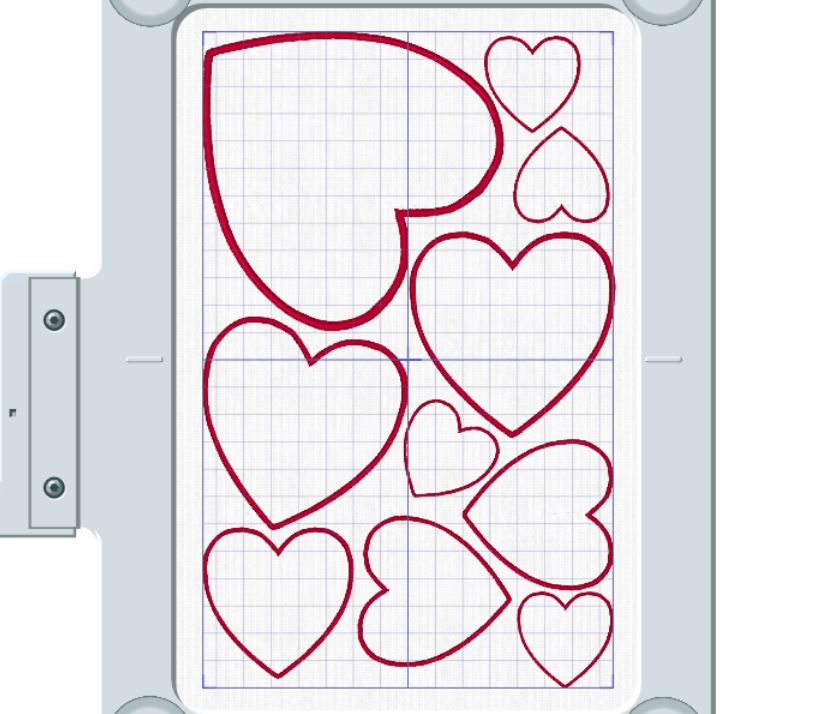
12. Arrange all the hearts in the embroidery area, leave a small margin between them to be able to cut them out later. There will be quite a lot of rotating and moving. Here is how my arrangement turned out:
13. Click on Combine, Combine all and then Colorsort. Make sure the size is smaller than 150x240mm.

14. Save the file as Hearts.
15. Go to File, New Window. Select Blank Canvas and the 240x150 hoop as before.
16. Click on File Insert and select the first file we made, Straight stipple background
17. Go to file, Insert again and add the Hearts file:
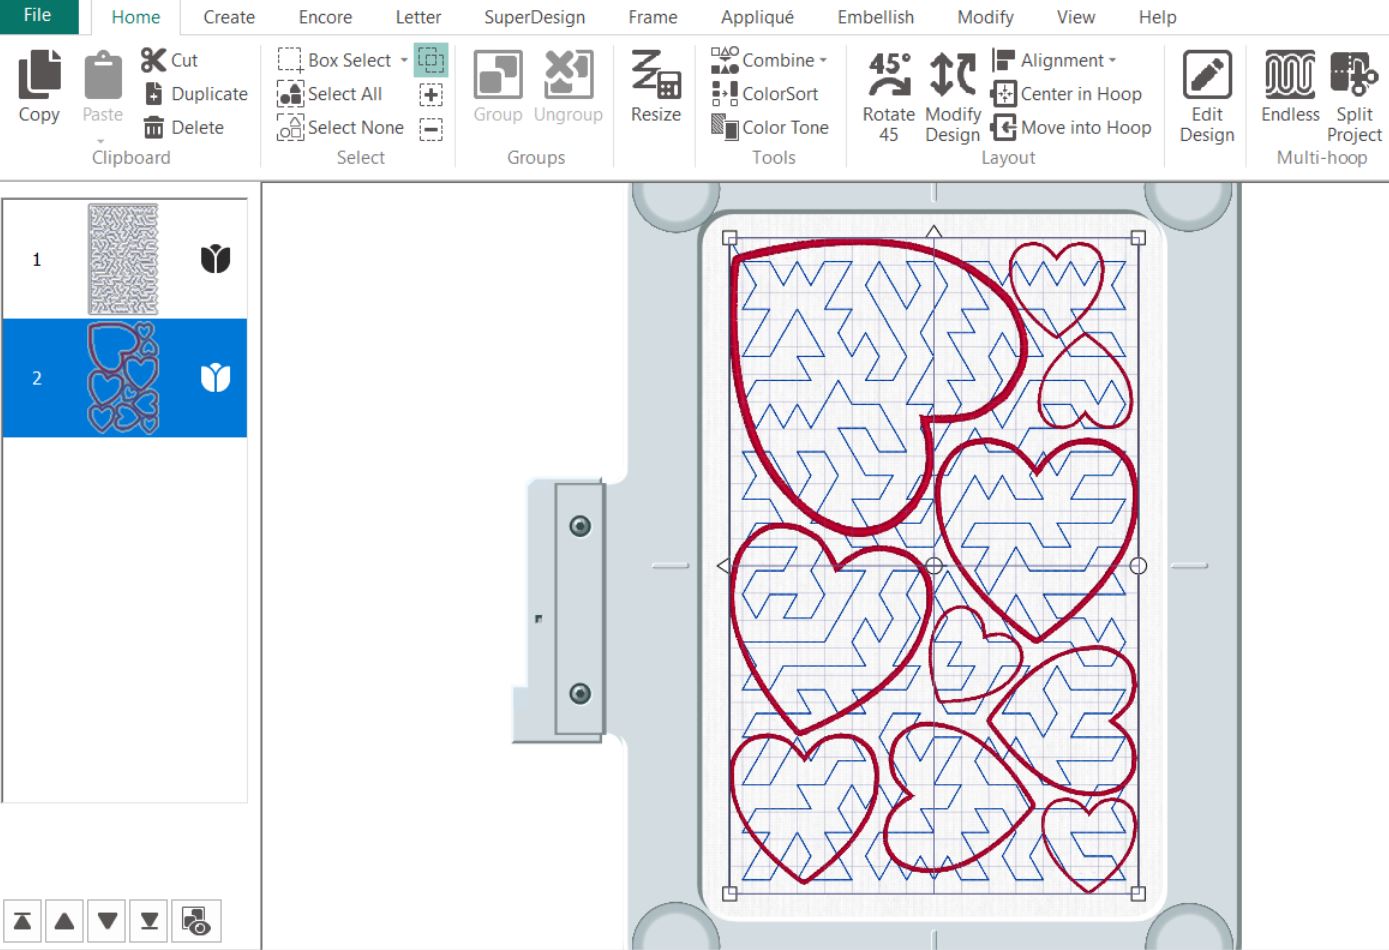
18. Holding down Shift key, click on both files in the Filmstrip and select Group
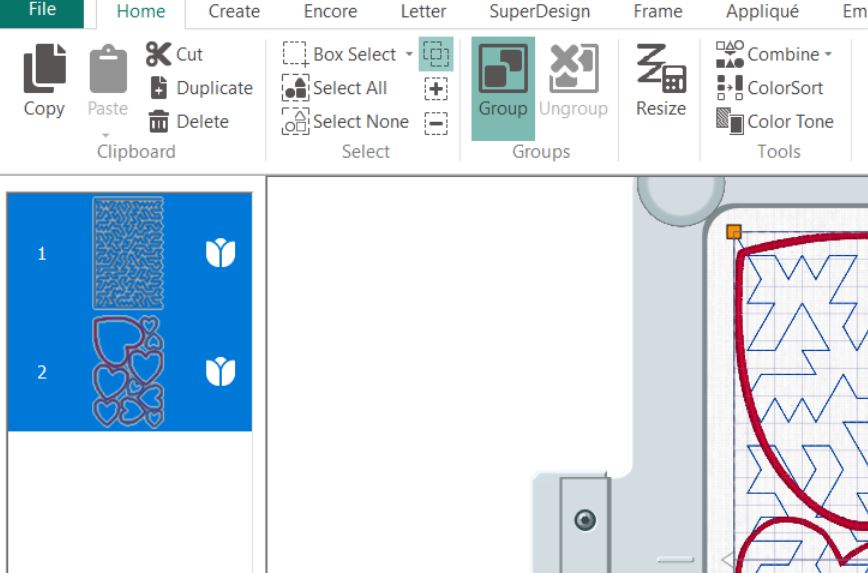
19. Now the files are grouped together. If you want to add another background for the quilting later, just ungroup and insert the new background!
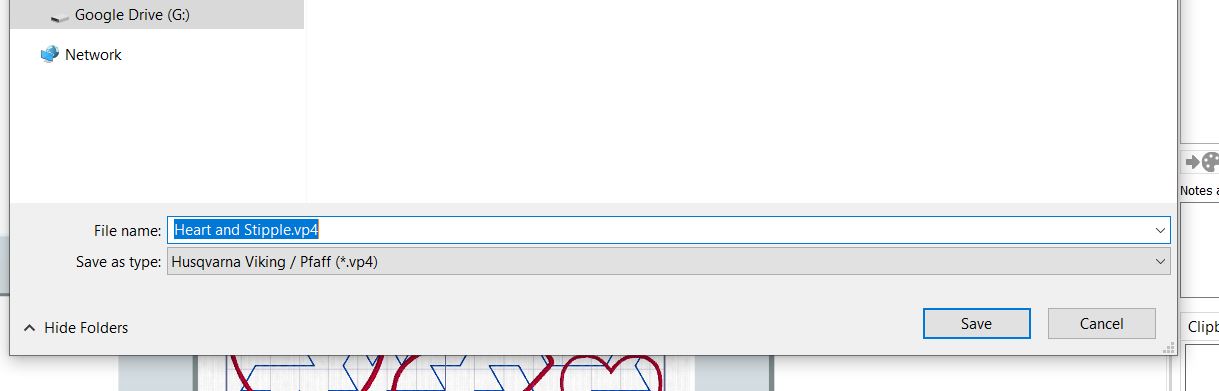
20. Save the file as: Heart and Stipple.
Stitch out the embroidery.
21. Export the file in your preferred file format.
22. Load it into your sewing machine.
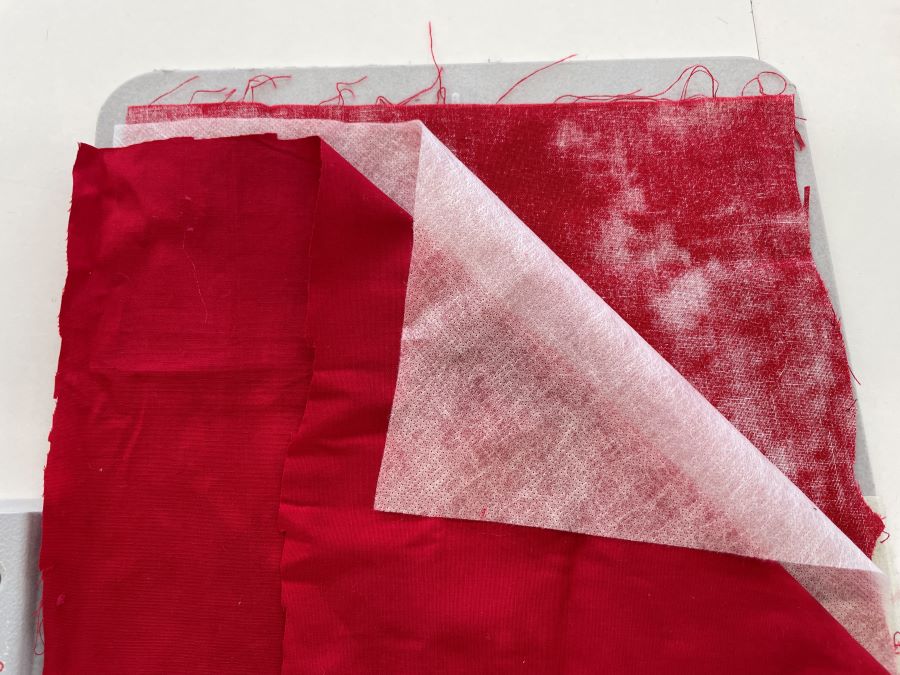
23. Select the hoopat least 240x150mm. If you use a magnetic hoop, put fabric for the back first right side down, then water soluble satbilizer and finally the top fabric layer right side facing up.
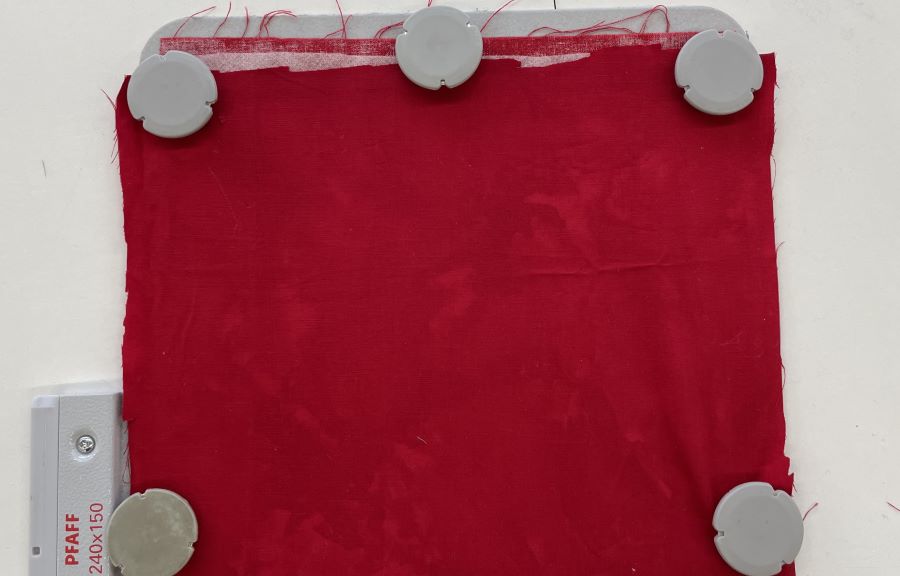
24. Secure with magnets.
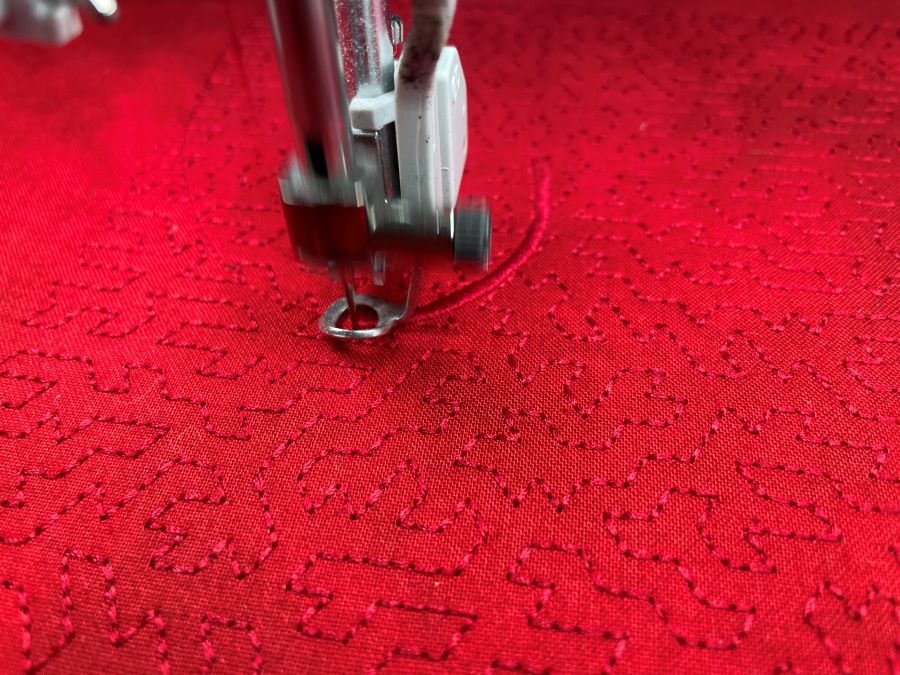
25. Stitch out the design, use the same thread on top and bobbin since both sides will be visible.
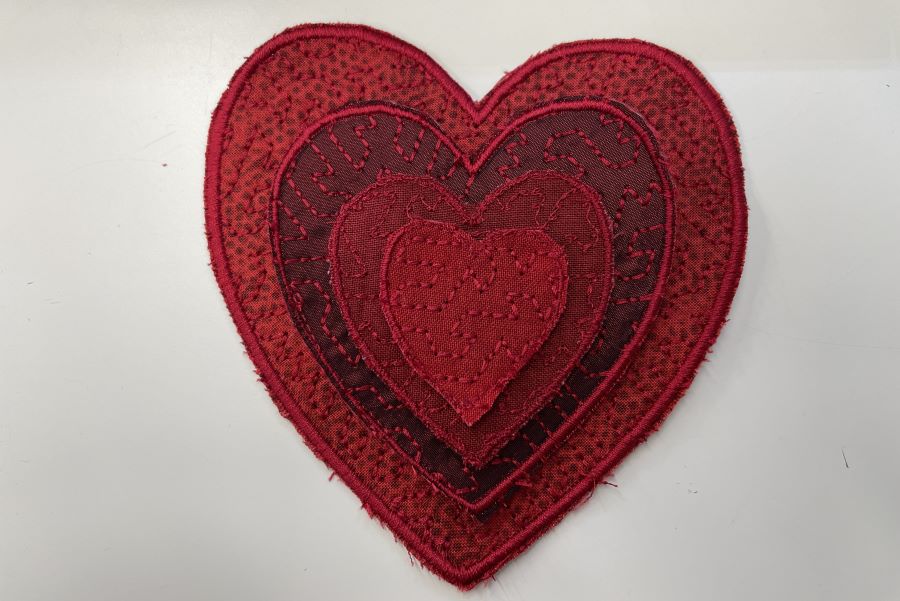
26. Cut out the hearts just outside the stitching.
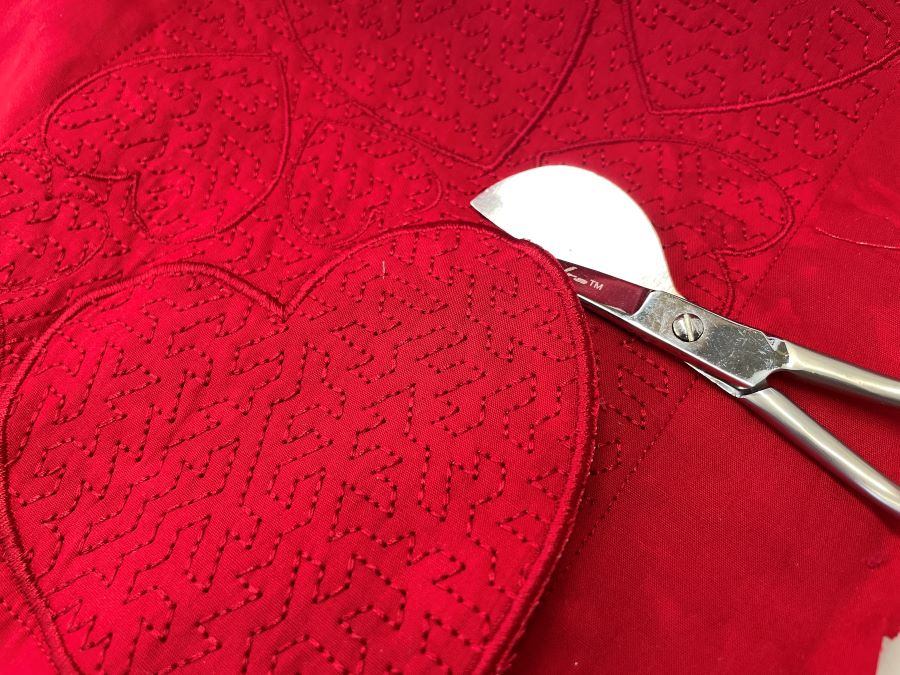
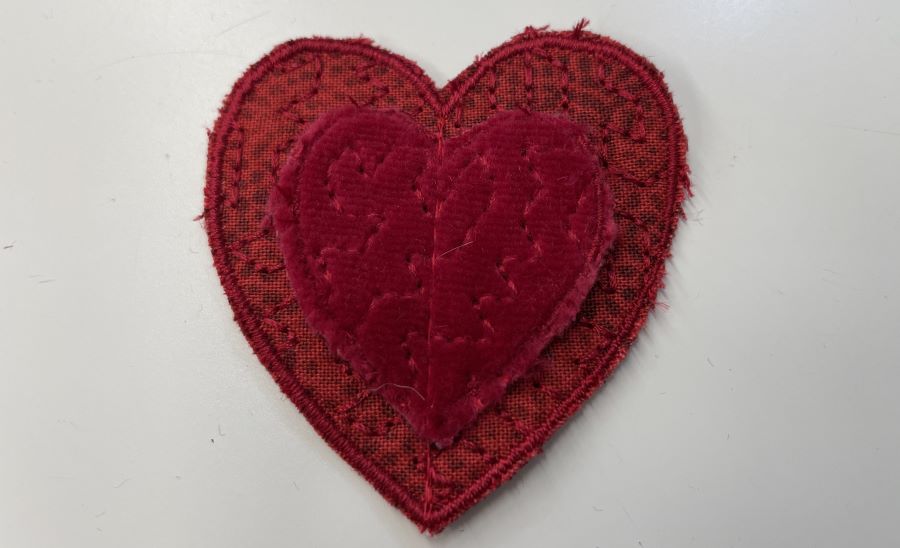
Make the stacked hearts
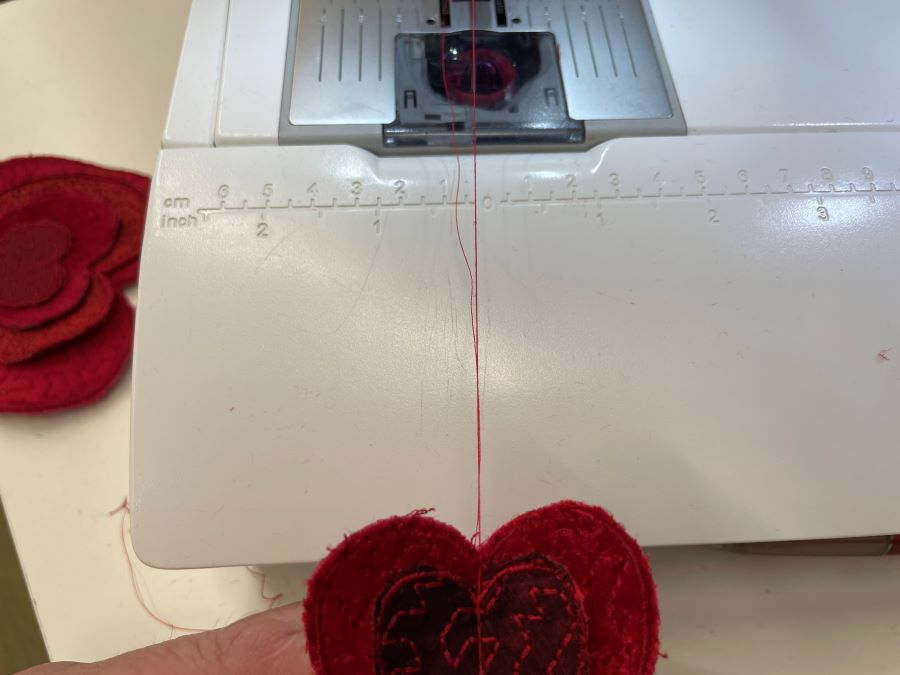
27. put the hearts on top of each other in size order. Stitch through the center line. Repeat on the other side of the heart if you want them to be the same on both sides. Repeat with the other hearts, you can make as many layers you want.
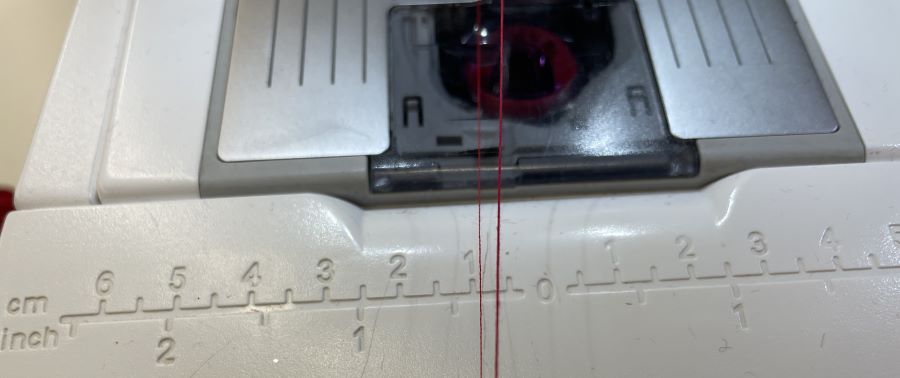
28. To make the string, pull out about ten inches (25cm). Start sewing down the center line. When you reach the end pull out about 2-5” (5-10 cm)thread before you add the next heart. Continue adding hearts as needed. Leave about 20” (50cm) tails at the end
. 
29. To make the hearts hang nicely in the window add a large bead at the start end.
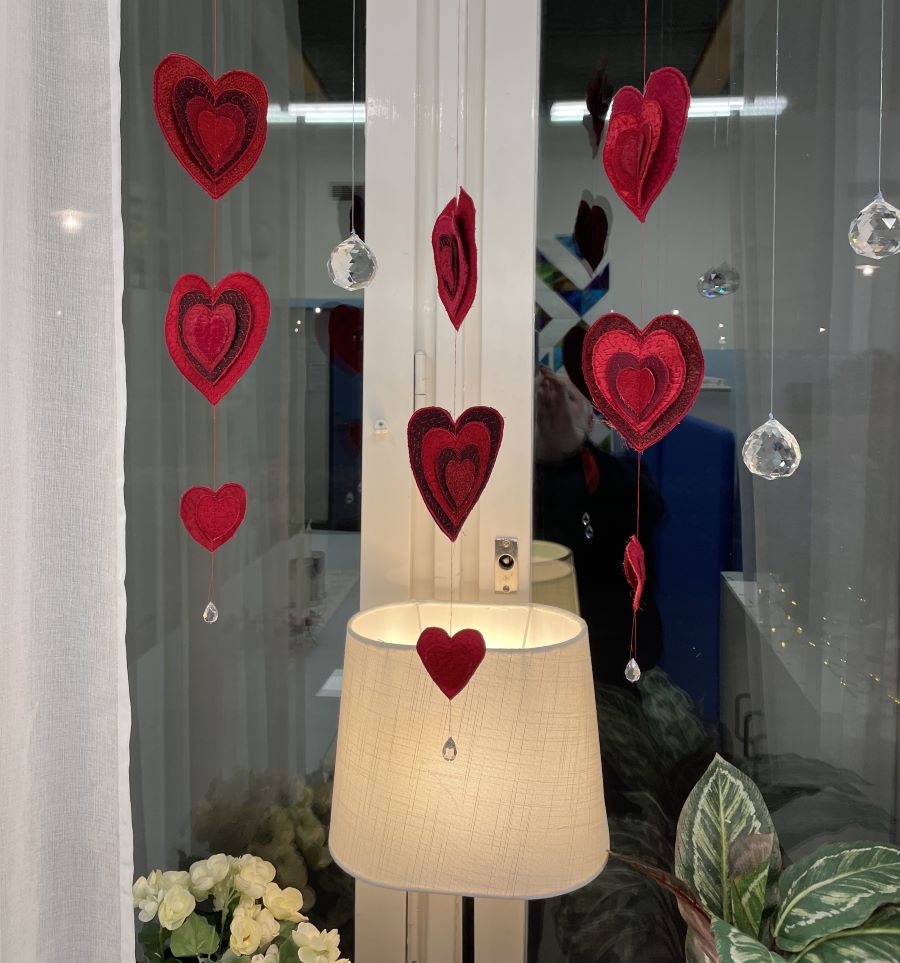
Tip: The hearts can be used in many other ways as decoration on christmas gifts, christmas tree ornaments and so on.