 United States
From Pinwheels to Butterflies
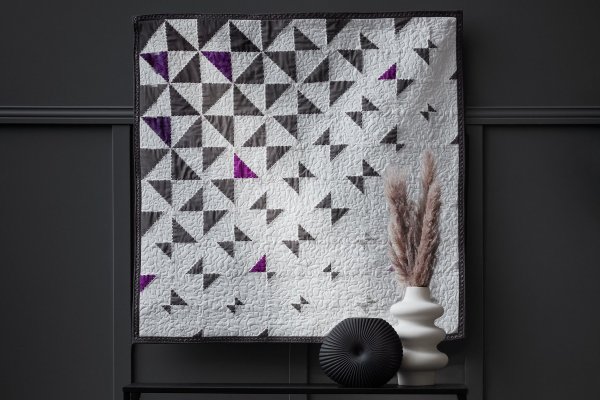
This quilt moves from one block to another It starts with the pinwheel and slowly transitions into the butterfly block, then further into small bow ties. It also mimics the quilt expression machine decor. The blocks are constructed with Floating Stitches and the border is decorated with ribbon embroidery.
What you need
Yardage calculated on 44” (112cm) wide fabric
- White background fabric 48” (125cm)
- Dark gray solid fabric for blocks and binding edge. 20” (50cm)
- Medium gray 24” (60cm)
- Light gray 3” ( 7,5cm)
- Dark fuchsia 6” (15cm)
- Medium fuchsia 6” (15cm)
- Light fuchsia 3” 7,5cm)
- 5mm gray satin ribbon 8 yards (8 meters)
- White embroidery thread
- Gray embroidery thread
- White cotton thread for quilting
- Batting 44x44” (115x115cm)
- Fabric for the backing and hanging sleeve corners. 44x50” (110x130cm)
Preparation
- White background fabric
- cut100 squares 5x5” (12x12cm)
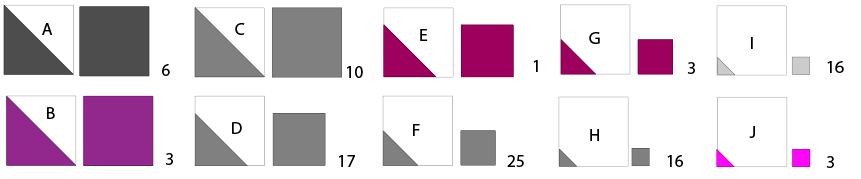
- Dark gray solid fabric cut
- 6 squares 5x5” (12x12cm)(A)
- 4 strips 3 ½” (9cm) for binding edge
- Medium gray cut
- 10 squares 5x5” (12x12cm)(C )
- 17 squares 4x4” (10x10cm)(D)
- 25 squares 3x3” (7,5x7,5cm)(F)
- 16 squares 2x2” (5x5cm)(H)
- Light gray cut
- 16 squares 2x2” (5x5cm)(I)
- Dark fuchsia cut
- 3 squares 5x5” (12x12cm)(B)
- Medium fuchsia cut
- 1 square 4x4” (10x10cm)(E)
- 3 squares 3x3” (7,5x7,5cm)(G)
- Light fuchsia cut
- 3 squares 2x2” (5x5cm)(J)
Making the squares
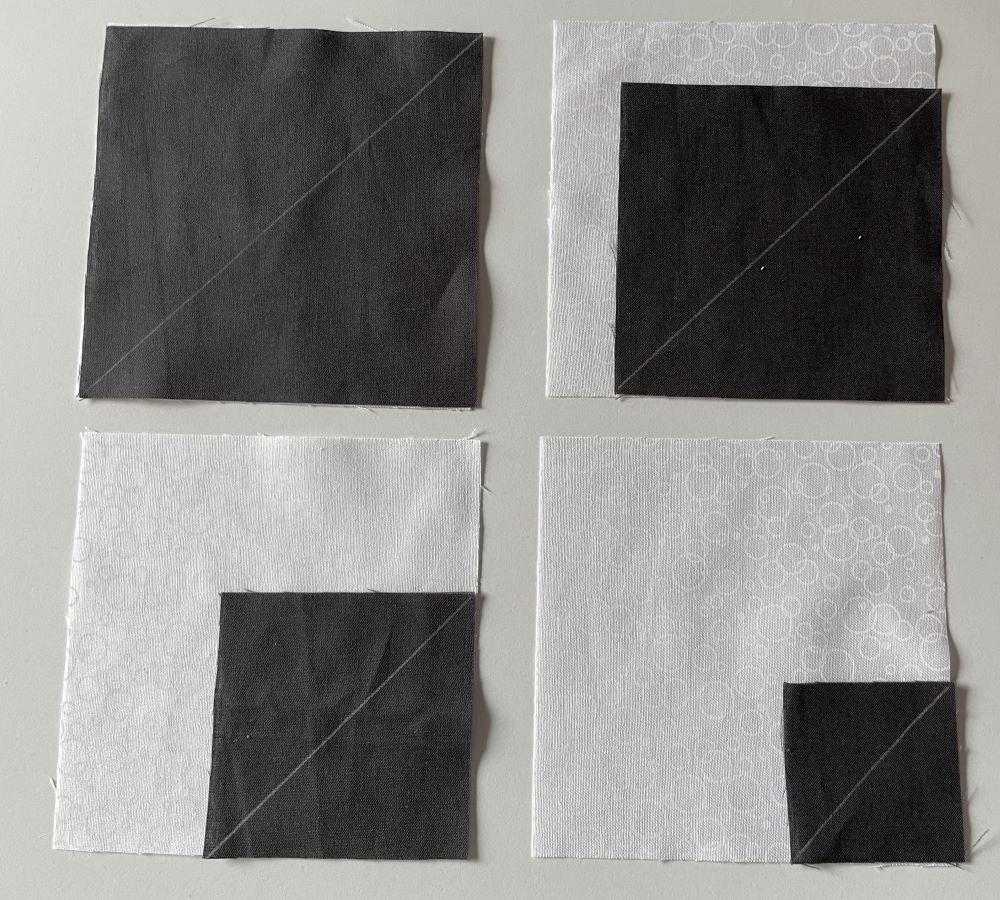
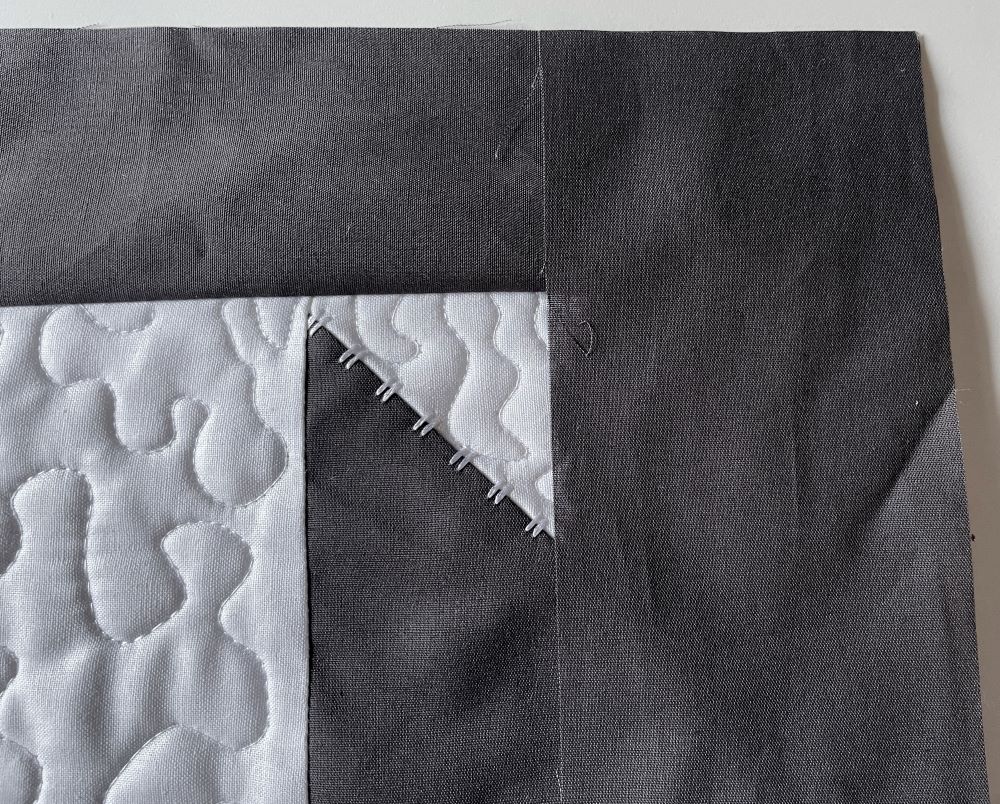
- All squares are made in the same way. The white square at the bottom and the colored square on top, right sides facing each other. The raw edges should be even in the corner.
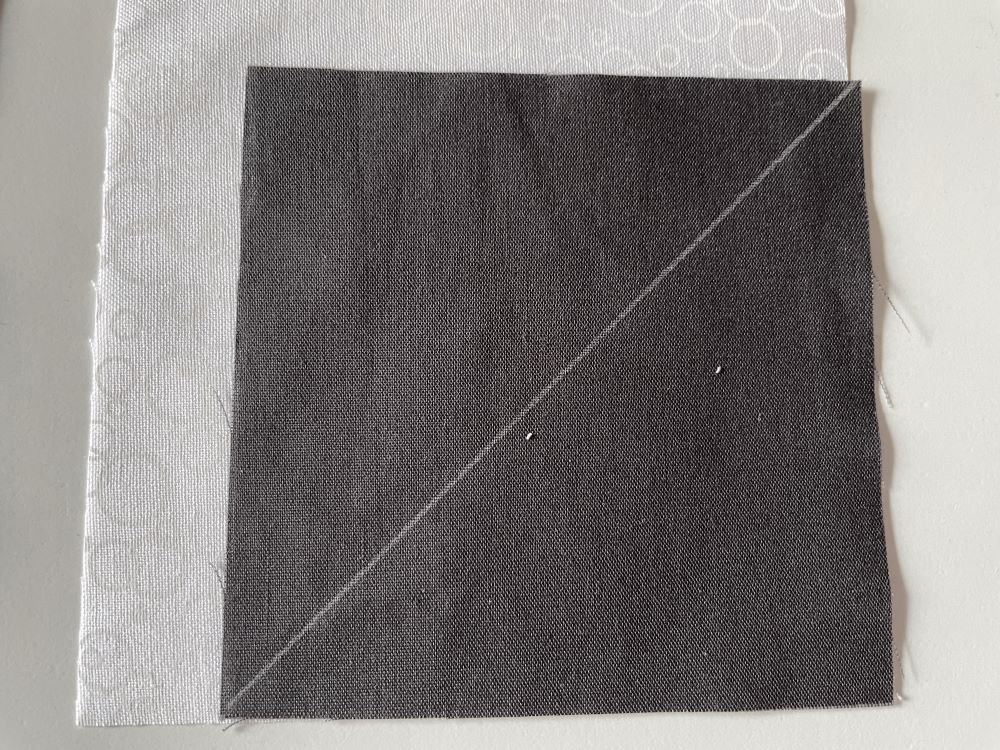
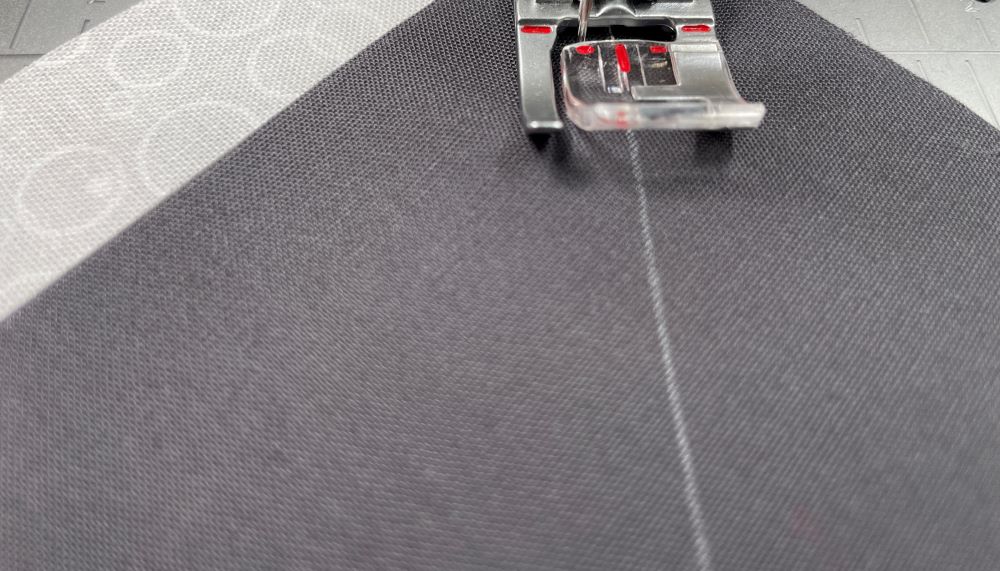
2. A line is drawn from one corner to the other on the colored square.
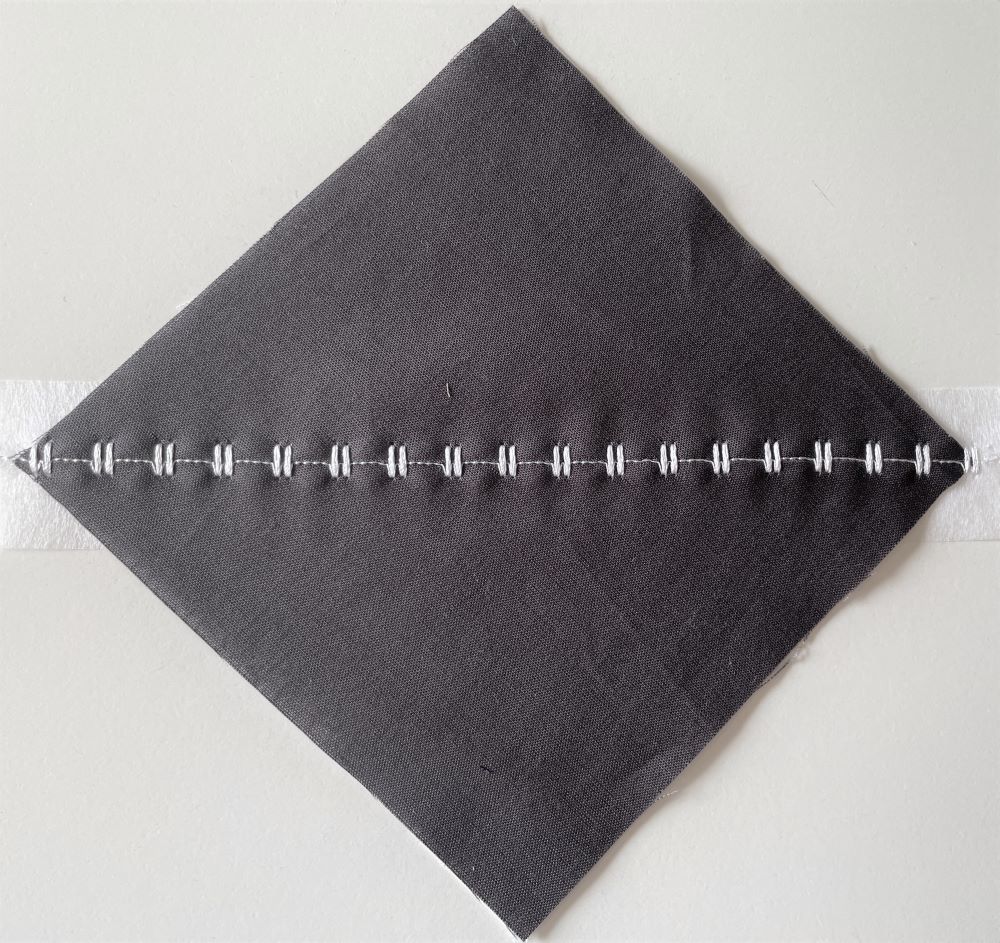
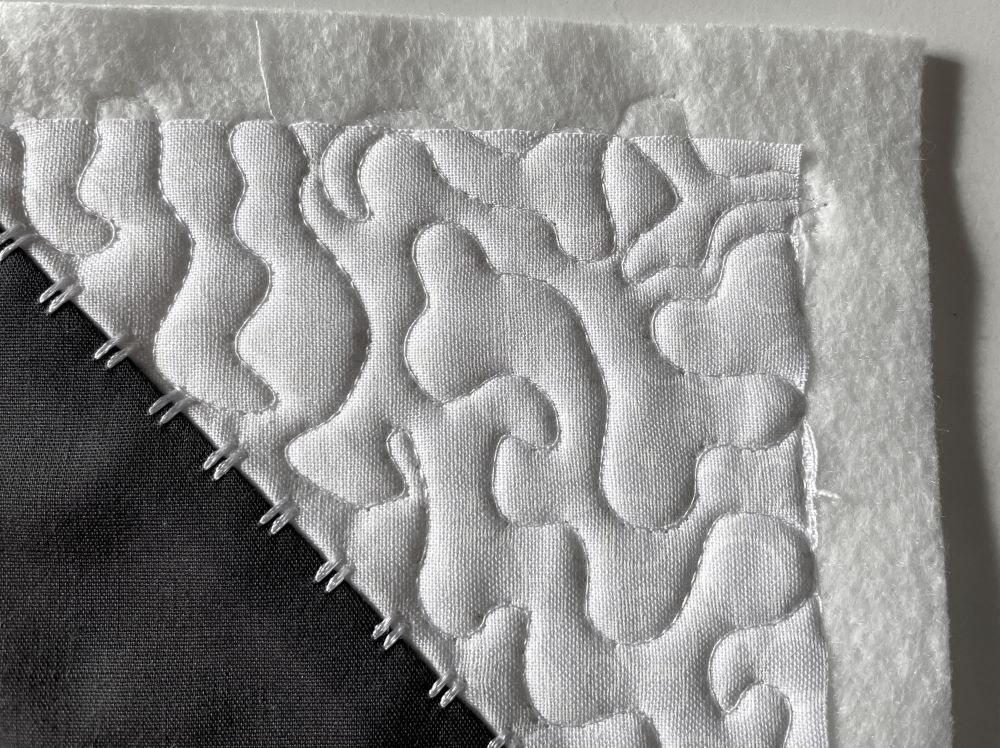
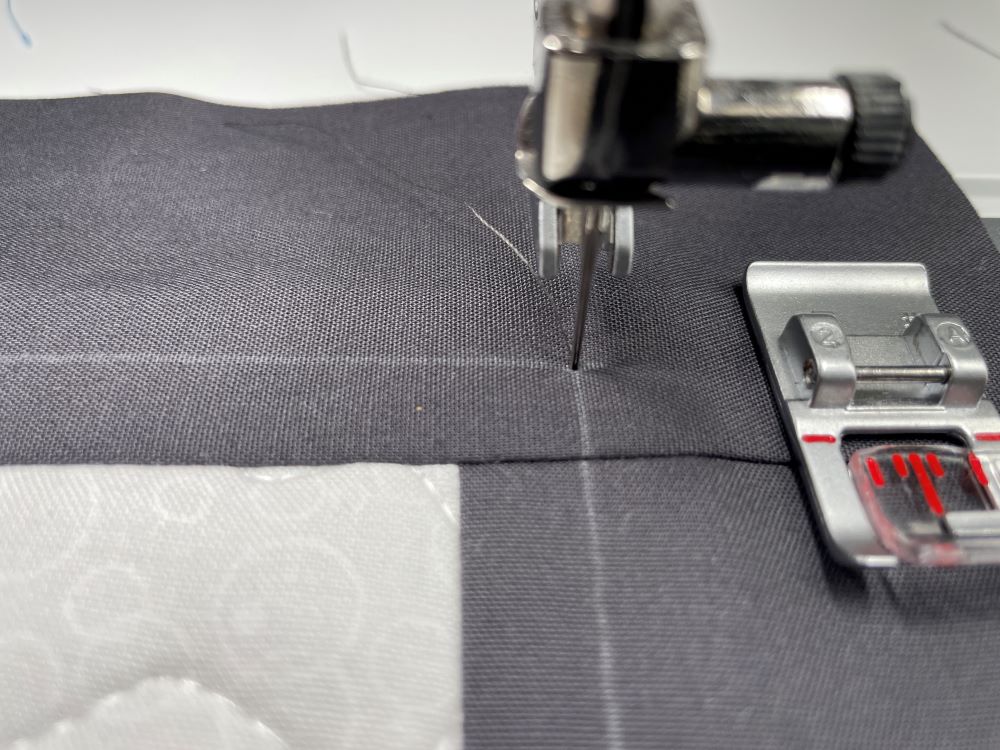
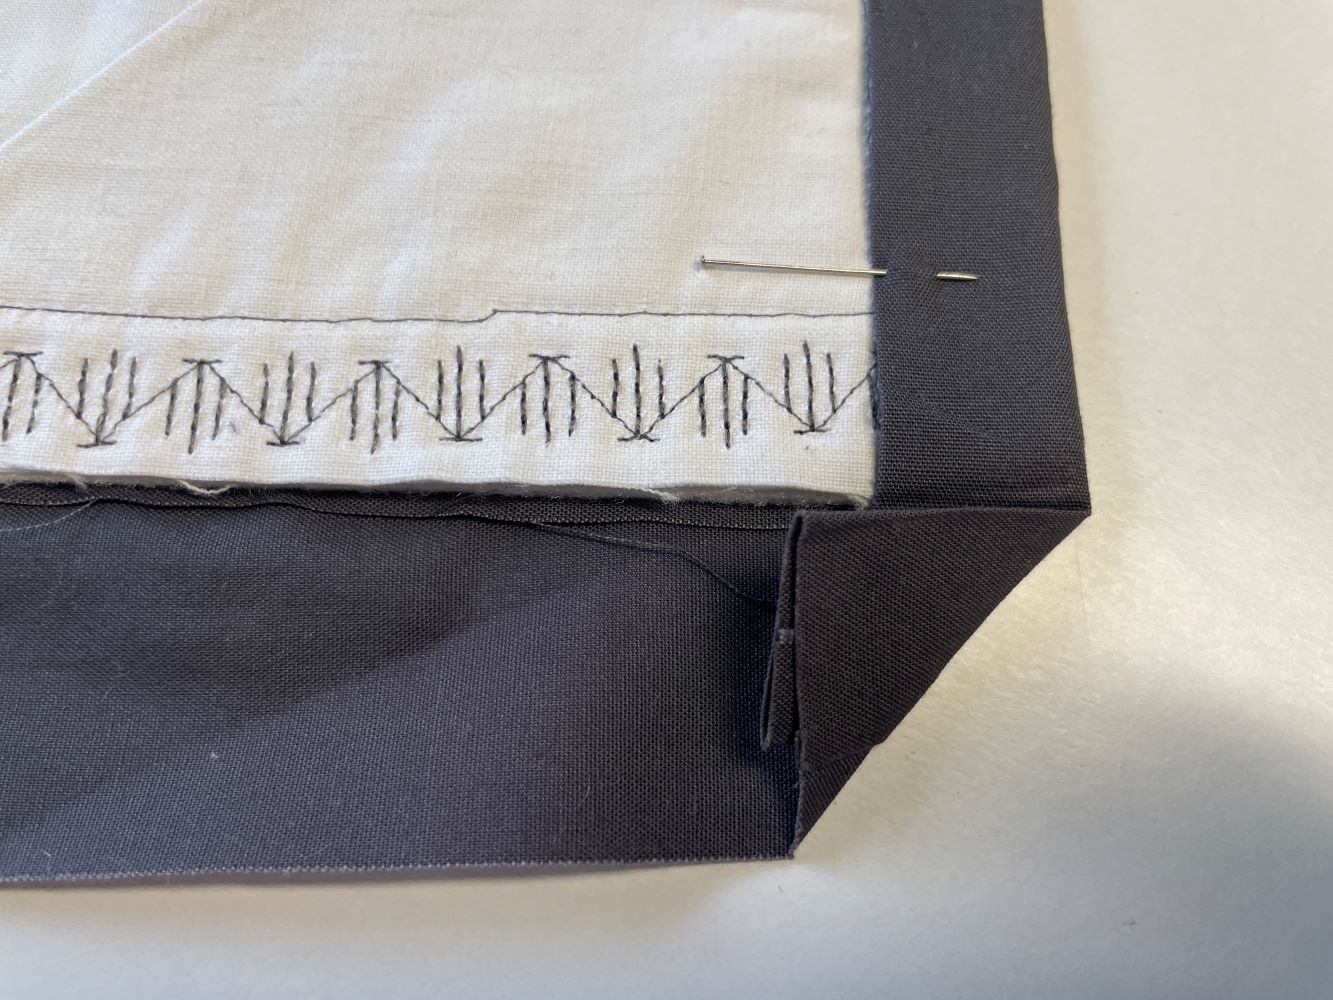
3.The blocks are stitched together along the drawn line with floating stitches. I used floating stitch 8:3:8. ![]() A 1” strip of tearaway stabilizer is put under the block to get the stitches nice and flat.
A 1” strip of tearaway stabilizer is put under the block to get the stitches nice and flat.
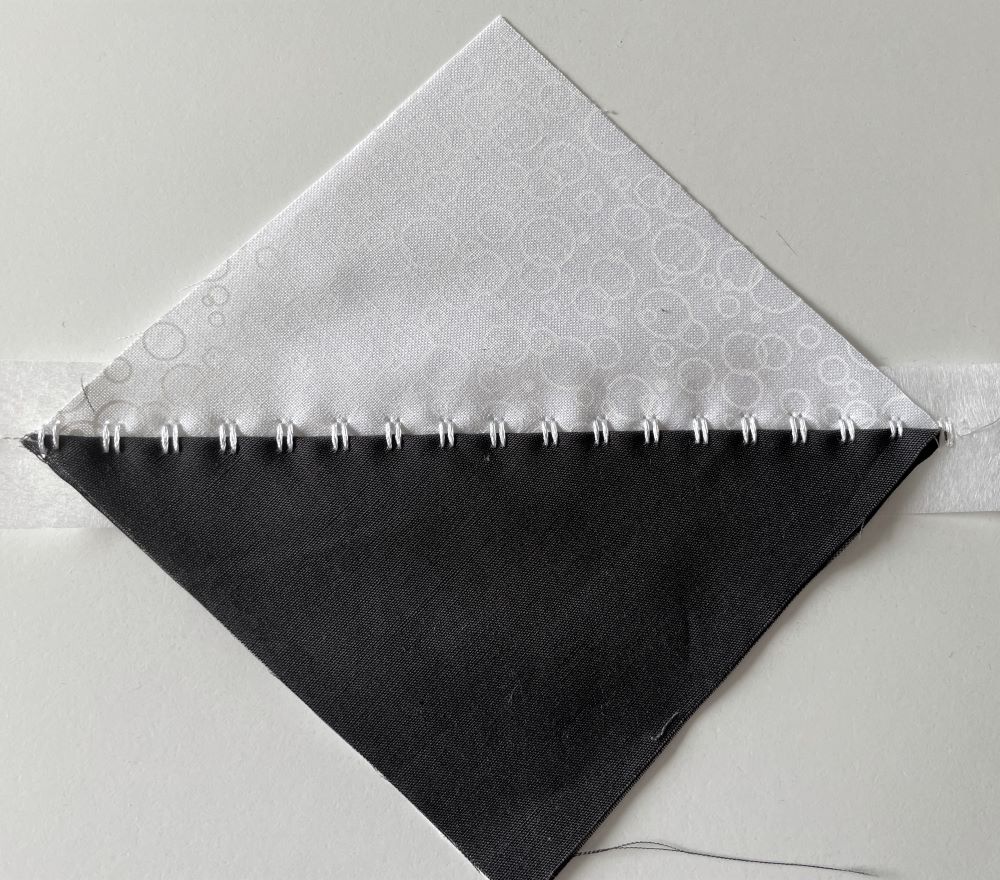
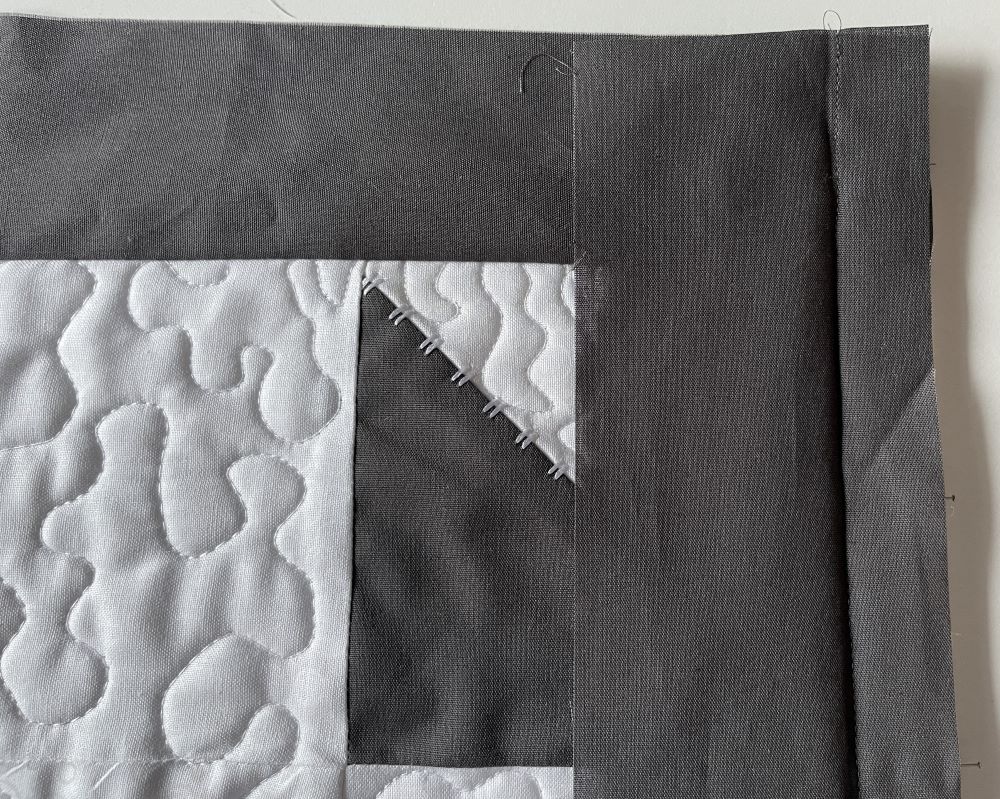
4. The colored fabric is folded back at the seam, revealing the floating stitches.
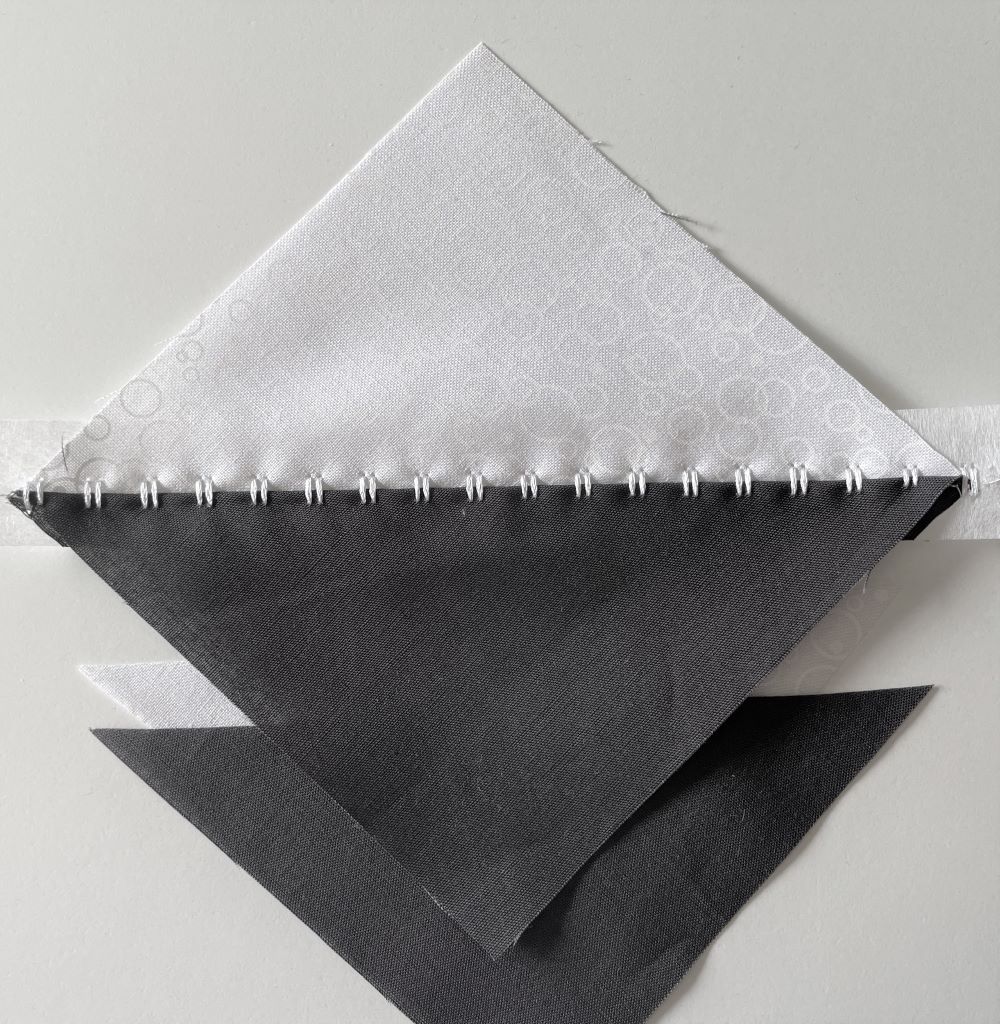
5. Excess fabric are cut off, leaving about ⅜” (1cm) seam allowance to reduce bulk.
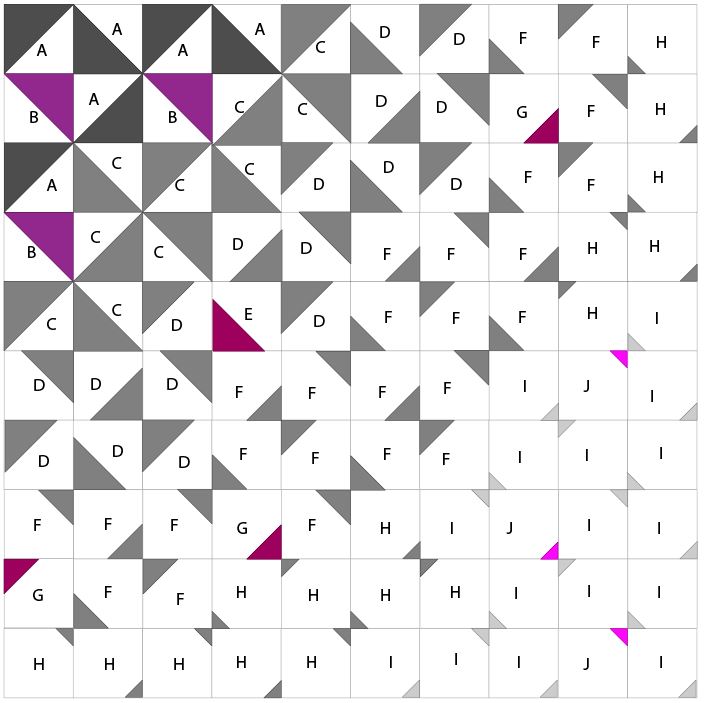
Layout
6. The finished blocks are placed as the layout below:
Putting it together
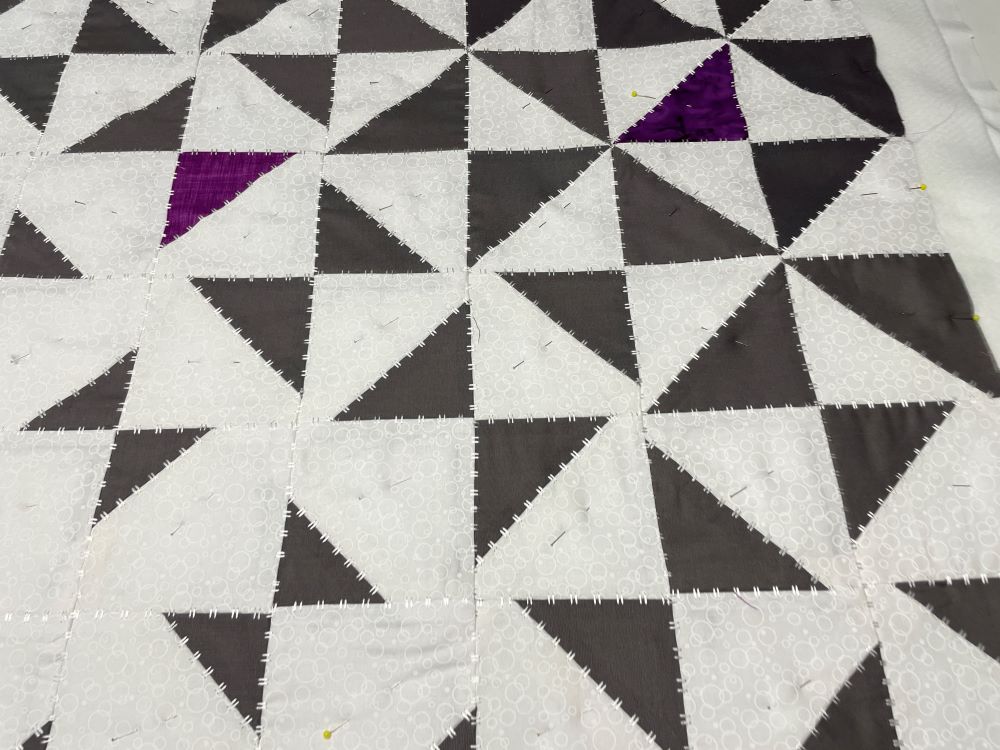
7. The blocks are sewn together in rows with the same floating stitchesas before. The rows are then stitched together also using the same stitches.

Add batting and backing
8. Lay the backing on the table wrong side up and put the batting on top. Place the quilt on the batting. The batting and backing should extend at least 2” (5cm) on all sides. Pin the layers together.
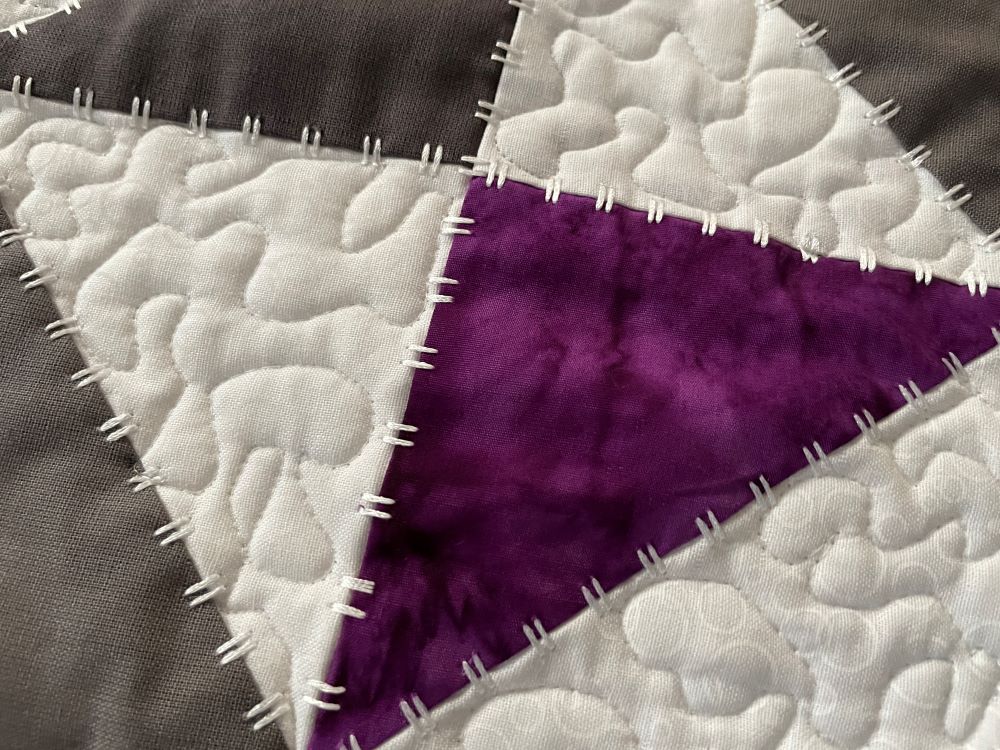
9. Quilt with freehand quilting puzzle pattern. I only quilted the white fabric because I wanted the colored parts to be raised from the surface.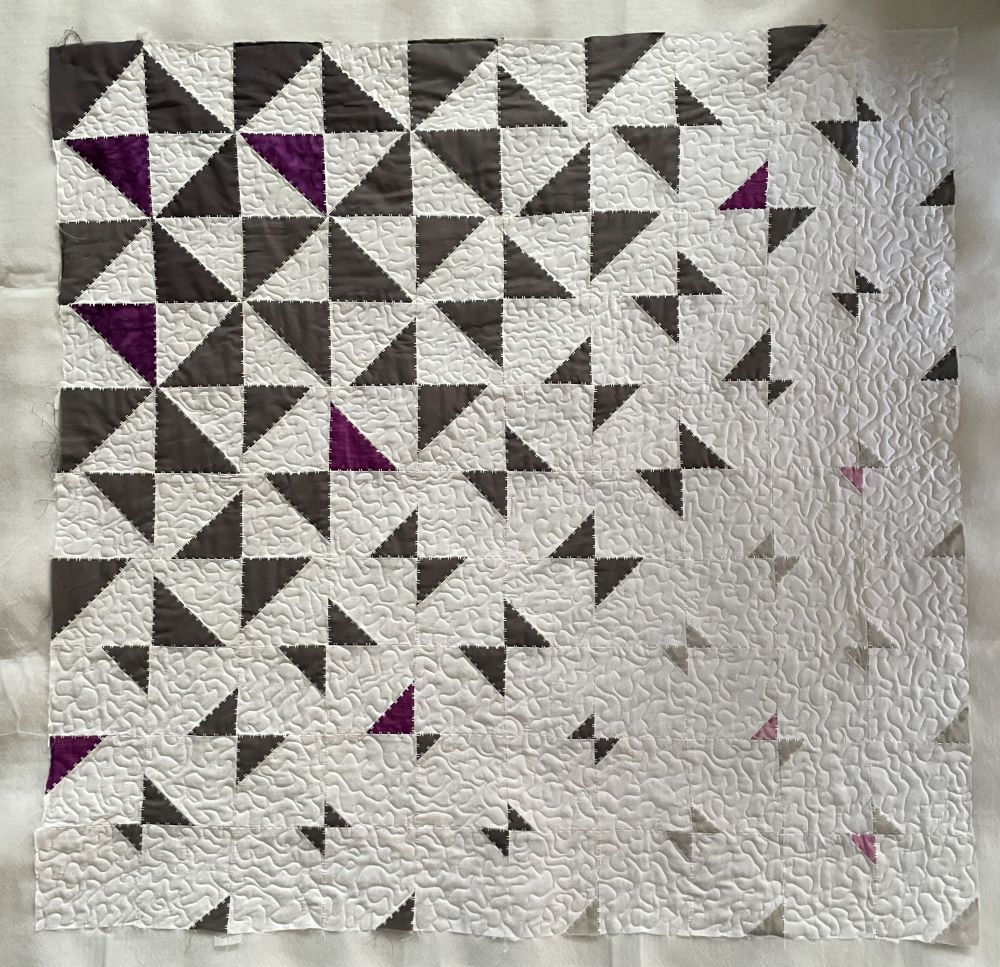
10. After the quilting is finished, cut away excess batting and backing fabric, leaving ½” (1,5cm) seam allowance on all sides.
Making the hanging sleeve corners
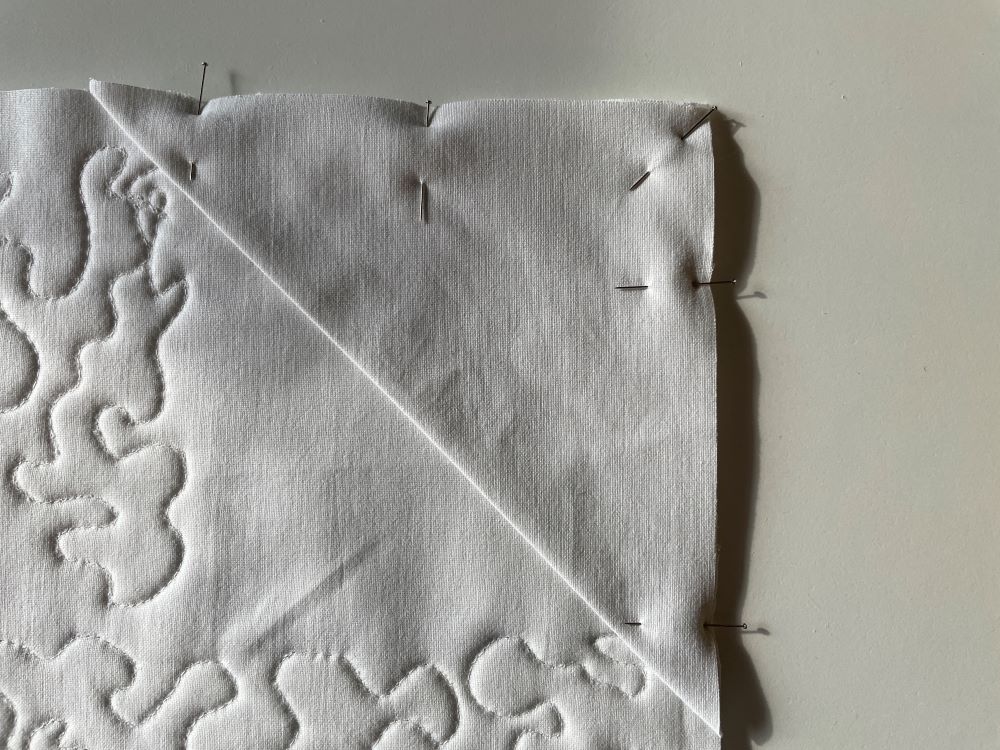
11. Cut out four squares 6x6” (15x15cm) from the backing fabric and fold them diagonally. Pin one in each corner on the backside with raw edges even.
Make the border.
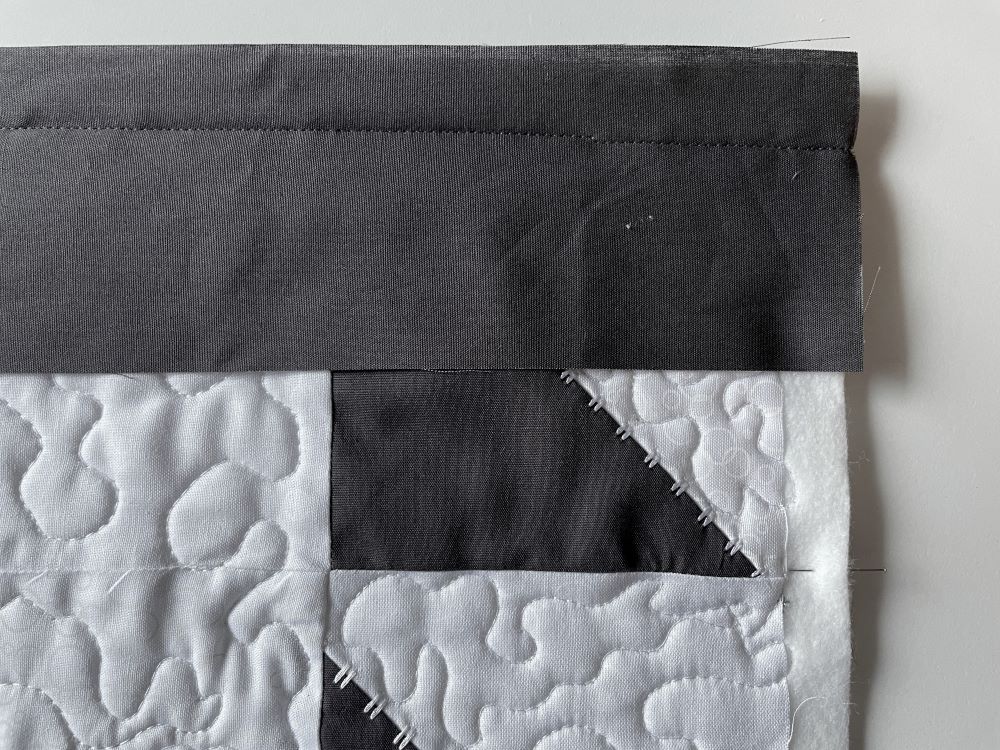
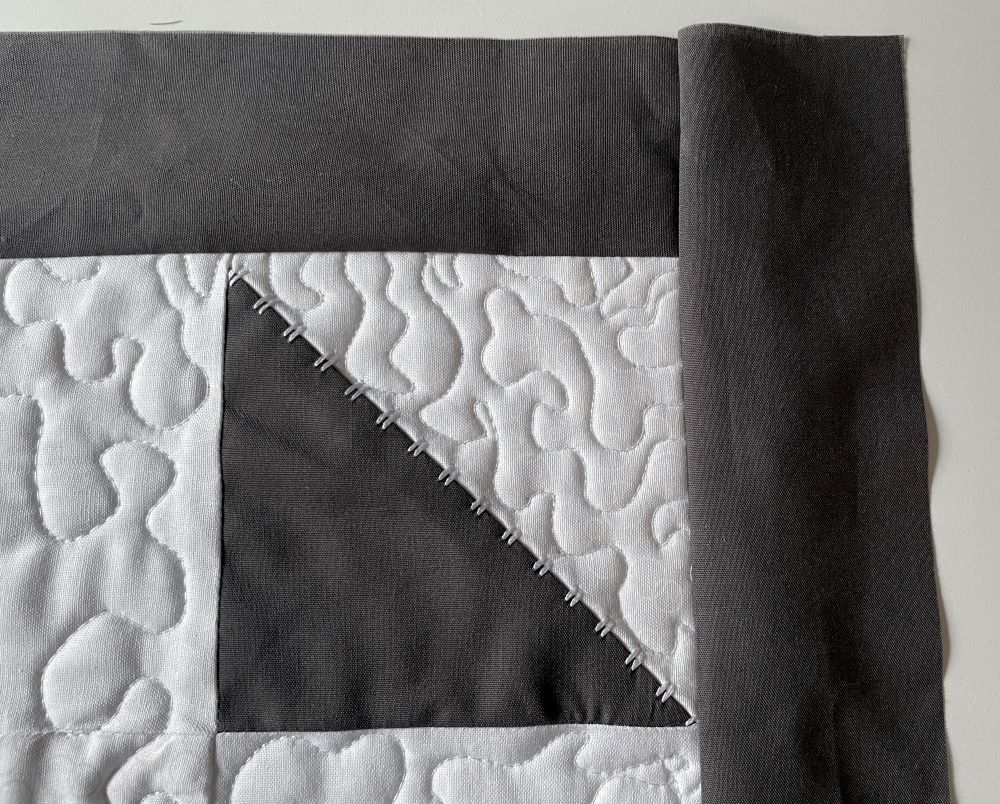
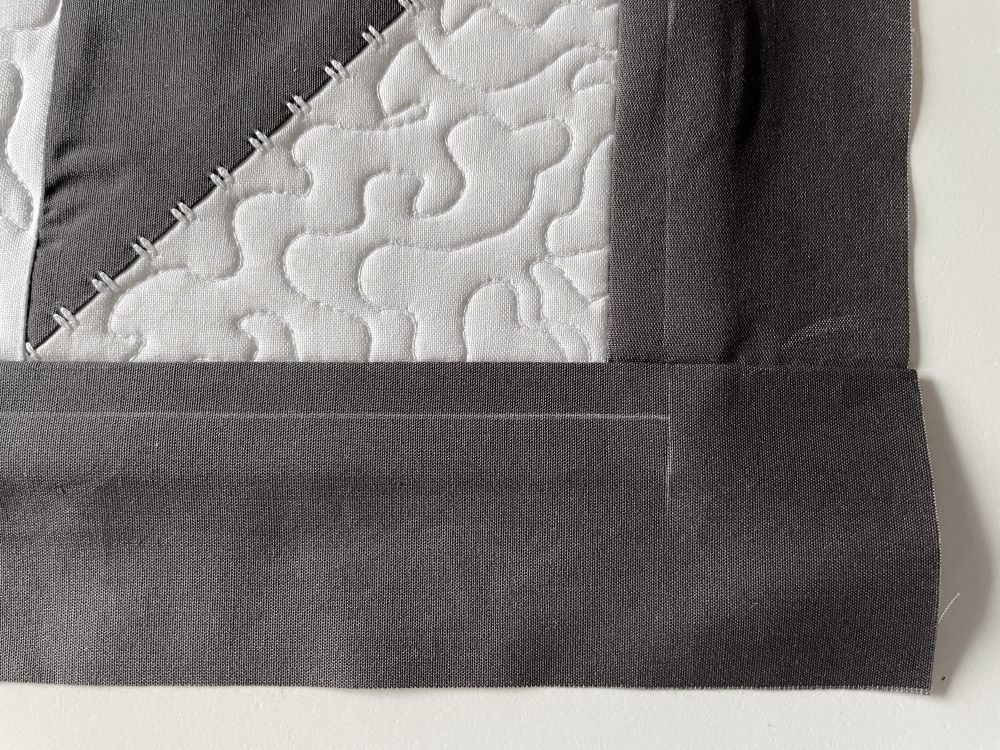
12. Measure the edge strip and cut two pieces. Add the edge strip using a ¾” (2cm) seam allowance on two adjacent sides. Fold out and press.
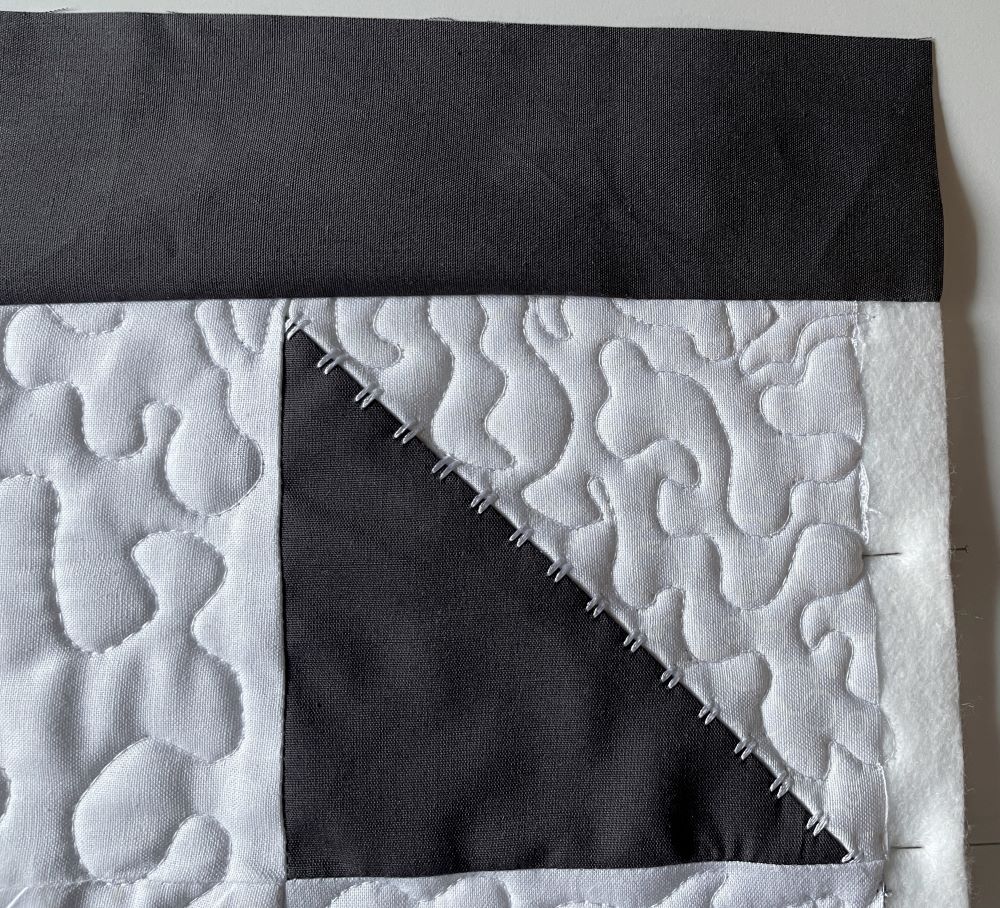
13. Repeat on the two remaining sides.
14. Draw a line ⅜” from the seam on all sides with a fabric marker.
Making the Ribbon stitch edge.
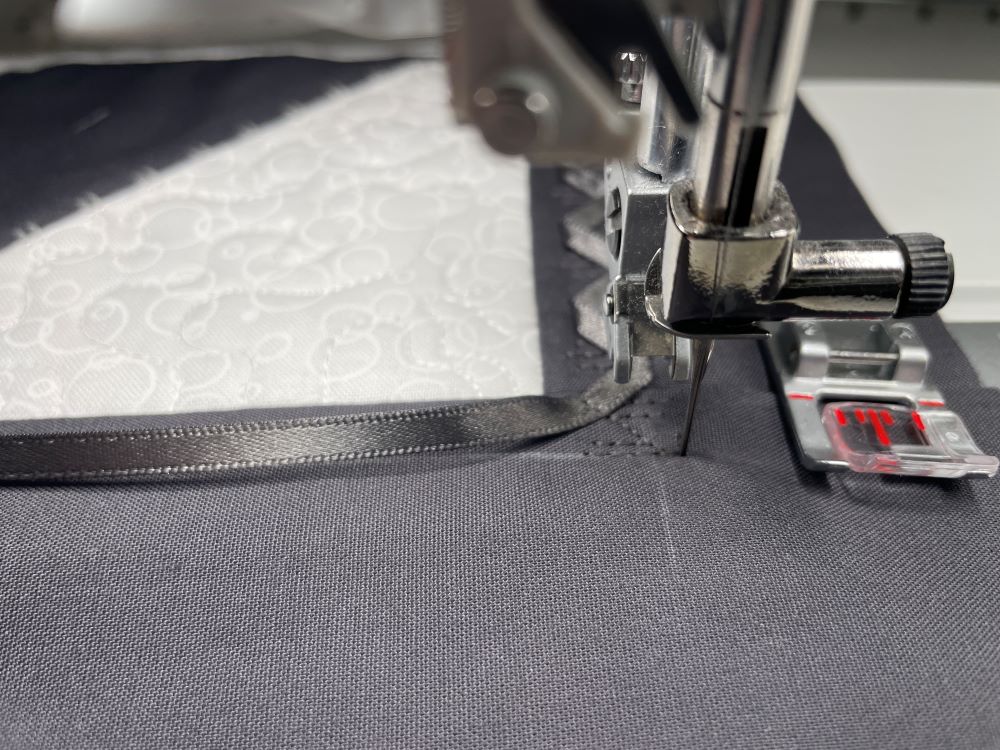
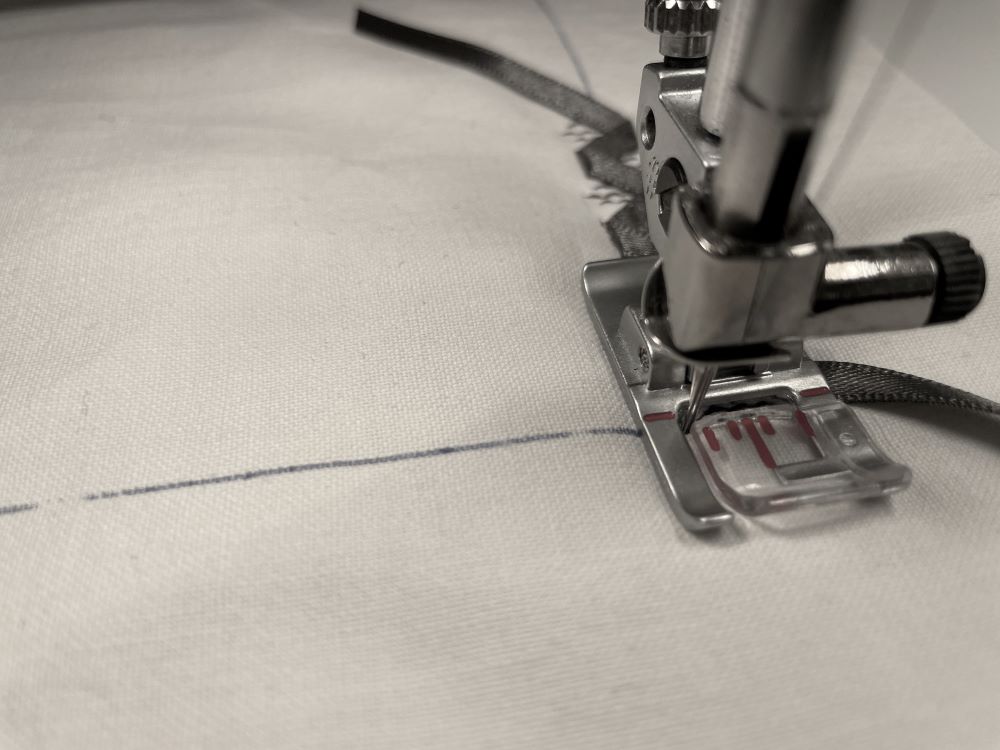
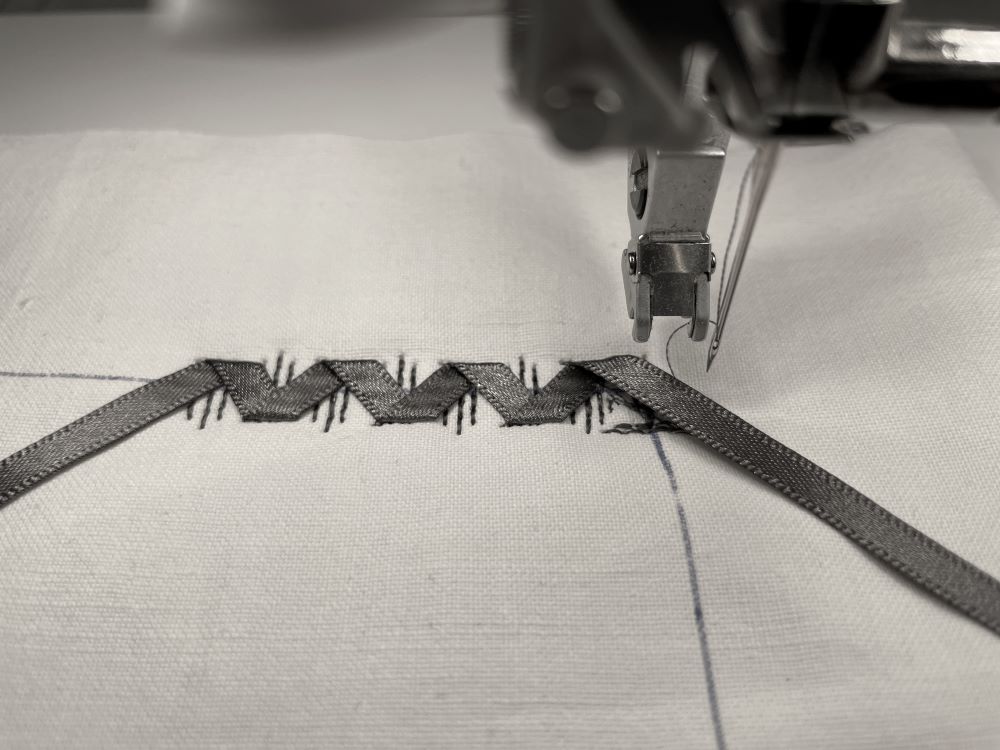
15. Start with the ribbon embroidery in on corner, ⅜” (1cm) before the corner (at the corner of the drawn line). (presser foot removed for better visibility)
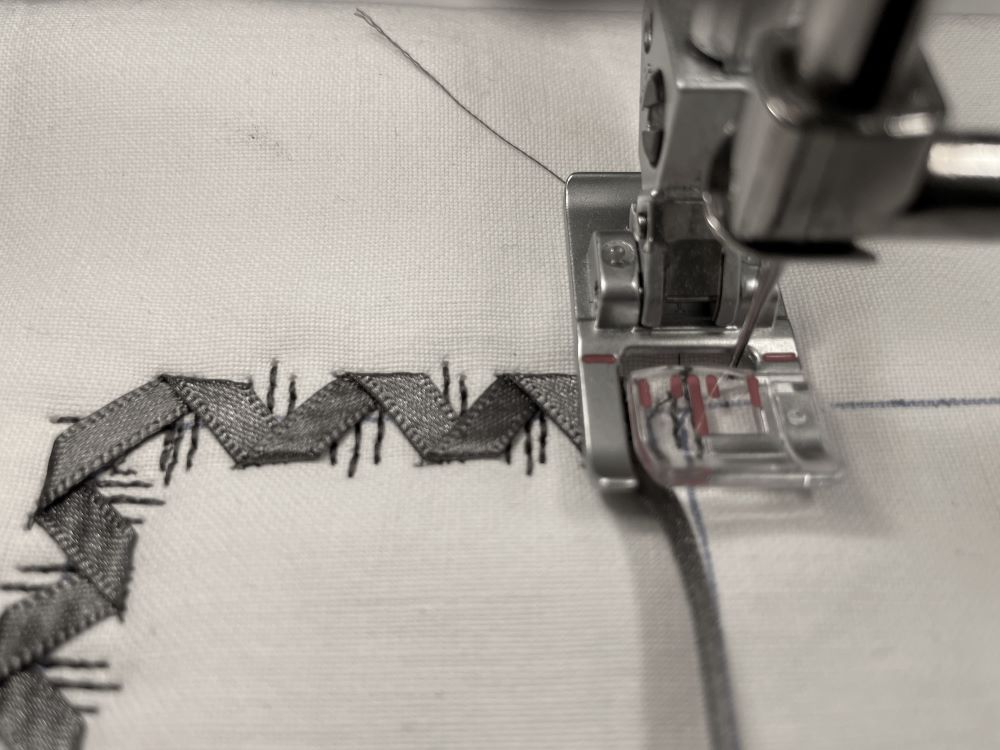
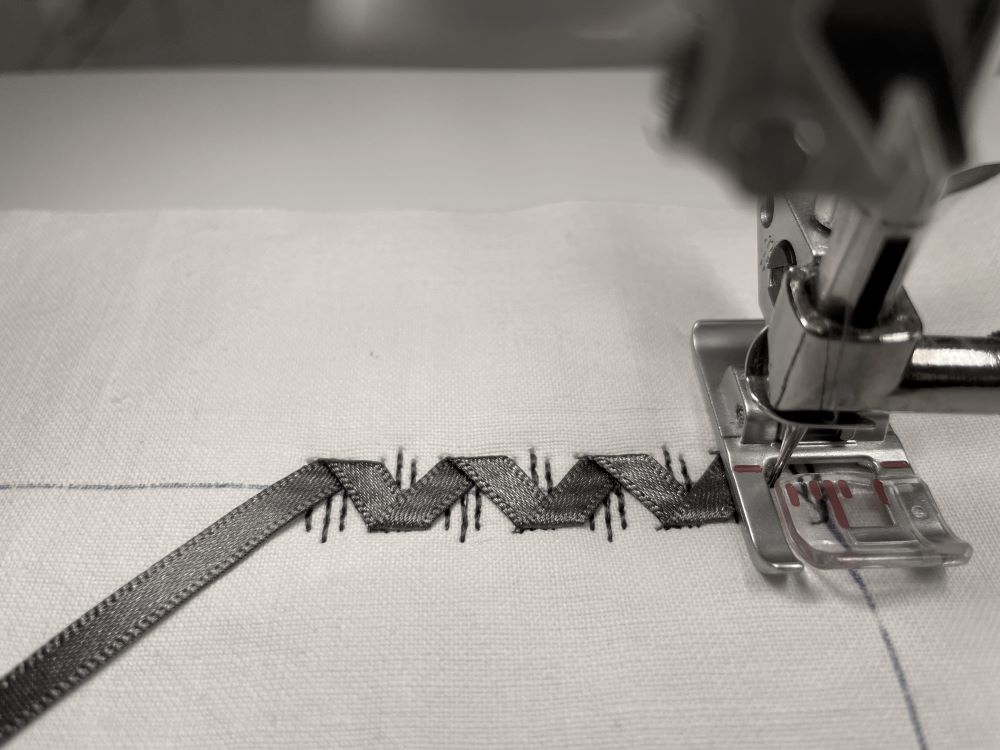
16. Stitch out the ribbon embroidery to the next corner. Stop at the intersection with the line on the next side. In this case the needle goes down on the right side.
Turning corners with ribbon embroidery
17. Turning corners: (the instructions below are made on a sampler fabric for better visibility)
-
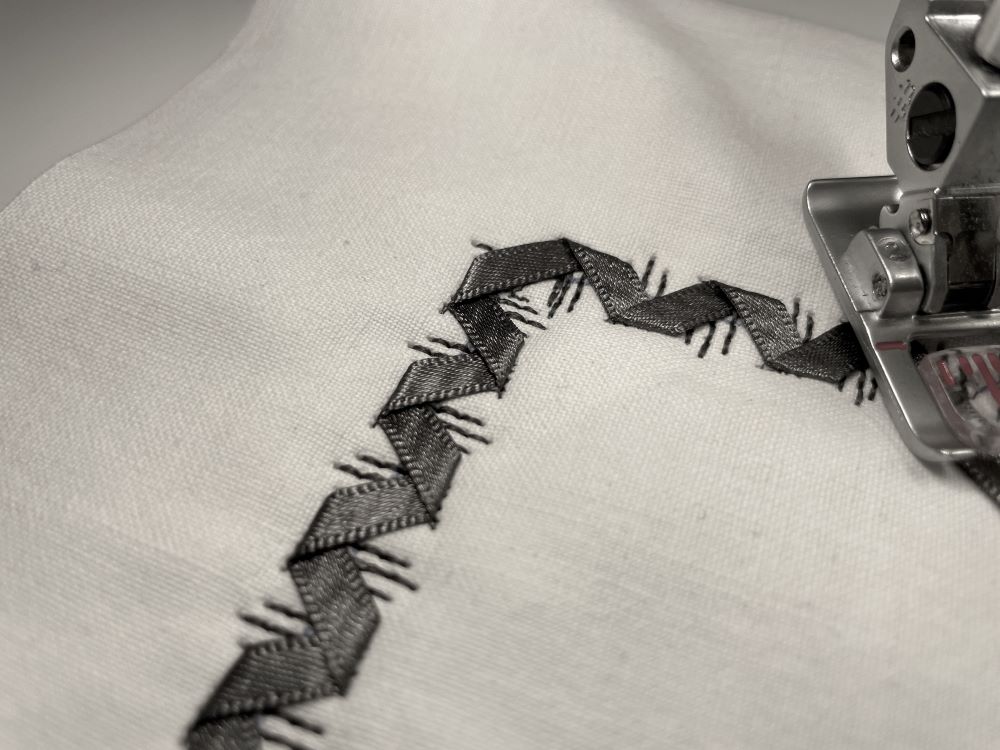
- If the needle goes down on the right side, do like this:
- Turn 90 degrees.
- Fold the ribbon up to the needle
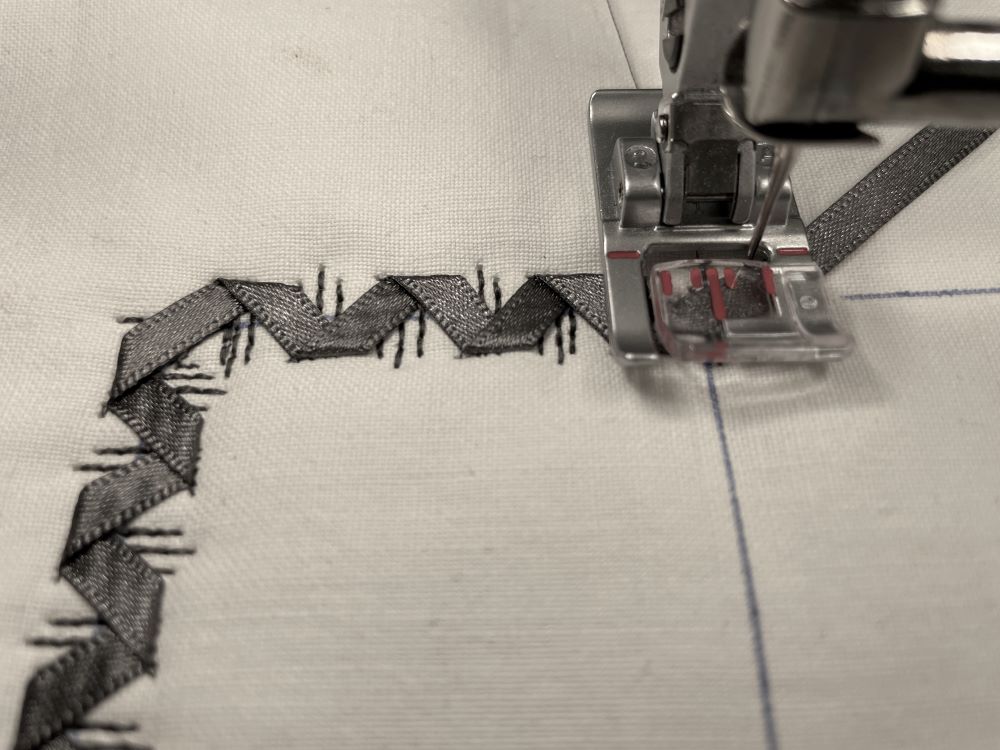
- Stitch next sequence
- Fold the ribbon down to the needle, then continue the ribbon stitching down the line
-
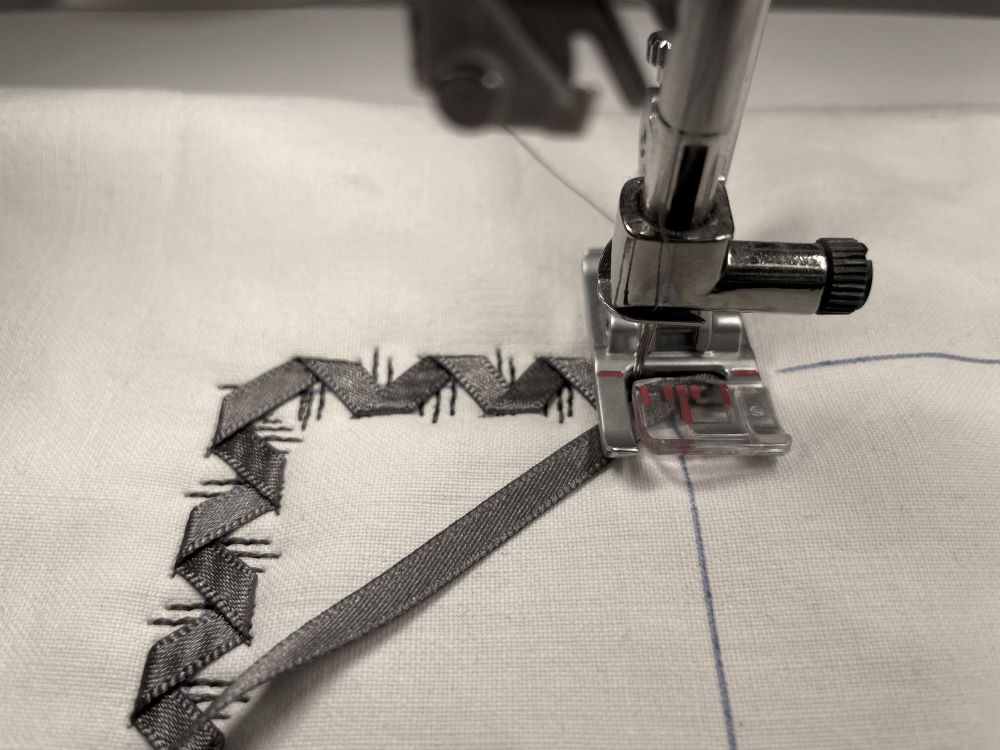
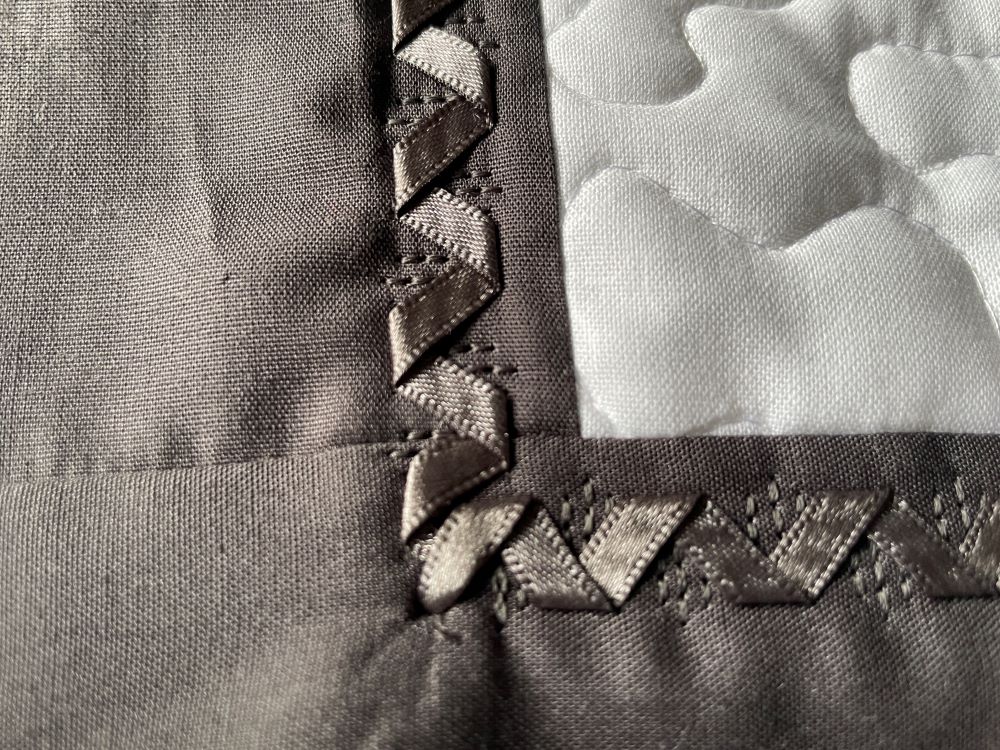
- If the needle goes down on the left side, do like this:
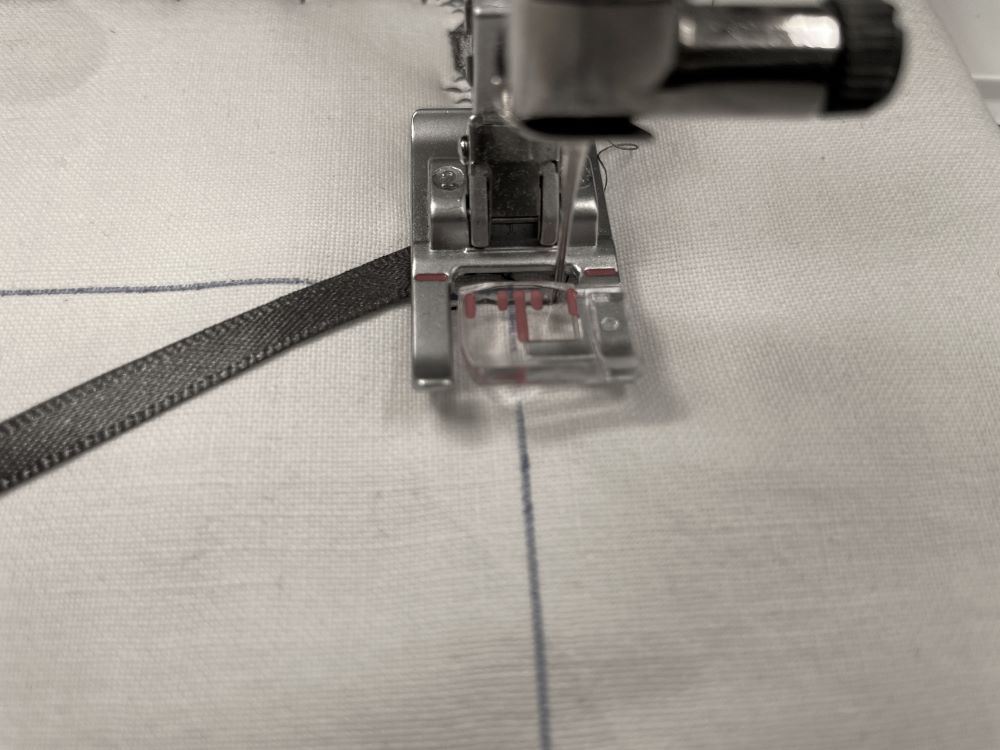
- Turn 90 degrees. Move the handwheel to get the needle up and move the presser foot up so the previous line is at the same level as the red line on the side of the presser foot.
- Stitch the next sequence, keep the ribbon out of the way. Then fold the ribbon down to the needle (presser foot removed for better visibility)
- Continue stitching the ribbon stitches down the line.
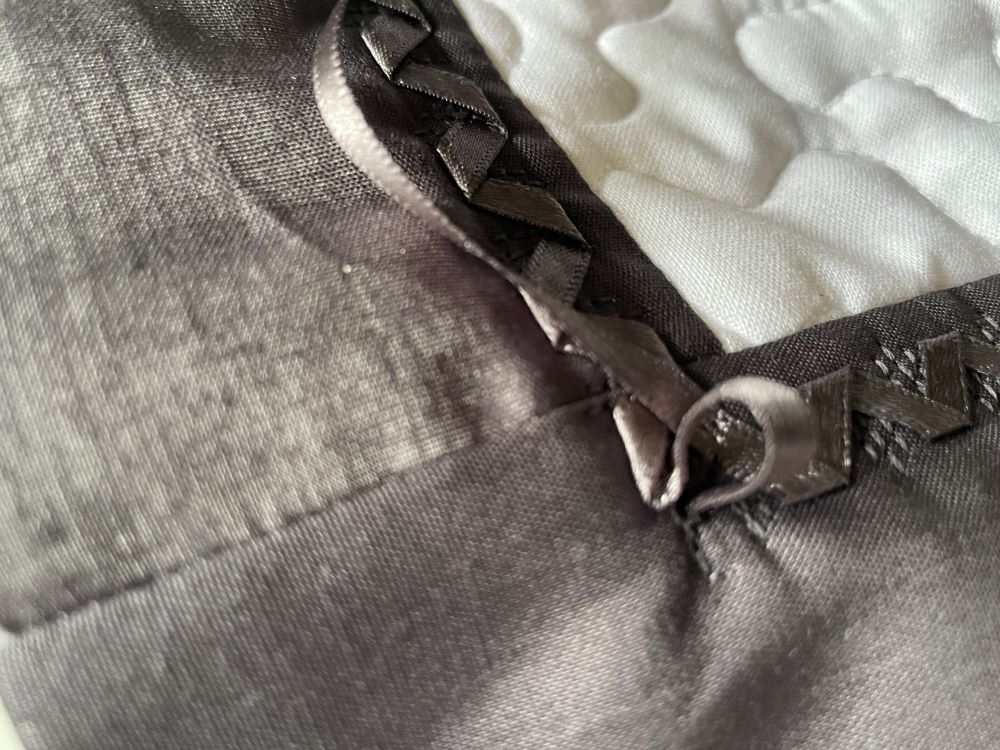
At the end, stop at the corner, move the ribbon out of the way and cut the thread. Use an awl to make a hole and drag the ribbon ends to the back. (the example below is one option, it will look different depending on where the ribbon stitches end.)
Finishing the edge
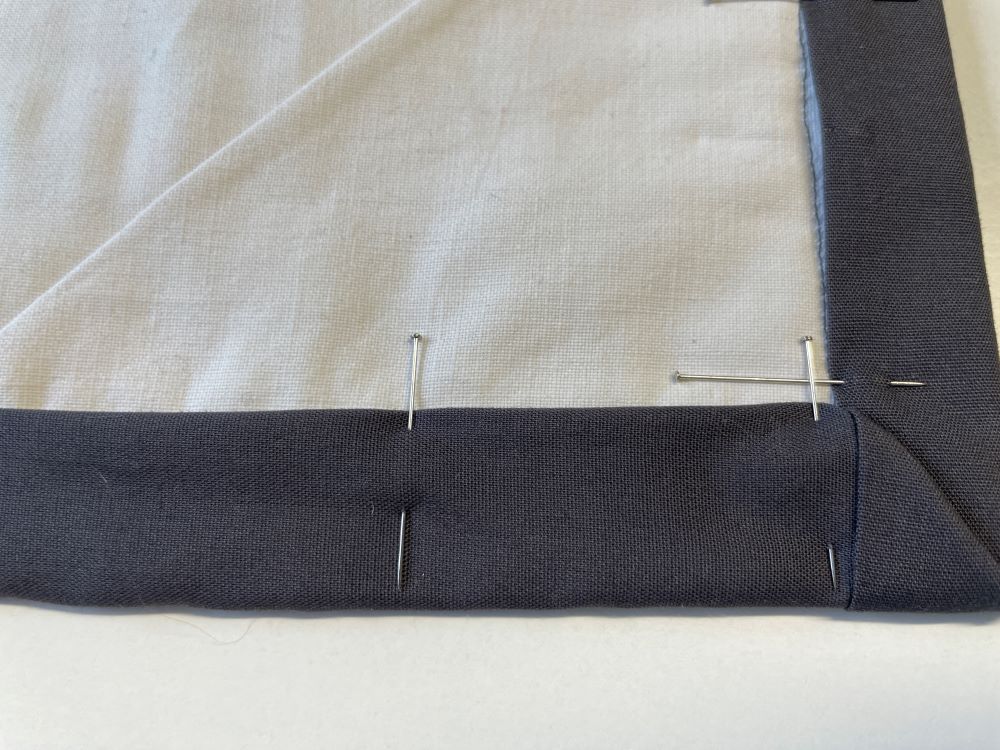
19. Fold the remaining edge strip to the wrong side, make diagonal corners and pin in place, stitch close to the folded edge.

Your quilt is now finished!