United States
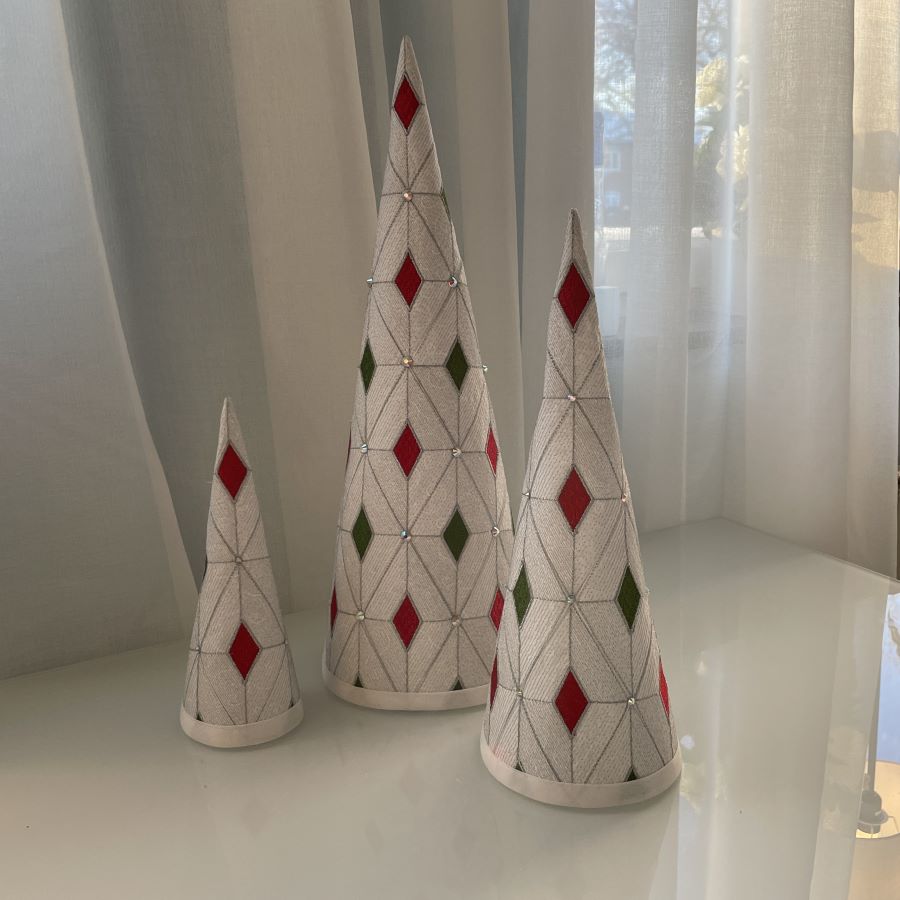
Digitize Your Own Bejeweled Christmas Tree
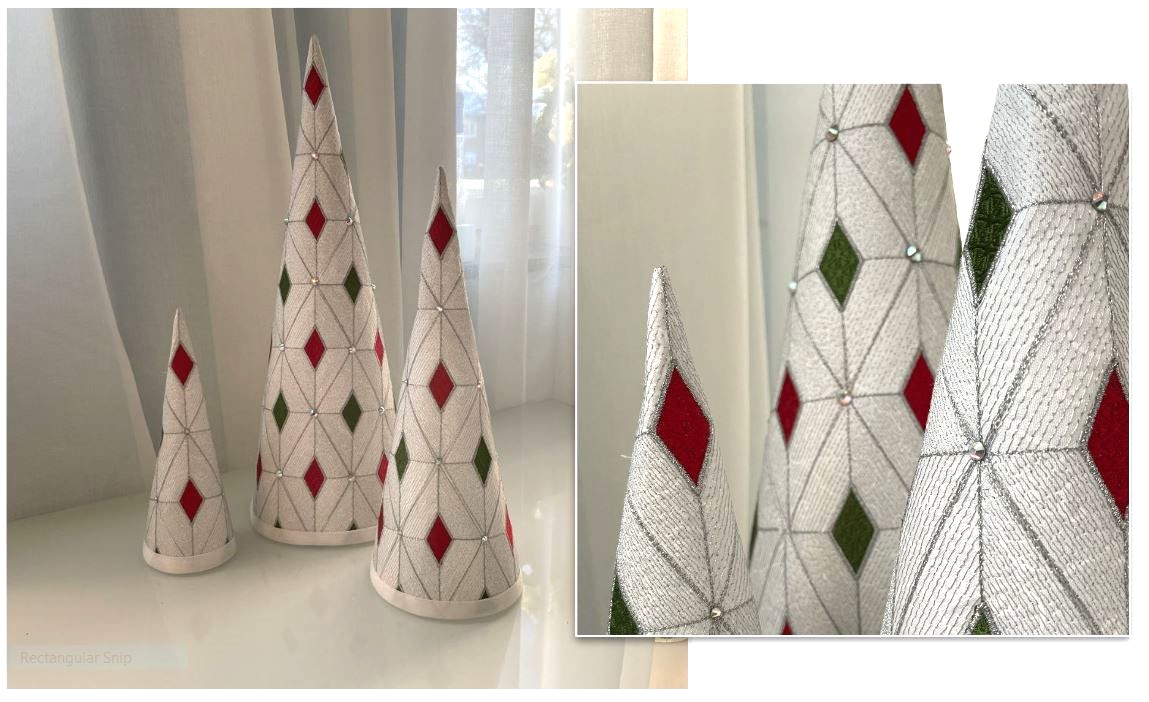
This Christmas tree can be mady in any size, The diamond shape can be used to make other things as well, like table runners, pillows etc. Follow the step by step instruction to digitze it from scratch!
What you need:
- mySewnet Embroidery Software, Platinum level
With 30-day Free Trial of mySewnet Embroidery Software you will get to try out the most user-friendly and feature rich digitizing software on the market. It works with all embroidery machine brands and is available for both Windows and Mac.
For the Christmas tree stitchouts you need:
- 240x150 mm Creative Grand Metal Hoop (or larger)
- Tear away stabilizer
- White Fabric
- Embroidery thread Green, Red and Silver (or grey)
- Optional: Hotfix Rhinestones or Beads
How to do:
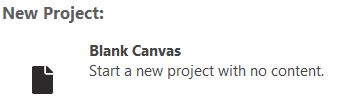
1. Open mySewnet embroidery software. Select Blank Canvas
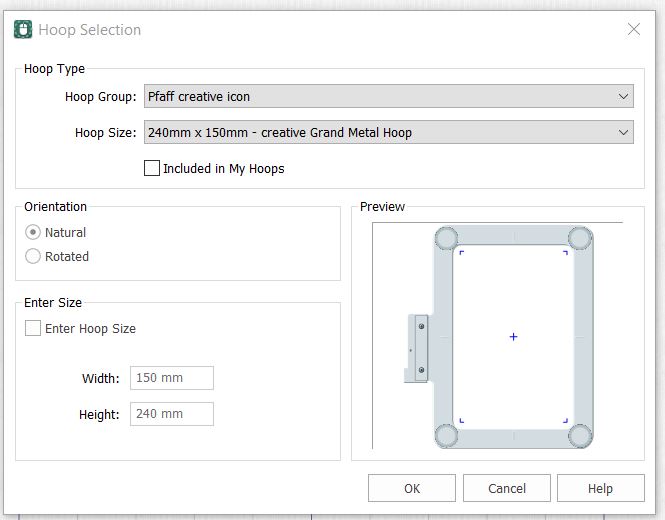
2. Select 240x150mm creative Grand Metal Hoop. (You can change this later to another hoop, but it is easier to use for now).
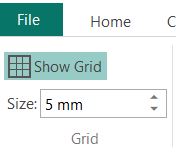
3. Click on View tab and set the Grid size to 5mm.
4. Click on Create and select Digitizing. A new window will open.

5. Select Start a New Embroidery with no Picture, click on Next
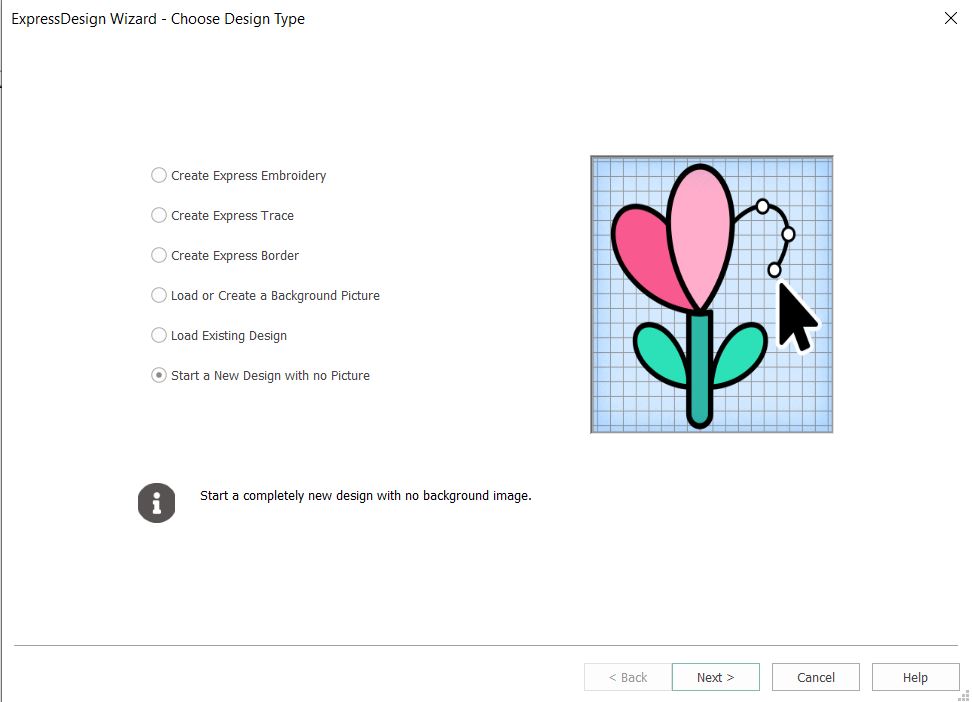
6. Click on Finish.

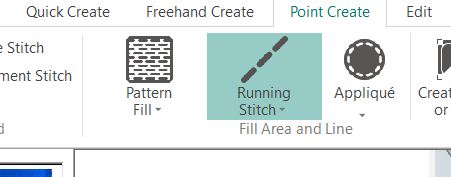
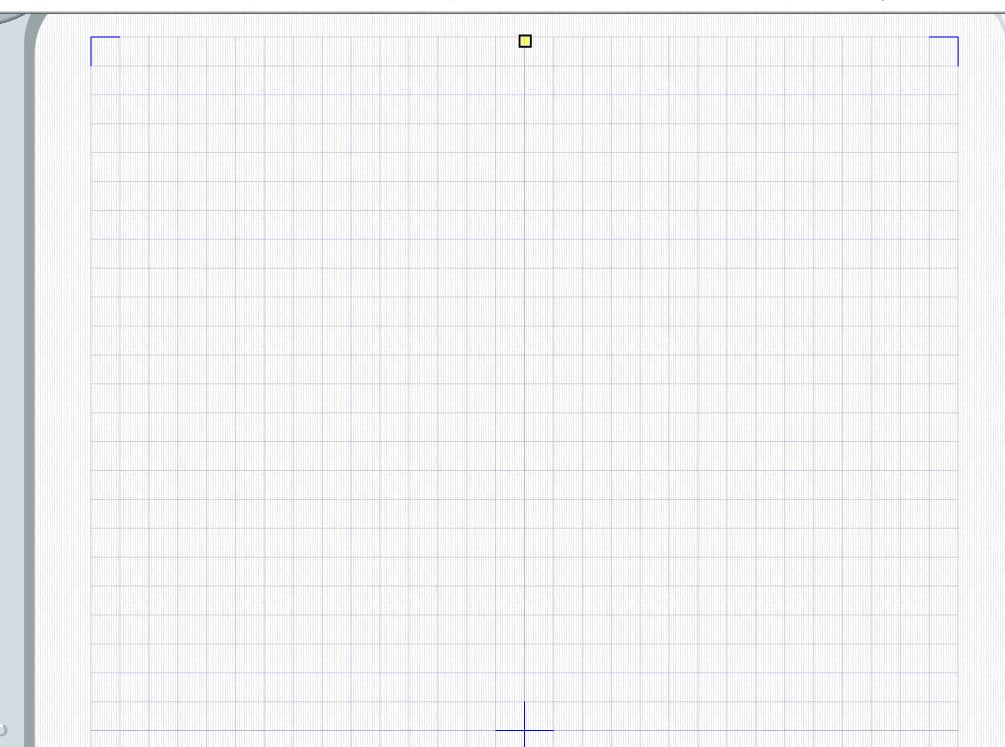
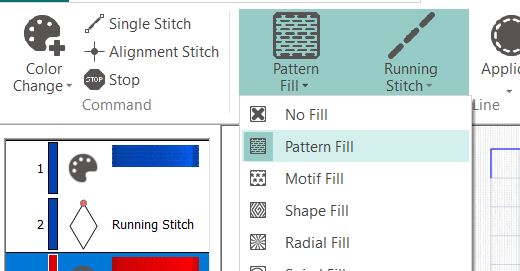
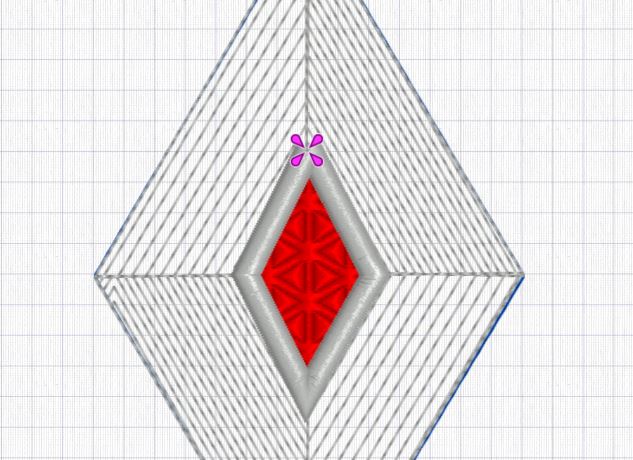
7. Click on Point Create, in Pattern Fill, select No Fill, In Satin Line, select Running Stitch. Now it should look like this:
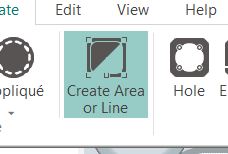
8. Now Click on Create Area or Line. The Arrow Cursor will change to a white dot.
9. Use the magnifying tool to zoom in to get a closer view of the grid. You will find the Magnifying and zooming tools down at the right hand corner.


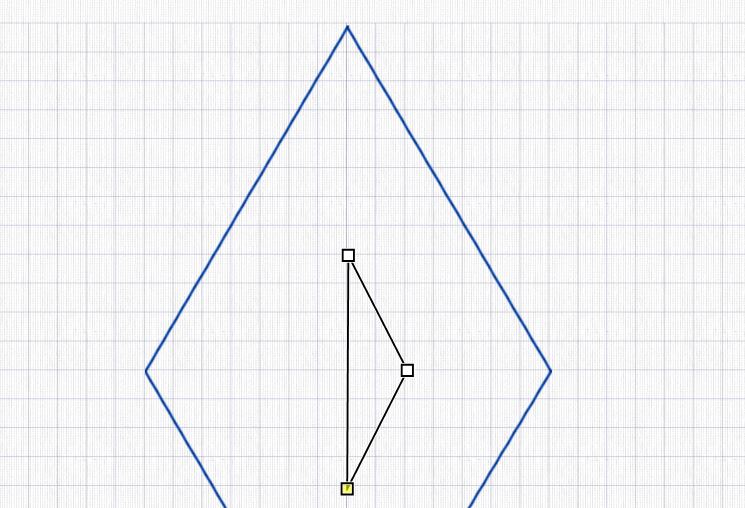
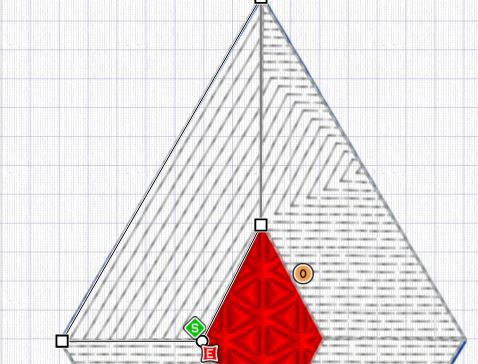
10. Set the first point at the center line close to the top of the grid.Hold down the Shift key to get a square point. This will make straight lines.
11. Set the second point 12 squares(6cm) down and 7 points(3,5cm) out to the right.
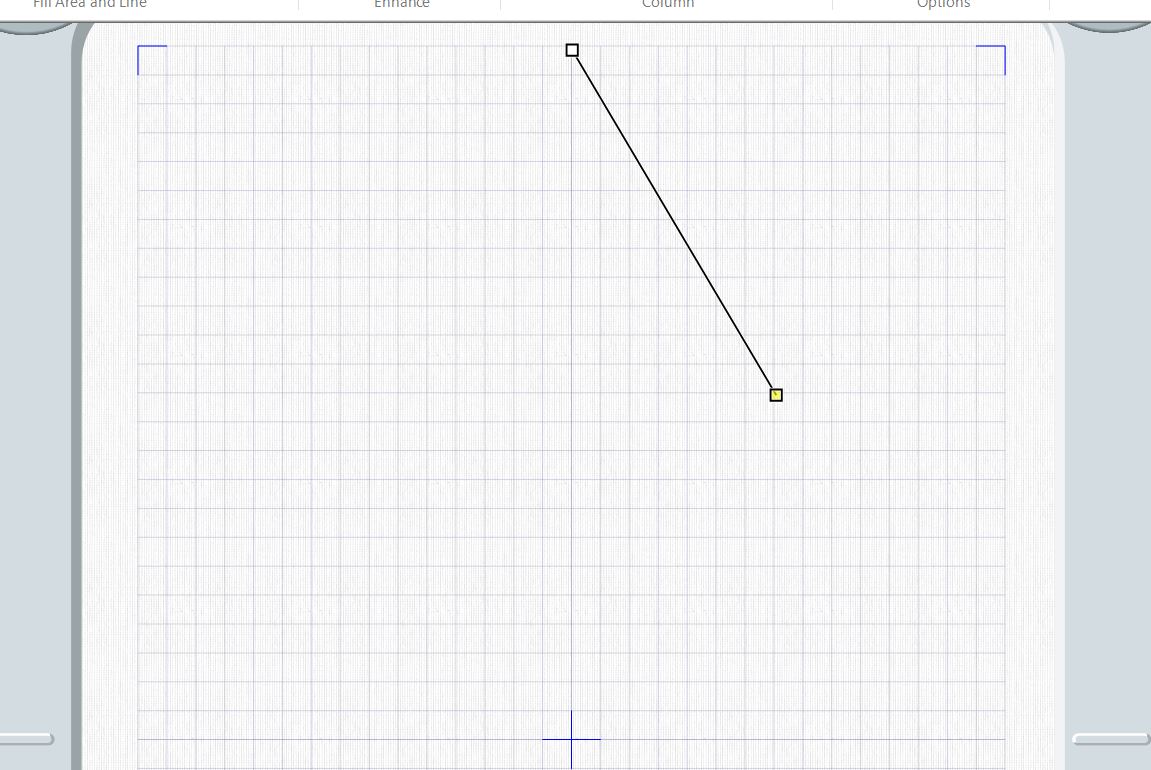
12. Set the third point on the center line, close to the middle.

13. The fourth point will be set at the same level as the second point, seven squares(3,5cm) to the left of the center line.
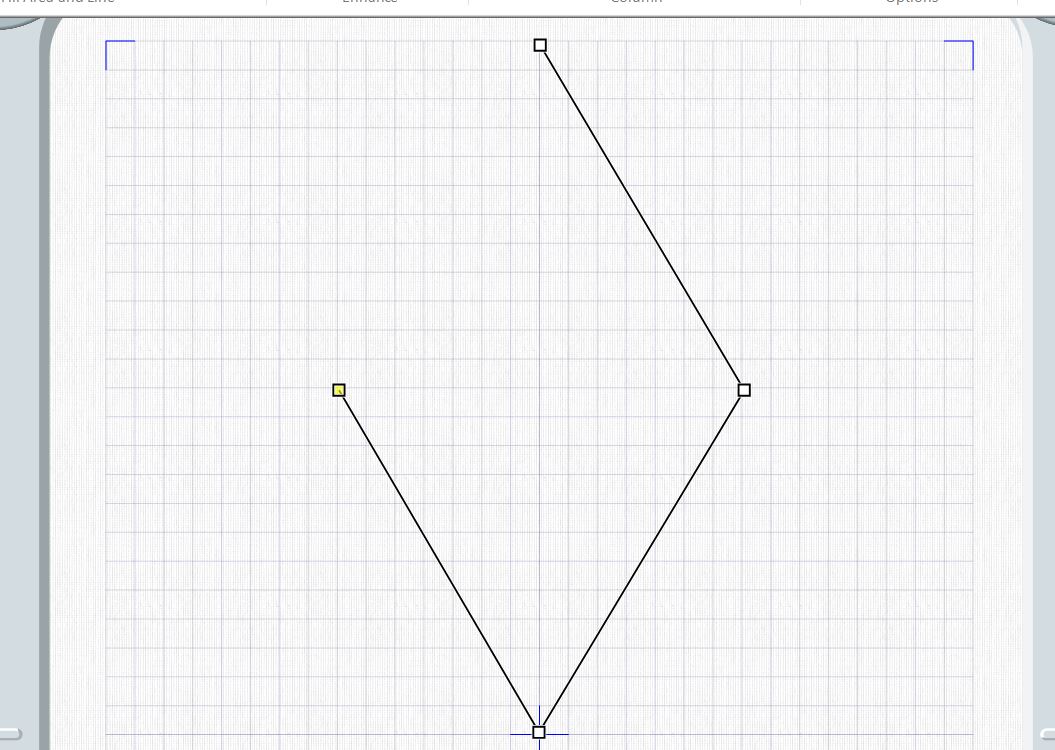
14. Close the shape by making a fifth point close to the first one and drag it on top of the first point.
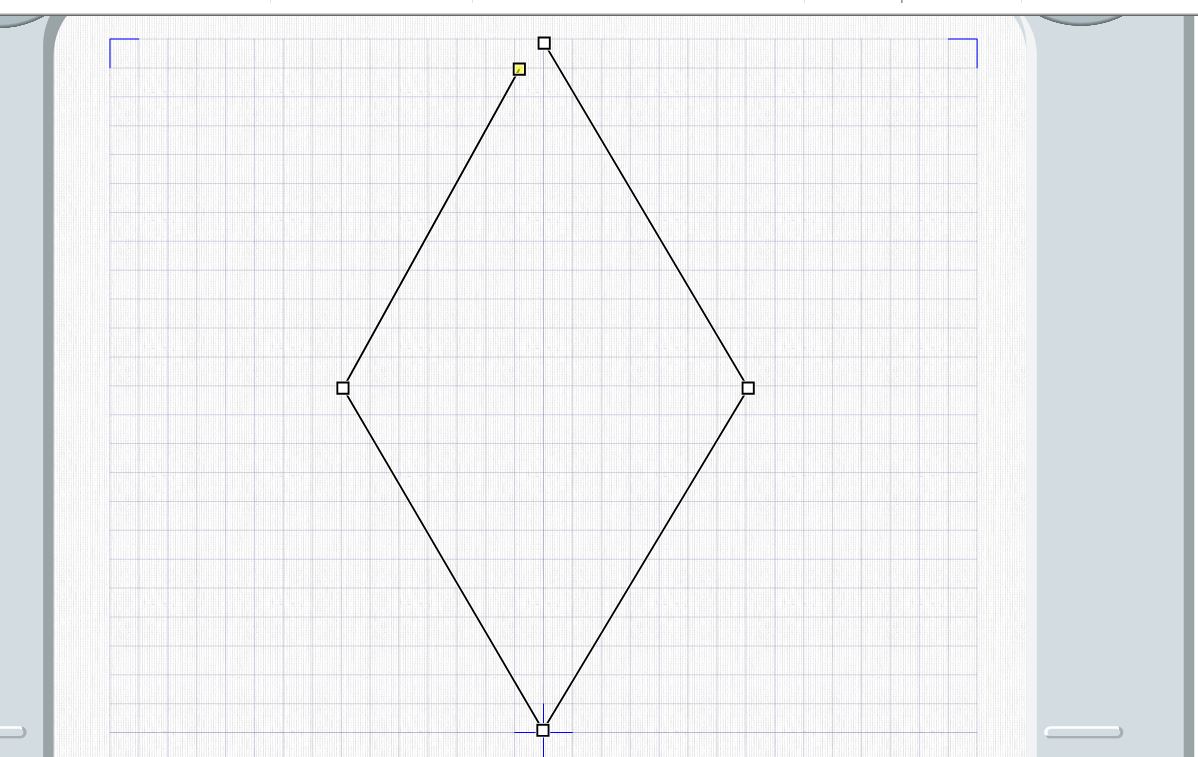
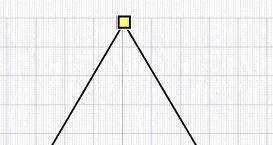
15. Right click to make the stitch line.
16. Click on Color Change and select a red color, and click on it.

17. Click on Pattern Fill and select Pattern Fill.
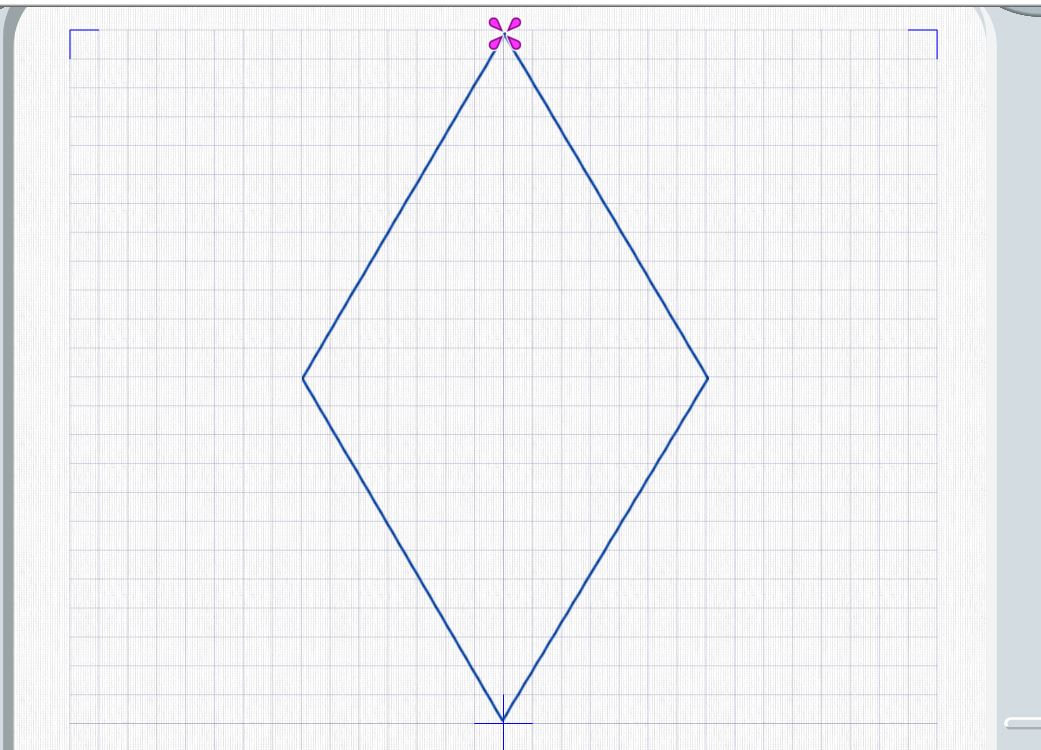
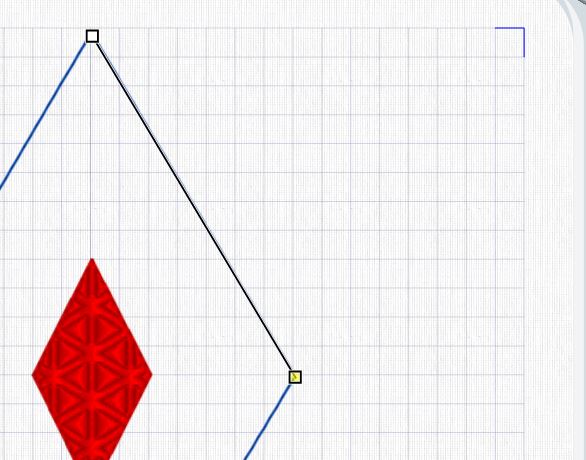
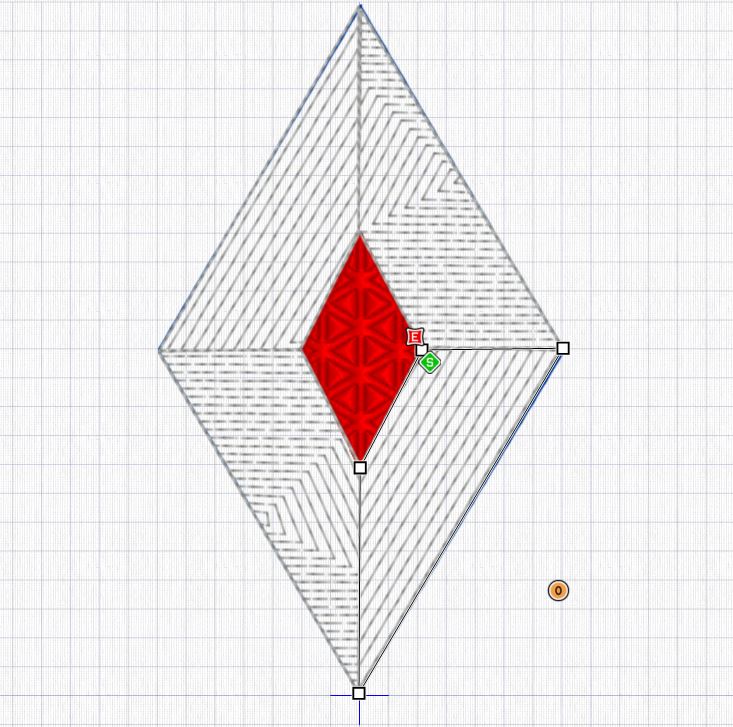
18. Set the first point 8 squares down(4cm) on the centerline. Hold down the Shift key to get straight lines.

19. Set the second point four squares(2cm) down and two squares(1cm) to the right.
20. Set the third point on the vertical center line, four squares(2cm) below the second point.
21. Finish the diamond shape by placing the fourth point four squares up and two squares to the left.
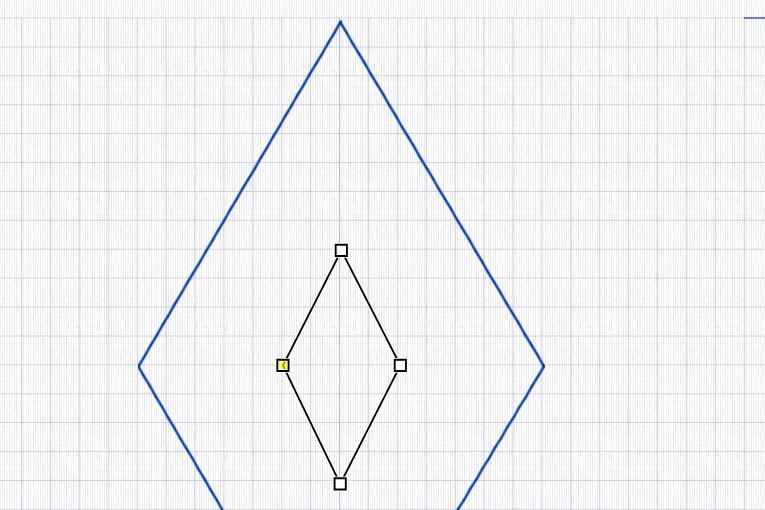
22. Right click to set the shape.
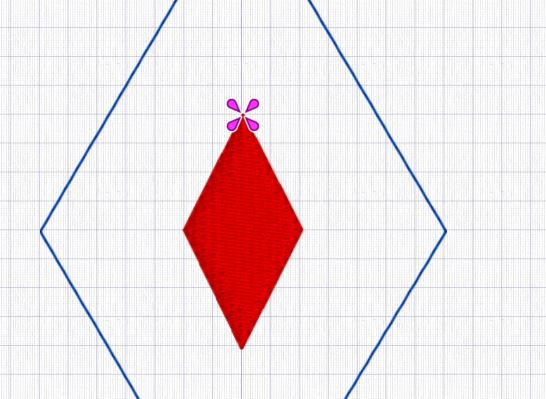
23. Now we will change the fill pattern: Right click in the fill pattern.
24. Right click again to get to the Fill Area and Line settings menu.
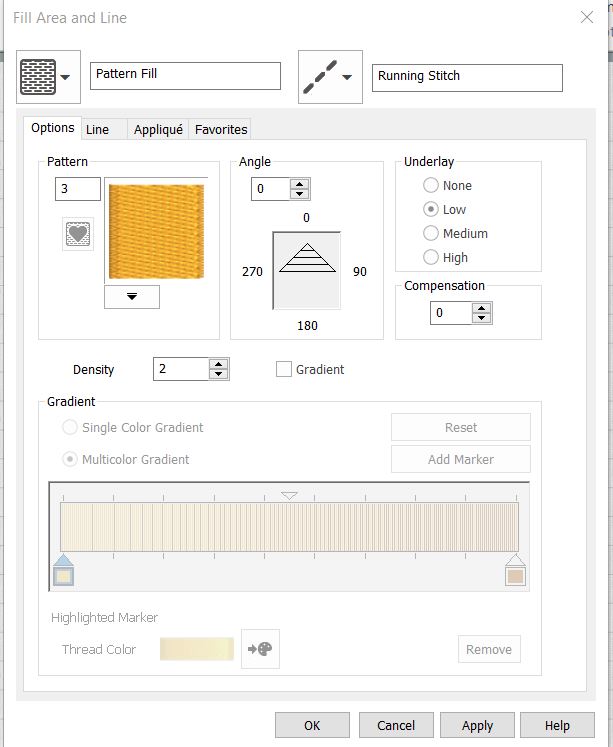
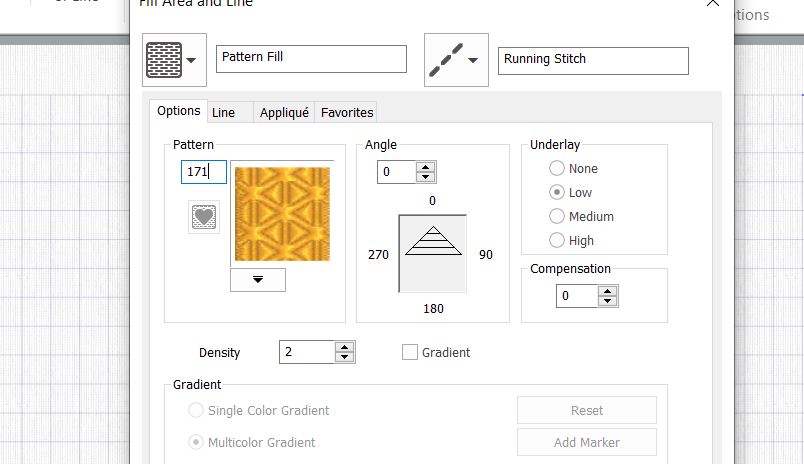
25. Type “171” in the Pattern box. Click OK.

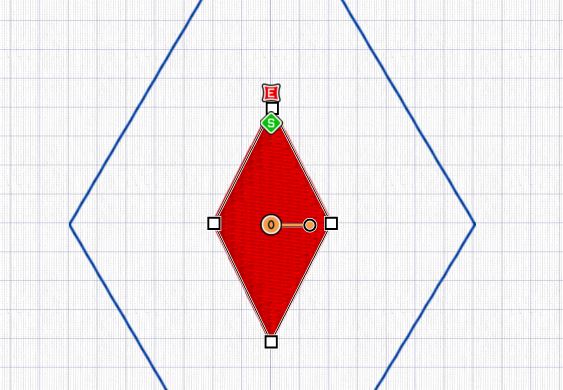
26. Now we will make the other shapes in the diamond, the facets.First add a color change, see step 16. Change to a gray color.
27. Change the Pattern Fill to Shape Fill.

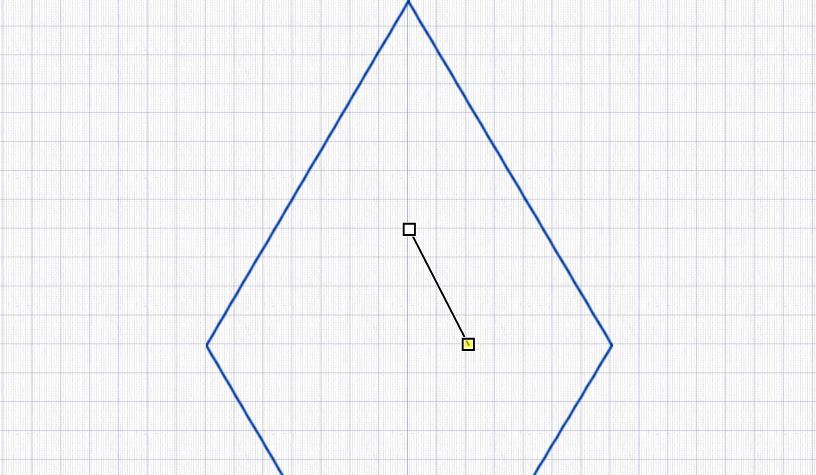
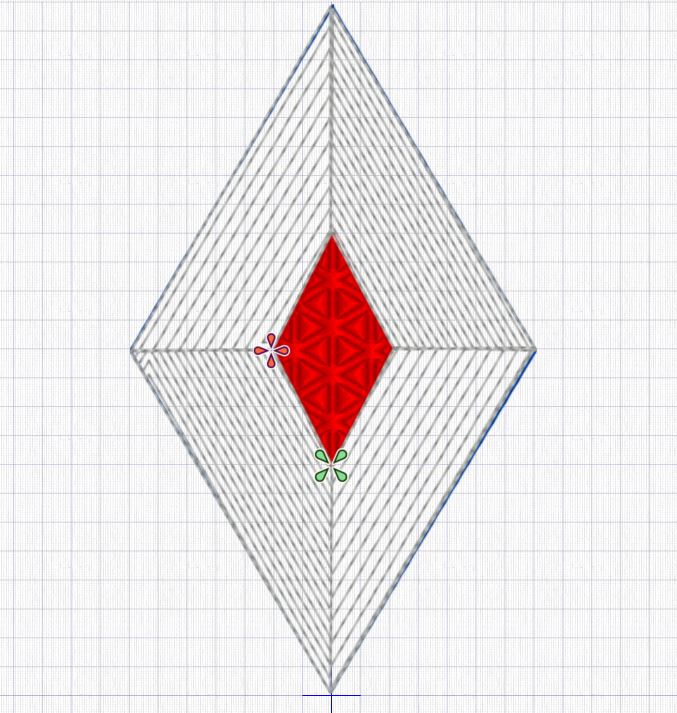
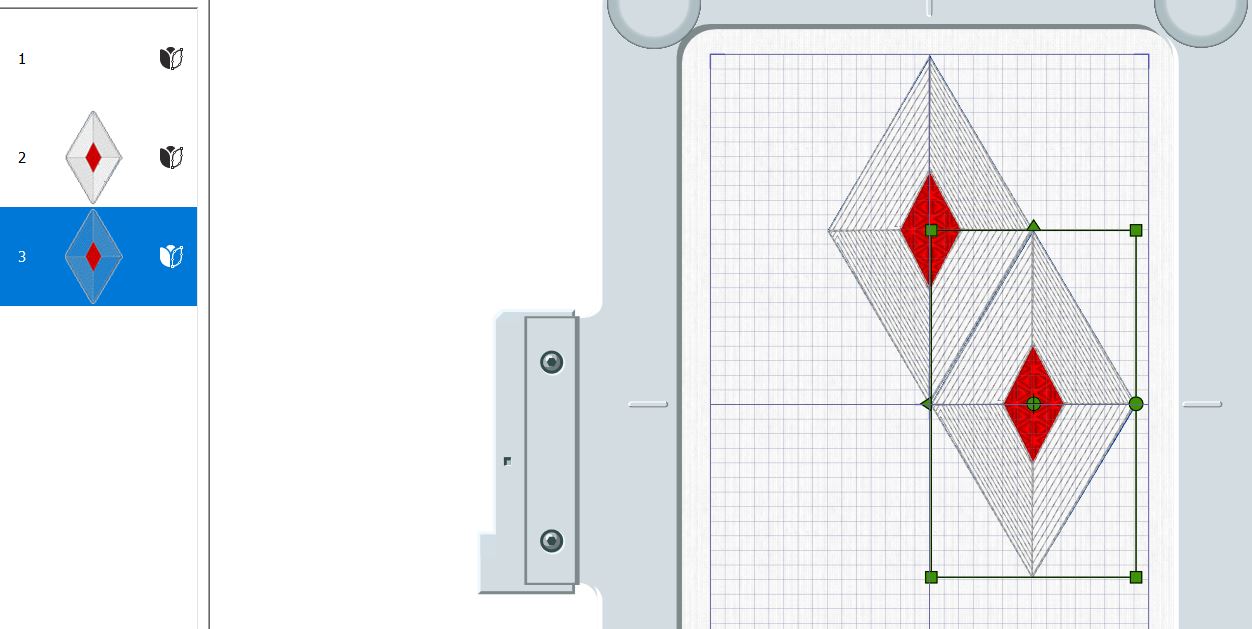
28. Click on Create Area or Line and set a pint on the center line on the top of the large diamond shape. Set the next point on the right side point of the diamond.
29. Set the next point on the right side point of the small diamond and the last one on top of the small diamond.
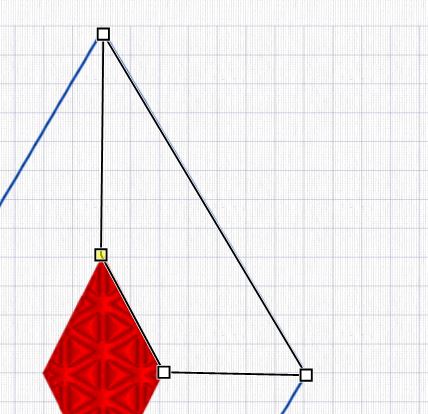
30. Right click to set the shape. It will look like this, we will change the pattern later.
31. Make the other three facets in the same way.
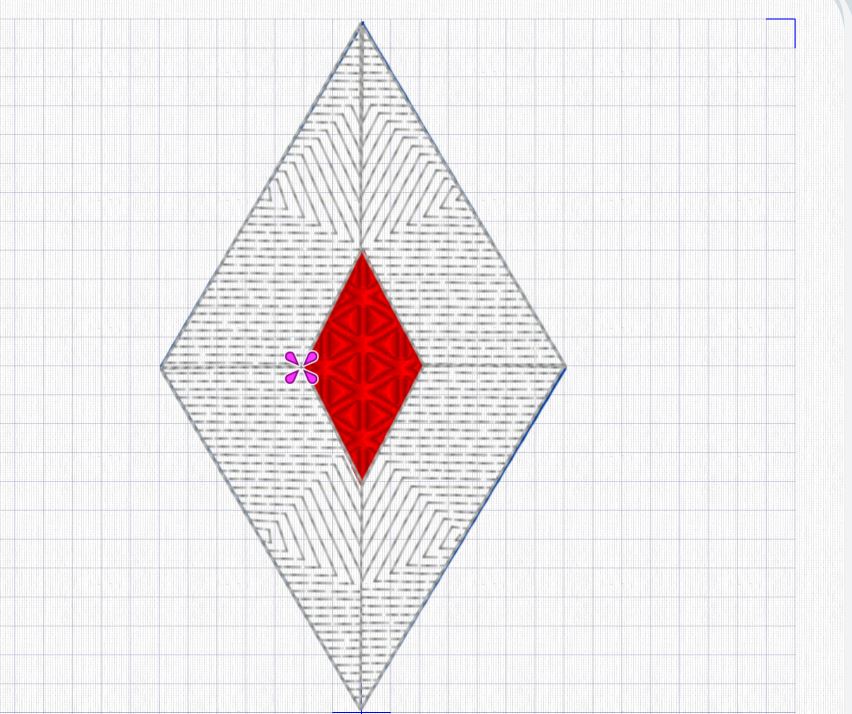
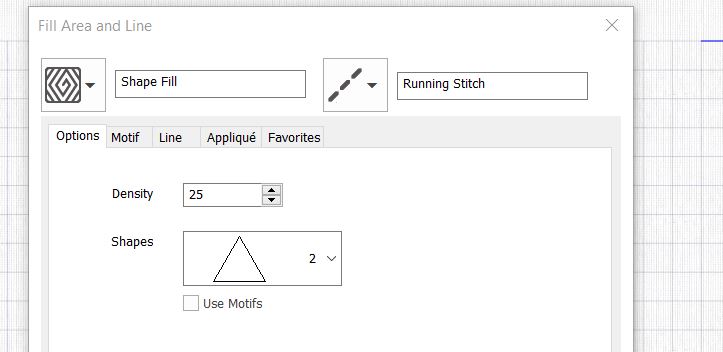
32. Now we will change the fill patterns in the facets: start with the top left facet. Click in the area twice to get to the settings menu. Set the Density to 25 and the Shape to 2 (Triangle) Click OK.
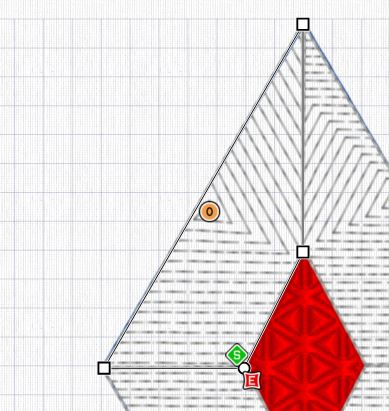
33. Drag the orange circle to get a pattern that is parallel to the outer line of the large diamond.
34. Repeat with the lower right shape using the same settings (density 25, shape2).
35. Repeat with the other two facets, but change the density to 15.
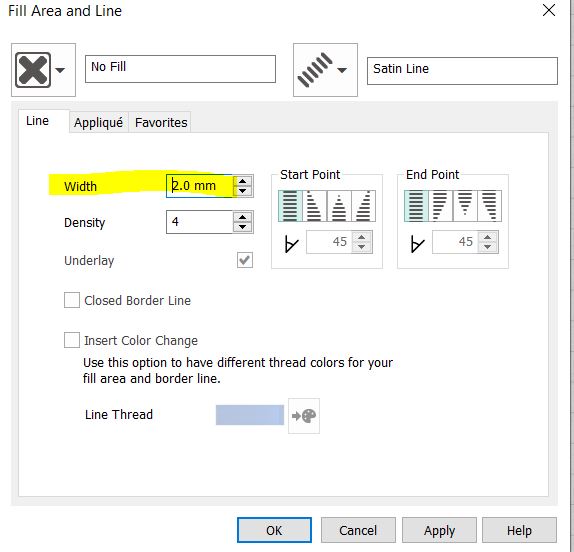
36. As a last step we will add a small satin edge on the small diamond. Select pattern Fill “No Fill” and Satin Line.
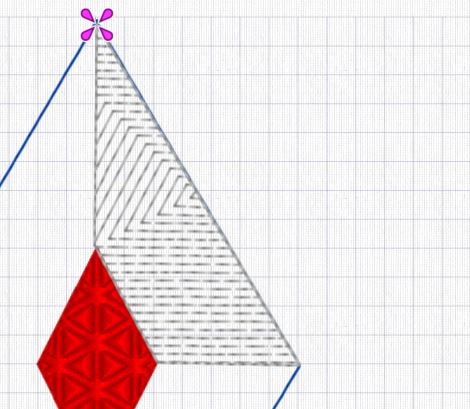
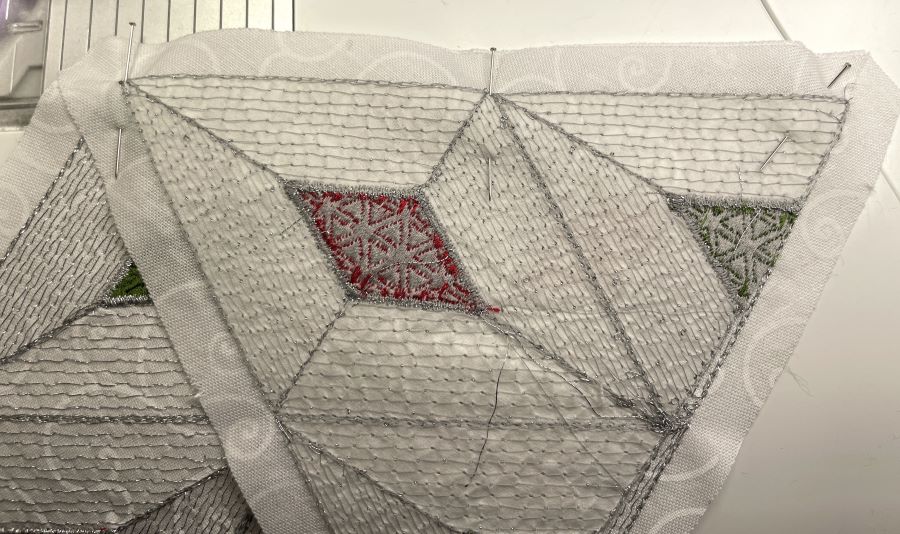
37. Click on Select Area or Line and set points at the four corners of the center diamond. Use the Shift key to get a straight line. Right click to set the stitch line.
38. The Satin Line is too wide so we will make it narrower: Right click twice to get to the settings menu, set the width to 2mm and click OK.
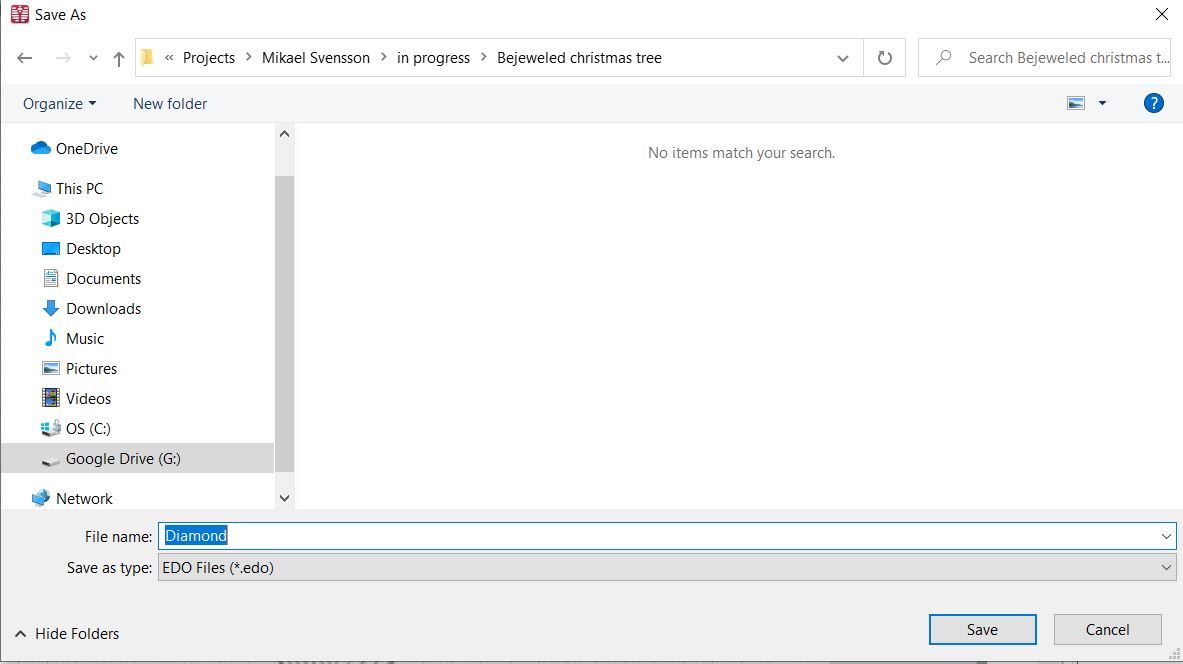
39. Before we continue we will save the EDO file. Click on File, Save and give the name “Diamond” to the file. This makes it possible to come back and edit the file further if needed.
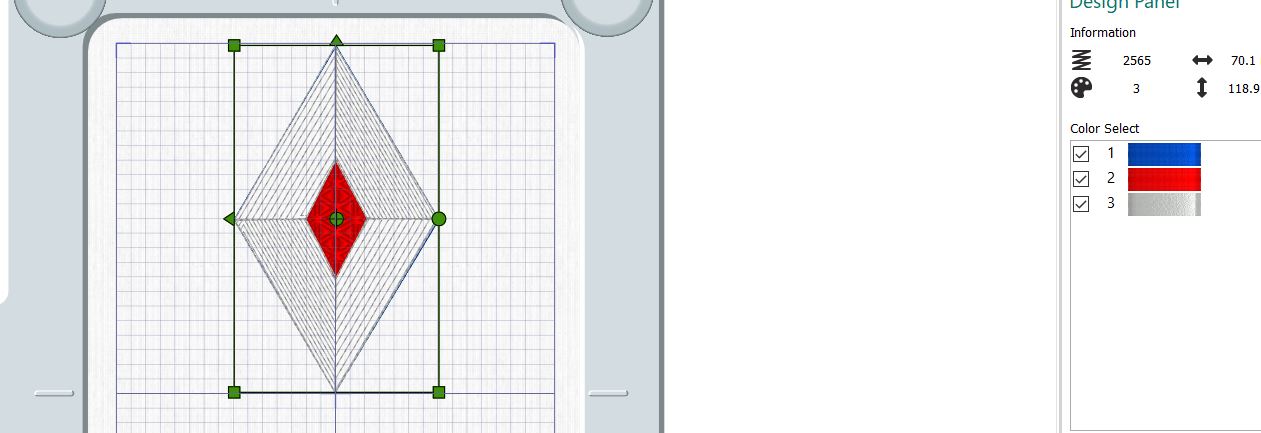
40. Close the digitizing module. The file will now appear in the embroidery software module.
41. Click on the home tab, click on copy, then paste. Drag it to the right and put it close to the first diamond.
42. Repat two more times, placing the files in a diamond pattern.Use the vertical and horizontal center lines to get them in place close to each other. Zoom in if needed.
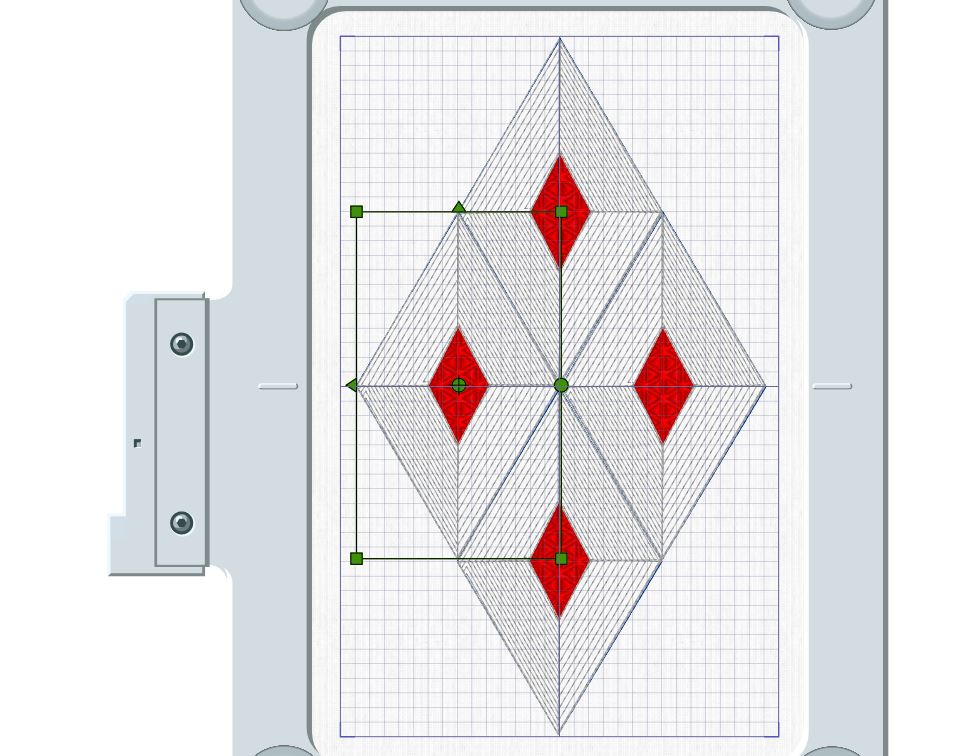
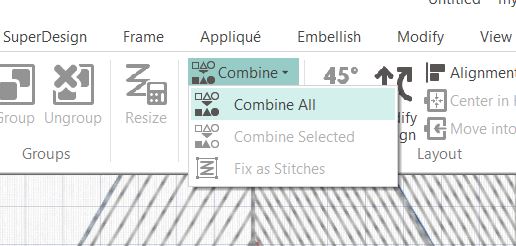
43. When finished, click on Combine, Combine All.
44. Now we will change two of the jewels to green. In the Design Panel to the right click on the red color for the right side diamond.Change the color to green. Repeat on the other side of the diamond.
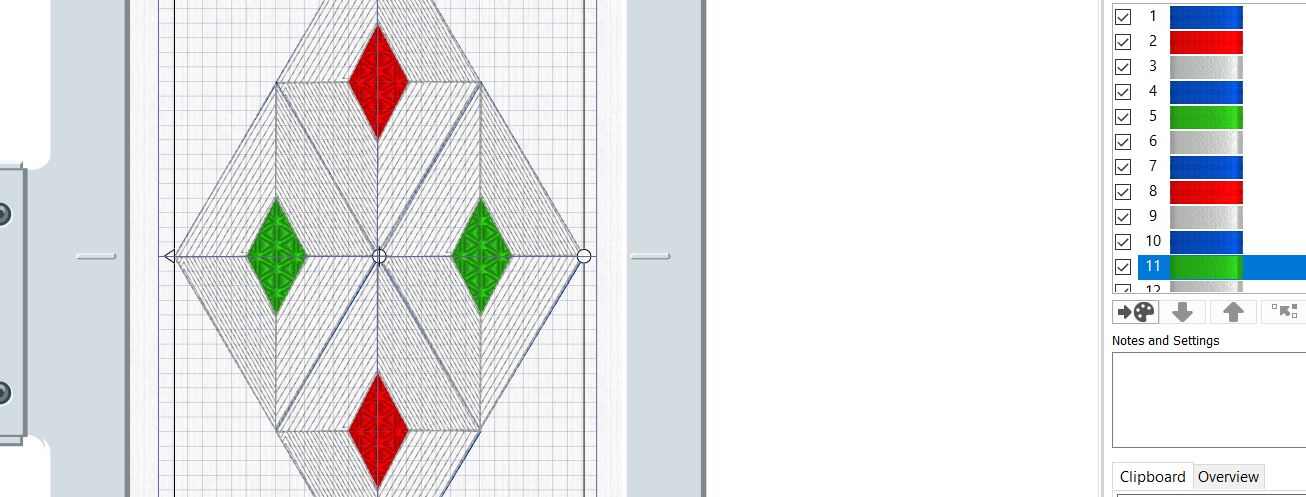
45. Click on ColorSort to reduce the thread changes to a minimum.
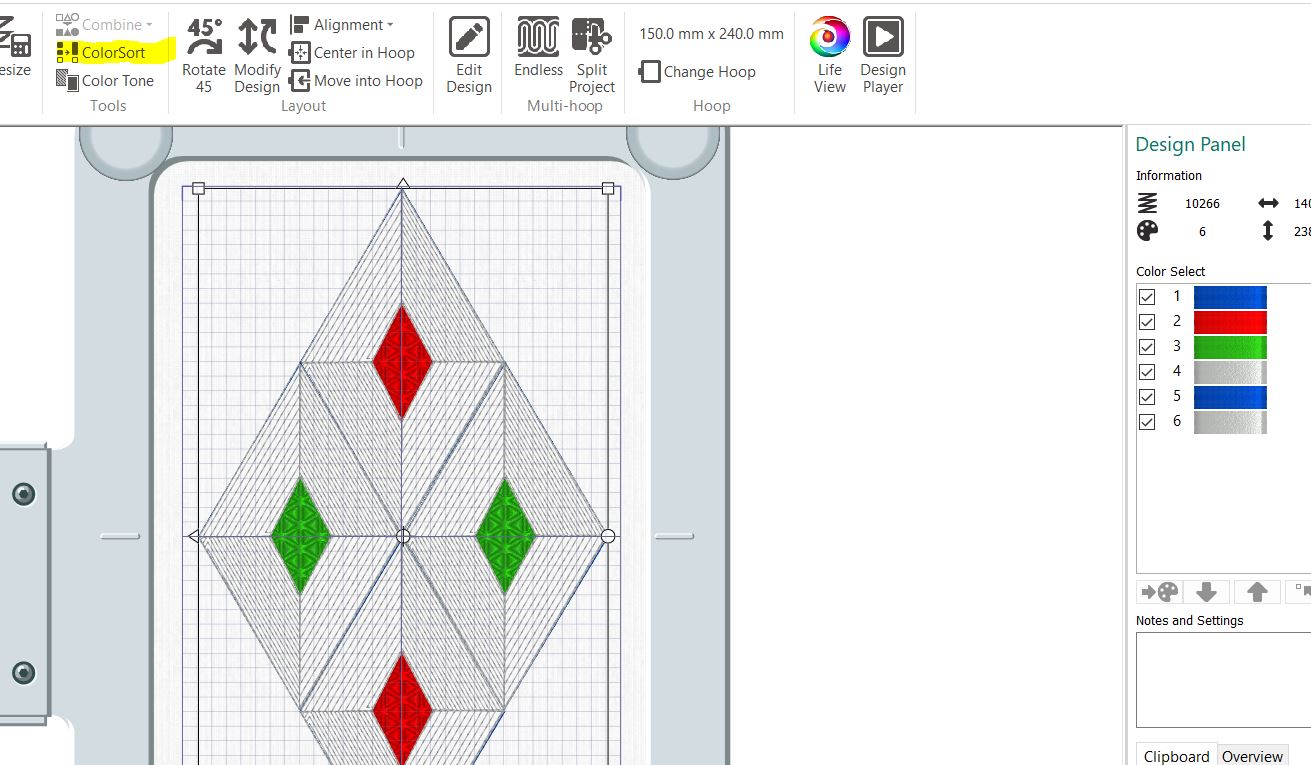
Tip: By changing the blue color to gray and the color sort you can reduce the color change further.
46. Save the file as Diamond.
47. To Stitch out the embroidery file you need to export it in your preferred format. I Choose vp3 as my format, many other formats are available depending on your embroidery machine.

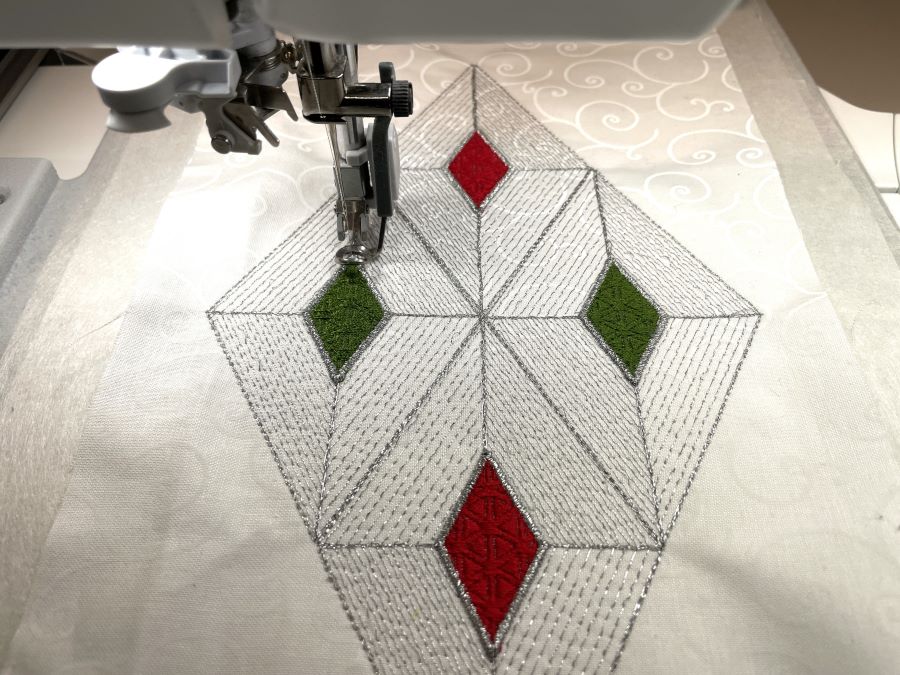
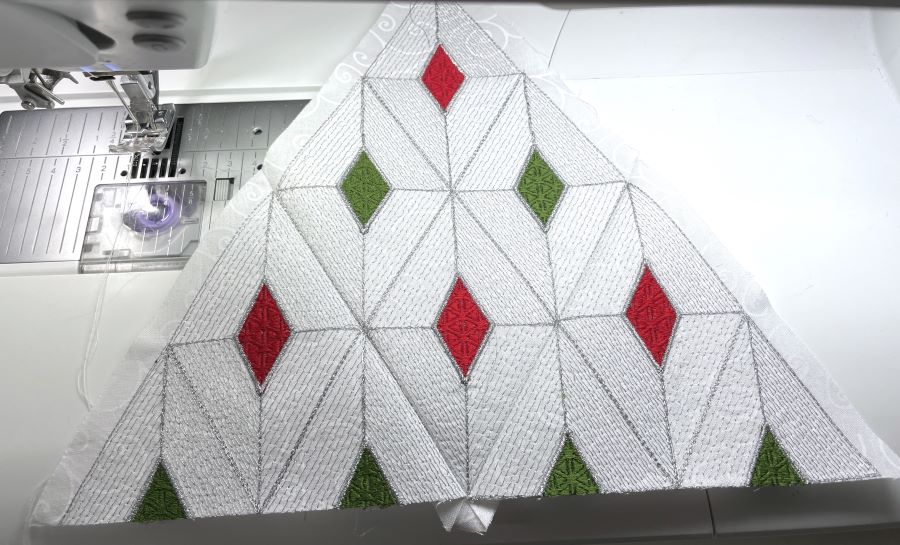
Embroidery design stitchout
48. Hoop Double layers of tear away stabilizer in the creative Grand Metal Hoop. Place fabric on top, right side up.
49. Stitch out the embroidery.
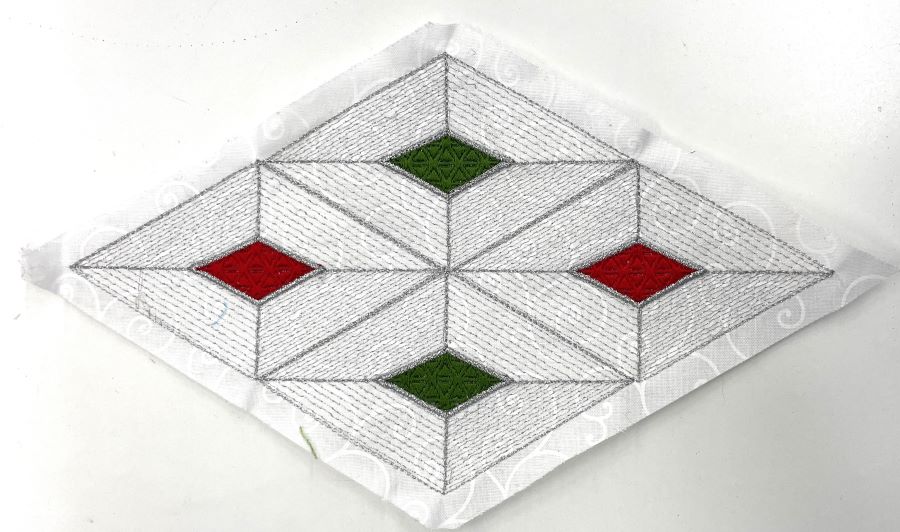
50. Unhoop and tear away excess stabilizer. Cut out with a ⅜” (1cm) seam allowance.
Making the Christmas tree cone
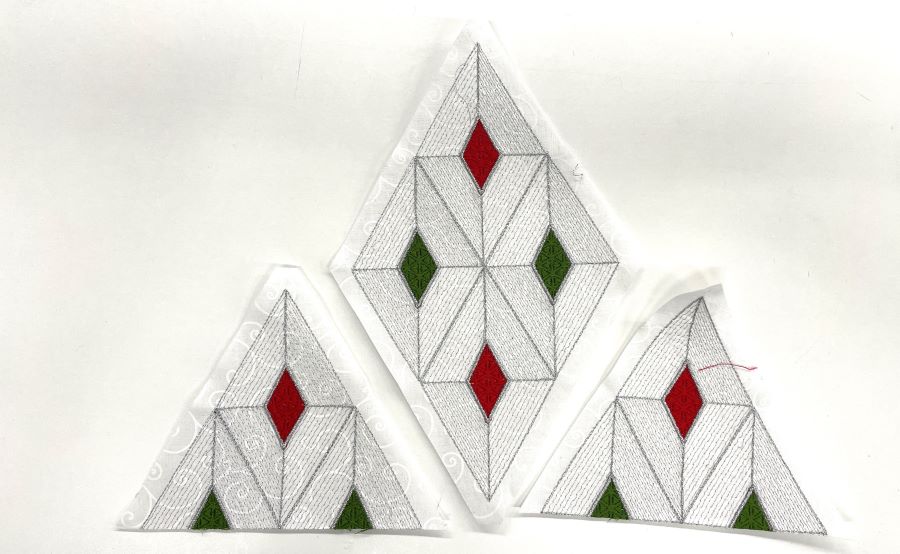
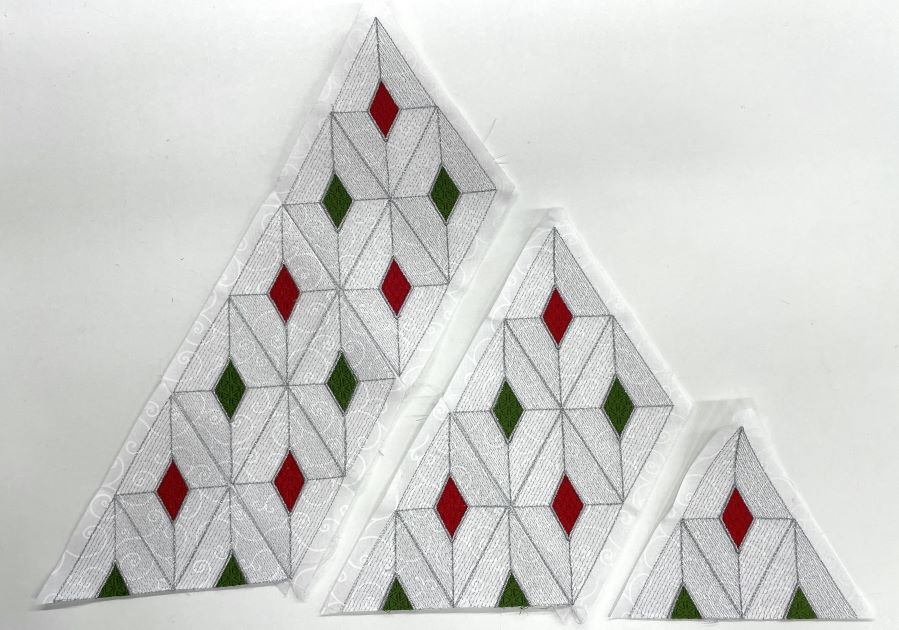
To make the tree cones you stitch out the diamonds and put them together. The number of stitch-outs depends on the size you want.
Small tree
- 2 diamonds, cut one of them in half , see below :
51. Stitch the pieces together to make a triangle.
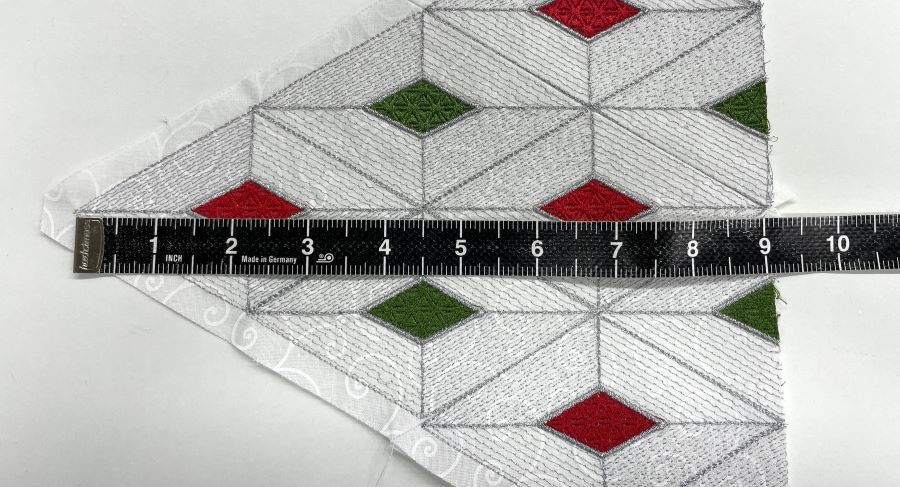
52. Measure the length from top to bottom of the triangle. Make a line with that distance from the top along the base of the triangle.
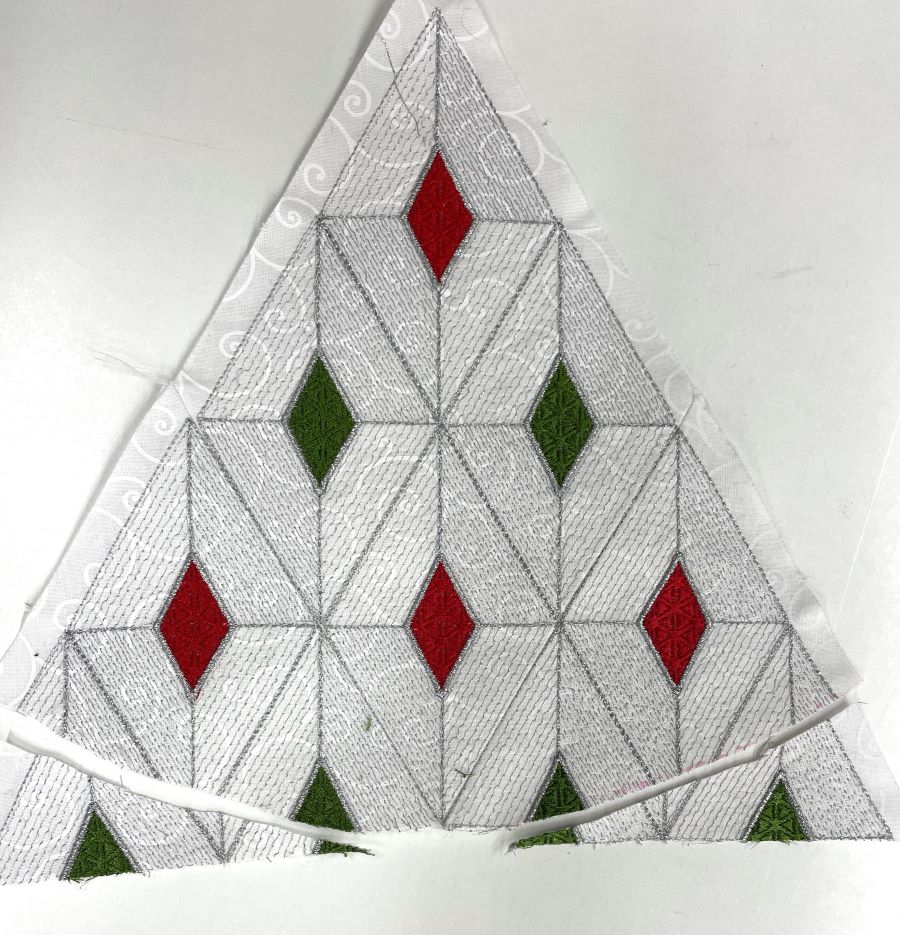
53. Cut off excess fabric.
54. Bind the rounded bottom edge of the tree with a bias cut strip, 2 ½” (6,5cm) wide.
55. Fold the tree right sides together and sew with a ⅜” (1cm) seam allowance.
56. Turn right side out .
Add Hotfix Rhineatones or pearls to the trees if you want even more glitter!
Medium tree
- 5 diamonds, cut two of them in half, you will get an extra half diamond.

Follow the instructions for the small tree.
Large tree
- 8 diamonds, cut two of them in half.
Follow the instructions for the small tree.
Tip: if you bind the edge on the finished tree you get a better shape at the bottom of the tree.
Try our embroidery digitizing software free for 30 days!