 United States
Digitize a Quilt Block with Spiro Embroidery Design
The Quilt Block Wizard can be combined with Spiro embroidery designs. This makes a really interesting pattern that looks complicated, but is easy to make! Try it out!
What you need
- mySewnet embroidery software Gold or Platinum level.
With 30-day Free Trial of mySewnet Embroidery Software you will get to try out the most user-friendly and feature rich digitizing software on the market. It works with all embroidery machine brands and is available for both Windows and Mac.
How to do
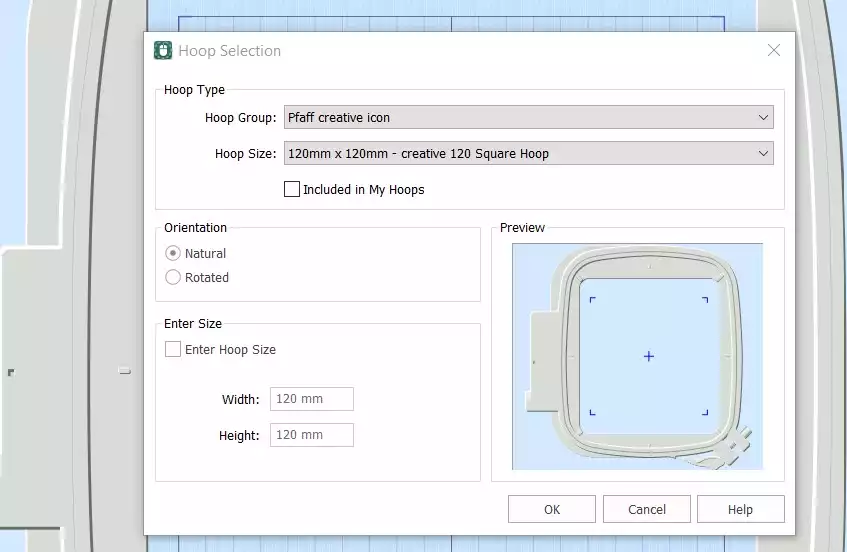
1. Open mySewnet Embroidery Software, choose Blank Canvas and set the Hoop Size to 120mm, click OK.
2. Go to Create tab, click on Spiro. A dialog box will appear. Set the Size to 100mm. Click on Random. A warning message will appear, click OK. A new spiro will be created. Continue to press the Random button to get the spiro you want to use. You can also use the different handles to refine the look. Click ok when finished. TIP: for more information on how to use the Spiro wizard, write "Spiro" in the search function in Studio.
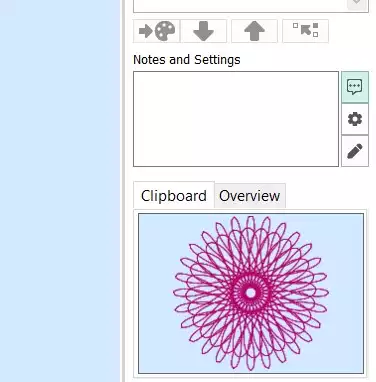
3. Go to Home tab and click Copy. The spiro will now appear in the clipboard window.
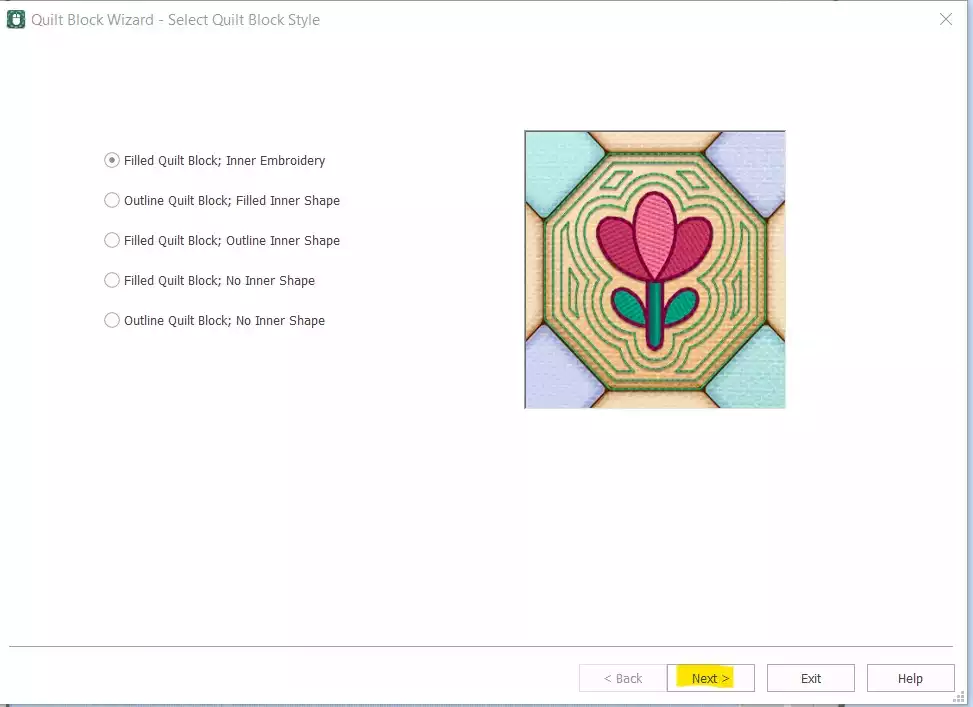
4. Go to Create, Quilt block and choose Filled Quilt Block, Inner Embroidery, click Next.
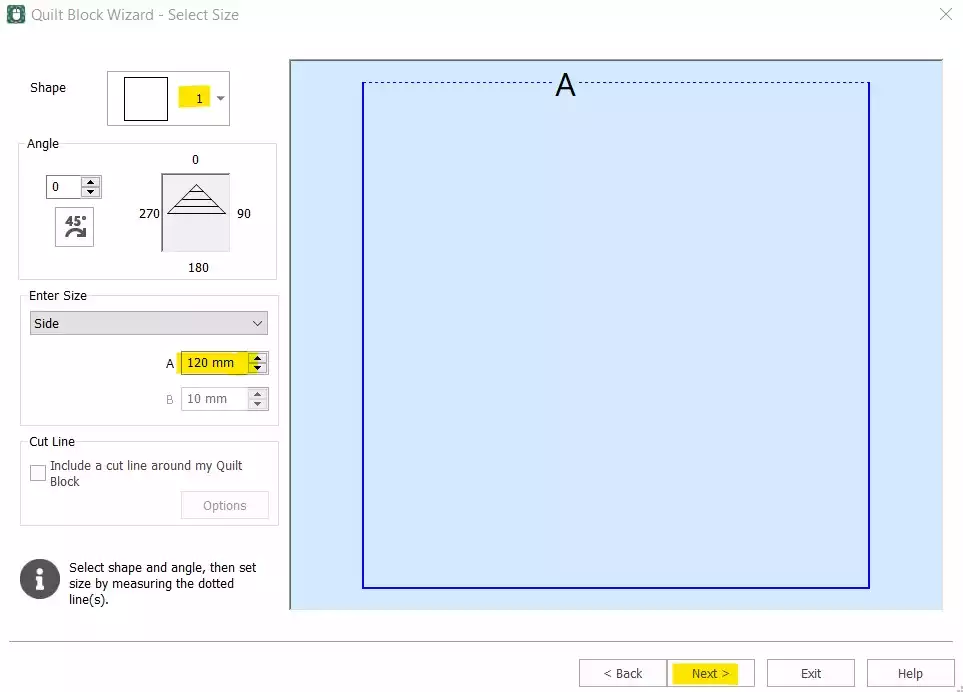
5. Choose Shape number 1, the Square and set the Side to 120mm, click next.
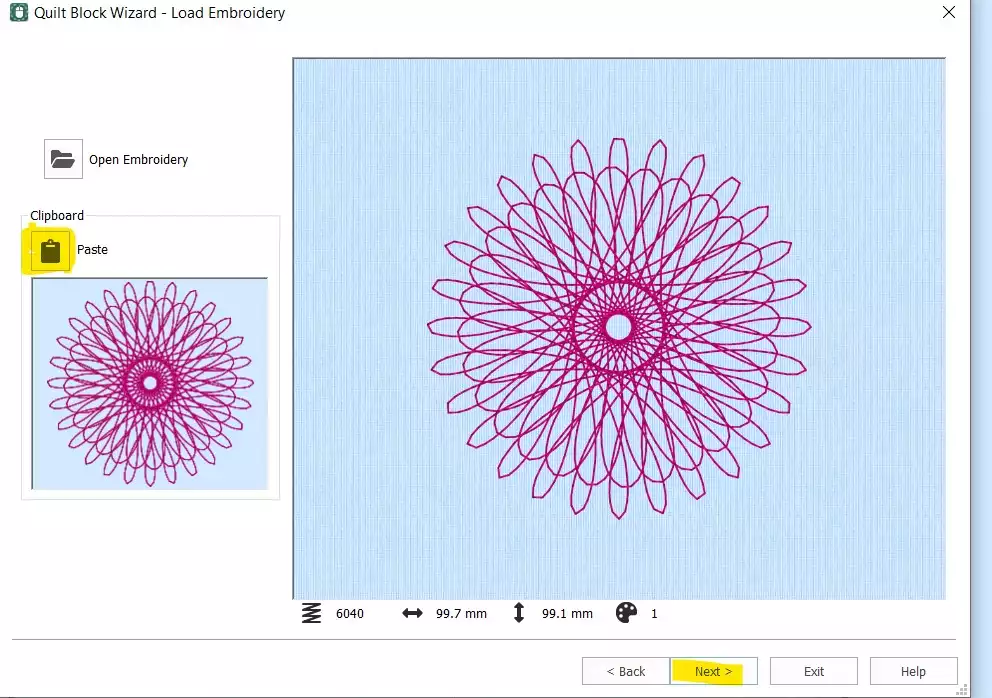
6. Click on Paste to insert the spiro, click Next.
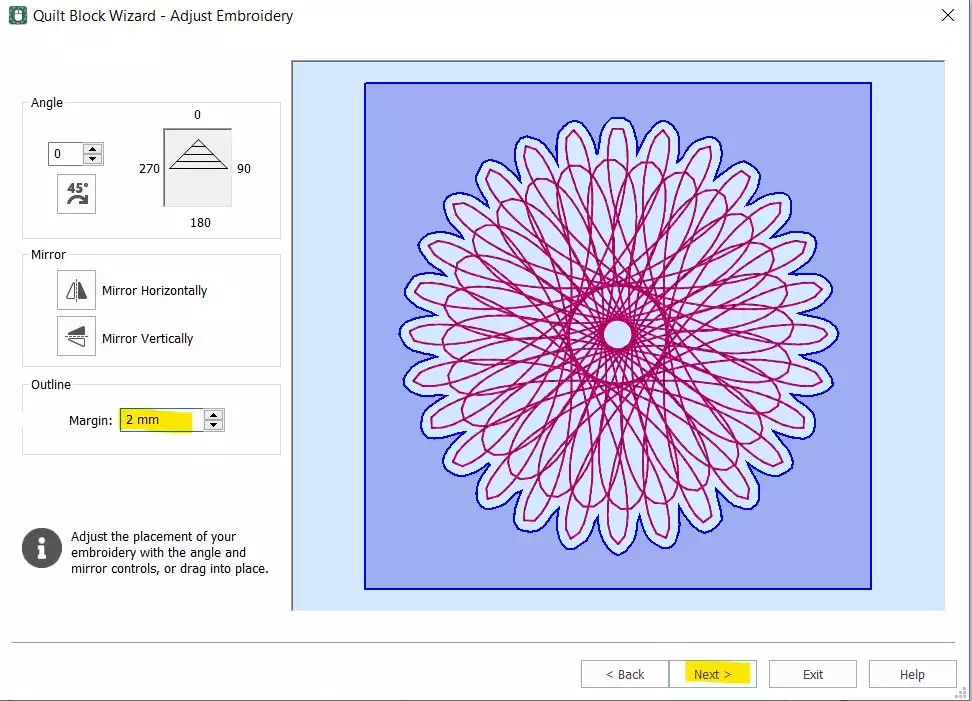
7. Set the Margin to 2mm and click Next.
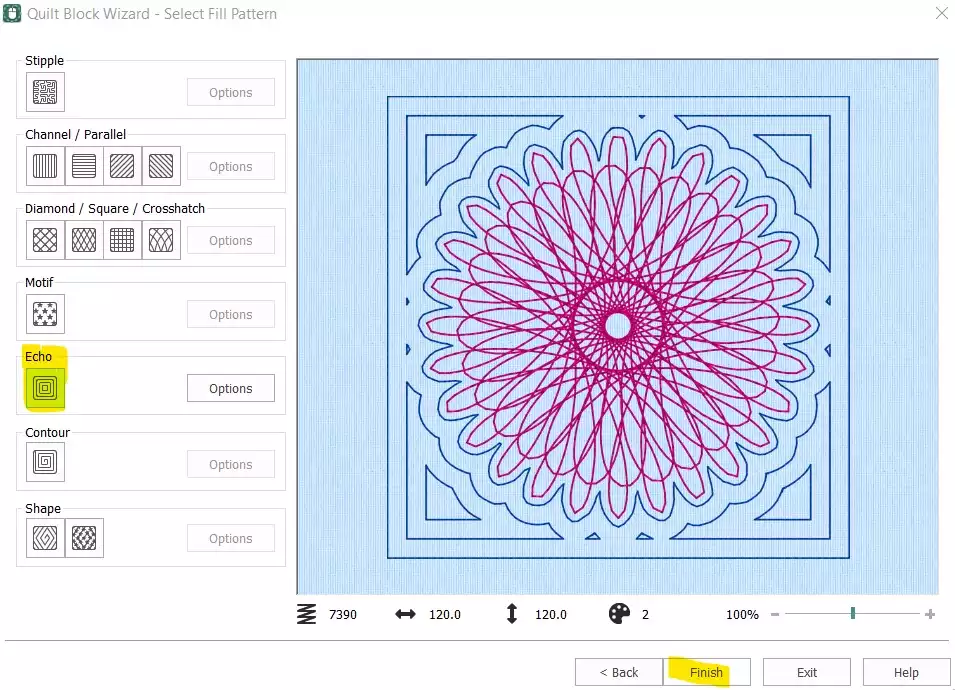
8. Choose Echo and click on Finish.
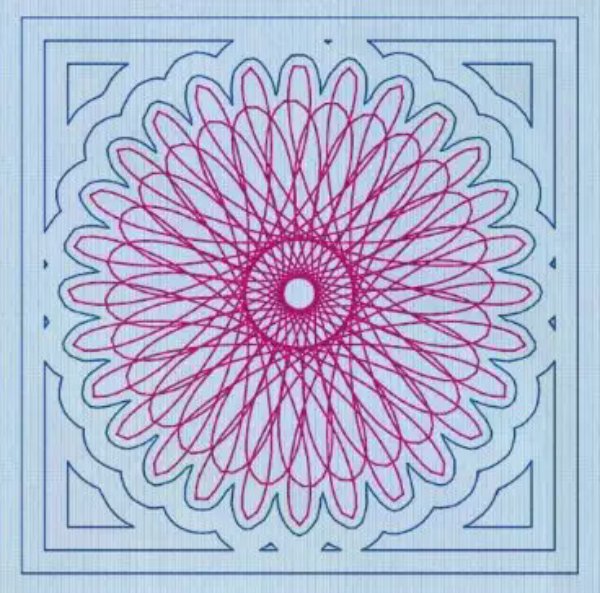
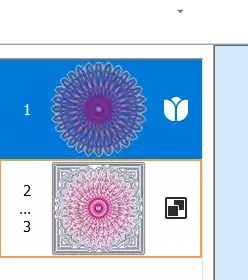
9. Your quilt block is now finished, we just have to remove the original Spiro and change the stitchout order
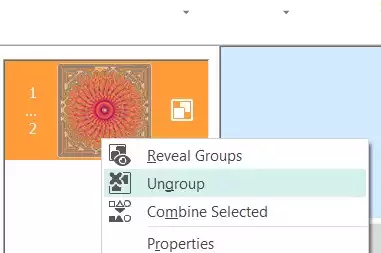
10. Select the first color (spiro) and right click, then choose Delete. Now you only have the quilt block with the inserted Spiro left. To change the stitchout order, right click on the embroidery in the Film Strip and choose Ungroup.
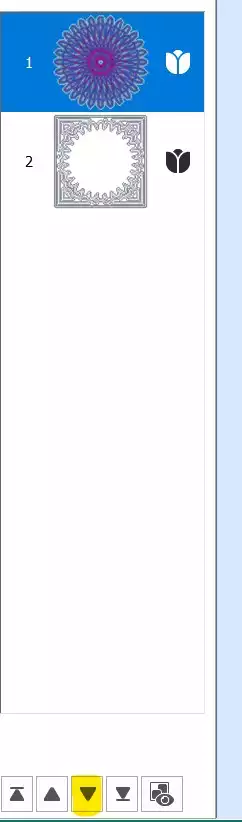
11. Select the first part (the spiro and move it down with the arrow key at the bottom
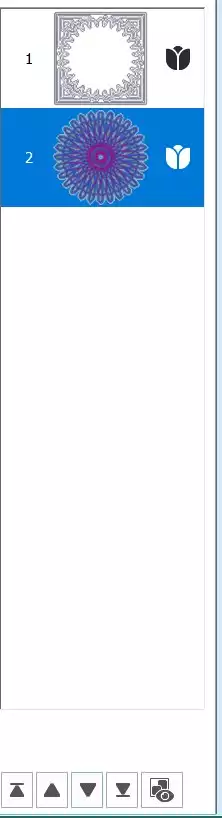
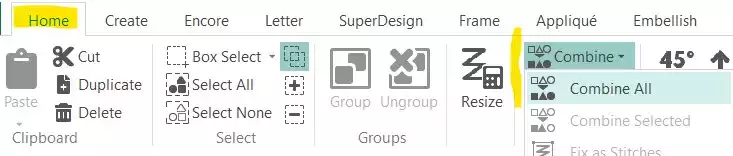
12. Go to Home tab and click on Combine, Combine All
13. Your spiro block is now finished. Save it and export it in your preferred format, eg .vp3