 United States
Cute and Cuddly Owl

Everybody will love the sweet little owl, it is super cute as a fun gift for a new home or a soft toy for a child. Sew and embroider, follow the steps in the instruction and have a fun time. To make it even more personal use the mySewnet Embroidery Software to add a name or a little text on the back of the owl.
SUPPLIES:
- Tear-A-Way Stabilizer
- Water Soluble Stabilizer
- Fabric A for the front piece of the owl 12”x12” (30 x 30cm)
- Fabric B 1 one strip 3” wide total length 38” (50cm) for the side pieces of the owl
- Fabric C 1 12”x12” (30 x 30cm) for the backside of the owl
- Fabric D (grey) 1 piece 8”x4” (10 cm x 20 cm) for the eye background
- 4 pieces of fabric for the wings (see template)
- 1 piece for the beak 2 ½”x 1 ½” (6cm x 3cm)
- White felt or jersey knit: 2 fabric pieces for the eyes 3”x3” (7.5cm x 7.5cm)
- 3 fabric pieces for the lace in different colors 3” x 10” (7.5 X 25cm)
- A piece of double sided fusible stabilizer
- Embroidery thread
- Sewing thread
- Bobbin fill
- 2 buttons for the eyes
- Fiber fill
PREPARATIONS
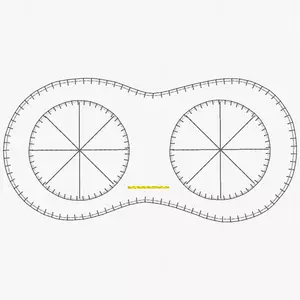
Download the template for the owl
Cut the 3” strip
2 strips 12 ½ ” long(16cm) for the parts between the ears and wings
1 strip 8 ½ long (22cm) for the top of the head between the ears
1 strip for the bottom part 16” (42cm) for the bottom of the owl
Embroider the pieces for the front
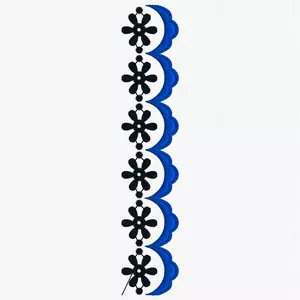
Start by embroidering 3 pieces of the lace design for the belly. Hoop water soluble stabilizer and embroider the lace on the three different fabrics.
Continue by embroidering the beak
Use a double faced interfacing and fuse the 2 beak pieces to each other, with the wrong sides together. The final size should be: 1 ½” x 1 ½” (3cmx3cm). Hoop a piece Tear-A-Way Stabilizer and use the basting around the design to place your beak fabric. Embroider, tear off the stabilizer.

Eye piece
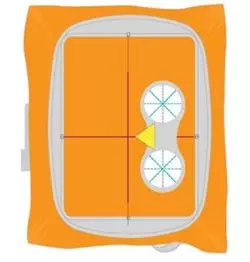
Hoop the fabric and the tear-a-way stabilizer for the front piece of the owl. This is an appliqué design, follow the instruction shown in the mySewnet™ Library.
The final two colors in the embroidery are for attaching the beak. The machine will sew placement stitches where you should place the beak, and color no. 2 is for attaching the beak.
Remove the fabric from the hoop and remove the stabilizer from the fabric. Attach the two buttons for the eyes using the automatic button sewing stitch.
Prepare the belly laces
Trim the width to 2 ½” (6cm). Select the basting stitch and sew a basting line above the embroidered lace. Pull the threads slightly to create gathering of the endless lace.
Construction
Draw three lines (see template) on the front piece of your owl, where you want the lace to be placed.
Start with lace the bottom line, attach it with pins and sew.
Continue by attaching the second, middle piece above and then the last lace piece on the top.
Cut out the owl wings according to the template.
Sew the wing pieces, right sides together. Turn the wings inside out and press. Mark the center of the front piece of owl and the center strip and pin them right together. Sew the strip to the owl but leave ½” (1cm) in the beginning and end of the strip.
Pin the wings of the owl to the strip on both sides (the ½” (1cm) that you left) and then pin strip no. 2 to one of the wings and front piece. Sew until you have reached the ear. Do the same on the other side.
Pin strip no 4 to the head of the owl and sew.
Pin the back piece, with the side pieces and sew around. Leave an opening at the bottom of the owl to add the fiber fill. Hint: If you would like the owl to be more stable and heavy you can sew a small bag and put rice inside the bag, then insert at the bottom of the owl. Sew the opening together.
