United States
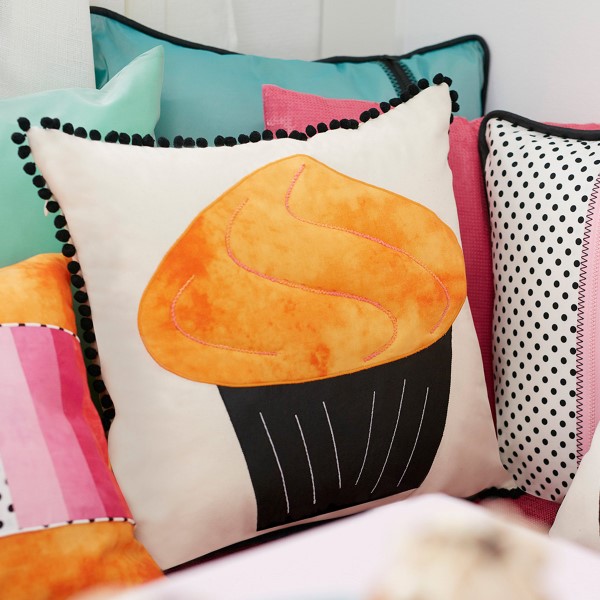
Cupcake Cushion
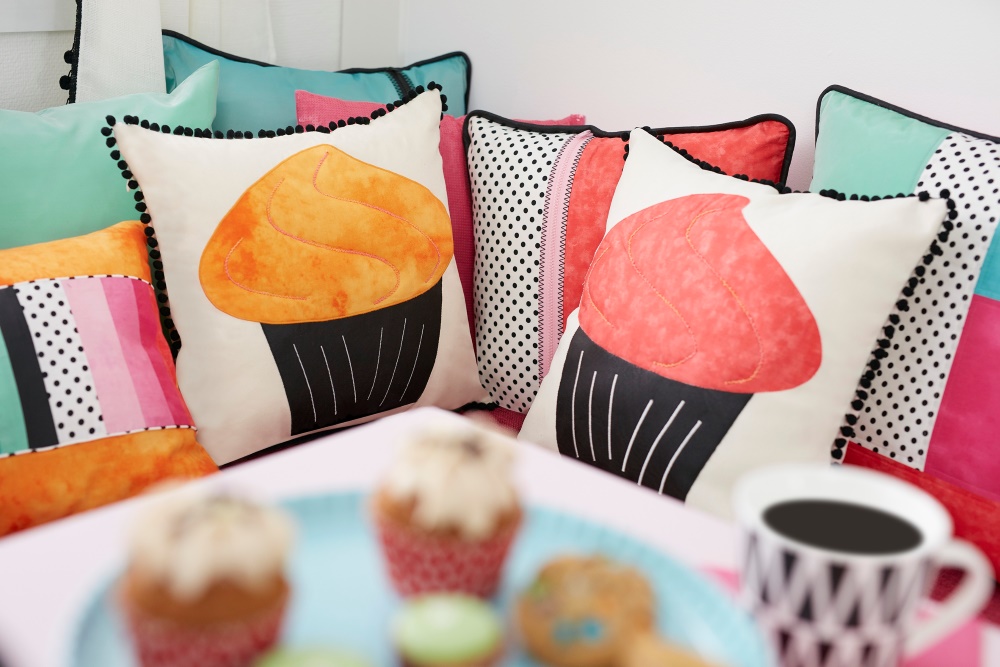
To make it “You”, pick your favorite color and have fun sewing!
Finished size: 18” x 18” (45cm x 45cm)
This project was created for the HUSQVARNA VIKING Jade 20 campaign, but can be sewn on any sewing machine.
What You Need:
- HUSQVARNA VIKING® JADE™ 20 sewing machine
- HUSQVARNA VIKING® Narrow Braid/ Cord Foot 411850945
- Fabric for front and back of the pillow 18 “of the full width
- Square of pink fabric for applique 14” x8 ½ ”(35 cm x 21cm)
- Square of black fabric for applique 10” x 6 ½” (25 cm x 15cm), we used fake leather
- Yarn to match pink fabric
- Pom pom fringe
- Sewing thread to match your fabrics
- Embroidery thread
- Bobbin thread
- Fiber fill
- Double sided fusible web
- Water Soluble marker
Prepare
- Cut the pieces for the front piece 18”x18” (46cm x46cm), the two back pieces 18”x 10” (46cmx25cm).
- Print the template of the cupcake and cut out the two parts. Template 1, Template2
- Iron the double sided fusible web to the back of the cupcake bottom fabric.
Sew the Cupcake front piece
1.Place the applique piece for the bottom part of the cupcake as shown on the template. Peel off the paper and iron it in place. Sew with zig zag stitch # 5, adjust the stitch width to 2mm and the stitch length to 1.5mm. Use the needle Stop Up/Down position to turn the corners.
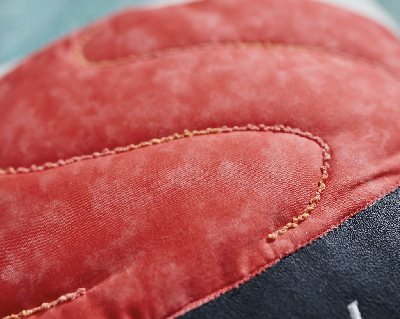
2. Stitch the white decoration lines with a satin stitch #27 using an embroidery thread. Adjust the stitch width to 4mm wide
3. Fuse and sew the cupcake top in place, matching the points of the arrows as shown in the illustration above. Attach the appliqué with zig zag # 5 or satin stitch # 27. Adjust the stitch width to your liking.
4. Use the marking pen to draw the curvy lines where you are going to stitch the yarn in place. Cut a small opening on the backside of the pillow front, approximately 2” (5cm) long, behind the pink appliqué and only in the white fabric so you can add a small amount of fiber fill inside the pink part of the cupcake for added dimension.

5. Place the applique piece for the bottom part of the cupcake as shown on the template. Peel off the paper and iron it in place. Sew with zig zag stitch # 5, adjust the stitch width to 2mm and the stitch length to 1.5mm. Use the needle Stop Up/Down position to turn the corners.
6. Stitch the white decoration lines with a satin stitch #27 using an embroidery thread. Adjust the stitch width to 4mm wide
7. Fuse and sew the cupcake top in place, matching the points of the arrows as shown in the illustration above. Attach the appliqué with zig zag # 5 or satin stitch # 27. Adjust the stitch width to your liking.
8. Use the marking pen to draw the curvy lines where you are going to stitch the yarn in place. Cut a small opening on the backside of the pillow front, approximately 2” (5cm) long, behind the pink appliqué and only in the white fabric so you can add a small amount of fiber fill inside the pink part of the cupcake for added dimension.
9. Add yarn on the lines using the Narrow Braid /Cord Foot. Zig zag to match the width of your yarn.
10. Pin the fringe around the edge of the pillow front on the right side. Stitch in place with a zig zag stitch.
Sew the heavy zipper on the back piece
Prepare
- Zig zag around the pieces.
- Stitch along the side of the zipper with the reinforced zig zag stitch # 11. Set the stitch width to 7mm and snap on zipper foot E. Sew both sides of the zipper.
Construction
1. Pin the pillow front and pillow back together, with right sides facing. Open the zipper at least halfway so you can turn the pillow right side out.
2. Refer to the Sewing Guide inside the lid of your JADE 20 sewing machine to set your machine for a straight stitch on woven medium fabric. Use the needle Stop Up/Down position to easily turn the corners.
3. Turn the pillow right side out. Press.
4. Add a pillow form inside and you have completed your fun cupcake pillow