United States
Christmas Tree In-The-Hoop
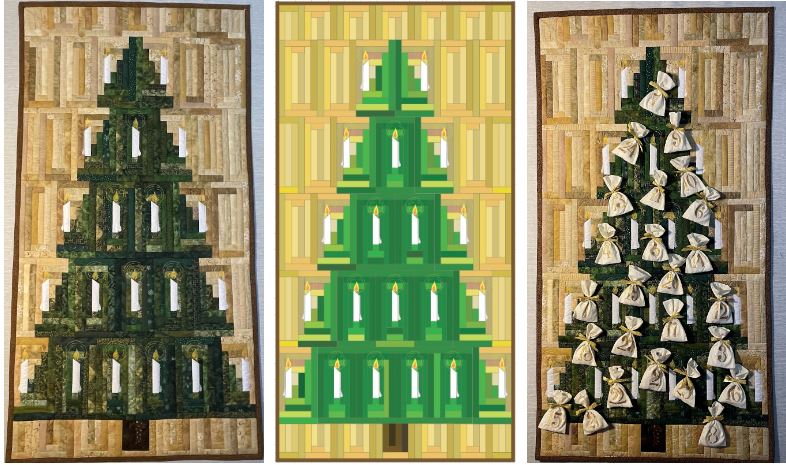
Create an instant Christmas feeling with this Quilt. It can be used as an advent calendar or just as it is. It is really easy to make in the hoop on your embroidery machine. It is a great opportunity to use op a lot of your leftover fabric from other projects, the smallest piece used is 1½x1½” (3x3cm)! make small bags with gifts and use it as an advent calendar
Finished size approx 56x29” (140x75cm)
Materials needed for the project
- Embroidery files for the blocks, find the collection Here:
- Fabric for the quilt top
- Fabric for the whole quilt calculated on 44” (112cm) wide fabric
- Cut 30 1 ¾” (4,5cm) wide strips in different green tones for the tree or use scraps pieces
- Cut 25 1 ¾” (4,5cm) wide strips in different golden tones for the background or use scrap pieces
- Cut 20 5x2 ½” (12x6cm) white fabric rectangles for the candles
- Small remnants 1 ¾” (4,5cm) wide from brown fabric for the trunk with a total length of about 50” (130cm)
- Cut-away stabilizer or waste cotton fabric (this will not be shown in the finished quilt)
- Thin batting about 3 mm 40 pieces 10½x6” (27x15cm)
- Fabric for the back of the quilt 60x32” (150x80cm)
- Fabric for hanging sleeve corners, 4 squares 8X8” (20x20cm) (the same fabric as the quilt back)
- Fabric for binding 2 ½ ” (6,5 cm) wide strips with a total length of 5 yds (5m)
- Embroidery hoop 260x200mm
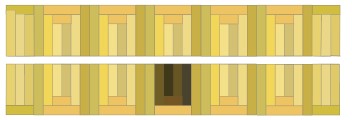
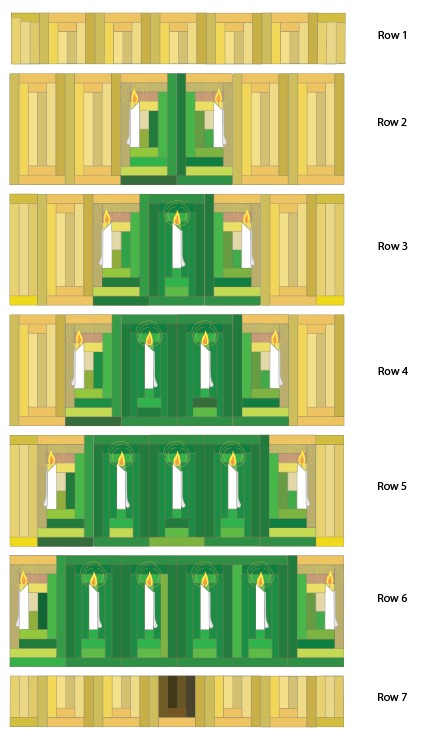
Quilt layout
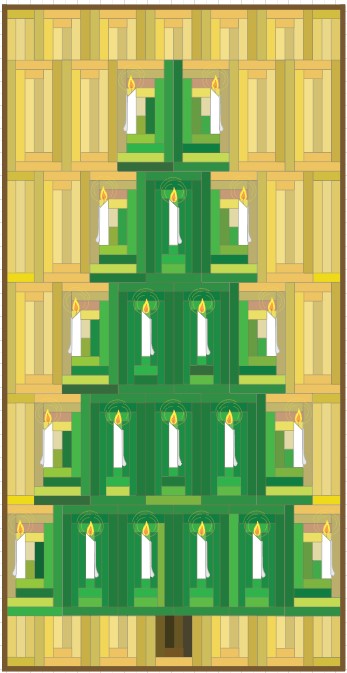
The top and bottom row are background blocks cut in half. How to proceed with this is included in the instruction.
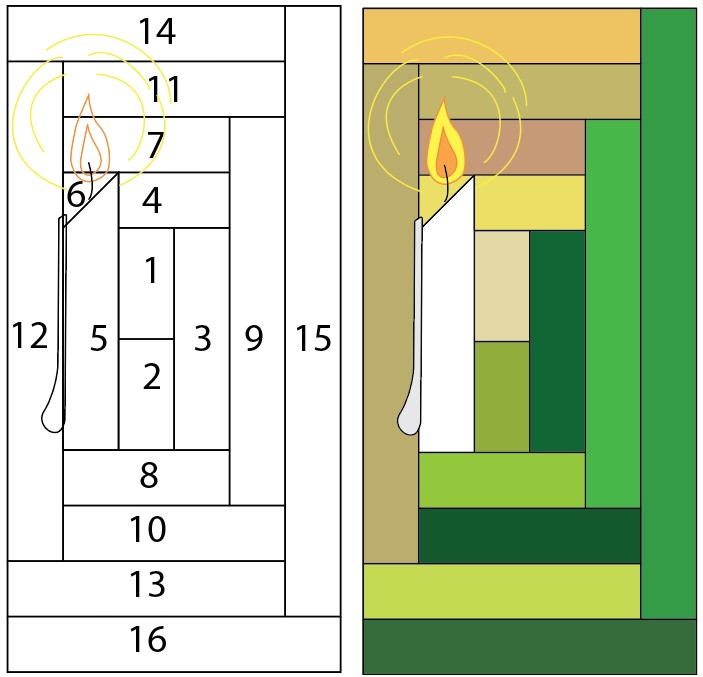
Block overview and color order
There are six different blocks used in this quilt:
Candle right side block (5 blocks).
Candle left side block (5 blocks).
Candle in the middle block (10 blocks).
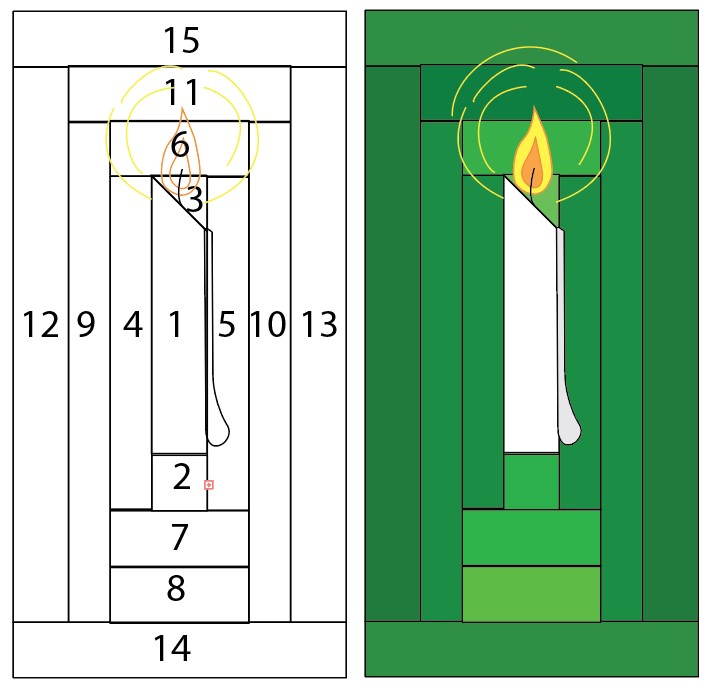
Background block (13 blocks).
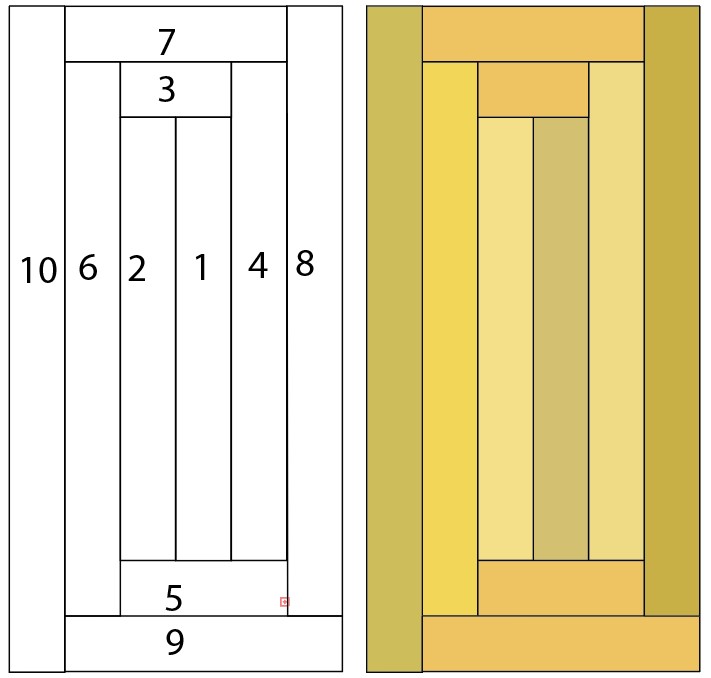
Background with tree trunk ( 1 block).
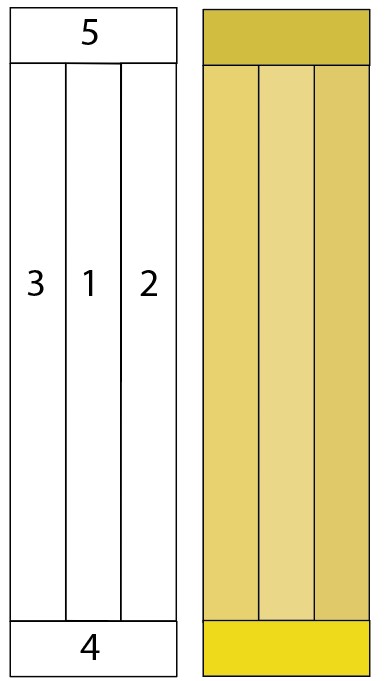
background fill- in block ( 6 blocks).
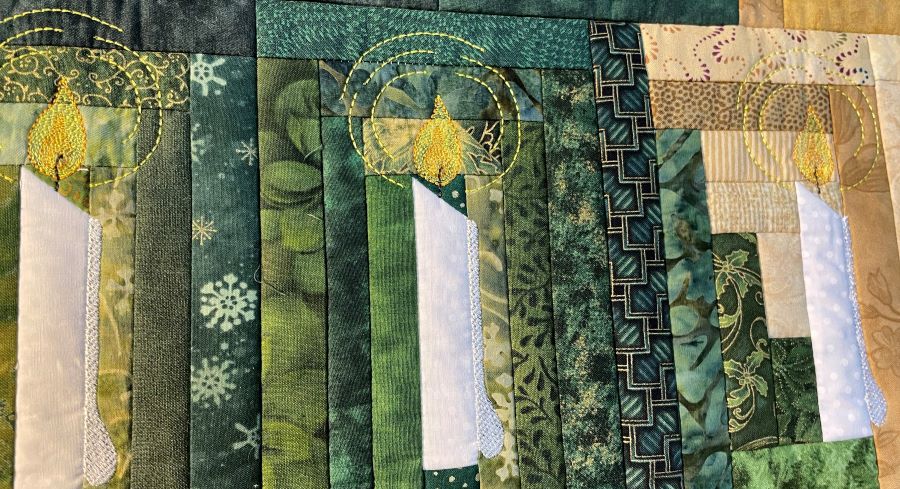
Making the blocks
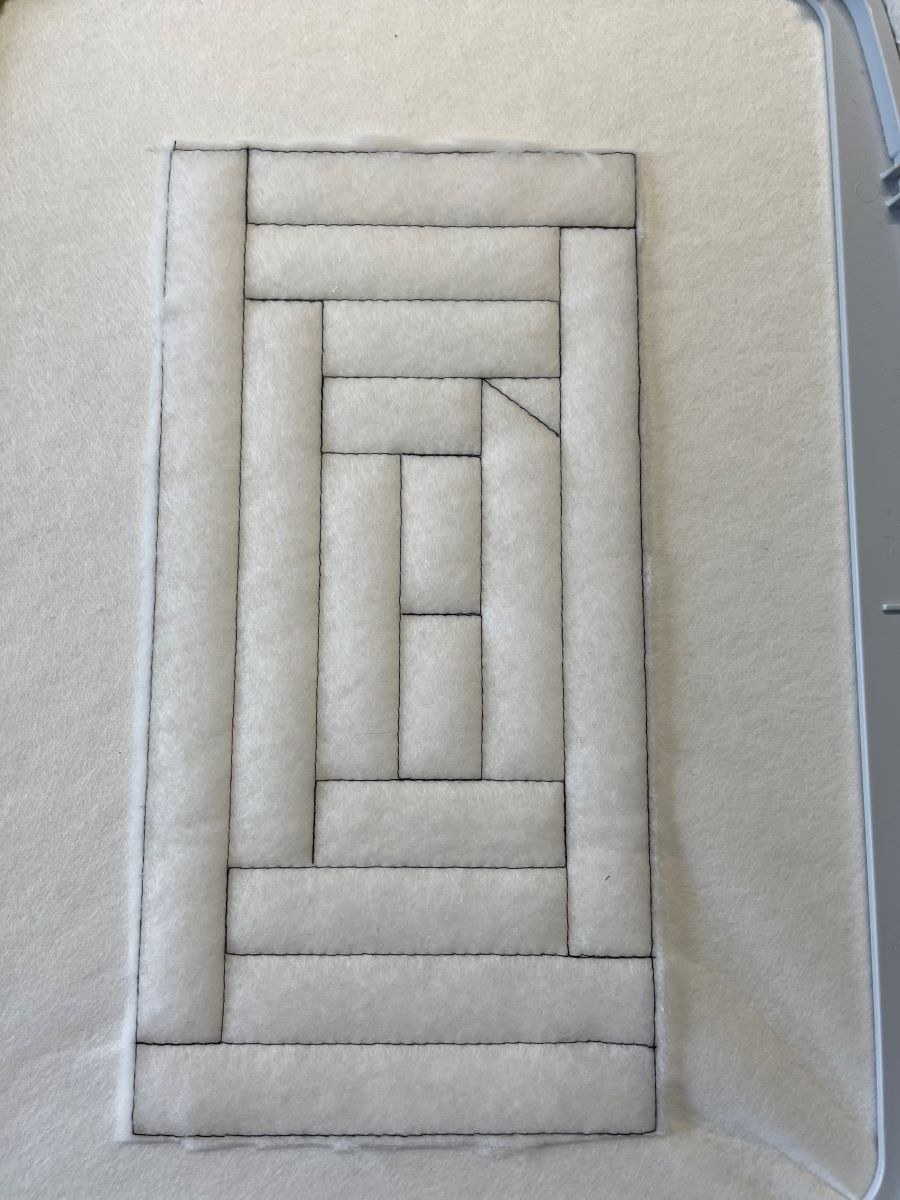
Each block is made in the same way. The technique is similar to paper piecing
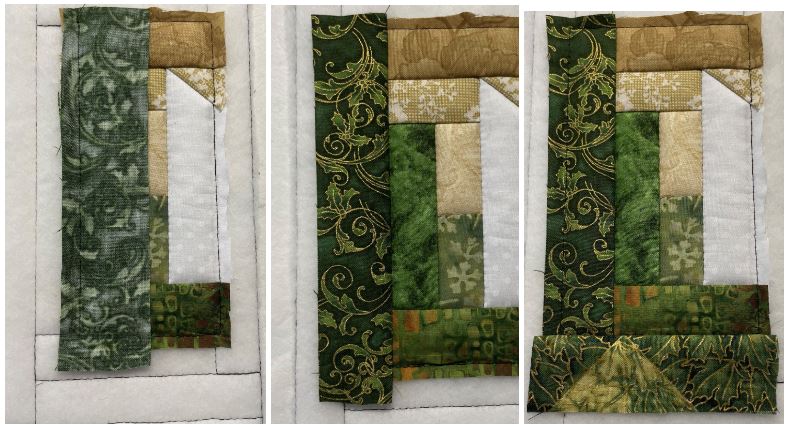
Here are the different steps in the process: (The block in the photos shown below are the right side candle block) The numbers show in which order the fabric pieces will be added
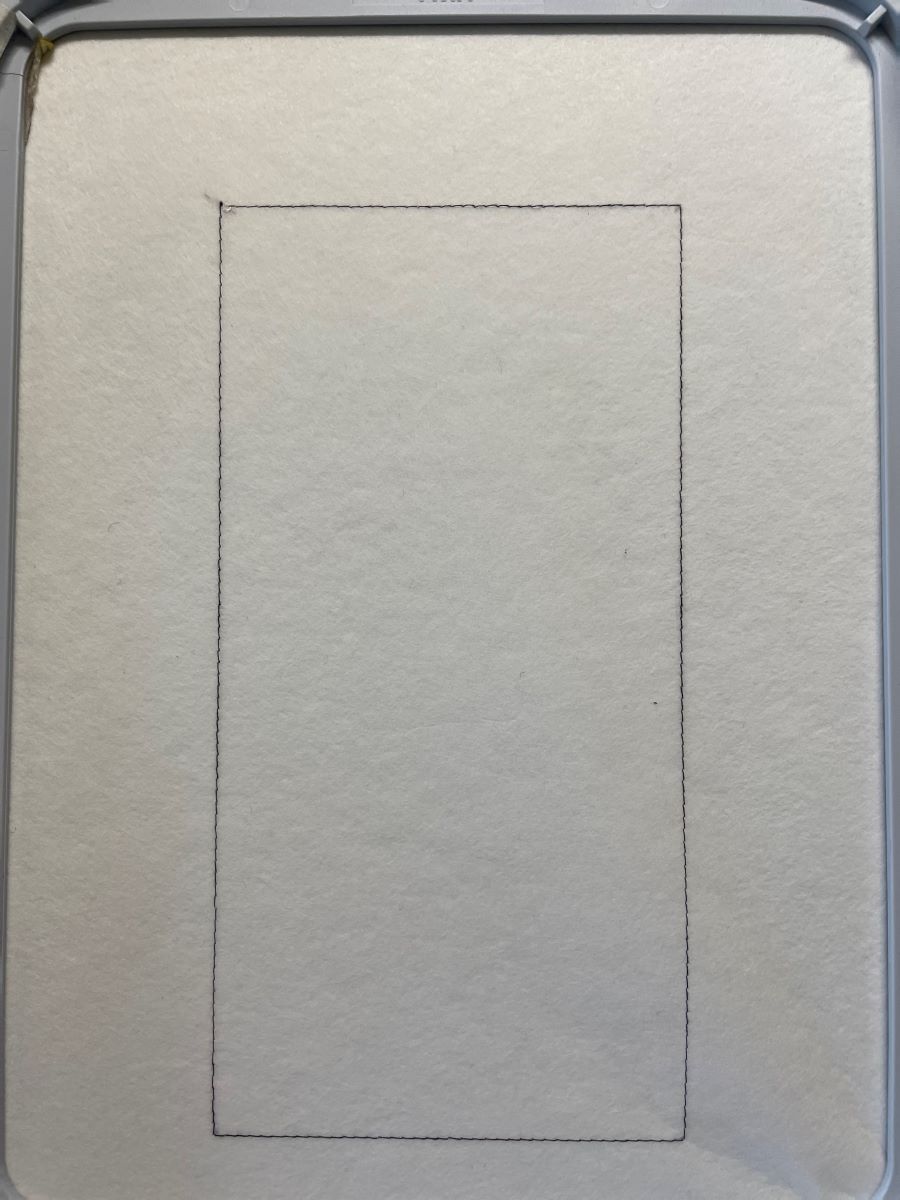
1. Hoop the cutaway stabilizer or waste fabric, eg old bed sheet. This is just a backing and will not be shown in the finished quilt.
2. Stitch out the first color, this will make a rectangle on the stabilizer to mark where to place the batting.
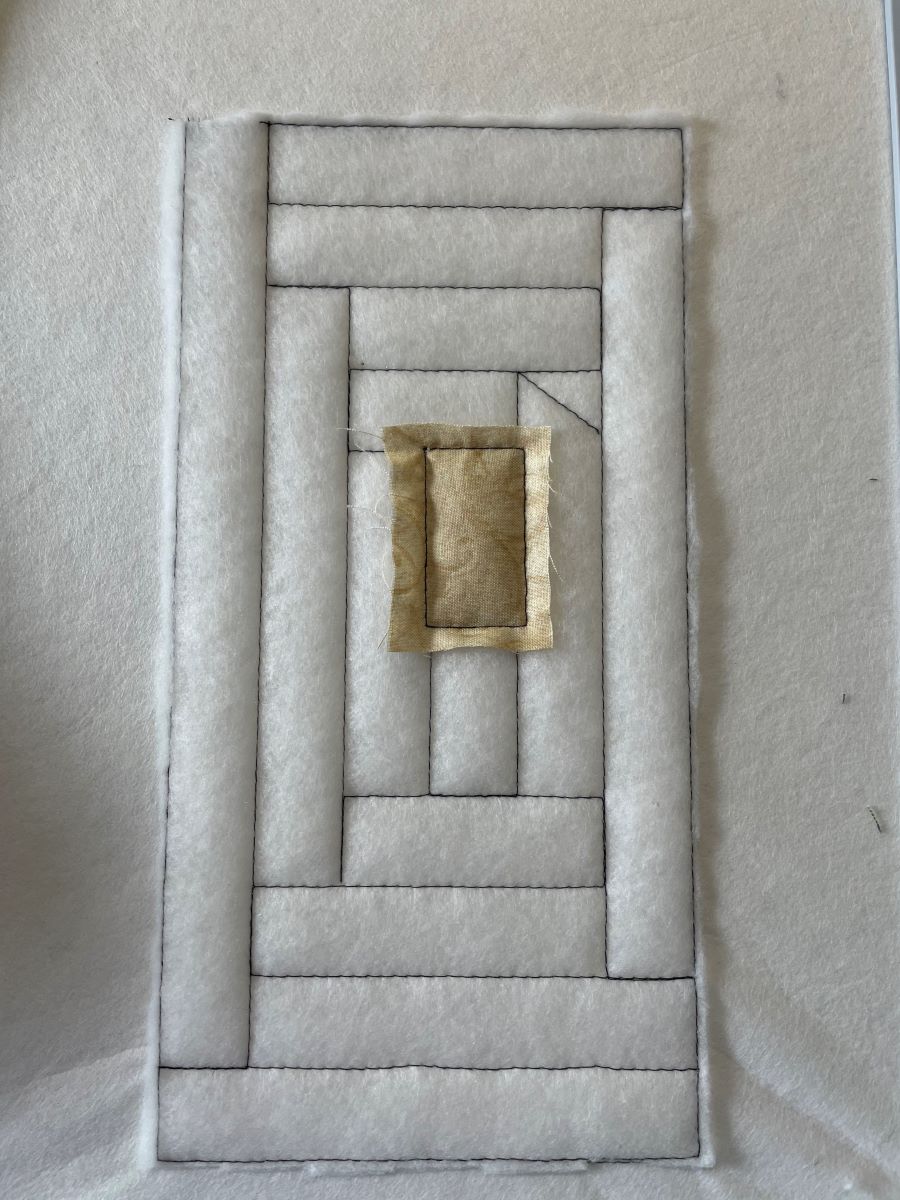
3. Place the batting on top and make sure it extends beyond the sewn line at all sides. Tape in place or hold down with a stiletto or seam ripper, take care not to get too close to the needle when stitching out to avoid damage or injury. This applies to all steps in the instruction.
4. Stitch out the next color, this will secure the batting in the hoop and also mark the placement for the fabric pieces. Cut away excess batting outside the block.
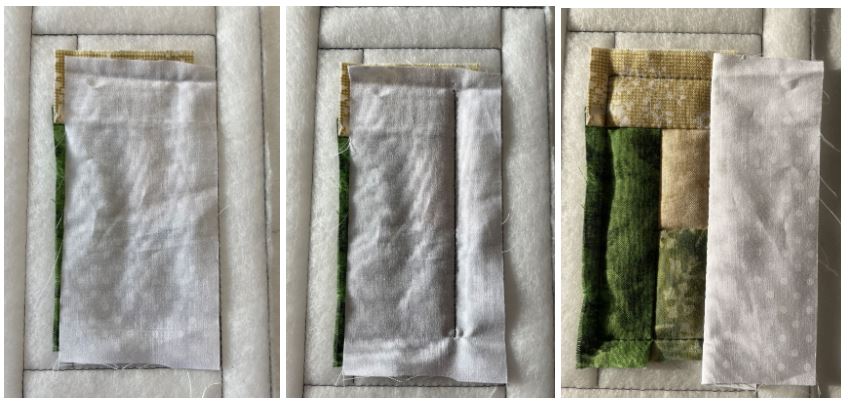
5. Place background fabric on top of the batting covering the #1 rectangle at all sides, stitch in place, cut away excess seam allowance leaving about ¼” (6mm).
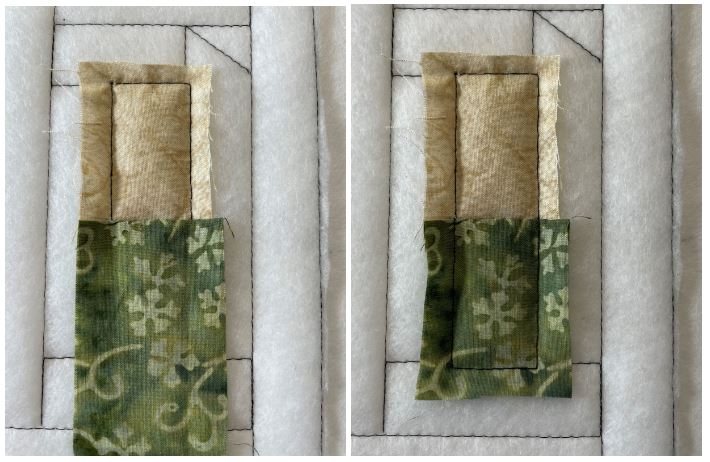
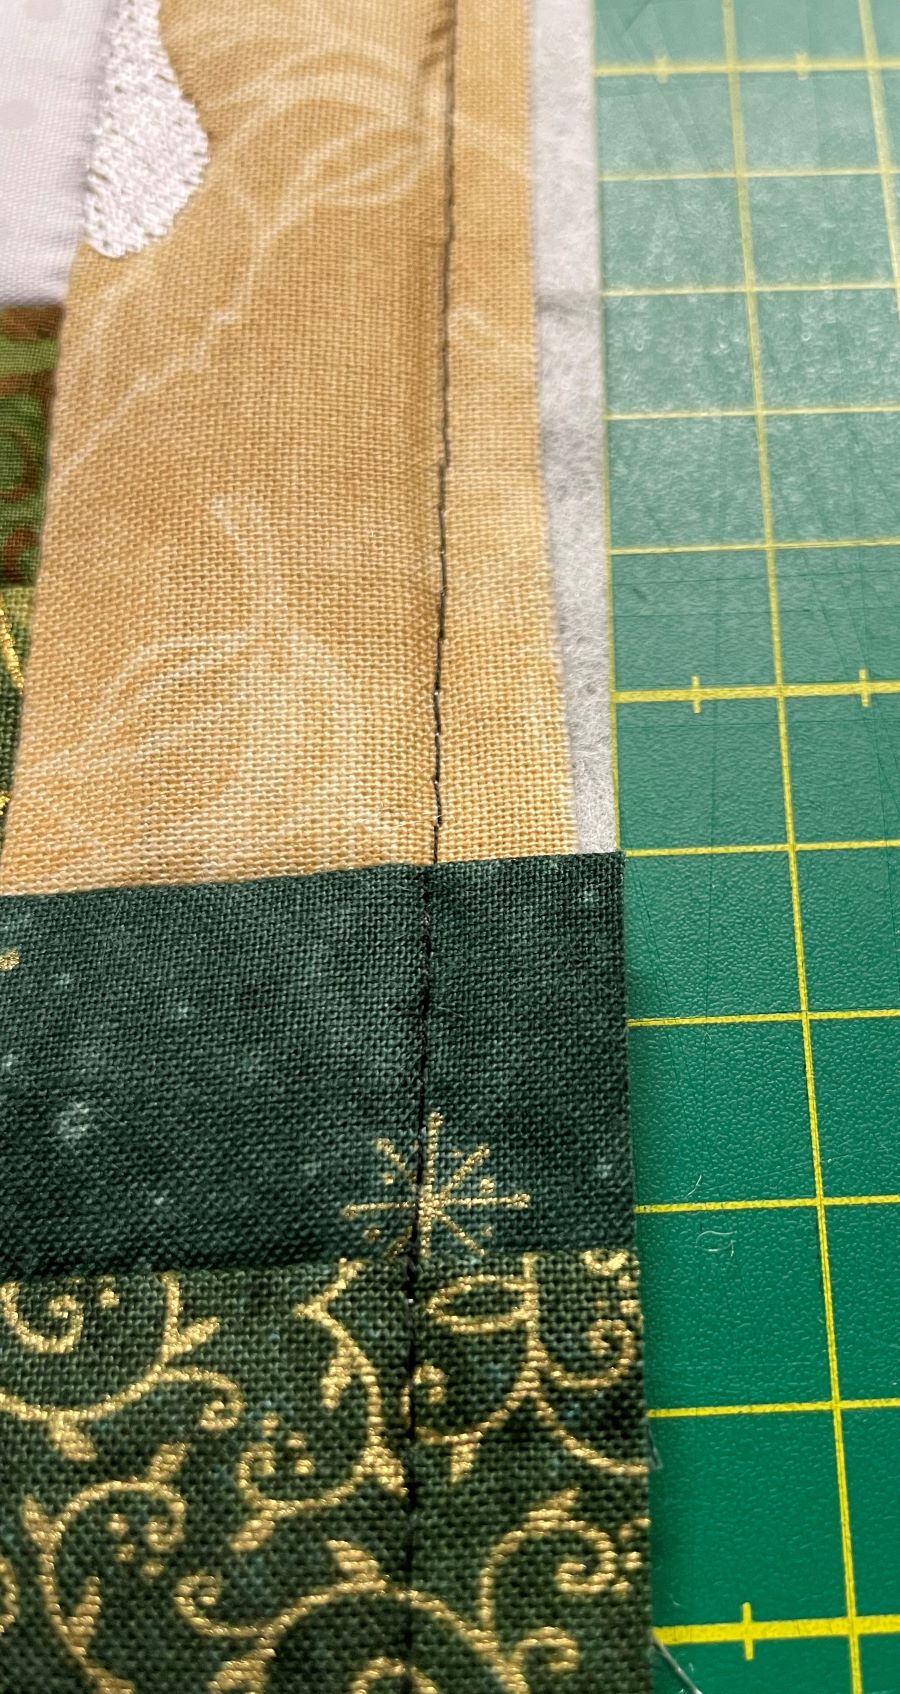
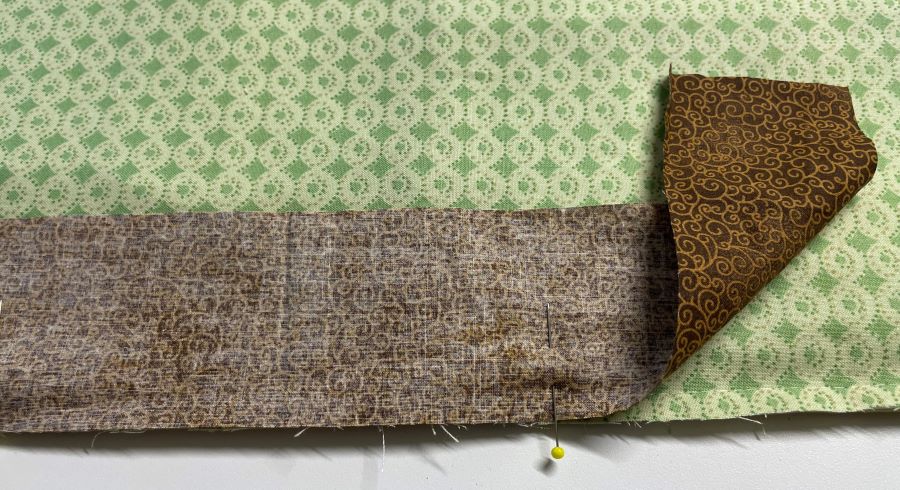
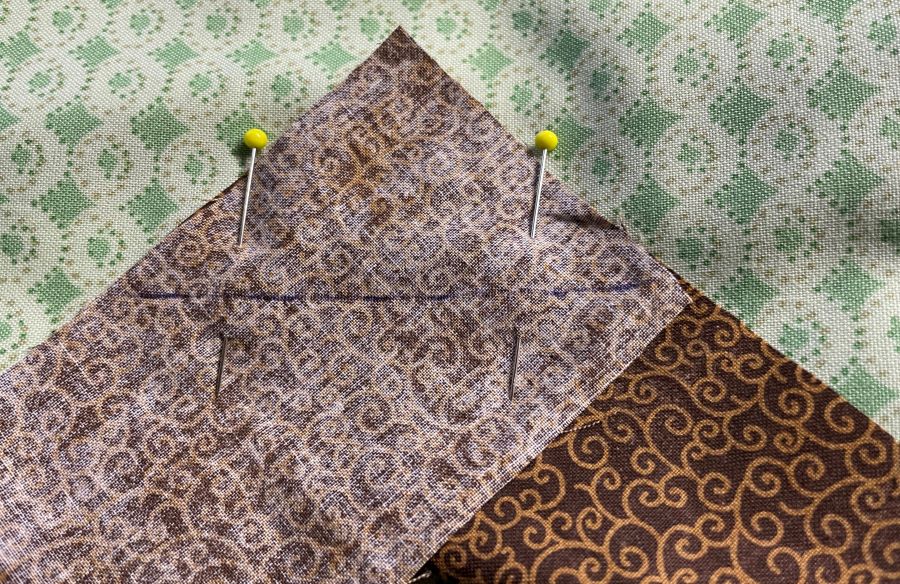
6. Now take one green fabric piece and lay it on top of the first fabric right side down.. The raw edges should be even in the edge between rectangle #1 and# 2 see photo for clarity.
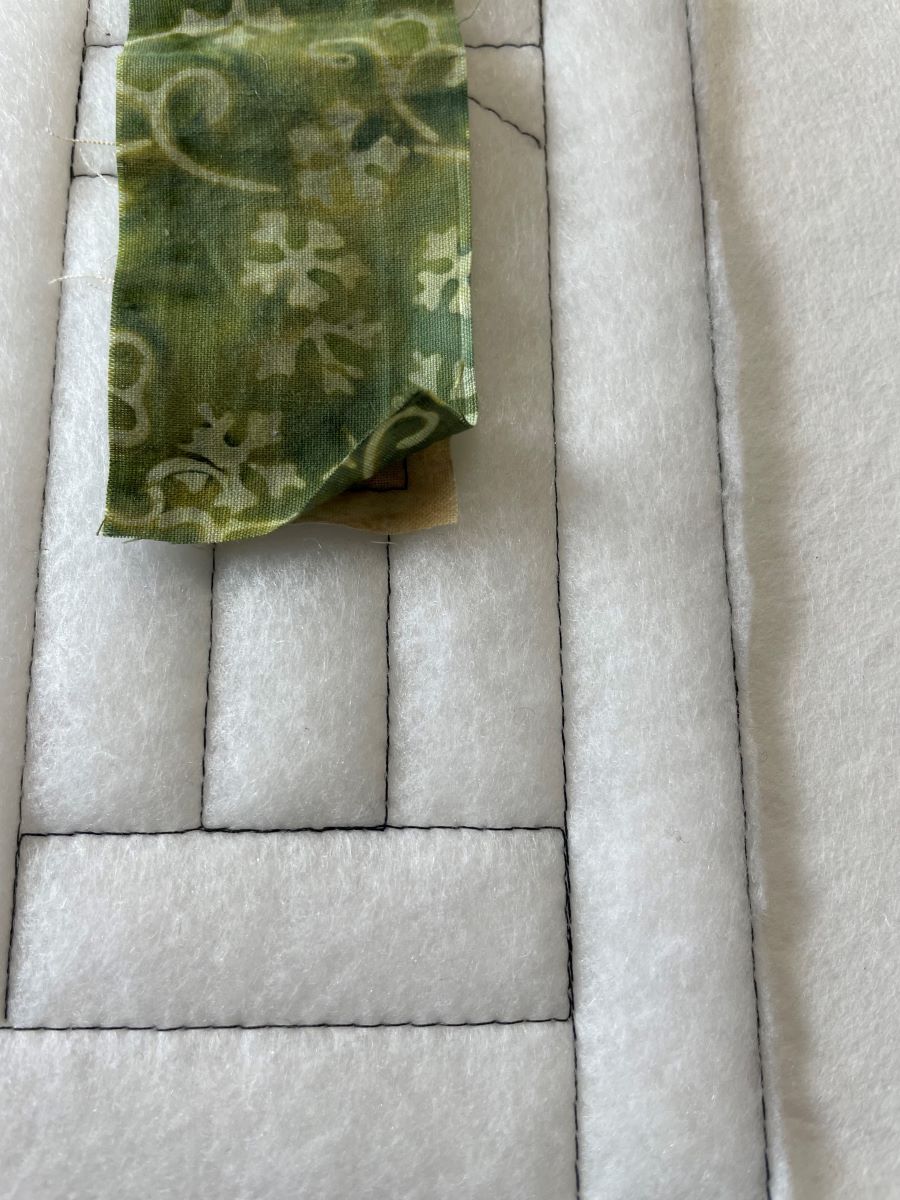
7. Stitch out the next color to sew the fabric pieces together.
8. Flip out the fabric piece and sew the next color, this will secure the fabric in place. Cut away excess fabric and leave about ¼” (6mm).
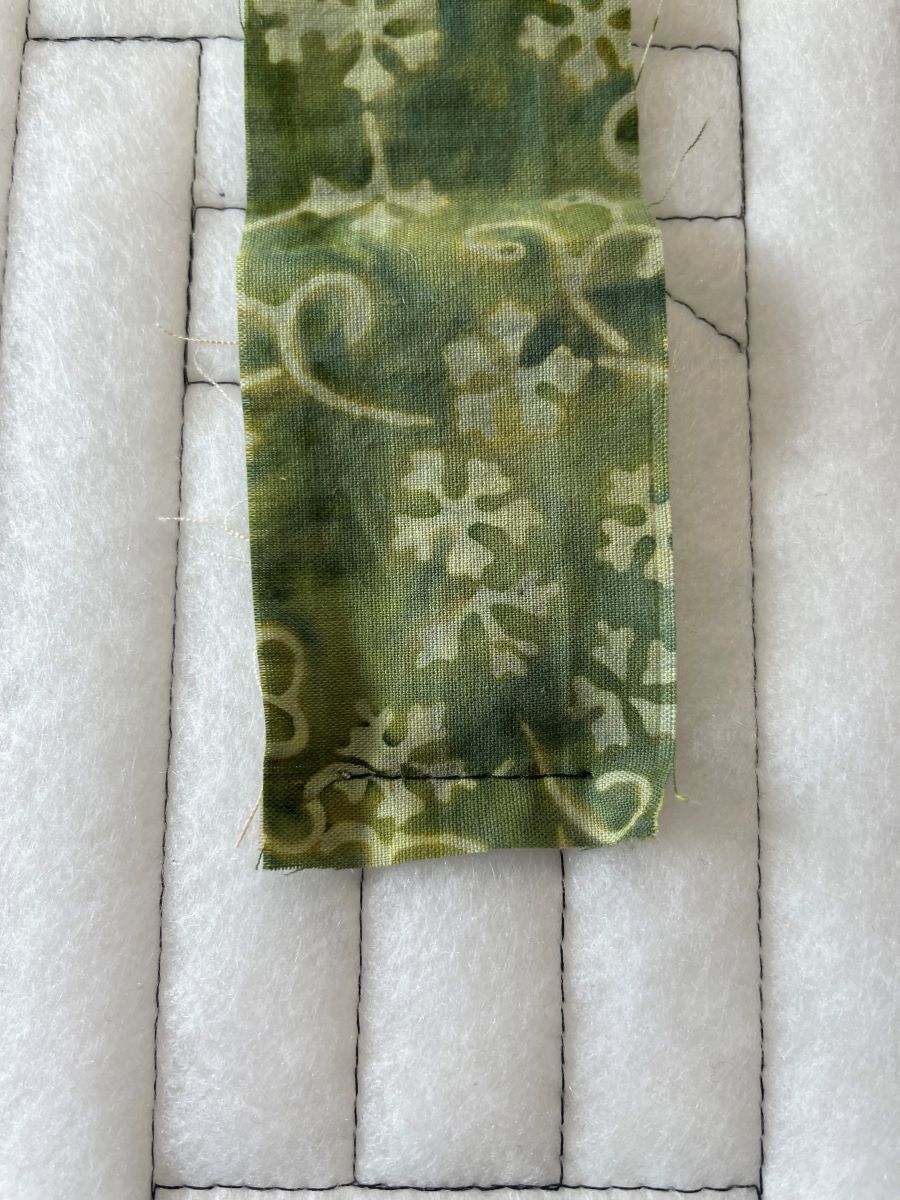
9. Place the next fabric piece (green) right side down with the raw edges even next to rectangle #3. Stitch out the next color. This will sew the fabric pieces together.
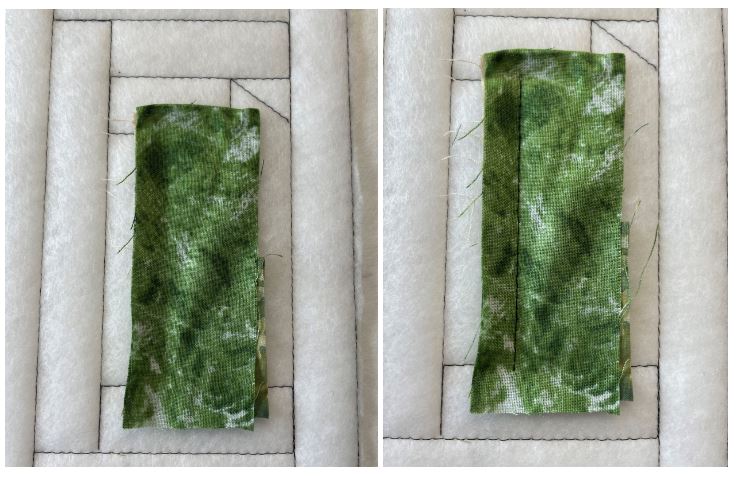
10. Flip out the fabric piece and sew the next color, this will secure the fabric in place. Cut away excess fabric and leave about ¼” (6mm).
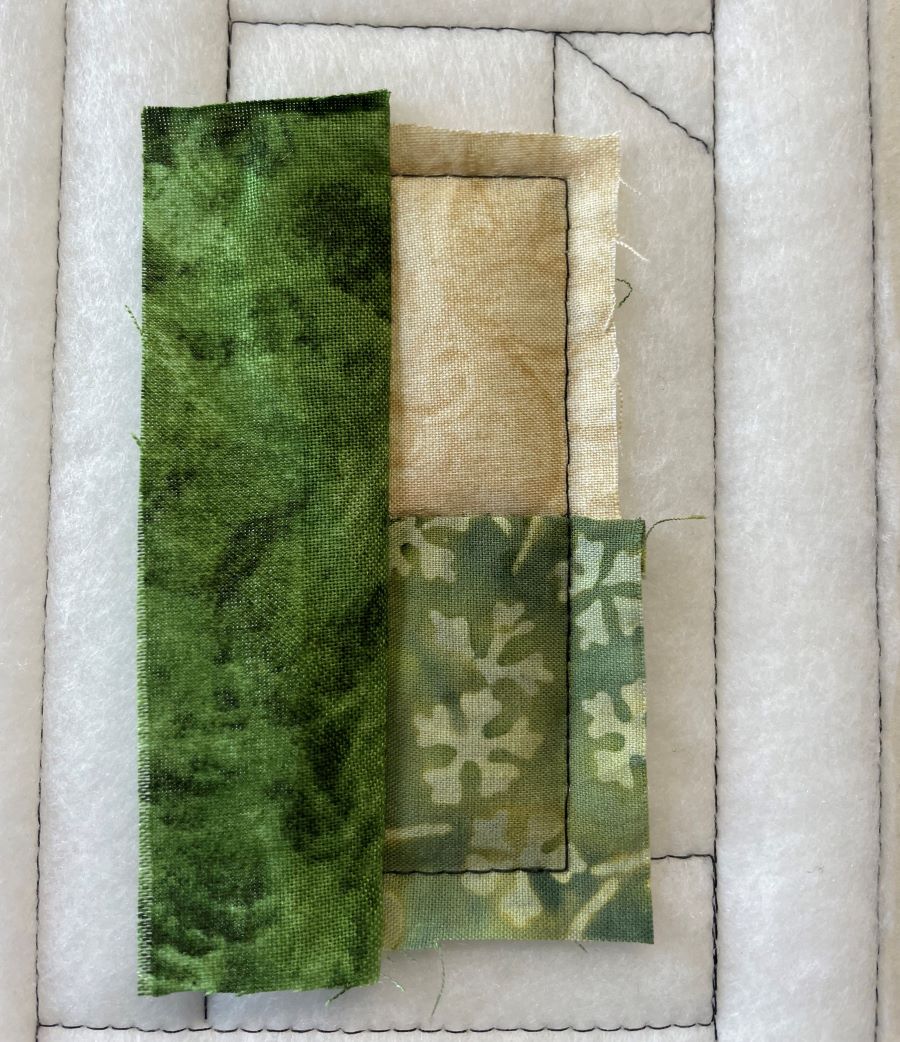
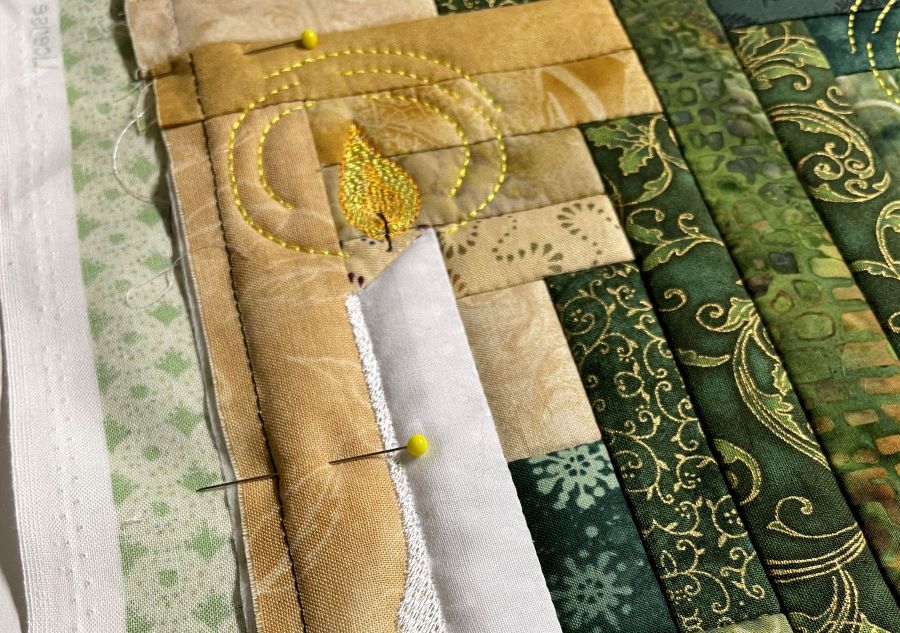
11. Continue to add fabric pieces in the numbered order. Look at the overview picture to see which fabric color to use. See the photos below showing the process.
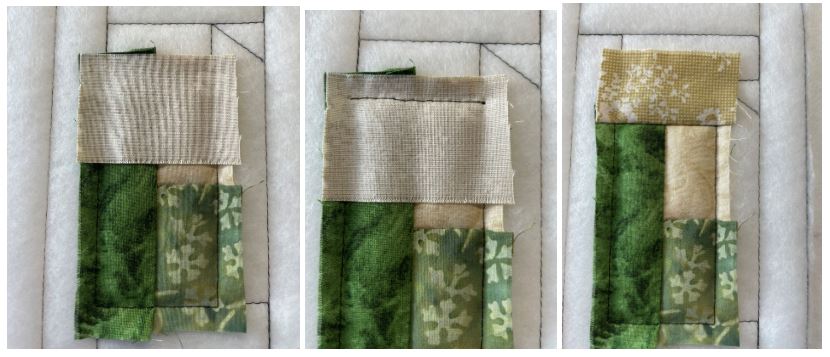
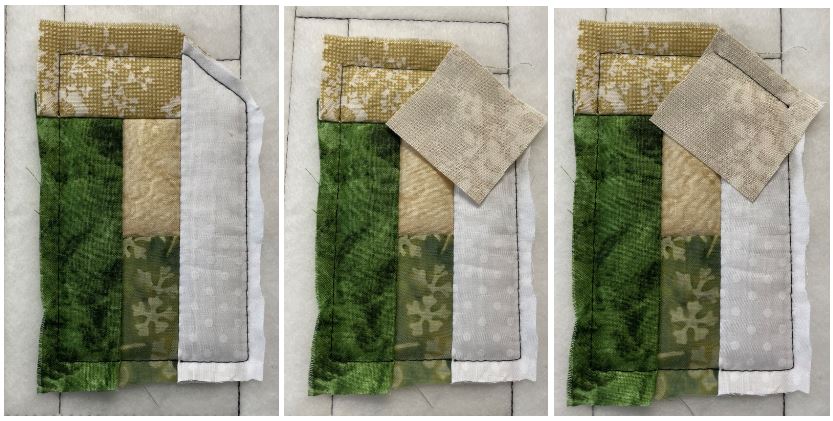
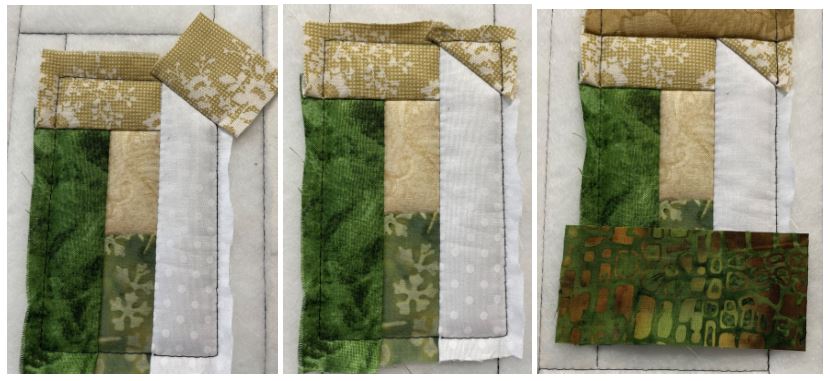
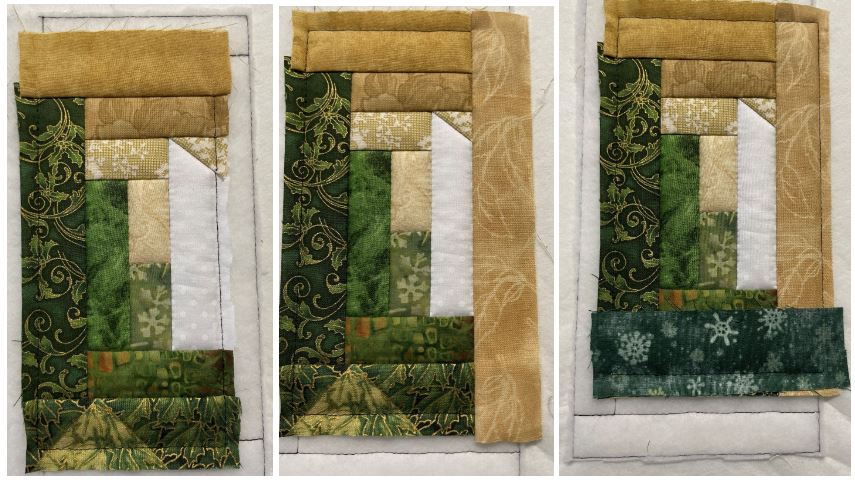
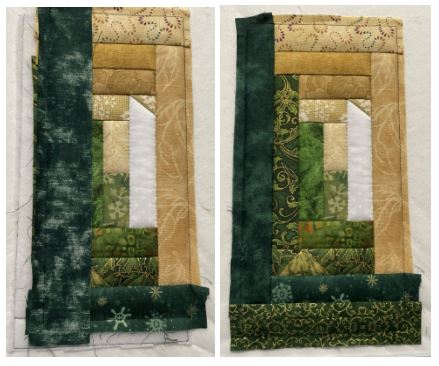
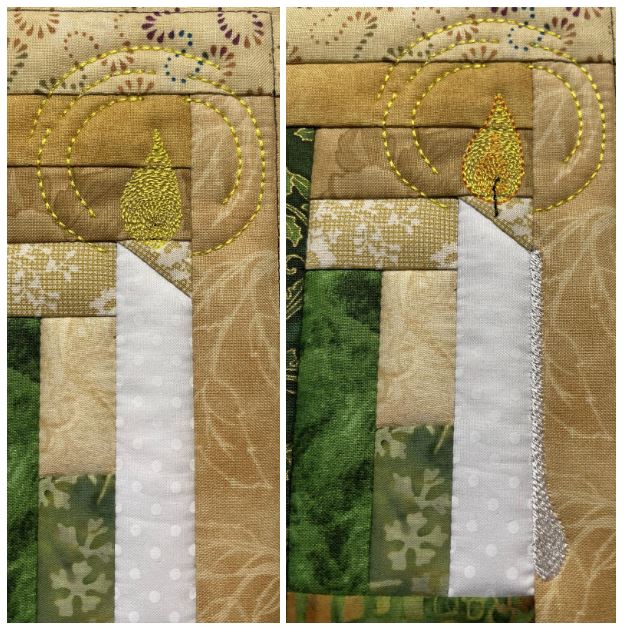
12. When all the fabric pieces are attached the flame, halo and the candle drip will be the next to stitch out. The candle drip is the last color and can be omitted.
Make a total of five blocks.
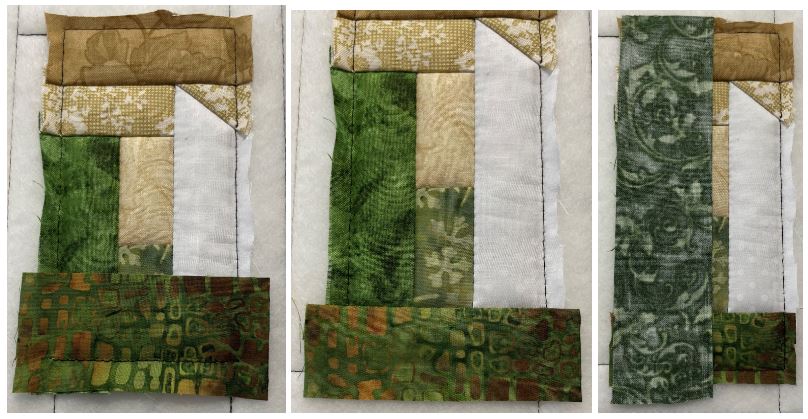
14. Unhoop the block and cut out with ⅜” (1cm) seam allowance. There is no need to worry about if the fabric is less than ⅜” (1cm) outside the block, the interfacing will show the accurate seam allowance for piecing later in the process.
15. Make the other blocks in the same manner, look at the overview to see how many blocks you need to make.
Putting it all together
16. First we will sew the blocks into rows and then piece the whole quilt together.
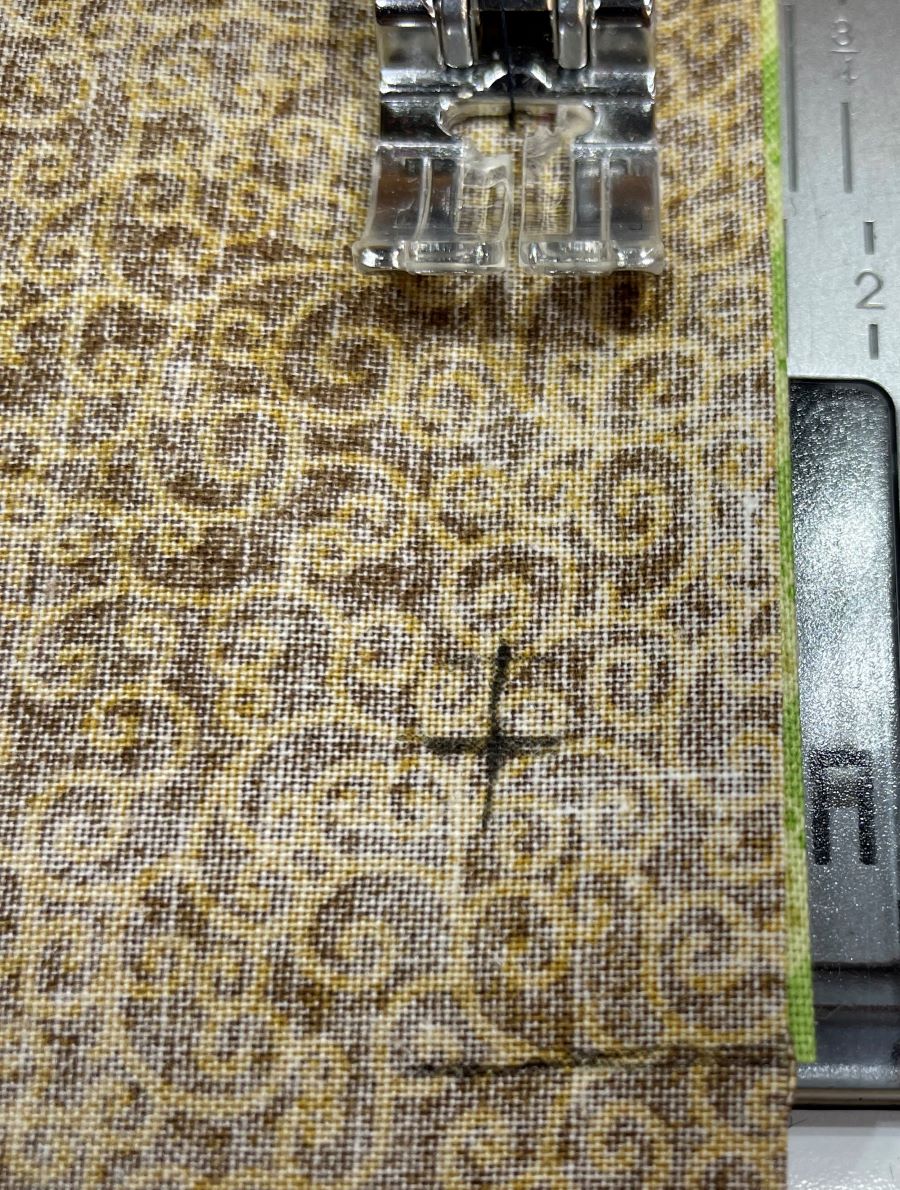
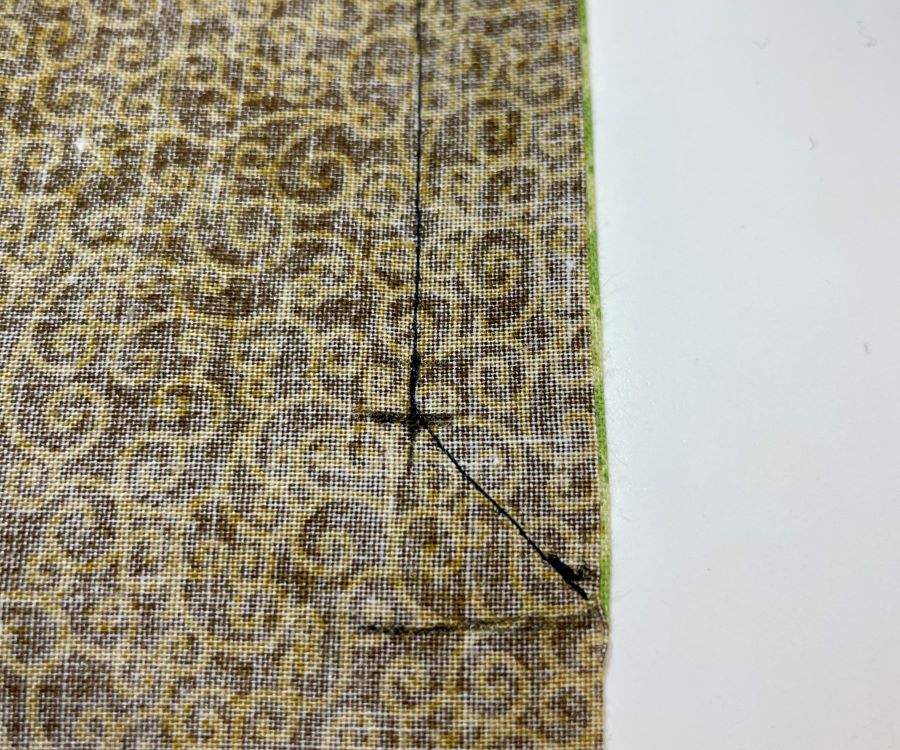
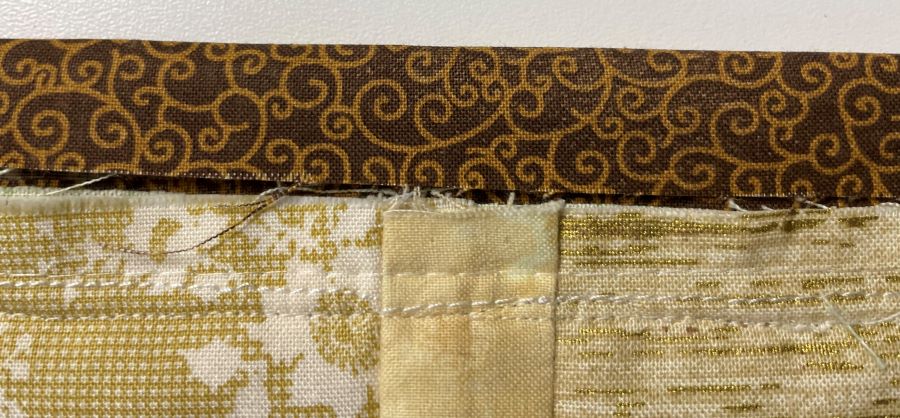
When you sew the blocks together you will see two lines at the seam allowance. Try to sew between those lines and you will get no visible stitches on the front!


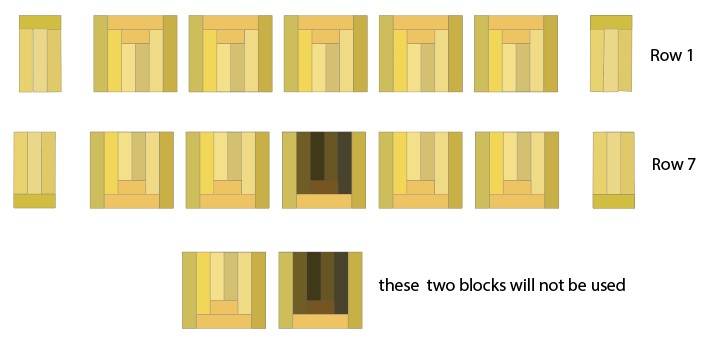
17. The top and bottom row will be made last since they are made of half blocks.
18. Start with row 2. Sew the blocks together, then continue with row 3-6
19. Now it is time to make row 1 and 7. Cut the remaining five background blocks, the two fill-in blocks and the tree trunk block in half. They will be 5” (13cm) high.
20. Sew them together into rows like this: You will get one tree trunk block and one background block extra.
21. Sew all the rows together to finish the quilt top.
22. Lay the backing fabric wrong side up on the table, and put the quilt top on top of it right side up. Pin around the edges and stitch ¼” (6mm) from the edge. Remove the pins. If you wish you can stitch in the ditch between the horizontal rows to catch the fabric on the back, but that is usually not necessary to do.
Making the sleeve corners and binding
23. Cut out four squares 8”x8” (20x20cm).
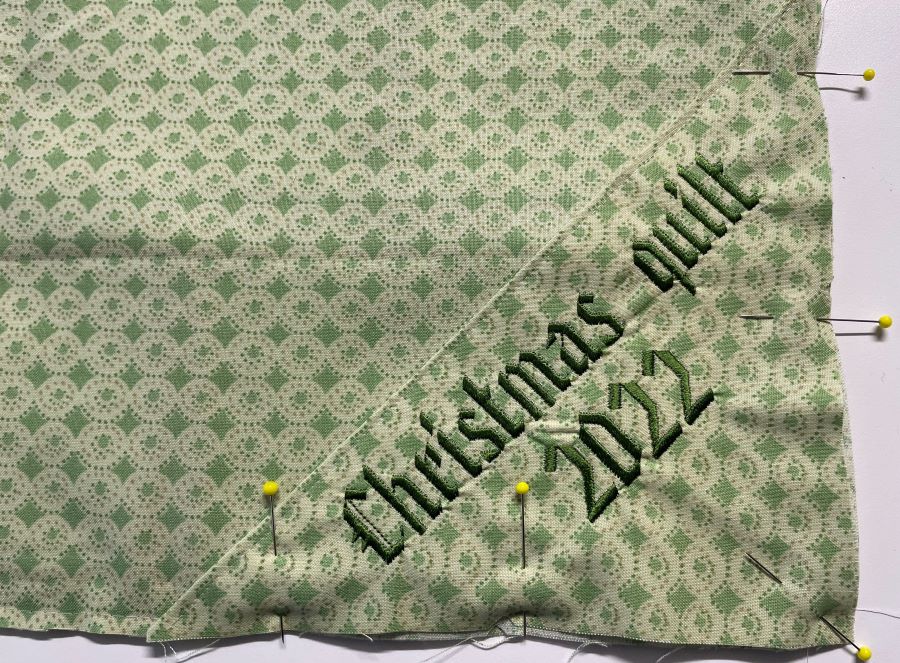
24. If you want to make quilt labels, stitch them out on the square(s) . When you make the label, remember that the corners will be folded diagonally when finished.
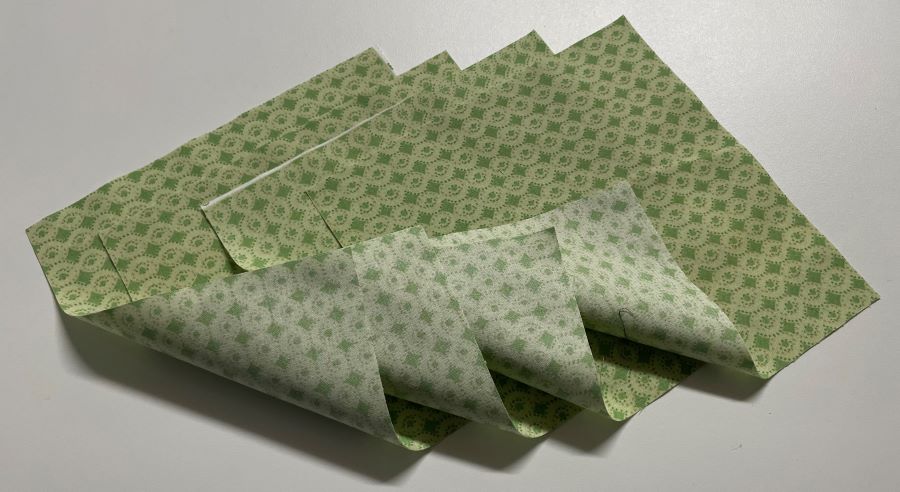
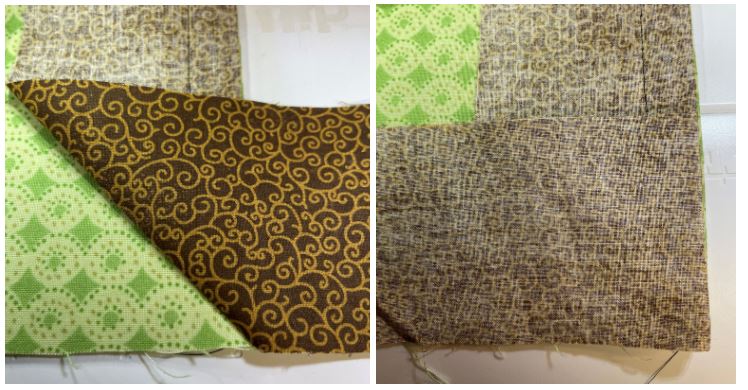
25. Fold the squares diagonally.
26. Pin a triangle in each corner, raw edges to the outer edge.
Binding the quilt
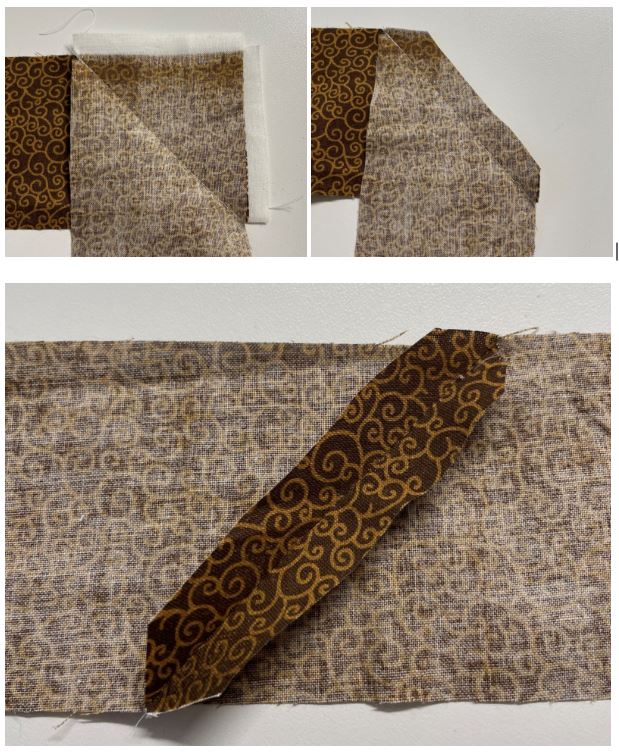
27. Join the strips together diagonally.The total strip length should be the perimeter of the quilt plus about 8” (20cm).
28. On the back of the quilt, start in the middle on one side, leaving a 6” (15cm)tail for joining later.
29. Sew with ⅝” (1,5cm) seam allowance, stop ⅝” (1,5cm) from the corner.
30. Sew diagonally at 45 degrees angle out into the corner. Cut thread.
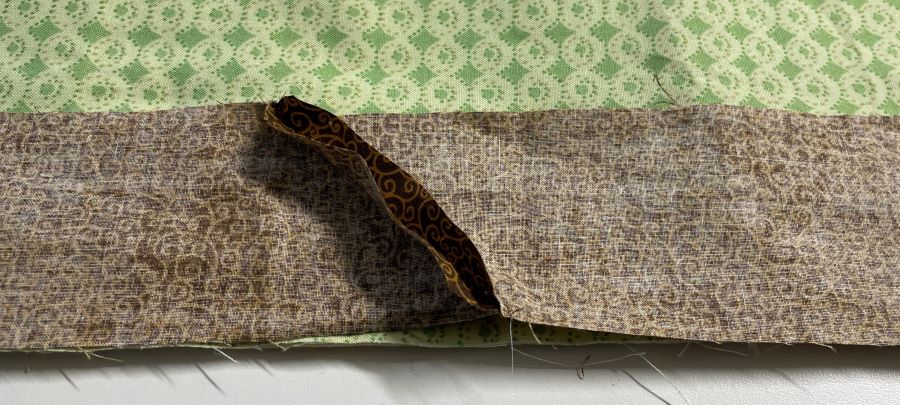
31. Fold the strip up and then down along the next side, see pictures for clarity.
32. Start sewing from the edge and stop ⅝” (1,5cm) from the next corner. Repeat on the next two sides.

33. To join the edges stop about 6-8” (15-20cm) from the starting point. Lay the strips on top of each other and cut the top strip 2 ½” (6,5cm) from the overlap.

34. Join the edges diagonally and finish the seam.
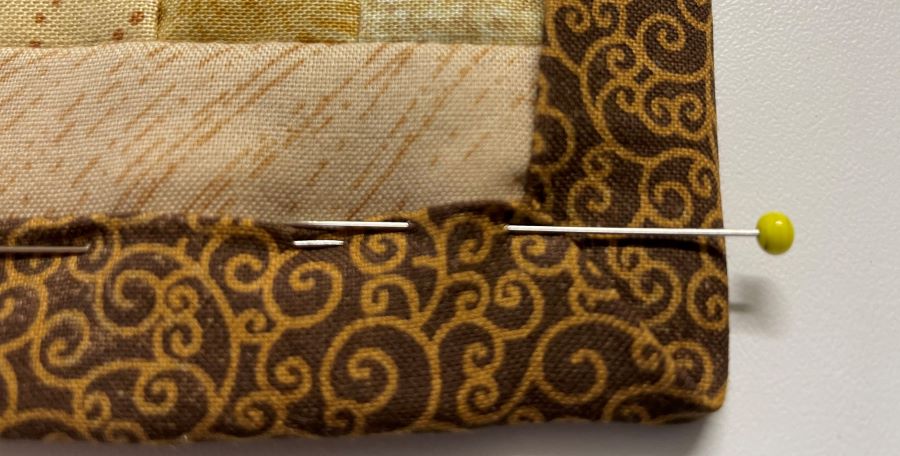
35. Turn right side of quilt up. Turn the raw edges to the quilt side, then turn again and pin in place, be careful to cover the previous seam.
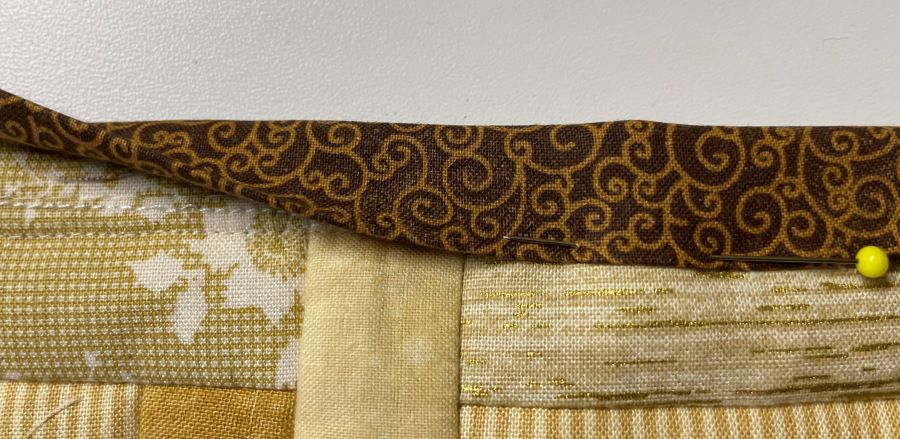
36. In the corner, fold the edge up and to the end and from the next side, fold the corner in forming a mitered corner.
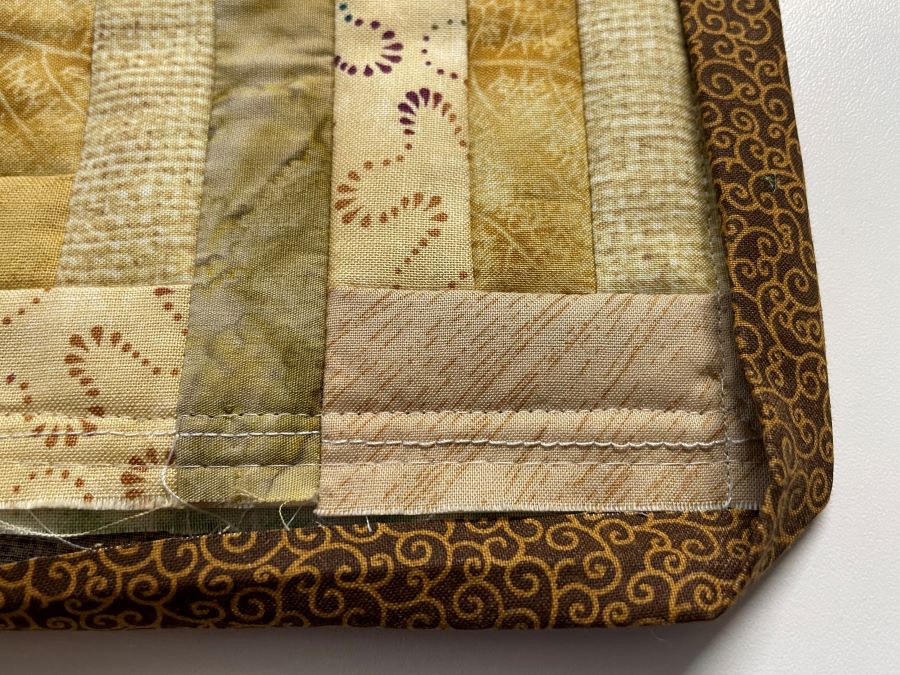
37. Stitch the binding close to the edge.
Hanging rod.
38. Measure the distance between the two corners on top of the quilt. Cut a wooden hanging rod to match the length and hang your quilt!