United States
Bow Tie
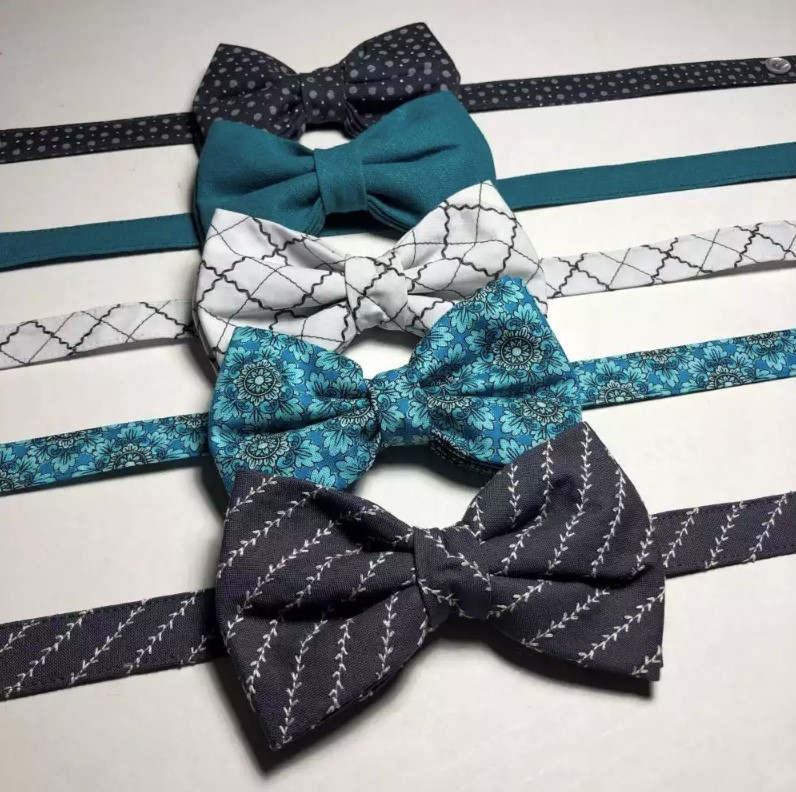
Custom bow ties are a fun way to express your style! Create your ties in solid colors, print fabrics, or use your machine’s decorative stitches to embellish the fabrics for an even more personal touch - the choice is yours!
What You Need:
Supplies listed below are for making one bow tie
- Fabric for bow front section A: 9¼” x 5¼” (23.5cm x 13.4cm)
- Fabric for bow back section B: 9¾” x 5¼” (24.8cm x 13.4cm)
- Fabric for “knot” to go around bow center: 3½” x 1¼” (9cm x 3.2cm)
- Fabric for adjustable neck band: 20” x 2” (50cm x 5cm)
- Lightweight fusible interfacing
- Two ½” (13mm) buttons
- Thread for construction and buttonholes
- Large safety pin and hand sewing needle
- Fabric marking tool and ruler Hand sewing needle
If adding decorative stitches, you may wish to have the following additional items:
- Contrasting thread for decorative stitching
- Lightweight tear-away stabilizer (to support fabric for decorative stitching)
Sewing Directions:
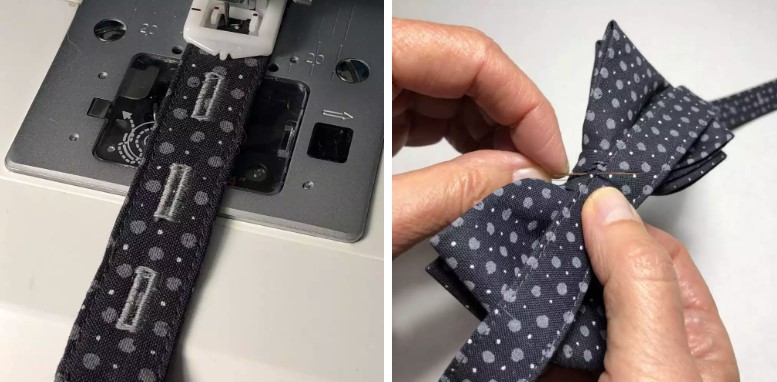
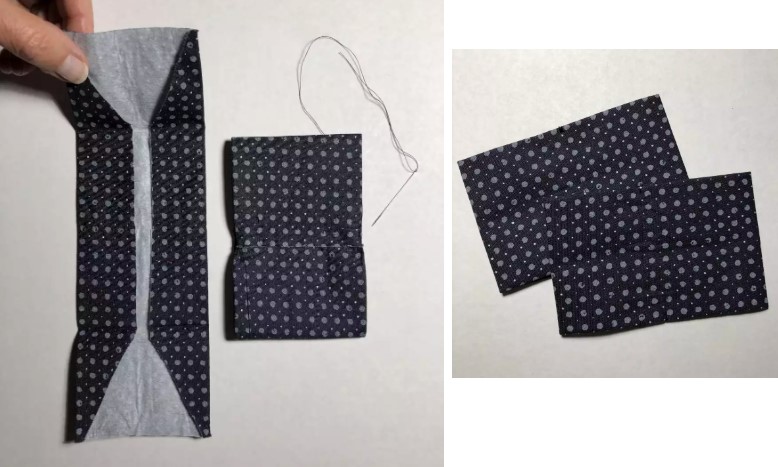
1. Apply the lightweight fusible interfacing to the backside of the bow front and bow front fabric pieces. For the front bow section, turn and press so the folded piece measures 4½” x 2¾” (11.4cm x 7cm). For the back bow section, turn and press so the folded piece measures 4⅝” x 2⅞” (11.8cm x 7.3cm) The back should be slightly larger than the front. Trim the ends at an angle, as shown, to help reduce bulk when assembling the bow. The fabric ends, once folded, should overlap. Hand baste the center of each.
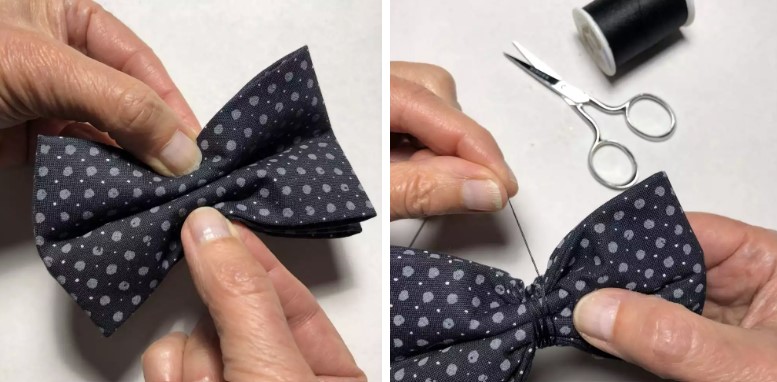
2. Place the front bow piece directly over the back bow piece. Bring the bow sides together at the center. Use a hand sewing needle to secure them together by wrapping the thread several times around the center, then tie a knot to secure them.
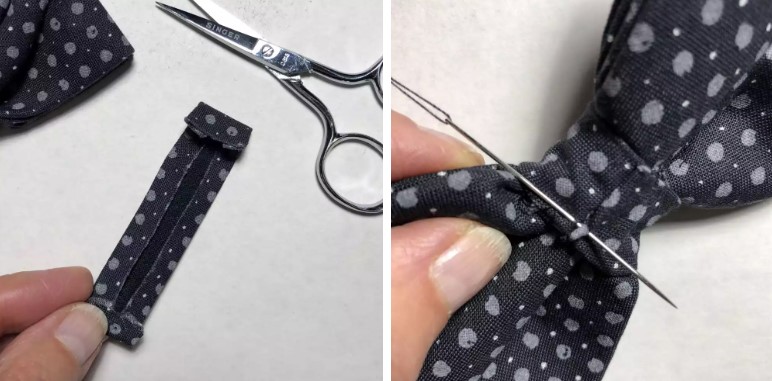
3. Prepare the “knot” for the bow center next. Fold the long sides ¼” and press. Then fold the short ends and press. Wrap the piece around the bow center, then stitch using a hand sewing needle. Set aside for now to prepare the neckband.
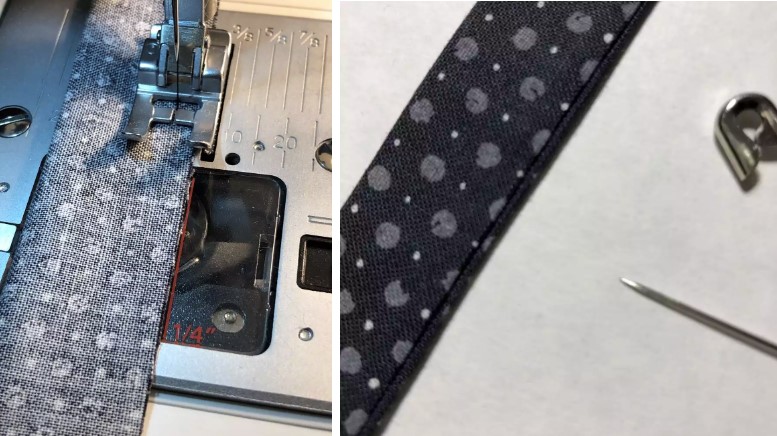
4. Fold the neckband fabric lengthwise. Sew a ¼” seam on the long side, leaving the short ends open. Use a safety pin to turn the neckband right side out. Press the seam. Fold in the raw edges at both short ends and press.
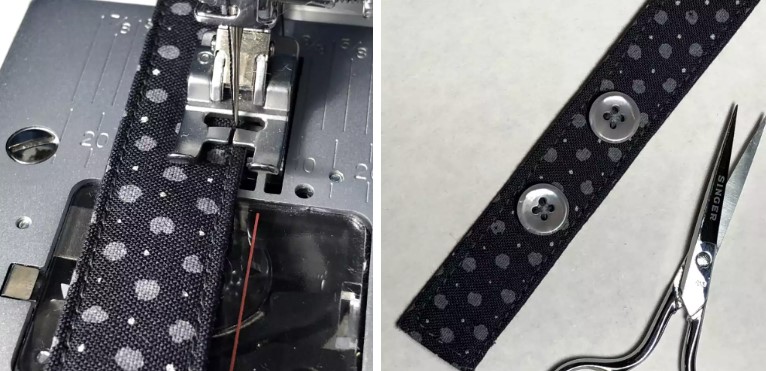
5. Topstitch all around the entire neckband piece. Sew buttons at one end of the neckband, either by machine or with a hand sewing needle.
6. Try on the neckband, then mark placement for buttonholes on the end opposite the buttons. Hand sew the neckband to the back side of the bow tie to finish.