 United States
Baby Quilt with Embroidered Squares
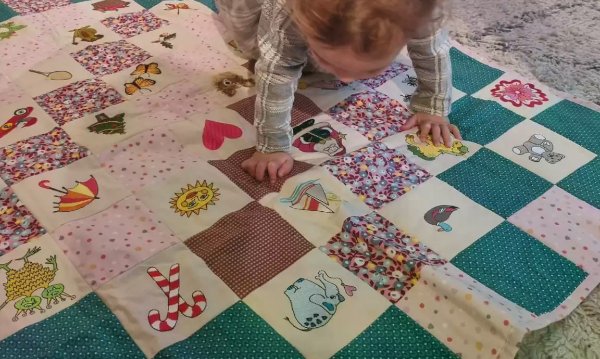
Sew a small quilt with a lot of colorful embroideries for children. She /He will love to discover new things every day.
What you need:
- Sewing and Embroidery machine
- Fabric to embroider on, enough for 40 pieces (110x110mm each)
- Embroidery designs
- Stabilizer
- Fabric in different colors for the rest of the squares, enough for 59 pieces (110x110mm each)
- Cotton batting
- Fabric for the backside and edge
- Treads for embroidering , thread for sewing
- ¼ inch Foot (for piecing)
- Edge Joining Foot ( for edge stitching)
Preparations and embroidering
1. Make your choice of embroideries, 40 small embroidery designs that fit in a square 110x110 mm. Think about that you need some space around the design itself.
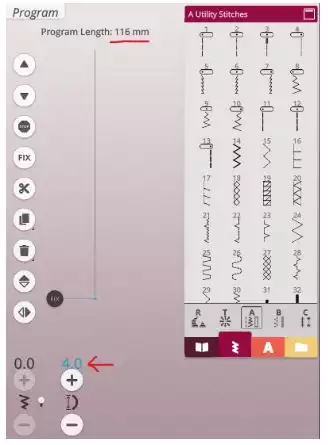
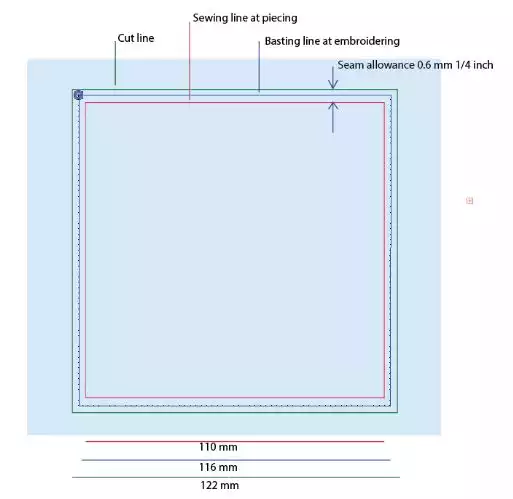
2. To make the placement of designs and the cutting easier, I have created a square of 116x116 mm using 4mm straight stitch. (Of course you can have another size for your quilt squares)
You can also build this square in programming in embroidery mode, by making a sequence with 4.0 mm long straight stitches. You need to add so many stitches that your sequence will be 116 mm long, (29 x 4.0=116) . Duplicate to have 4 lines, and build them together to a square.
3. Hoop your fabric for embroidery
4. Load or create the 116 x 116 mm square
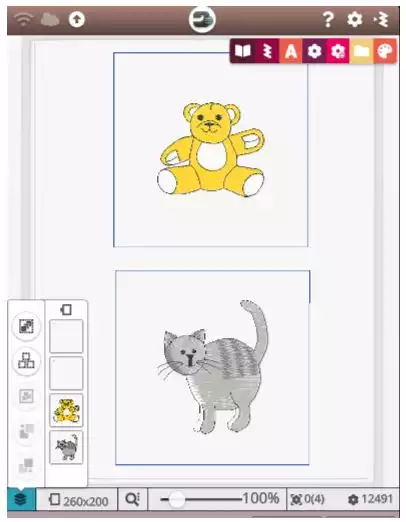
5. Load your selected designs and place them in the middle of the square
6.Stitch out all the embroidery designs.
Cutting and preparation for piecing
7. When all embroidery is finished it is time to cut the pieces to the correct size. You can use the basting line as a guide when cutting the pieces. Cut 3mm / ⅛ inch outside the basting stitch, to get the correct size;122 x 122 mm. (40 pieces)
 8. Cut the rest of the squares without embroideries, 122 x122 mm (59 pieces)
9. Arrange the squares to you get the desired design on your quilt.
10. For piecing, use the ¼ inch Foot. First sew together the squares into vertical rows.
11. In the next step you will sew the backside, the batting and the quilt top togetther in one step. (quilt-as-you-go).With this technique the sewing and the quilting will be done at the same time. Lay out the back piece flat, with the wrong side up. Place the batting on top and ensure that both layers are lying nice and flat. The back must be slightly bigger than the quilt itself, since we will do the edge by folding over the backside to the frontside.
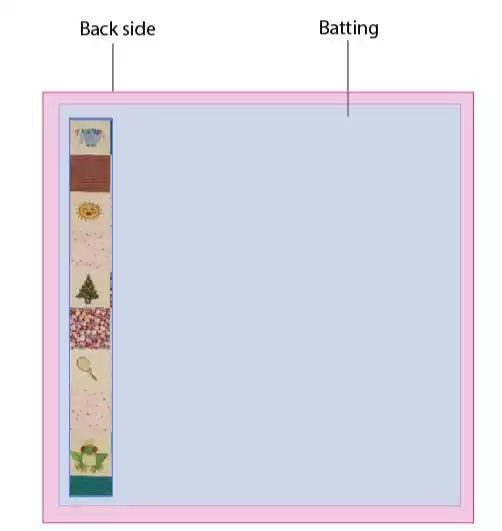
12. Sew the rows togther into a quilt. Sew through all the three layers and add the rows one by one, till all the rows are sewn together. Start from the left hand side. The quilt will be “quilted” only lengthwise , but that is sufficient for this small size of quilt.

13. Cut off the excess batting , do not cut the backside fabric together with the batting we will do that in the next step.
14.Now cut the backside fabric, make it approx 1" (2,5cm) bigger around the quilt.
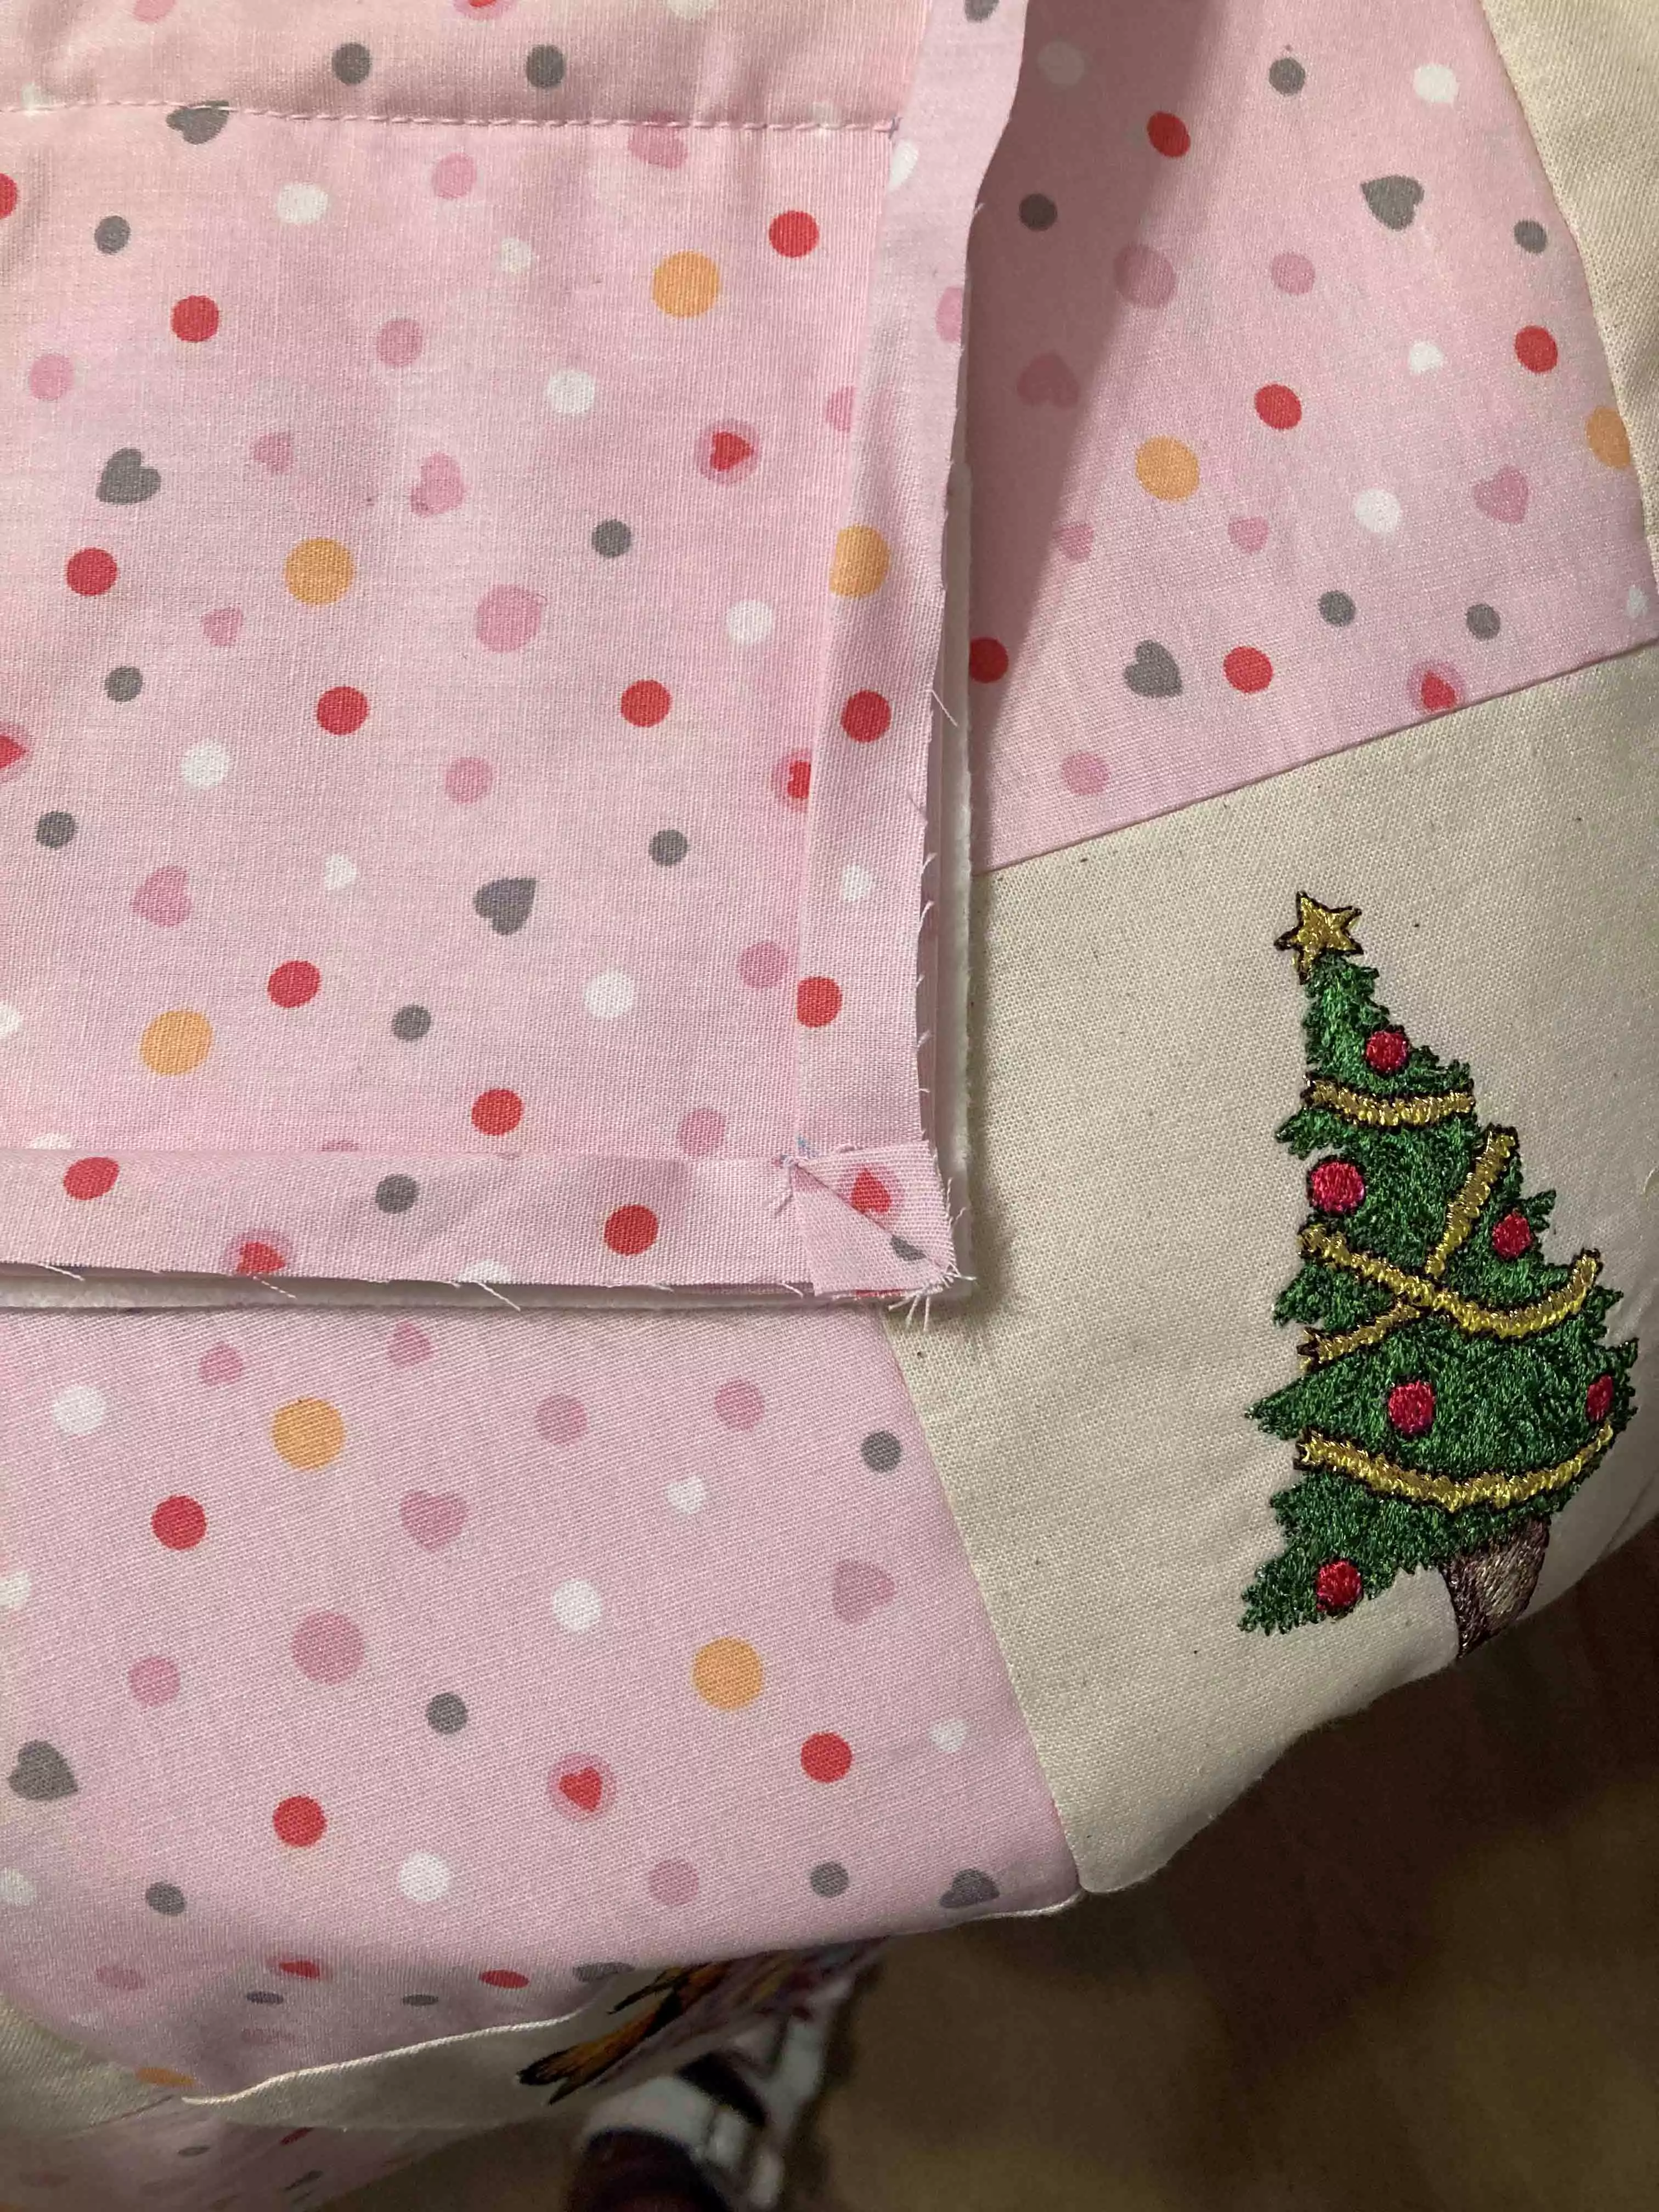
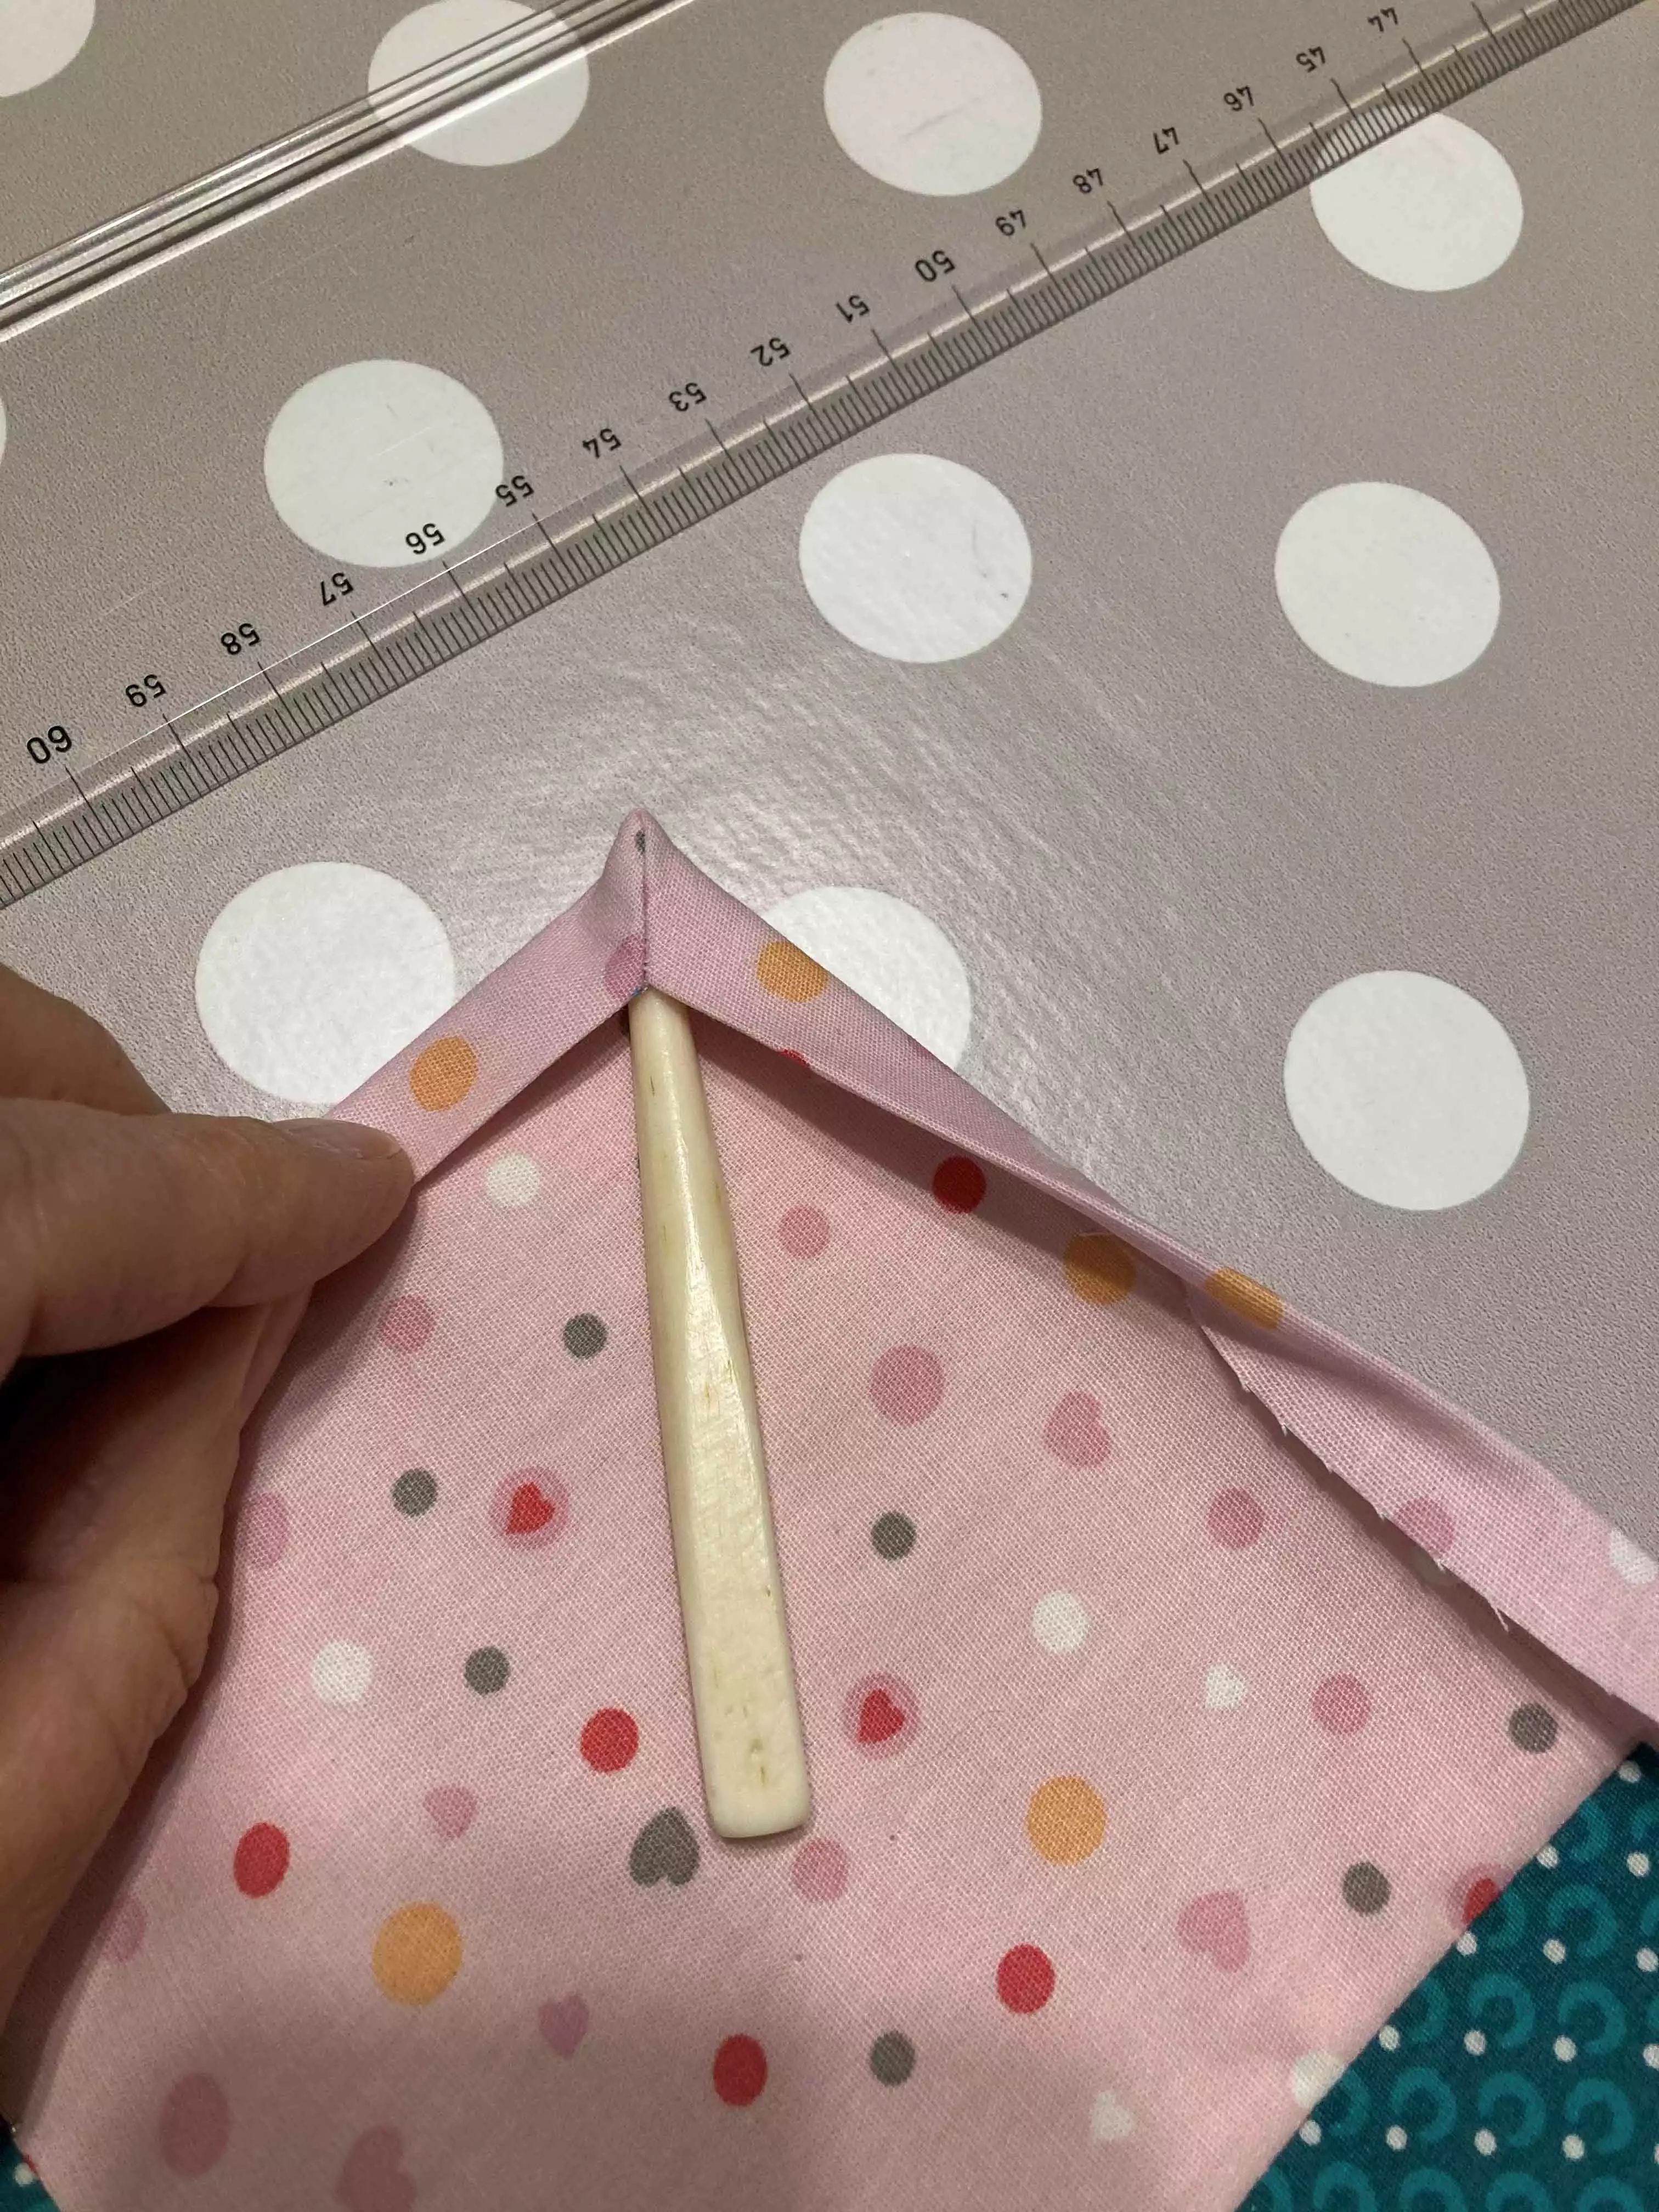
15. Double fold the backside fabric toward the right side. Sew off the corners in 45 degrees.
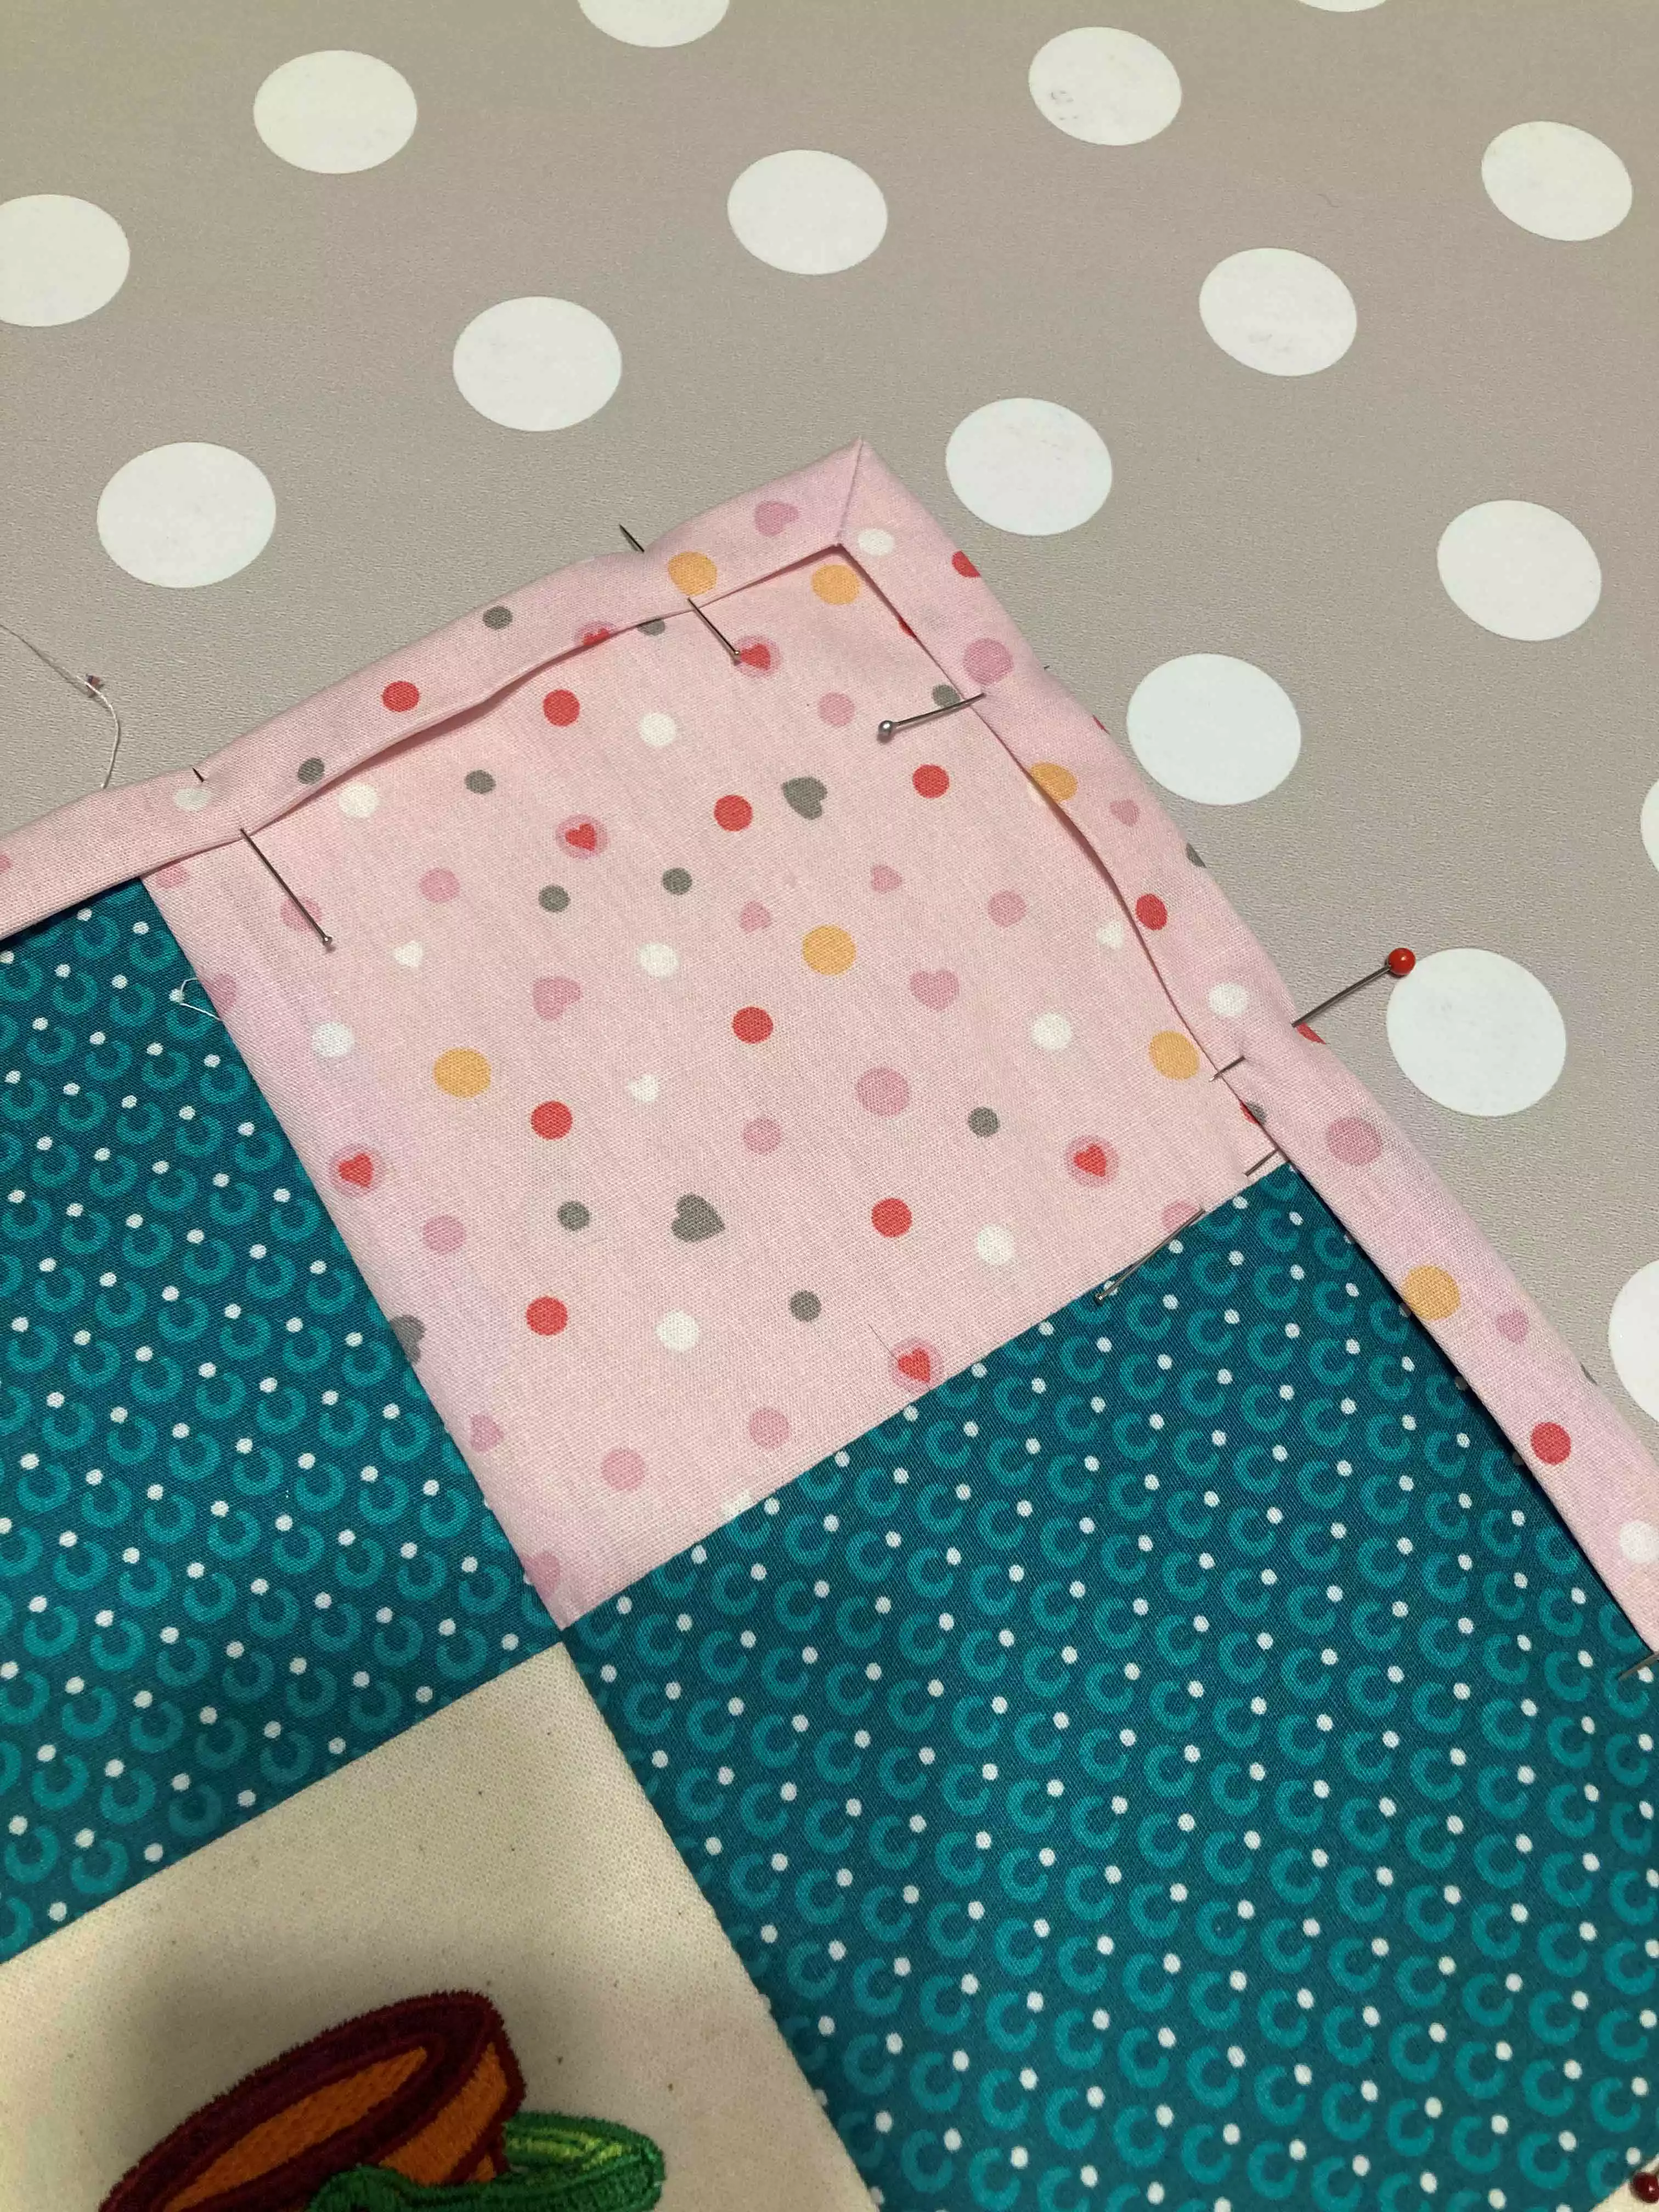
16. Pin the edges and sew around the quilt . Use the Edge Joining Foot, that guides you along the edge. Adjust the needle position so the stitch will end up 1-2 mm from the Fabric edge
Your quilt is now finished!