 United States
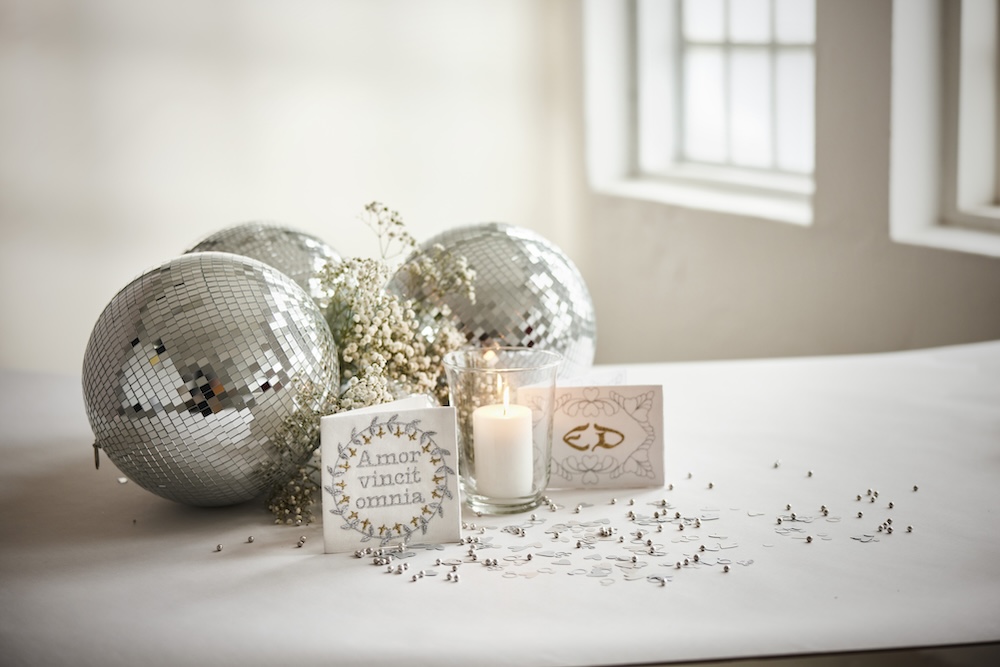
Amor Vincit Omnia (Love Conquers All)
Change the look of the card completely using Superdesigns and the Encore feature in mySewnet embroidery software
What you need
- Mysewnet Embroider software, Gold level or above
- Fabric for the card, in this project an old linen tablecloth is given a new life
- Tear away stabilizer
- Gold and silver embroidery thread
- Thin cardstock for stabilizing the finished card.
How to do
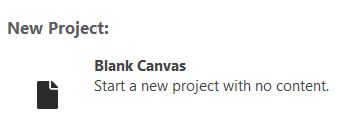
- Open mySewnet software, select Blank Canvas
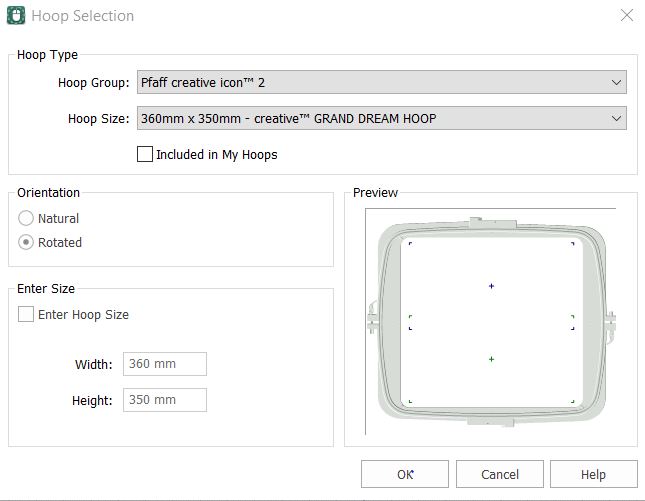
- Set hoop size to 360x350mm.
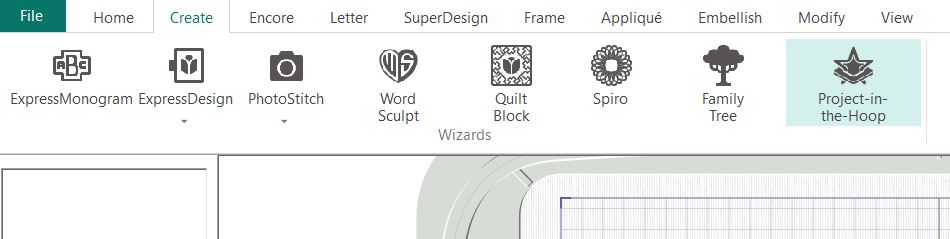
- Go to Create and click on Project-in-the-Hoop.
- select Card and click Next.
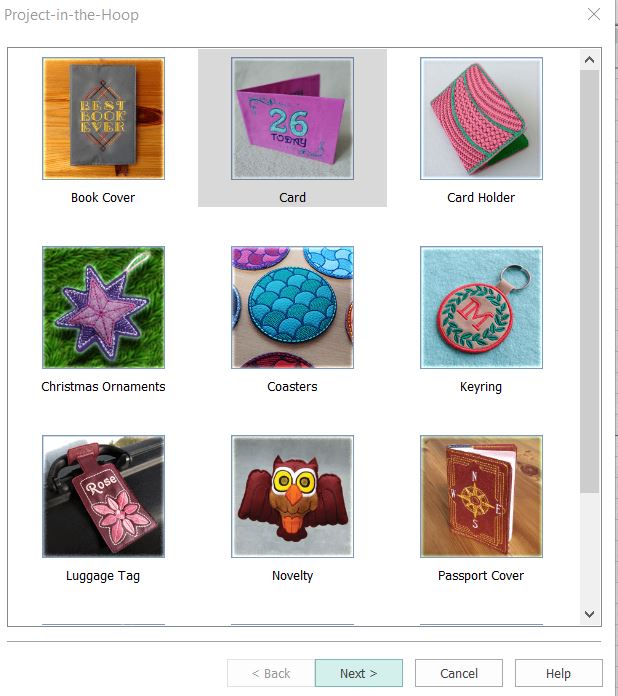
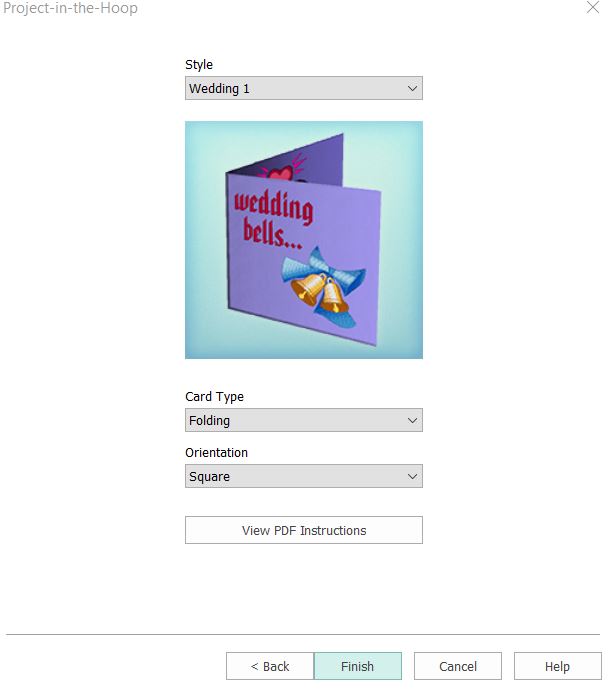
- select Wedding, Folding and Square, click Finish.
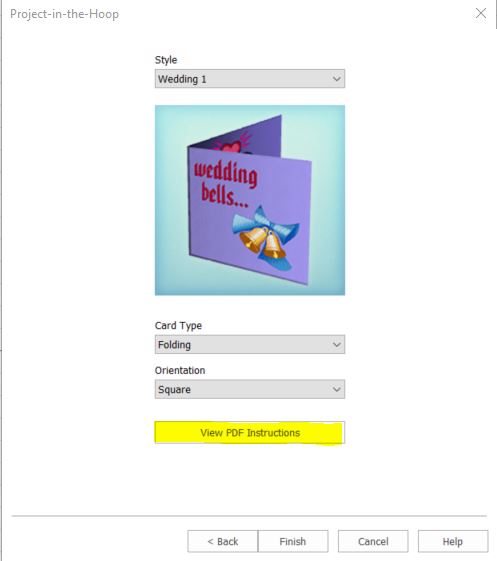
Note: If this is the first time you make a card, take the time to read the PDF instructions to get more information. Click on View PDF-Instructions
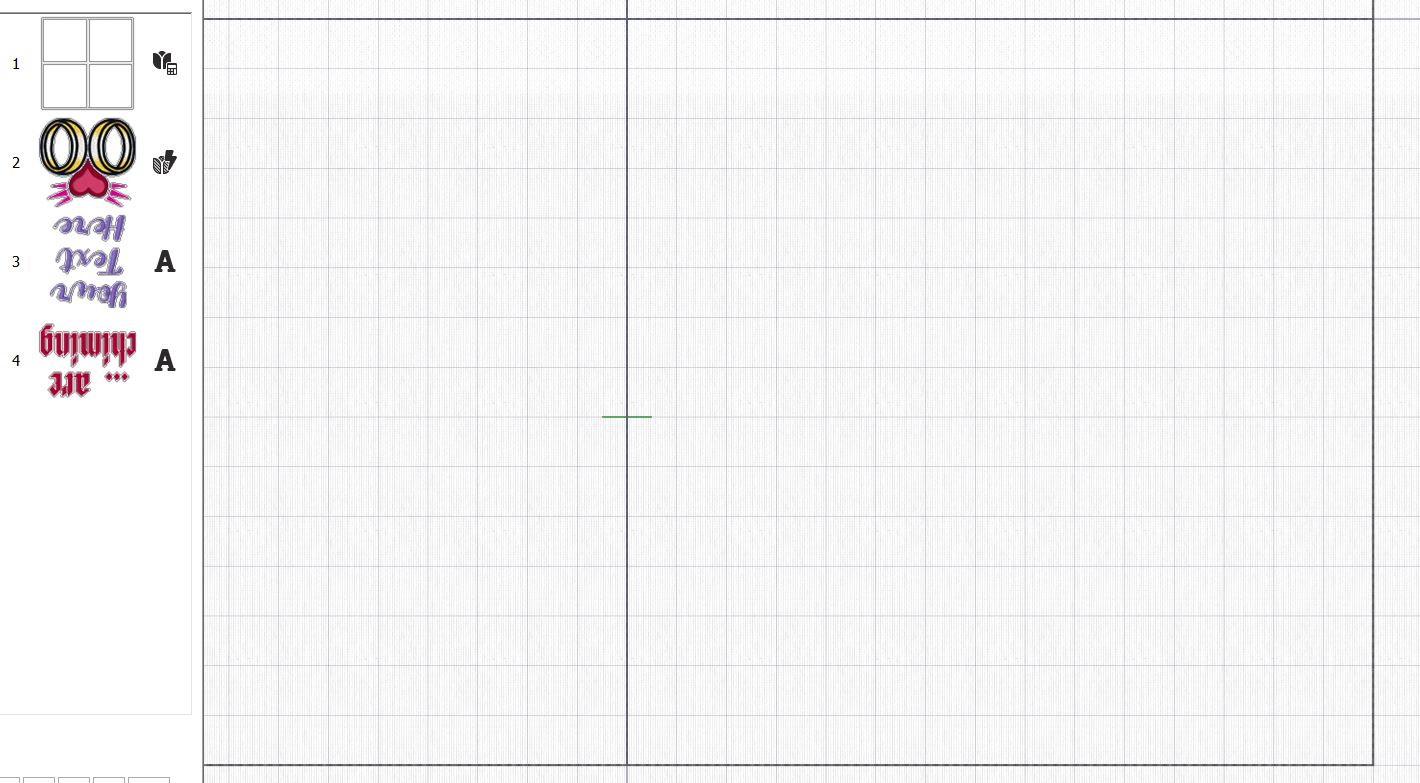
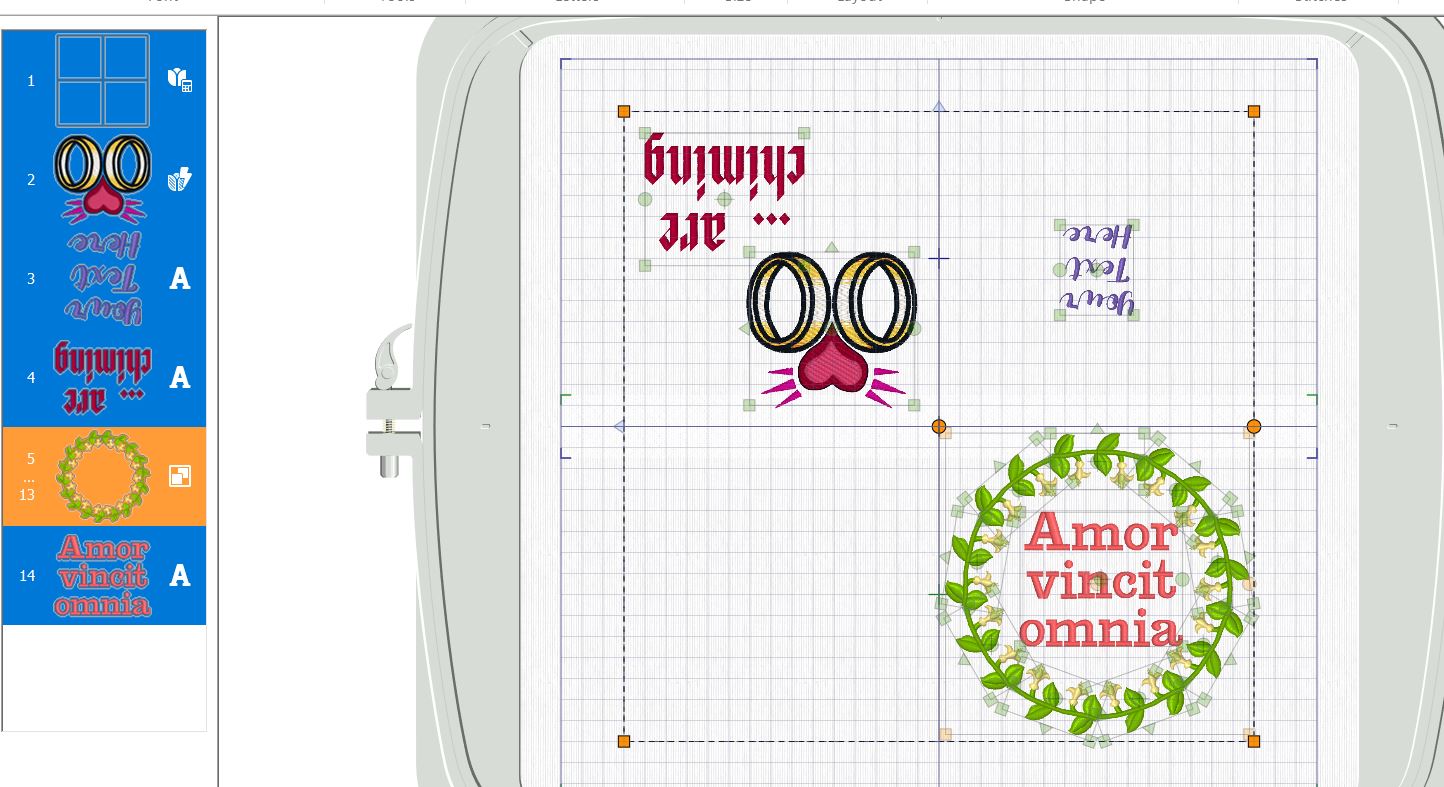
- Your screen will now look like this:

- we will start by deleting the wedding bells embroidery. And the text "personally designed for you. Click on the designs holding down the shift key and then click on Delete on your keyboard.

- Use the magnifying tool to zoom in on the lower right square.
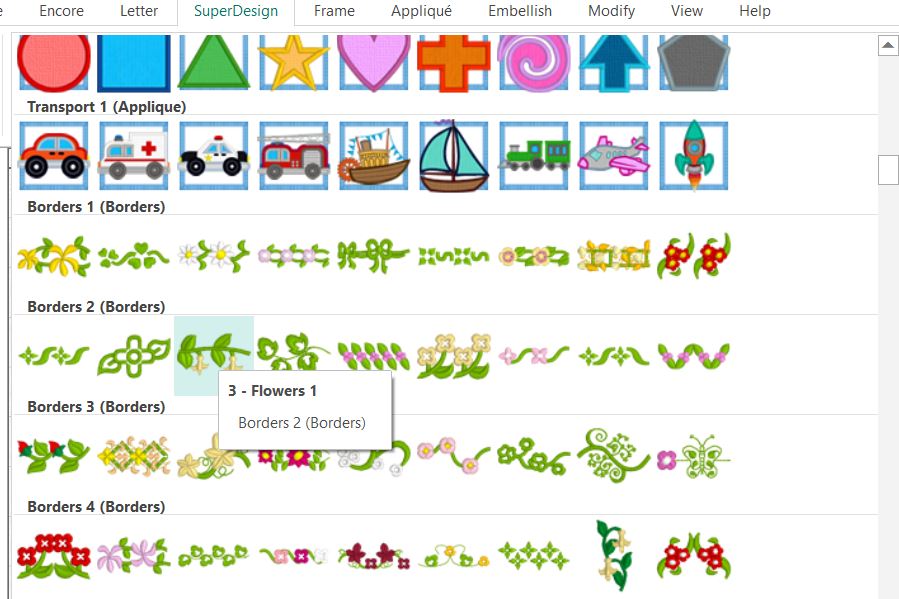
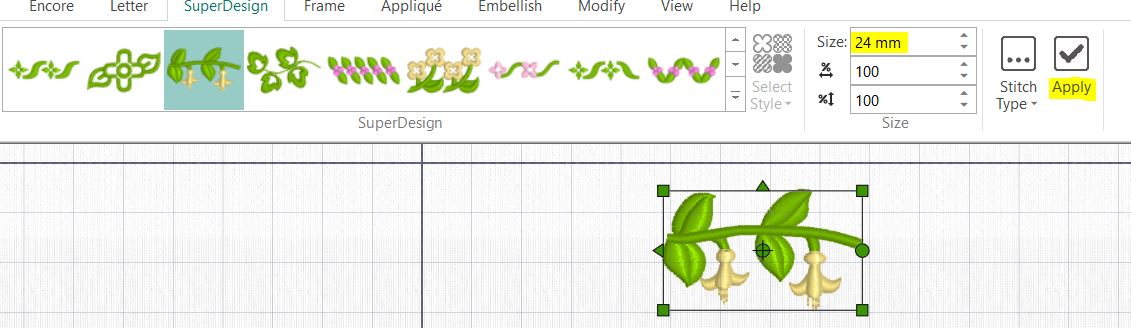
- Go to Superdesigns, Borders 2 and select Number 3, Flowers1.
- Make sure the size is 24mm and click Apply.
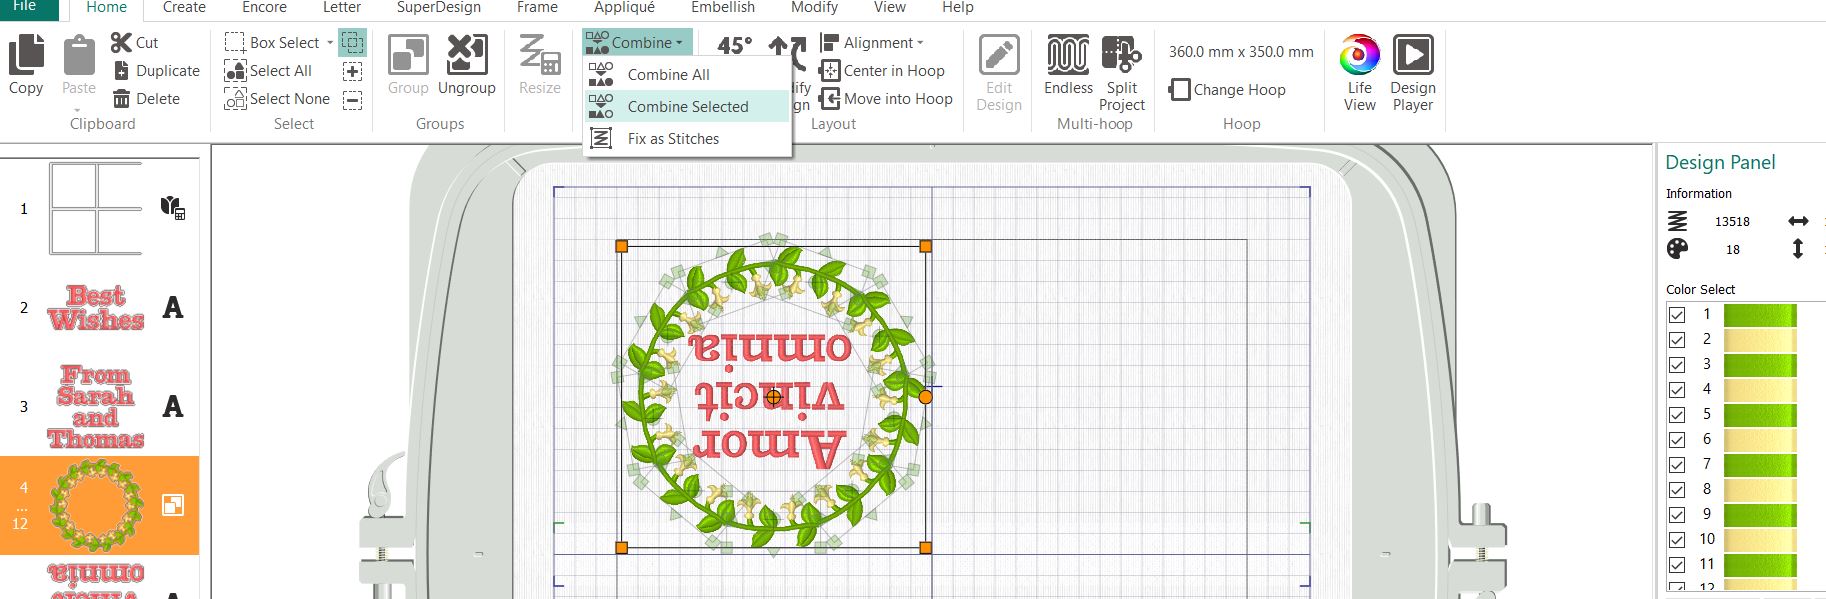
- Go to Encore tab, select the Circle, set the repeats to 9 and click Preview.

- Drag the circle together using the + sign (the Cursor will turn into a + sign when it is possible to adjust the circle. Drag the designs together to form a wreath. Click on Apply when you are done.
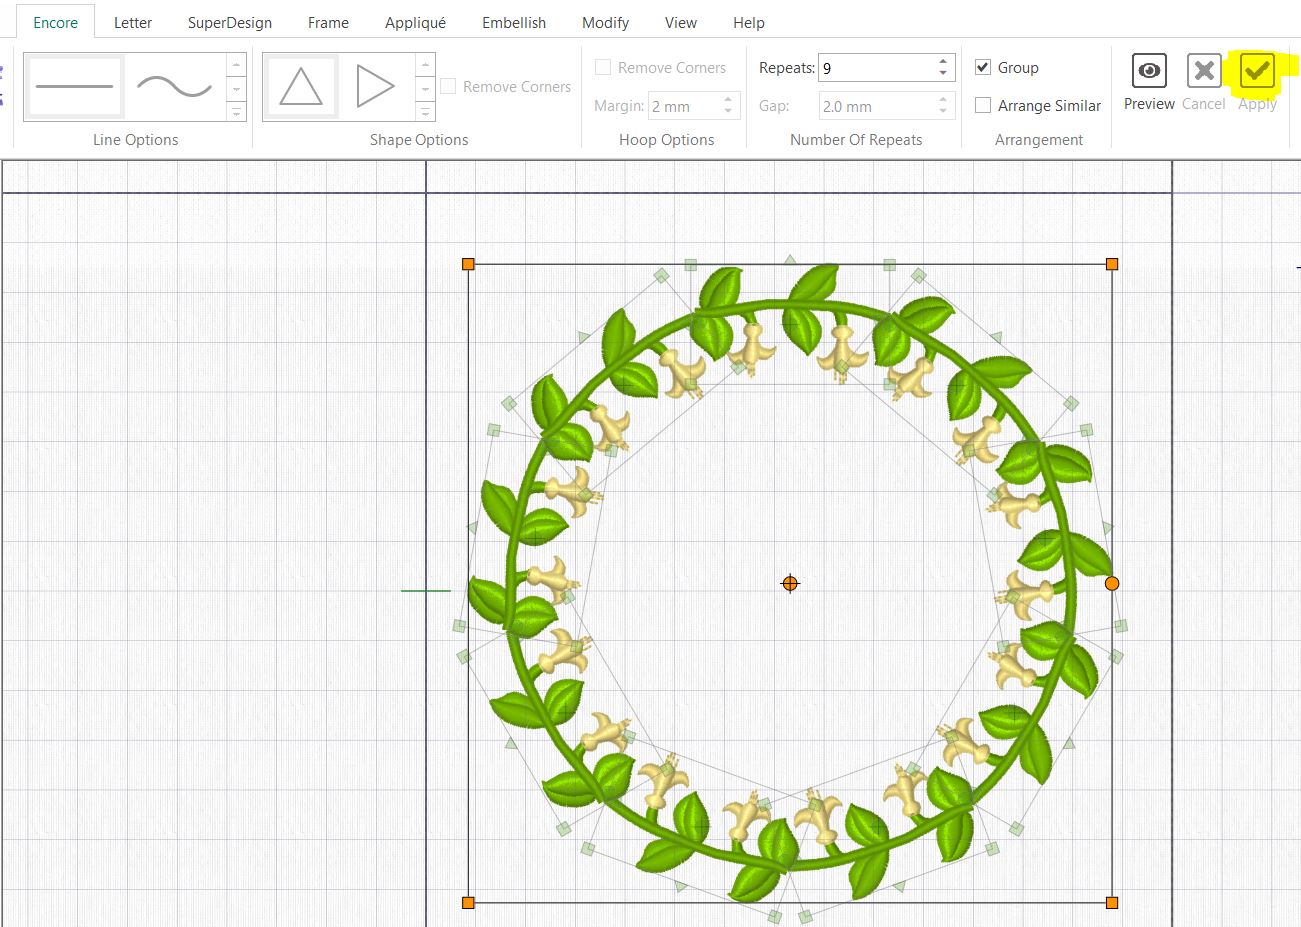
- The handle on the design is orange, drag in the corners to make the wreath fit in the square, leave about 1/8” (3mm) margin on all sides.

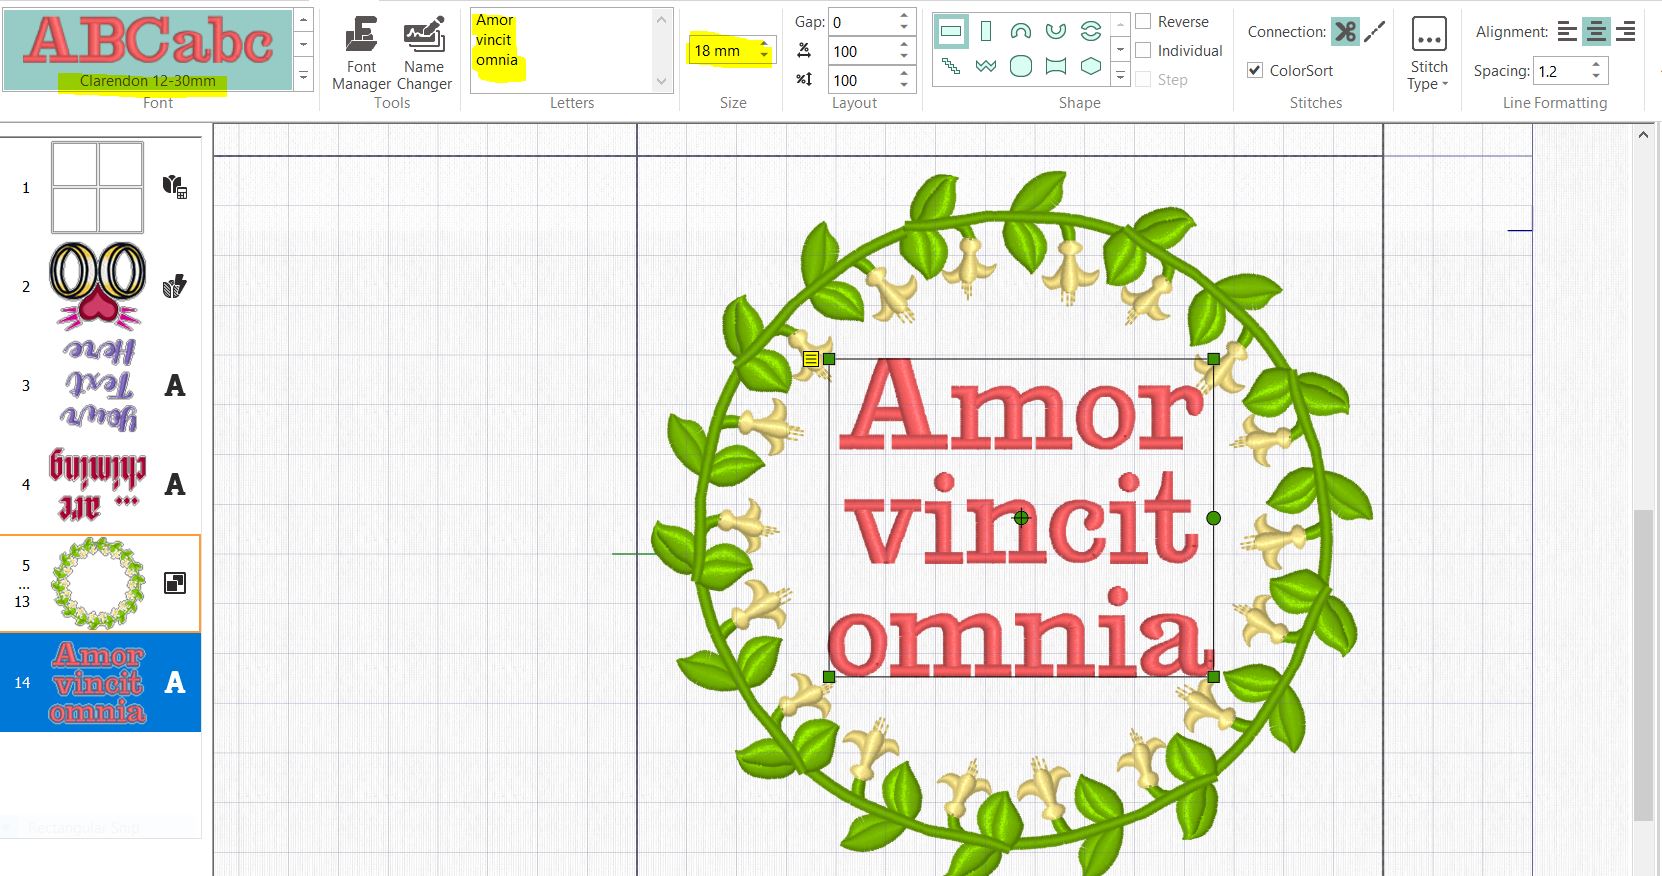
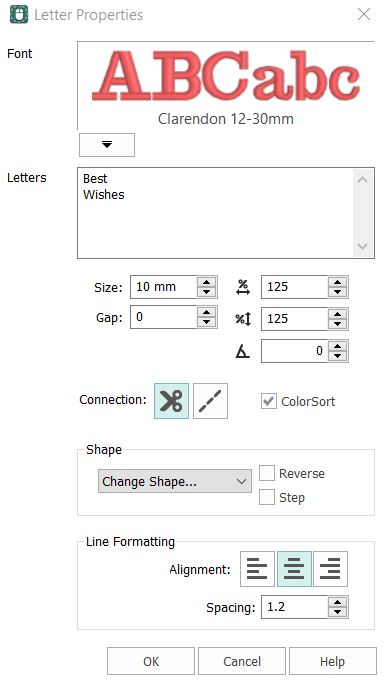
- Now we will add the text. Go to Letter, select Clarendon 12-30mm in the Traditional section. Set the Size to 18mm. Add the text “Amor, vincit omina” Click Enter after each word to get a new row. Then click Apply and move the text inside the wreath. Now it should look like this:
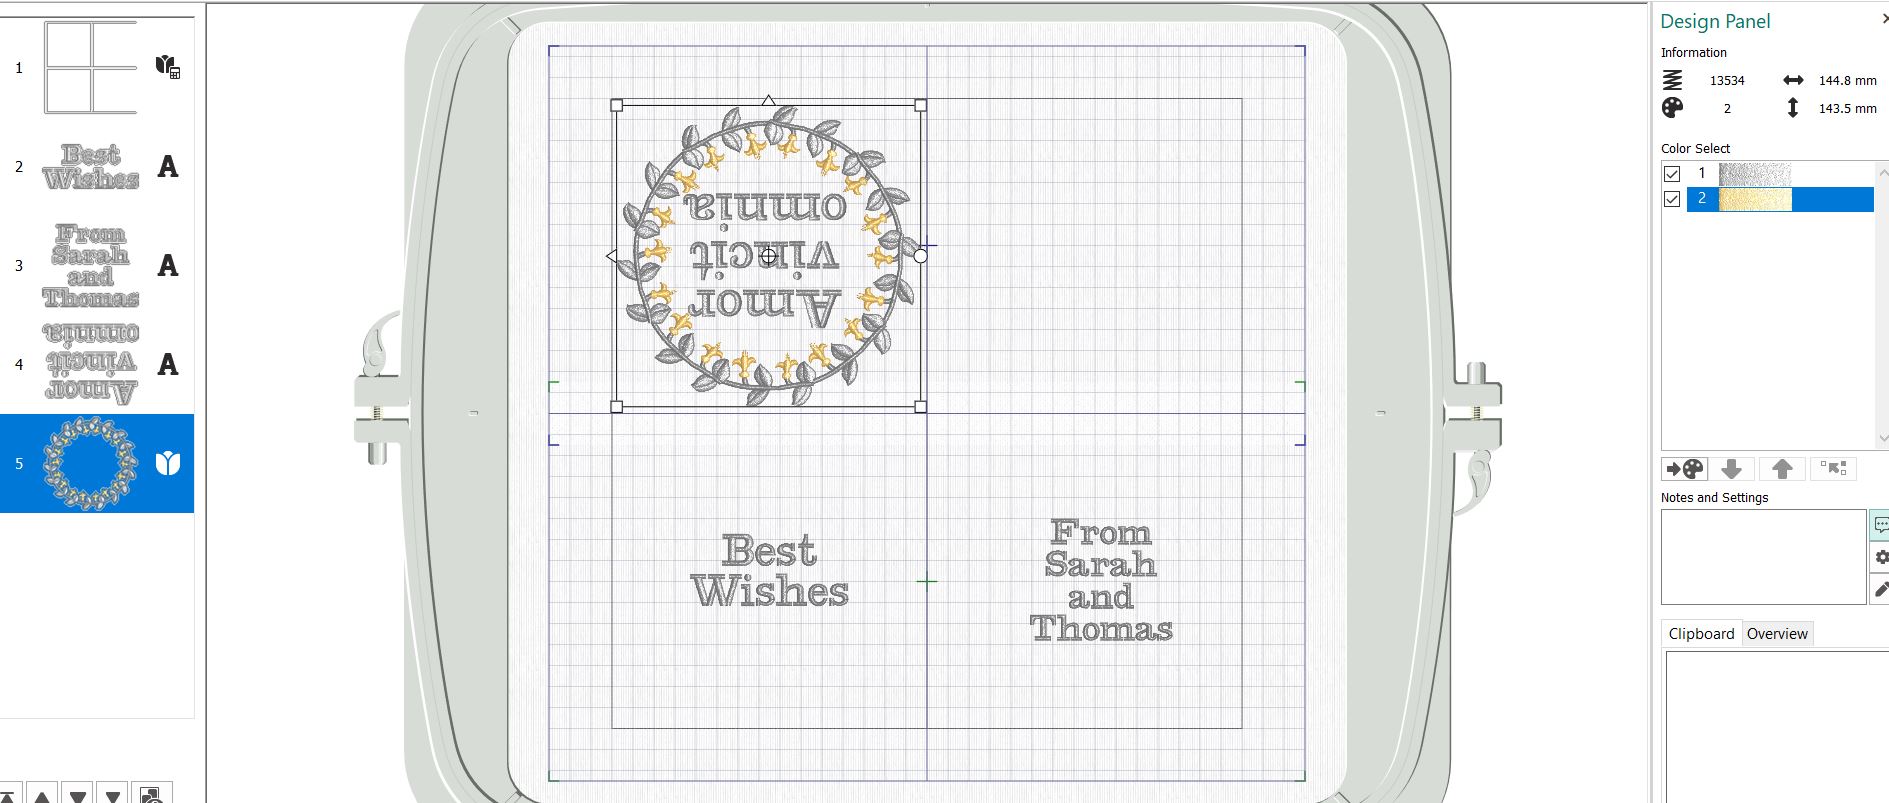
- Zoom out to see the whole card.
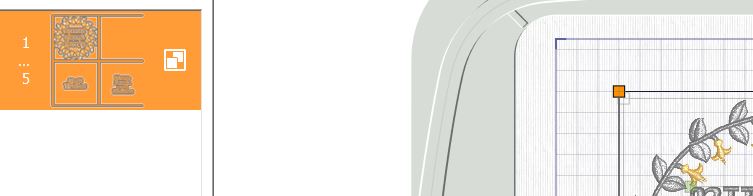
- On the Filmstrip, select all the designs by holding down the Shift key and click on the top and bottom design. When selected the background on the designs will turn blue (except the combined wreath)
- Go to Home tab, click on the Rotate 45-degree tool four times to turn the card 180 degrees.
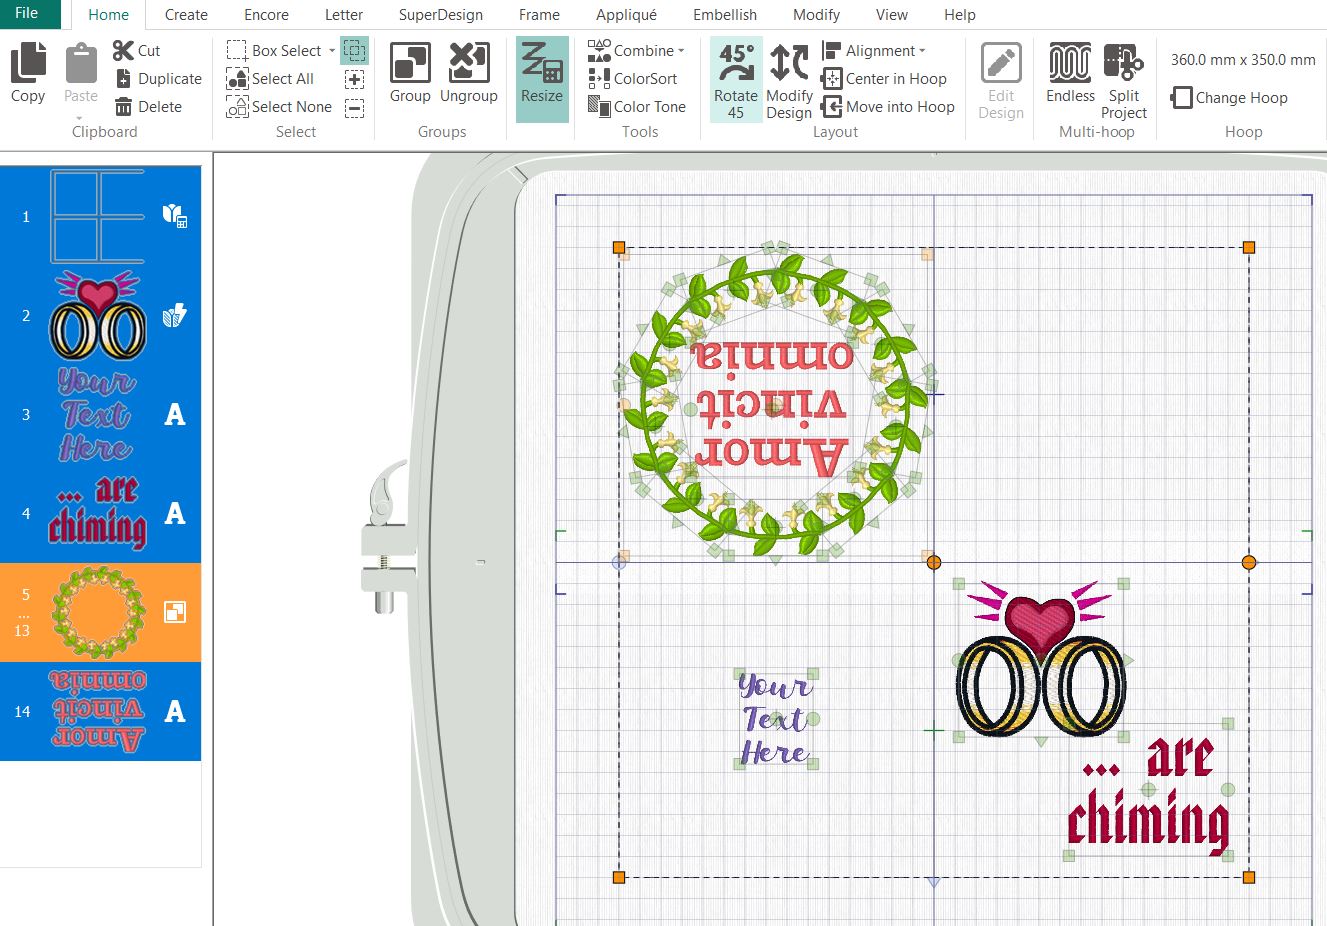
- Let´s start with the text inside the card, click on “your text here” in the Filmstrip and right click. A dialog box will appear, select Edit Lettering.
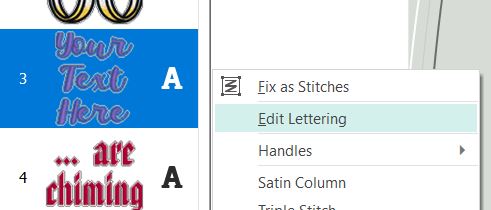
19. A new dialog box will open. Here you can select font, size, and text. When you are done, click OK.
20, repeat with the last square. You can add or remove designs as you wish in the card.
- To finish off the design, go to Home tab, select the Wreath in the Filmstrip, and click on Combine, Combine Selected and then ColorSort.
- Change the colors as needed, I made this card in Silver and Gold.
Final steps
The last steps are to save the card, and then export it. The best way is to use Group instead of Combine since it is much easier to change the layout later if needed.
- Select all the designs in the Filmstrip when holding down the CTRL-key. The background of the designs in the filmstrip turns blue. Then Go to Home tab and click on Group.
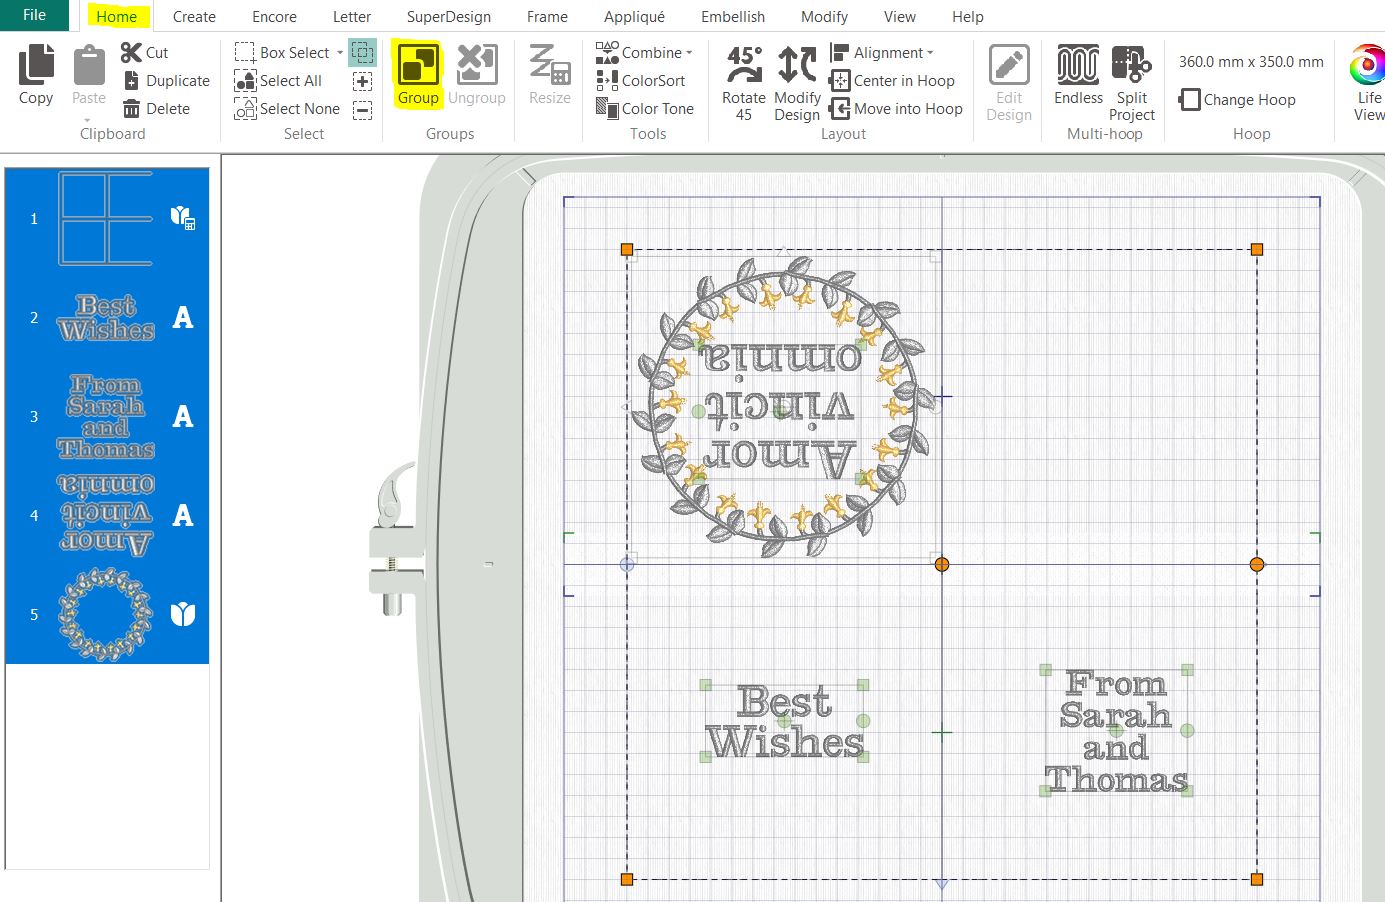
24. The grouped design will have an orange background in the Filmstrip.
- To save the design go to File and click on Save. A dialog box will open. Save the design where you want to. The format will be vp4.

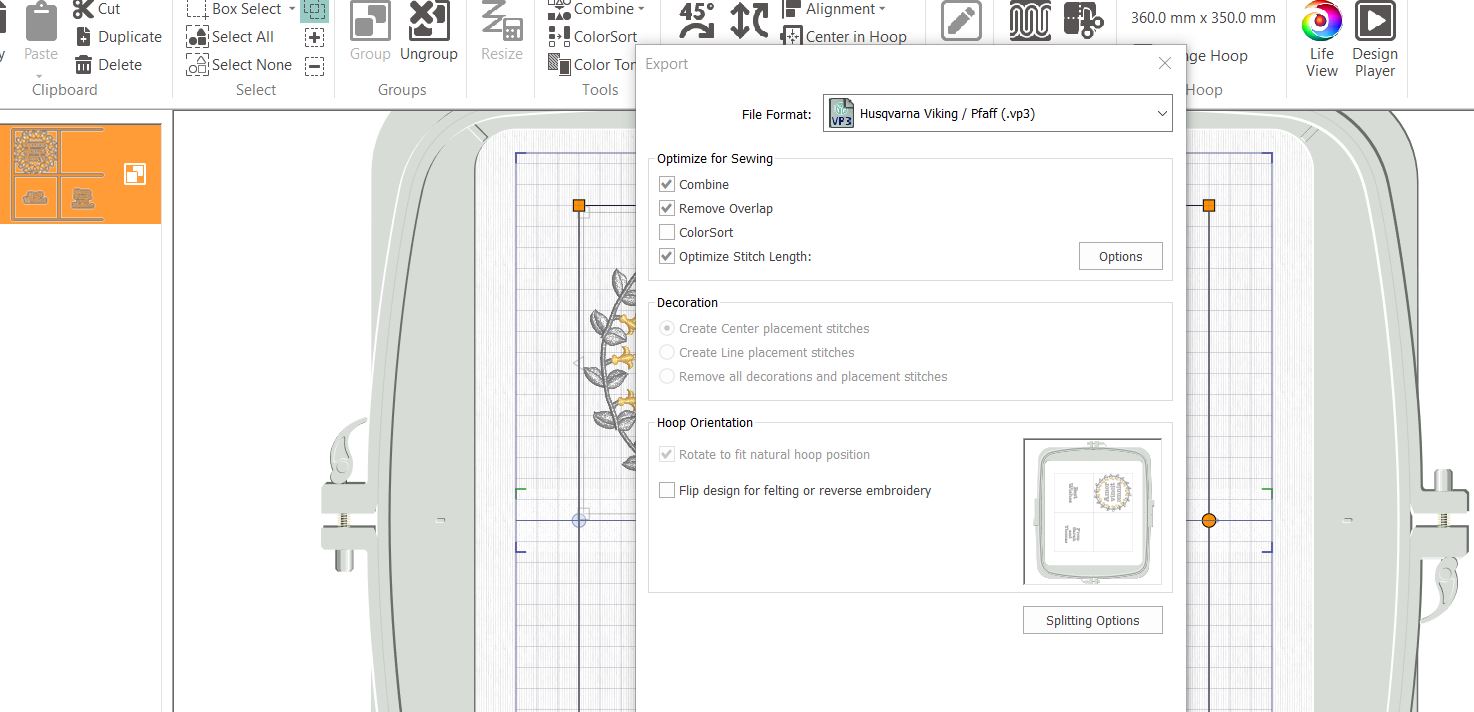
- Export the file in your preferred format. Go to File, Export. In the dialog box uncheck ColorSort and click OK. Save it on your computer, on a USB stick or send it to your machine.
Stitching out the design
- Hoop stabilizer and fabric in the 360x350mm hoop.

- Stitch out the design. Follow the instructions on your sewing machine when to turn the hoop around. I find it easier to turn the thread cutting off when making text to avoid too many loose thread ends at the back.
- When finished unhoop the embroidery and follow the instructions in the PDF to put the card together.
